
 Web Front-end
JS Tutorial
Detailed explanation of MintUI based on Vue.js mobile component library
Web Front-end
JS Tutorial
Detailed explanation of MintUI based on Vue.js mobile component library
Detailed explanation of MintUI based on Vue.js mobile component library

Mint UI contains rich CSS and JS components, which can meet daily mobile development needs. Next, through this article, I will share with you Mint UI based on the Vue.js mobile component library. Friends who need it can refer to it. I hope it can help everyone.
Official website address http://mint-ui.github.io/
Mint UI contains rich CSS and JS components, which can meet daily mobile development needs. Through it, you can quickly build a page with a unified style and improve development efficiency.
True loading of components on demand. You can only load the declared components and their style files, without worrying about the file size being too large.
Taking into account the performance threshold of the mobile terminal, Mint UI uses CSS3 to handle various animations to avoid unnecessary redrawing and rearrangement of the browser, so that users can obtain a smooth and smooth experience.
Relying on the efficient componentization solution of Vue.js, Mint UI is lightweight. Even if all are introduced, the compressed file size is only 100+ K.
Mint UI
GitHub: https://github.com/ElemeFE/mint-ui
Project homepage: http:/ /mint-ui.github.io/#!/zh-cn
Demo: http://elemefe.github.io/mint-ui/#!/
Documentation: http: //mint-ui.github.io/docs/#!/zh-cn
Mint UI launched by the Ele.me front-end team is a mobile component library based on Vue.js. Since it was open sourced in early June, some bugs have been fixed and some new components have been added based on feedback from the community and the team. Version 0.2.0 was released this week. This article describes how to build a Vue project from scratch using Mint UI.
Scaffolding
With the rapid development of Vue.js, there are currently many options for building scaffolding for a Vue project. For example, you can use the officially provided vue-cli. This article uses Ele.me’s own build tool cooking to complete this task.
First, install cooking globally:
npm i cooking -g
Create a new project folder:
mkdir mint-ui-example
Enter the project folder and use cooking to build:
cooking init vue
The last parameter vue indicates that the scaffolding based on Vue.js is being built.
During the construction process, cooking requires the following parameters:

Among them, "Which CSS preprocessing to use" here is Salad, which is a A set of solutions based on PostCSS, interested students can learn about it. Of course, you can also choose other preprocessors.
The project structure after completing the build is:

Next install Mint UI:
npm i mint-ui --save
Introducing Mint UI
Okay, the subsequent work can be divided into two situations:
1. Introduce all components
If your project will use To get to the many components in Mint UI, the easiest way is to introduce them all. At this time, it needs to be in the entry file main.js:
import MintUI from 'mint-ui';
import 'mint-ui/lib/style.css';
Vue.use(MintUI);
2. Import on demand
If you only need to use a certain component, you can only introduce this component, Mint UI can Ensure that when the code is packaged, files unrelated to this component will not appear in the final code. For example, if you need to introduce the Button component, in main.js:
import Button from 'mint-ui/lib/button';
import 'mint-ui/lib/button/style.css';
Vue.component(Button.name, Button);
It can be seen that the above two introduction methods must separately introduce the corresponding CSS file. This is inconvenient, especially when you use the on-demand import method to introduce multiple components. To avoid this problem, you can use babel-plugin-component plugin. The first thing is of course to install it:
npm i babel-plugin-component -D
Then configure it in .babelrc:
{
 "plugins": ["other-plugin", ["component", [
 { "libraryName": "mint-ui", "style": true }
 ]]]
}This way the above two introduction methods can be simplified For:
import MintUI from 'mint-ui';
Vue.use(MintUI);
and
import Button from 'mint-ui/lib/button';
Vue.component(Button.name, Button);
plug-ins will automatically introduce the corresponding CSS files.
Usage
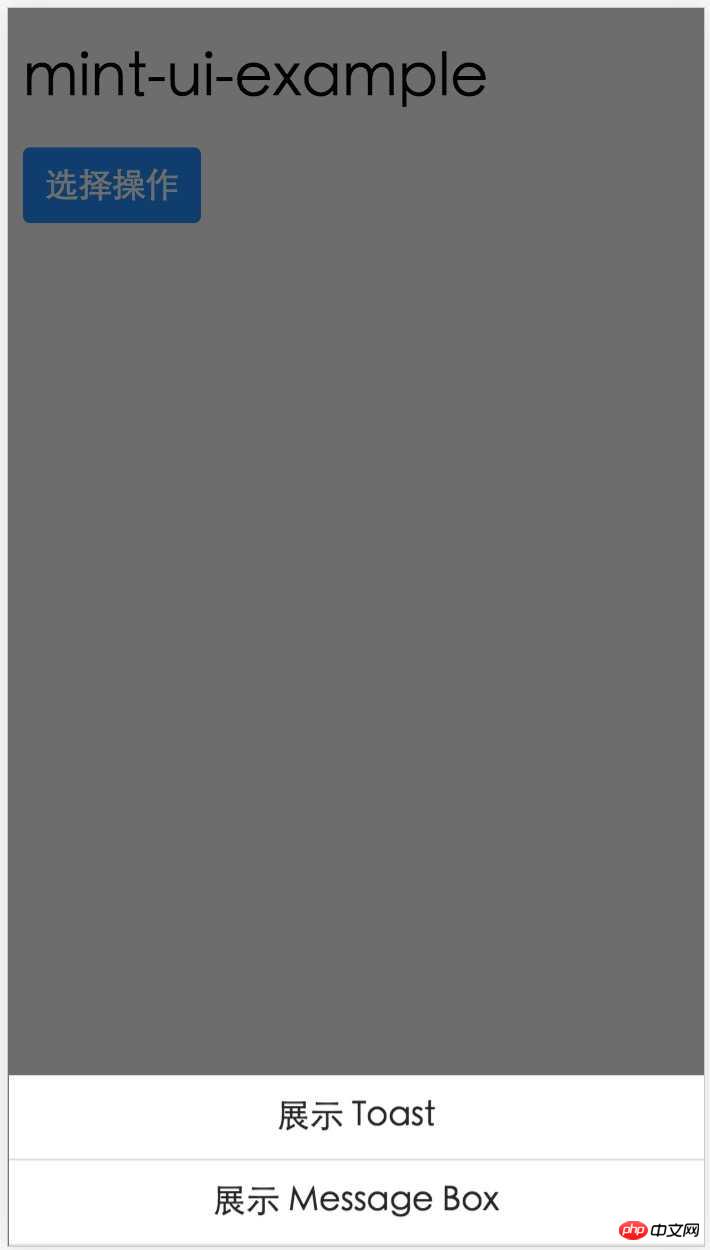
Please read the documentation for how to use each component. Here is just a small example. In app.vue:
<template>
 <h1>mint-ui-example</h1>
 <mt-button
 type="primary"
 @click="sheetVisible = true">
 选择操作
 </mt-button>
 <mt-actionsheet
 cancel-text=""
 :actions="actions"
 :visible.sync="sheetVisible">
 </mt-actionsheet>
</template>
<script>
 import { Toast, MessageBox } from 'mint-ui';
 export default {
 name: 'app',
 data() {
 return {
 sheetVisible: false,
 actions: [{
 name: '展示 Toast',
 method: this.showToast
 }, {
 name: '展示 Message Box',
 method: this.showMsgbox
 }]
 };
 },
 methods: {
 showToast() {
 Toast('这是一个 Toast');
 },
 showMsgbox() {
 MessageBox('提示', '这是一个 Message Box');
 }
 }
 };
</script>, you will get the following page:
<meta name="viewport" content="width=device-width, user-scalable=no, initial-scale=1.0, maximum-scale=1.0, minimum-scale=1.0">
Detailed introduction to the use of VUE.JS mobile framework Mint UI
The above is the detailed content of Detailed explanation of MintUI based on Vue.js mobile component library. For more information, please follow other related articles on the PHP Chinese website!

Hot AI Tools

Undresser.AI Undress
AI-powered app for creating realistic nude photos

AI Clothes Remover
Online AI tool for removing clothes from photos.

Undress AI Tool
Undress images for free

Clothoff.io
AI clothes remover

AI Hentai Generator
Generate AI Hentai for free.

Hot Article
Hot Tools

Notepad++7.3.1
Easy-to-use and free code editor

SublimeText3 Chinese version
Chinese version, very easy to use

Zend Studio 13.0.1
Powerful PHP integrated development environment

Dreamweaver CS6
Visual web development tools

SublimeText3 Mac version
God-level code editing software (SublimeText3)
Hot Topics


 How to implement an online speech recognition system using WebSocket and JavaScript
Dec 17, 2023 pm 02:54 PM
How to implement an online speech recognition system using WebSocket and JavaScript
Dec 17, 2023 pm 02:54 PM
How to use WebSocket and JavaScript to implement an online speech recognition system Introduction: With the continuous development of technology, speech recognition technology has become an important part of the field of artificial intelligence. The online speech recognition system based on WebSocket and JavaScript has the characteristics of low latency, real-time and cross-platform, and has become a widely used solution. This article will introduce how to use WebSocket and JavaScript to implement an online speech recognition system.
 WebSocket and JavaScript: key technologies for implementing real-time monitoring systems
Dec 17, 2023 pm 05:30 PM
WebSocket and JavaScript: key technologies for implementing real-time monitoring systems
Dec 17, 2023 pm 05:30 PM
WebSocket and JavaScript: Key technologies for realizing real-time monitoring systems Introduction: With the rapid development of Internet technology, real-time monitoring systems have been widely used in various fields. One of the key technologies to achieve real-time monitoring is the combination of WebSocket and JavaScript. This article will introduce the application of WebSocket and JavaScript in real-time monitoring systems, give code examples, and explain their implementation principles in detail. 1. WebSocket technology
 How to implement an online reservation system using WebSocket and JavaScript
Dec 17, 2023 am 09:39 AM
How to implement an online reservation system using WebSocket and JavaScript
Dec 17, 2023 am 09:39 AM
How to use WebSocket and JavaScript to implement an online reservation system. In today's digital era, more and more businesses and services need to provide online reservation functions. It is crucial to implement an efficient and real-time online reservation system. This article will introduce how to use WebSocket and JavaScript to implement an online reservation system, and provide specific code examples. 1. What is WebSocket? WebSocket is a full-duplex method on a single TCP connection.
 How to use JavaScript and WebSocket to implement a real-time online ordering system
Dec 17, 2023 pm 12:09 PM
How to use JavaScript and WebSocket to implement a real-time online ordering system
Dec 17, 2023 pm 12:09 PM
Introduction to how to use JavaScript and WebSocket to implement a real-time online ordering system: With the popularity of the Internet and the advancement of technology, more and more restaurants have begun to provide online ordering services. In order to implement a real-time online ordering system, we can use JavaScript and WebSocket technology. WebSocket is a full-duplex communication protocol based on the TCP protocol, which can realize real-time two-way communication between the client and the server. In the real-time online ordering system, when the user selects dishes and places an order
 Simple JavaScript Tutorial: How to Get HTTP Status Code
Jan 05, 2024 pm 06:08 PM
Simple JavaScript Tutorial: How to Get HTTP Status Code
Jan 05, 2024 pm 06:08 PM
JavaScript tutorial: How to get HTTP status code, specific code examples are required. Preface: In web development, data interaction with the server is often involved. When communicating with the server, we often need to obtain the returned HTTP status code to determine whether the operation is successful, and perform corresponding processing based on different status codes. This article will teach you how to use JavaScript to obtain HTTP status codes and provide some practical code examples. Using XMLHttpRequest
 JavaScript and WebSocket: Building an efficient real-time weather forecasting system
Dec 17, 2023 pm 05:13 PM
JavaScript and WebSocket: Building an efficient real-time weather forecasting system
Dec 17, 2023 pm 05:13 PM
JavaScript and WebSocket: Building an efficient real-time weather forecast system Introduction: Today, the accuracy of weather forecasts is of great significance to daily life and decision-making. As technology develops, we can provide more accurate and reliable weather forecasts by obtaining weather data in real time. In this article, we will learn how to use JavaScript and WebSocket technology to build an efficient real-time weather forecast system. This article will demonstrate the implementation process through specific code examples. We
 How to get HTTP status code in JavaScript the easy way
Jan 05, 2024 pm 01:37 PM
How to get HTTP status code in JavaScript the easy way
Jan 05, 2024 pm 01:37 PM
Introduction to the method of obtaining HTTP status code in JavaScript: In front-end development, we often need to deal with the interaction with the back-end interface, and HTTP status code is a very important part of it. Understanding and obtaining HTTP status codes helps us better handle the data returned by the interface. This article will introduce how to use JavaScript to obtain HTTP status codes and provide specific code examples. 1. What is HTTP status code? HTTP status code means that when the browser initiates a request to the server, the service
 How to use insertBefore in javascript
Nov 24, 2023 am 11:56 AM
How to use insertBefore in javascript
Nov 24, 2023 am 11:56 AM
Usage: In JavaScript, the insertBefore() method is used to insert a new node in the DOM tree. This method requires two parameters: the new node to be inserted and the reference node (that is, the node where the new node will be inserted).
