
Bootstrap is based on HTML, CSS, and JAVASCRIPT and is used to develop responsive layout, mobile device-first WEB projects. Bootstrap has made more personalized improvements based on JQuery to form its own unique website style and is compatible with most jQuery plug-ins. Make front-end development faster and simpler.
Basic structure: Bootstrap provides a basic structure with a grid system, link styles, and background.
CSS: Bootstrap comes with the following features: global CSS settings, defining basic HTML element styles, extensible classes, and an advanced grid system.
Components: Bootstrap contains more than a dozen reusable components for creating images, drop-down menus, navigation, alert boxes, pop-up boxes, and more.
JavaScript plug-ins: Bootstrap includes more than a dozen custom jQuery plug-ins. You can include all plug-ins directly, or you can include them one by one.
Customization: You can customize Bootstrap components, LESS variables and jQuery plug-ins to get your own version.
【Related video recommendation: Bootstrap tutorial】
1. Bootstrap basic template
<!DOCTYPE html> <html lang="zh-CN"> <head> <meta charset="utf-8"> <!--让浏览器使用最新的IE内核进行渲染页面--> <meta http-equiv="X-UA-Compatible" content="IE=edge"> <!--设置视口宽度等于当前设备宽度,默认缩放比为1--> <meta name="viewport" content="width=device-width, initial-scale=1"> <!-- 上述3个meta标签*必须*放在最前面,任何其他内容都*必须*跟随其后! --> <title>Bootstrap 101 Template</title> <!-- 导入Bootstrap核心CSS文件 --> <link href="css/bootstrap.css" rel="external nofollow" rel="stylesheet"> <!-- HTML5 shim and Respond.js for IE8 support of HTML5 elements and media queries --> <!-- WARNING: Respond.js doesn't work if you view the page via file:// --> <!-- ①<!--[if lt IE 9]>…… <![endif]- ->这一对标签用于检测当前浏览器的版本,lt表示小于,gt表示大写。所以这句话作用是,当浏览器版本低于IE9执行。 ②html5shiv:解决ie9以下浏览器对html5新增标签的不识别,并导致CSS不起作用的问题。 ③respond.min:让不支持css3 Media Query的浏览器包括IE6-IE8等其他浏览器支持查询。 --> <!--[if lt IE 9]> <script src="https://cdn.bootcss.com/html5shiv/3.7.3/html5shiv.min.js"></script> <script src="https://cdn.bootcss.com/respond.js/1.4.2/respond.min.js"></script> <![endif]--> </head> <body> <h1>你好!</h1> <script src="js/jquery-3.1.1.js"></script> <!-- 导入BootStrap的JS插件 ①如果不使用BootStrap提供的JS插件,则这个JS文件无需导入; ②BootStrap的JS插件功能依赖JQuery,因此这个JS必须在JQuery之后导入; --> <script src="js/bootstrap.min.js"></script> </body> </html>
Copy and paste the above HTML Code, this is the simplest Bootstrap page. It is important to note that all JavaScript plugins for Bootstrap depend on jQuery, so jQuery must be introduced before Bootstrap.
2. Components
Bootstrap contains a wealth of Web components. Based on these components, you can quickly build a beautiful and fully functional website. It includes the following components:
Drop-down menu, button group, button drop-down menu, navigation, navigation bar, path navigation, paging, layout, thumbnails, warning dialog box, progress bar, media objects, etc.
2.1 Font icons
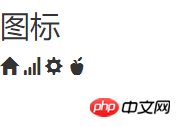
bootstrap provides more than 200 icons by default. We can use these icons through span tags:
<h3>图标</h3>
 <span class="glyphicon glyphicon-home"></span>
 <span class="glyphicon glyphicon-signal"></span>
 <span class="glyphicon glyphicon-cog"></span>
 <span class="glyphicon glyphicon-apple"></span>
Let’s take a look at the effect:
2.2 Button
<h3>按钮</h3>
 <button type="button" class="btn btn-default">按钮</button>
 <button type="button" class="btn btn-primary">primary</button>
 <button type="button" class="btn btn-success">success</button>
 <button type="button" class="btn btn-info">info</button>
 <button type="button" class="btn btn-warning">warning</button>
 <button type="button" class="btn btn-danger">danger</button>
 <h3>按钮尺寸</h3>
 <button type="button" class="btn btn-default">按钮</button>
 <button type="button" class="btn btn-primary btn-lg">primary</button>
 <button type="button" class="btn btn-success btn-sm">success</button>
 <button type="button" class="btn btn-info btn-xs">info</button>
 <h3>把图标显示在按钮里</h3>
 <button type="button" class="btn btn-default"><span class="glyphicon glyphicon-home"></span>  按钮</button>
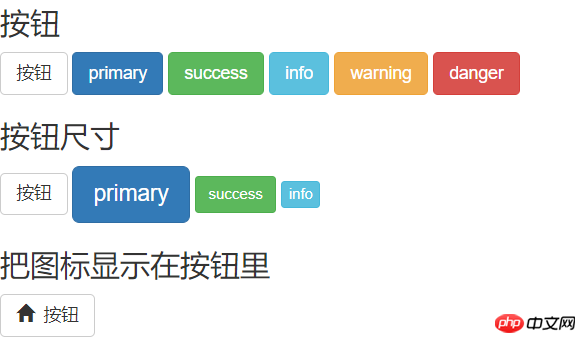
Effect:
2.3 Drop-down menu
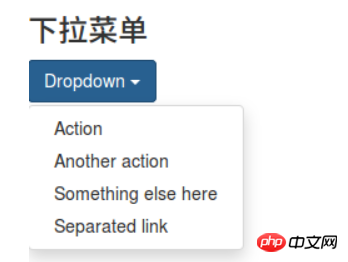
Drop-down menu is one of the most common interactions, bootstrap provides us with beautiful style.
 <h3>下拉菜单</h3>
 <p class="dropdown">
 <button class="btn btn-primary dropdown-toggle" type="button" id="dropdownMenu1" data-toggle="dropdown" aria-expanded="true">
 Dropdown
 <span class="caret"></span>
 </button>
 <ul class="dropdown-menu" role="menu" aria-labelledby="dropdownMenu1">
 <li role="presentation"><a role="menuitem" tabindex="-1" href="#" rel="external nofollow" rel="external nofollow" rel="external nofollow" rel="external nofollow" rel="external nofollow" rel="external nofollow" rel="external nofollow" rel="external nofollow" rel="external nofollow" rel="external nofollow" rel="external nofollow" rel="external nofollow" rel="external nofollow" >Action</a></li>
 <li role="presentation"><a role="menuitem" tabindex="-1" href="#" rel="external nofollow" rel="external nofollow" rel="external nofollow" rel="external nofollow" rel="external nofollow" rel="external nofollow" rel="external nofollow" rel="external nofollow" rel="external nofollow" rel="external nofollow" rel="external nofollow" rel="external nofollow" rel="external nofollow" >Another action</a></li>
 <li role="presentation"><a role="menuitem" tabindex="-1" href="#" rel="external nofollow" rel="external nofollow" rel="external nofollow" rel="external nofollow" rel="external nofollow" rel="external nofollow" rel="external nofollow" rel="external nofollow" rel="external nofollow" rel="external nofollow" rel="external nofollow" rel="external nofollow" rel="external nofollow" >Something else here</a></li>
 <li role="presentation"><a role="menuitem" tabindex="-1" href="#" rel="external nofollow" rel="external nofollow" rel="external nofollow" rel="external nofollow" rel="external nofollow" rel="external nofollow" rel="external nofollow" rel="external nofollow" rel="external nofollow" rel="external nofollow" rel="external nofollow" rel="external nofollow" rel="external nofollow" >Separated link</a></li>
 </ul>
 </p>
Look at the effect:
2.4 Input box
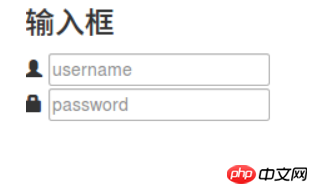
Create an input box through the tag .
 <h3>输入框</h3>
 <p class="input-group">
 <span class="glyphicon glyphicon-user"></span>
 <input type="text" placeholder="username">
 </p>
 <p class="input-group">
 <span class="glyphicon glyphicon-lock"></span>
 <input type="password" placeholder="password">
 </p>
Rendering:
2.5 Navigation Bar
The navigation bar is essential as a guide for the entire website.
 <h3>导航栏</h3>
 <nav class="navbar navbar-inverse navbar-fixed-top">
 <p id="navbar" class="navbar-collapse collapse">
 <ul class="nav navbar-nav">
 <li class="active"><a href="#" rel="external nofollow" rel="external nofollow" rel="external nofollow" rel="external nofollow" rel="external nofollow" rel="external nofollow" rel="external nofollow" rel="external nofollow" rel="external nofollow" rel="external nofollow" rel="external nofollow" rel="external nofollow" rel="external nofollow" >Home</a></li>
 <li><a href="#about" rel="external nofollow" >About</a></li>
 <li><a href="#contact" rel="external nofollow" >Contact</a></li>
 <li class="dropdown">
 <a href="#" rel="external nofollow" rel="external nofollow" rel="external nofollow" rel="external nofollow" rel="external nofollow" rel="external nofollow" rel="external nofollow" rel="external nofollow" rel="external nofollow" rel="external nofollow" rel="external nofollow" rel="external nofollow" rel="external nofollow" class="dropdown-toggle" data-toggle="dropdown" role="button" aria-expanded="false">Dropdown <span class="caret"></span></a>
 <ul class="dropdown-menu" role="menu">
 <li><a href="#" rel="external nofollow" rel="external nofollow" rel="external nofollow" rel="external nofollow" rel="external nofollow" rel="external nofollow" rel="external nofollow" rel="external nofollow" rel="external nofollow" rel="external nofollow" rel="external nofollow" rel="external nofollow" rel="external nofollow" >Action</a></li>
 <li><a href="#" rel="external nofollow" rel="external nofollow" rel="external nofollow" rel="external nofollow" rel="external nofollow" rel="external nofollow" rel="external nofollow" rel="external nofollow" rel="external nofollow" rel="external nofollow" rel="external nofollow" rel="external nofollow" rel="external nofollow" >Another action</a></li>
 <li class="pider"></li>
 <li class="dropdown-header">Nav header</li>
 <li><a href="#" rel="external nofollow" rel="external nofollow" rel="external nofollow" rel="external nofollow" rel="external nofollow" rel="external nofollow" rel="external nofollow" rel="external nofollow" rel="external nofollow" rel="external nofollow" rel="external nofollow" rel="external nofollow" rel="external nofollow" >Separated link</a></li>
 </ul>
 </li>
 </ul>
 </p><!--/.nav-collapse -->
 </p>
 </nav>
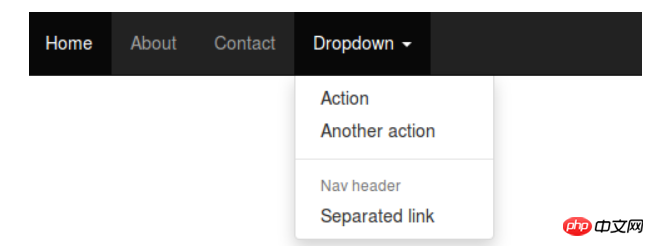
What’s the effect↓
2.6 Form
The transfer of data between people and the system needs to rely on forms to complete . For example, submission of registration/login information, submission of query conditions, etc. Use the
tag to create a form.<h3>表单</h3> <form> <p class="form-group"> <span class="glyphicon glyphicon-user"></span> <input type="email" id="exampleInputEmail1" placeholder="Enter email"> </p> <p class="form-group"> <span class="glyphicon glyphicon-lock"></span> <input type="password" id="exampleInputPassword1" placeholder="Password"> </p> <p class="form-group"> <label for="exampleInputFile">File input</label> <input type="file" id="exampleInputFile"> <p class="help-block">Example block-level help text here.</p> </p> <p class="checkbox"> <label> <input type="checkbox"> Check me out </label> </p> <button type="submit" class="btn btn-default">Submit</button> </form>
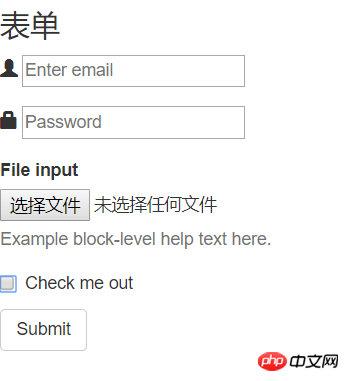
The effect is as follows:
2.7 Warning box
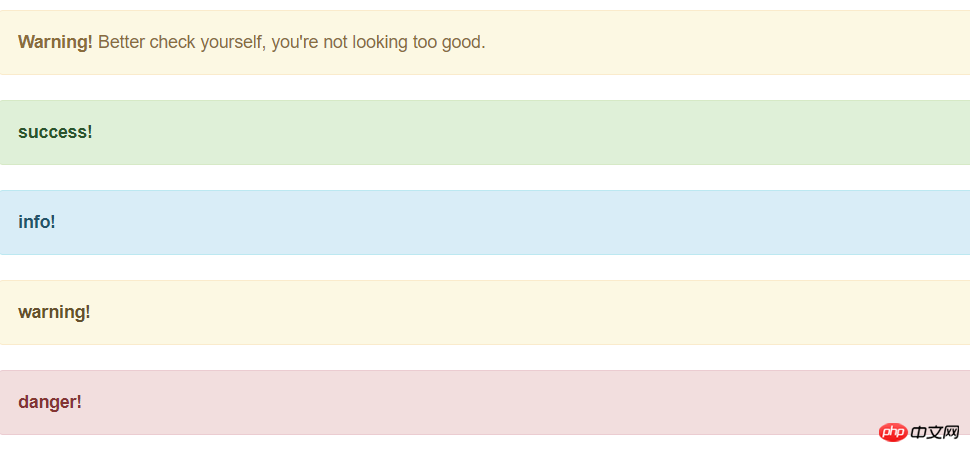
The warning box is an important means for the system to convey information and provide guidance to users. There is no label for the warning box. You can instantly create a beautiful warning box through the styles provided by bootstrap.
 <h3>警告框</h3>
 <p class="alert alert-warning alert-dismissible" role="alert">
 <button type="button" class="close" data-dismiss="alert" aria-label="Close"><span aria-hidden="true">×</span></button>
 <strong>Warning!</strong> Better check yourself, you're not looking too good.
 </p>
 <p class="alert alert-success" role="alert">
 <a href="#" rel="external nofollow" rel="external nofollow" rel="external nofollow" rel="external nofollow" rel="external nofollow" rel="external nofollow" rel="external nofollow" rel="external nofollow" rel="external nofollow" rel="external nofollow" rel="external nofollow" rel="external nofollow" rel="external nofollow" class="alert-link">success!</a>
 </p>
 <p class="alert alert-info" role="alert">
 <a href="#" rel="external nofollow" rel="external nofollow" rel="external nofollow" rel="external nofollow" rel="external nofollow" rel="external nofollow" rel="external nofollow" rel="external nofollow" rel="external nofollow" rel="external nofollow" rel="external nofollow" rel="external nofollow" rel="external nofollow" class="alert-link">info!</a>
 </p>
 <p class="alert alert-warning" role="alert">
 <a href="#" rel="external nofollow" rel="external nofollow" rel="external nofollow" rel="external nofollow" rel="external nofollow" rel="external nofollow" rel="external nofollow" rel="external nofollow" rel="external nofollow" rel="external nofollow" rel="external nofollow" rel="external nofollow" rel="external nofollow" class="alert-link">warning!</a>
 </p>
 <p class="alert alert-danger" role="alert">
 <a href="#" rel="external nofollow" rel="external nofollow" rel="external nofollow" rel="external nofollow" rel="external nofollow" rel="external nofollow" rel="external nofollow" rel="external nofollow" rel="external nofollow" rel="external nofollow" rel="external nofollow" rel="external nofollow" rel="external nofollow" class="alert-link">danger!</a>
 </p>
Rendering:
2.8 Progress bar
The system’s processing often requires users to wait, and the progress bar can allow users to perceive Systematic processing, thereby increasing tolerance.
 <h3>进度条</h3>
 <p class="progress">
 <p class="progress-bar" role="progressbar" aria-valuenow="70" aria-valuemin="0" aria-valuemax="100" style="width: 60%;">
 70%
 </p>
 </p>
3. Bootstrap Grid System
First of all, we must first understand what a grid system is! Look down↓

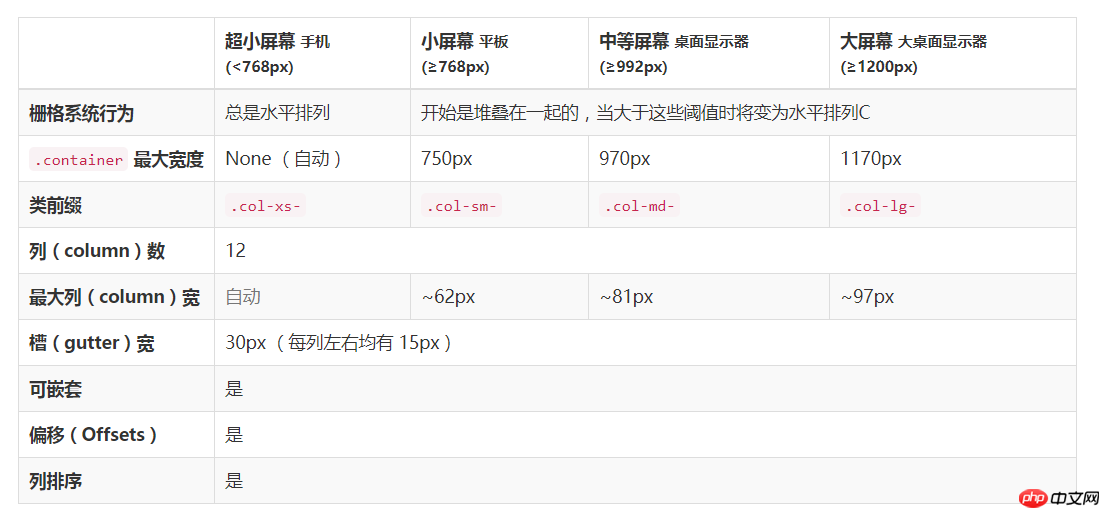
Bootstrap provides a responsive, mobile-first fluid grid system. As the screen or viewport size increases, The system will automatically divide it into up to 12 columns. It contains easy-to-use predefined classes and powerful mixins for generating more semantic layouts.
The grid system is used to create page layouts through a series of combinations of rows and columns, and our content can be placed into these created layouts. Here's an introduction to how the Bootstrap grid system works:
"Row" must be contained in .container (fixed width) or .container-fluid (100% width) in order to give it the appropriate Alignment and padding.
Create a group of "columns" in the horizontal direction through "rows".
你的内容应当放置于“列(column)”内,并且,只有“列(column)”可以作为行(row)”的直接子元素。
类似 .row 和 .col-xs-4 这种预定义的类,可以用来快速创建栅格布局。Bootstrap 源码中定义的 mixin 也可以用来创建语义化的布局。
通过为“列(column)”设置 padding 属性,从而创建列与列之间的间隔(gutter)。通过为 .row 元素设置负值 margin 从而抵消掉为 .container 元素设置的 padding,也就间接为“行(row)”所包含的“列(column)”抵消掉了padding。
栅格系统中的列是通过指定1到12的值来表示其跨越的范围。例如,三个等宽的列可以使用三个 .col-xs-4 来创建。
如果一“行(row)”中包含了的“列(column)”大于 12,多余的“列(column)”所在的元素将被作为一个整体另起一行排列。
栅格类适用于与屏幕宽度大于或等于分界点大小的设备 , 并且针对小屏幕设备覆盖栅格类。 因此,在元素上应用任何 .col-md-*栅格类适用于与屏幕宽度大于或等于分界点大小的设备 , 并且针对小屏幕设备覆盖栅格类。 因此,在元素上应用任何 .col-lg-*不存在, 也影响大屏幕设备。
3.1媒体查询
在栅格系统中,我们在 Less 文件中使用以下媒体查询(media query)来创建关键的分界点阈值。
/* 超小屏幕(手机,小于 768px) */
/* 没有任何媒体查询相关的代码,因为这在 Bootstrap 中是默认的( Bootstrap 是移动设备优先) */
/* 小屏幕(平板,大于等于 768px) */
@media (min-width: @screen-sm-min) { ... }
/* 中等屏幕(桌面显示器,大于等于 992px) */
@media (min-width: @screen-md-min) { ... }
/* 大屏幕(大桌面显示器,大于等于 1200px) */
@media (min-width: @screen-lg-min) { ... }3.2栅格参数
<p class="row">
 <p class="col-md-1">.col-md-1</p>
 <p class="col-md-1">.col-md-1</p>
 <p class="col-md-1">.col-md-1</p>
 <p class="col-md-1">.col-md-1</p>
 <p class="col-md-1">.col-md-1</p>
 <p class="col-md-1">.col-md-1</p>
 <p class="col-md-1">.col-md-1</p>
 <p class="col-md-1">.col-md-1</p>
 <p class="col-md-1">.col-md-1</p>
 <p class="col-md-1">.col-md-1</p>
 <p class="col-md-1">.col-md-1</p>
 <p class="col-md-1">.col-md-1</p>
</p>
<p class="row">
 <p class="col-md-8">.col-md-8</p>
 <p class="col-md-4">.col-md-4</p>
</p>
<p class="row">
 <p class="col-md-4">.col-md-4</p>
 <p class="col-md-4">.col-md-4</p>
 <p class="col-md-4">.col-md-4</p>
</p>
<p class="row">
 <p class="col-md-6">.col-md-6</p>
 <p class="col-md-6">.col-md-6</p>
</p>

输入上面的代码就可以实现上图的样式,是不是已经对栅格系统有所了解了,我们继续往下看↓
3.3响应式列重置
即便有给出的栅格class,你也不免会碰到一些问题,例如,在某些阈值时,某些列可能会出现比别的列高的情况。为了克服这一问题,建议联合使用 .clearfix 和响应式工具类。
<p class="row">
 <p class="col-xs-6 col-sm-3">.col-xs-6 .col-sm-3</p>
 <p class="col-xs-6 col-sm-3">.col-xs-6 .col-sm-3</p>
 <p class="clearfix visible-xs-block"></p>
 <p class="col-xs-6 col-sm-3">.col-xs-6 .col-sm-3</p>
 <p class="col-xs-6 col-sm-3">.col-xs-6 .col-sm-3</p>
</p>
除了列在分界点清除响应, 您可能需要 重置偏移, 后推或前拉某个列。
<p class="row"> <p class="col-sm-5 col-md-6">.col-sm-5 .col-md-6</p> <p class="col-sm-5 col-sm-offset-2 col-md-6 col-md-offset-0">.col-sm-5 .col-sm-offset-2 .col-md-6 .col-md-offset-0</p> </p> <p class="row"> <p class="col-sm-6 col-md-5 col-lg-6">.col-sm-6 .col-md-5 .col-lg-6</p> <p class="col-sm-6 col-md-5 col-md-offset-2 col-lg-6 col-lg-offset-0">.col-sm-6 .col-md-5 .col-md-offset-2 .col-lg-6 .col-lg-offset-0</p> </p> <h2 style="margin: 8px 0px 0px; padding: 0px; font-weight: bold; font-size: 16px; line-height: 28px; max-width: 100%; color: #59c3f9; min-height: 32px; border-bottom-width: 1.5px; border-bottom-style: solid; border-color: #59c3f9; text-align: justify;"><span style="font-family: 'Microsoft YaHei'; font-size: 14px;"><span class="autonum" style="background-color: #59c3f9; color: #ffffff; display: block; float: left; line-height: 20px; margin: 0px 8px 0px 0px; max-width: 100%; padding: 4px 10px; word-wrap: break-word !important;" title="" src-title="">3.2.1</span><span style="font-size: 16px;"><strong class="135brush" style="border-color: #59c3f9; color: inherit;" data-brushtype="text">内部类作为事件监听器</strong></span></span></h2>

3.4列偏移
使用 .col-md-offset-* 类可以将列向右侧偏移。这些类实际是通过使用 * 选择器为当前元素增加了左侧的边距(margin)。例如,.col-md-offset-4 类将 .col-md-4 元素向右侧偏移了4个列(column)的宽度。
<p class="row">
 <p class="col-md-4">.col-md-4</p>
 <p class="col-md-4 col-md-offset-4">.col-md-4 .col-md-offset-4</p>
</p>
<p class="row">
 <p class="col-md-3 col-md-offset-3">.col-md-3 .col-md-offset-3</p>
 <p class="col-md-3 col-md-offset-3">.col-md-3 .col-md-offset-3</p>
</p>
<p class="row">
 <p class="col-md-6 col-md-offset-3">.col-md-6 .col-md-offset-3</p>
</p>

3.5嵌套列
为了使用内置的栅格系统将内容再次嵌套,可以通过添加一个新的 .row 元素和一系列 .col-sm-* 元素到已经存在的 .col-sm-* 元素内。被嵌套的行(row)所包含的列(column)的个数不能超过12(其实,没有要求你必须占满12列)。
<p class="row">
 <p class="col-sm-9">
 Level 1: .col-sm-9
 <p class="row">
 <p class="col-xs-8 col-sm-6">
 Level 2: .col-xs-8 .col-sm-6
 </p>
 <p class="col-xs-4 col-sm-6">
 Level 2: .col-xs-4 .col-sm-6
 </p>
 </p>
 </p>
</p>

3.6列排序
通过使用 .col-md-push-* 和 .col-md-pull-* 类就可以很容易的改变列(column)的顺序。
<p class="row">
 <p class="col-md-9 col-md-push-3">.col-md-9 .col-md-push-3</p>
 <p class="col-md-3 col-md-pull-9">.col-md-3 .col-md-pull-9</p>
</p>

相关推荐:
The above is the detailed content of Detailed explanation of Bootstrap, the best front-end framework in 2018. For more information, please follow other related articles on the PHP Chinese website!
 Is python front-end or back-end?
 How to implement instant messaging on the front end
 Introduction to the framework used by vscode
 The difference between front-end and back-end
 Introduction to the relationship between php and front-end
 The difference between i5 and i7
 what does js mean
 OuYi Exchange app download
 Registration domain name query tool