

Express and multer implement the image upload function in node

In the front end, we use ajax to asynchronously upload images, use file-input to upload images, use formdata objects to process image data, post to the server, and use multer middleware in node to process the upload routing interface. . This article mainly introduces the use of express+multer to implement the image upload function in node. Friends who need it can refer to it. I hope it can help everyone.
multer document
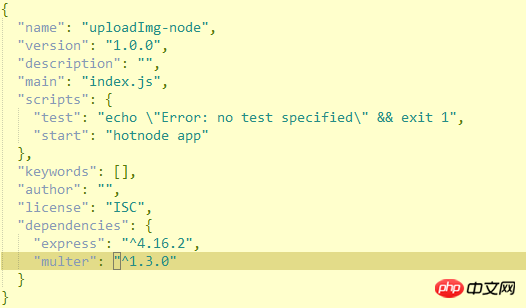
package.json
html part
<body>
<p class="form-group">
    <label>File input:</label>
    <input type="file" name="file" id="file">
    <p id="result"></p>
    <img id="img" src="">
  </p>
  <button id="upload" class="btn btn-default">提交</button>
  </body>
js part
<script src="https://cdn.bootcss.com/jquery/3.3.1/jquery.min.js"></script>
  <script>
    //上传图片的业务逻辑函数
    function uploadFile(){
      //上传图片的input
      var file = document.getElementById("file")
      //因为准备用post提交,又因为图片的内容比较大,所以我们选择使用formdata来承载数据
      //创建formdata对象
      var formData = new FormData();
      //给formdata对象中放入数据(键值对的方式)
      formData.append('file',file.files[0]);
      //提交请求
      $.ajax({
        url: '/upload',//请求路径
        type: 'POST',
        data: formData,
        contentType: false,//为了让浏览器根据传入的formdata来判断contentType
        processData: false,//同上
        success: function(data){
          if(200 === data.code) {
            $('#result').html("上传成功!");
            $('#img').attr('src',data.data);
          } else {
            $('#result').html("上传失败!");
          }
          console.log(2)
        },
        error: function(){
          $("#result").html("与服务器通信发生错误");
        }
      });
      console.log(1)
    }
    //给按钮添加点击事件
    function postPage() {
        //上传按钮
        var uploada = document.getElementById('upload');
        uploada.addEventListener("click",function () {
          uploadFile();
        },false);
    }
    window.onload = function () {
      postPage();
    }
</script>NodeJS logic code
const http = require('http')
const path = require('path')
const express = require('express')
//是nodejs中处理multipart/form-data数据格式(主要用在上传功能中)的中间件
//文档:https://github.com/expressjs/multer/blob/master/doc/README-zh-cn.md
const multer = require('multer')
const app = express()
//配置express的静态目录
app.use(express.static(path.join(__dirname, 'public')));
app.get('/',(req,res)=>{
res.sendFile(__dirname+'/index.html')
})
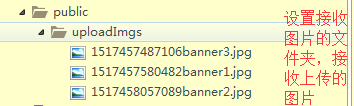
//配置diskStorage来控制文件存储的位置以及文件名字等
var storage = multer.diskStorage({
//确定图片存储的位置
destination: function (req, file, cb){
cb(null, './public/uploadImgs')
},
//确定图片存储时的名字,注意,如果使用原名,可能会造成再次上传同一张图片的时候的冲突
filename: function (req, file, cb){
cb(null, Date.now()+file.originalname)
}
});
//生成的专门处理上传的一个工具,可以传入storage、limits等配置
var upload = multer({storage: storage});
//接收上传图片请求的接口
app.post('/upload', upload.single('file'), function (req, res, next) {
//图片已经被放入到服务器里,且req也已经被upload中间件给处理好了(加上了file等信息)
//线上的也就是服务器中的图片的绝对地址
var url = '/uploadImgs/' + req.file.filename
res.json({
code : 200,
data : url
})
});
http.createServer(app).listen(3000,()=>{
console.log('server is listening')
})I feel good about myself, but I don’t know why the blog garden removed the homepage for me....
再发一次,if(delete){
alert('Never publish anything again.')
}else{
alert(1)
}Related recommendations:
Kindeditor editor adds image upload watermark implementation method
ThinkPHP5.0 implements image upload plug-in example sharing
PHP implements WeChat applet image upload Example code sharing
The above is the detailed content of Express and multer implement the image upload function in node. For more information, please follow other related articles on the PHP Chinese website!

Hot AI Tools

Undresser.AI Undress
AI-powered app for creating realistic nude photos

AI Clothes Remover
Online AI tool for removing clothes from photos.

Undress AI Tool
Undress images for free

Clothoff.io
AI clothes remover

AI Hentai Generator
Generate AI Hentai for free.

Hot Article
Hot Tools

Notepad++7.3.1
Easy-to-use and free code editor

SublimeText3 Chinese version
Chinese version, very easy to use

Zend Studio 13.0.1
Powerful PHP integrated development environment

Dreamweaver CS6
Visual web development tools

SublimeText3 Mac version
God-level code editing software (SublimeText3)
Hot Topics
 1378
1378
 52
52

 How to delete node in nvm
Dec 29, 2022 am 10:07 AM
How to delete node in nvm
Dec 29, 2022 am 10:07 AM
How to delete node with nvm: 1. Download "nvm-setup.zip" and install it on the C drive; 2. Configure environment variables and check the version number through the "nvm -v" command; 3. Use the "nvm install" command Install node; 4. Delete the installed node through the "nvm uninstall" command.
 How to use express to handle file upload in node project
Mar 28, 2023 pm 07:28 PM
How to use express to handle file upload in node project
Mar 28, 2023 pm 07:28 PM
How to handle file upload? The following article will introduce to you how to use express to handle file uploads in the node project. I hope it will be helpful to you!
 An in-depth analysis of Node's process management tool 'pm2”
Apr 03, 2023 pm 06:02 PM
An in-depth analysis of Node's process management tool 'pm2”
Apr 03, 2023 pm 06:02 PM
This article will share with you Node's process management tool "pm2", and talk about why pm2 is needed, how to install and use pm2, I hope it will be helpful to everyone!
 Pi Node Teaching: What is a Pi Node? How to install and set up Pi Node?
Mar 05, 2025 pm 05:57 PM
Pi Node Teaching: What is a Pi Node? How to install and set up Pi Node?
Mar 05, 2025 pm 05:57 PM
Detailed explanation and installation guide for PiNetwork nodes This article will introduce the PiNetwork ecosystem in detail - Pi nodes, a key role in the PiNetwork ecosystem, and provide complete steps for installation and configuration. After the launch of the PiNetwork blockchain test network, Pi nodes have become an important part of many pioneers actively participating in the testing, preparing for the upcoming main network release. If you don’t know PiNetwork yet, please refer to what is Picoin? What is the price for listing? Pi usage, mining and security analysis. What is PiNetwork? The PiNetwork project started in 2019 and owns its exclusive cryptocurrency Pi Coin. The project aims to create a one that everyone can participate
 Let's talk about how to use pkg to package Node.js projects into executable files.
Dec 02, 2022 pm 09:06 PM
Let's talk about how to use pkg to package Node.js projects into executable files.
Dec 02, 2022 pm 09:06 PM
How to package nodejs executable file with pkg? The following article will introduce to you how to use pkg to package a Node project into an executable file. I hope it will be helpful to you!
 What to do if npm node gyp fails
Dec 29, 2022 pm 02:42 PM
What to do if npm node gyp fails
Dec 29, 2022 pm 02:42 PM
npm node gyp fails because "node-gyp.js" does not match the version of "Node.js". The solution is: 1. Clear the node cache through "npm cache clean -f"; 2. Through "npm install -g n" Install the n module; 3. Install the "node v12.21.0" version through the "n v12.21.0" command.
 What is a single sign-on system? How to implement it using nodejs?
Feb 24, 2023 pm 07:33 PM
What is a single sign-on system? How to implement it using nodejs?
Feb 24, 2023 pm 07:33 PM
What is a single sign-on system? How to implement it using nodejs? The following article will introduce to you how to use node to implement a single sign-on system. I hope it will be helpful to you!
 Token-based authentication with Angular and Node
Sep 01, 2023 pm 02:01 PM
Token-based authentication with Angular and Node
Sep 01, 2023 pm 02:01 PM
Authentication is one of the most important parts of any web application. This tutorial discusses token-based authentication systems and how they differ from traditional login systems. By the end of this tutorial, you will see a fully working demo written in Angular and Node.js. Traditional Authentication Systems Before moving on to token-based authentication systems, let’s take a look at traditional authentication systems. The user provides their username and password in the login form and clicks Login. After making the request, authenticate the user on the backend by querying the database. If the request is valid, a session is created using the user information obtained from the database, and the session information is returned in the response header so that the session ID is stored in the browser. Provides access to applications subject to
