

Preparation work: Create a new folder chatroom and enter the following command in the terminal. Follow the steps npm (if you have not installed it, go to the official website to install node and npm) and a package.json file will be automatically generated for you
Installation express and socket.io
package.json files are as follows:
//package.json
{
 "name": "chatroom",
 "version": "1.0.0",
 "description": "A simple chatroom",
 "main": "index.js",
 "scripts": {
  "test": "echo \"Error: no test specified\" && exit 1"
 },
 "repository": {
  "type": "git",
  "url": "git+https://github.com/ddvdd008/chatroom.git"
 },
 "keywords": [
  "chatroom",
  "nodejs",
  "express"
 ],
 "author": "ddvdd",
 "license": "ISC",
 "bugs": {
  "url": "https://github.com/ddvdd008/chatroom/issues"
 },
 "homepage": "https://github.com/ddvdd008/chatroom#readme"
}Install express and socket.io
npm install express --save
npm install socket.io --save
package.json automatically adds dependencies
"dependencies": {
 "express": "^4.16.2",
 "socket.io": "^2.0.4"
}Because we use express framework to write End service, use socket.io (Socket.io is actually the parent set of WebSocket. Socket.io encapsulates methods such as WebSocket and polling. It will choose methods to communicate according to the situation.) to establish the client and server. A persistent link to facilitate communication.
The preparation work is almost done here, let’s start implementing it step by step.
express create service
It should be familiar to those who have learned node, you can use http.createServer Simply create a server, this time we use express to create the service. Create an app.js in the project root directory.
/**
* Created by ddvdd on 2018-02-07.
*/
const express = require('express');
const app = express();    // 创建express实例,赋值给app。
const fs = require('fs');   // 这个是node的文件读取模块,用于读取文件
const path = require('path');  // 这是node的路径处理模块,可以格式化路径

app.listen(3000,()=>{
 console.log("server running at 127.0.0.1:3000");  // 代表监听3000端口,然后执行回调函数在控制台输出。
});

/**
* app.get(): express中的一个中间件,用于匹配get请求,说的简单点就是node处理请求的路由,对于不同url请求,让对应的不同app.get()去处理
* '/': 它匹配get请求的根路由 '/'也就是 127.0.0.1:3000/就匹配到它了
* req带表浏览器的请求对象,res代表服务器的返回对象
*/
app.get('/',(req,res)=>{
 res.redirect('/chat.html');  // express的重定向函数。如果浏览器请求了根路由'/',浏览器就给他重定向到 '127.0.0.1:3000/chat.html'路由中
});


/**
* 这里匹配到的是/chat.html就是上面重定向到的路径。
*/
app.get('/chat.html',(req,res)=>{
 fs.readFile(path.join(__dirname,'./public/chat.html'),function(err,data){  //读取文件,readFile里传入的是文件路径和回调函数,这里用path.join()格式化了路径。
  if(err){
   console.error("读取chat.html发生错误",err);     //错误处理
   res.send('4 0 4');           //如果发生错误,向浏览器返回404
  } else {
   res.end(data);     //这里的data就是回调函数的参数,在readFile内部已经将读取的数据传递给了回调函数的data变量。
  }         //我们将data传到浏览器,就是把html文件传给浏览器
 })
});After reading this, you will say that the express framework does not seem to be that simple. The simplest method of sending a single page is the http.createServer that comes with node. It’s not much different. It’s quite troublesome. From the current point of view, this is indeed the case. I am not doing this to make it easier for you to understand. Express provides a very powerful middleware to help us host static resource files. Let’s implement it below:
app.use('/',express.static(path.join(__dirname,'./public'))); //一句话就搞定。
Replace the original:
app.get('/chat.html',(req,res)=>{
 fs.readFile(path.join(__dirname,'./public/chat.html'),function(err,data){
  if(err){
   console.error("读取chat.html发生错误",err);
   res.send('4 0 4');
  } else {
   res.end(data);
  }
 })
});__dirname represents the absolute path where the current file is located, so we use path.join to combine the absolute path of app.js with public Added together, we get the absolute path to public. Path.join is used to avoid strange paths like ././public. express.static helps us host the static resources in the public folder. As long as there is a path of 127.0.0.1:3000/XXX/AAA, it will go to the public folder to find the AAA file in the XXX folder and then send it to the browser.
Now let’s see if this code is very brief. Students who know specifically what app.use() does can go here
socket.io to establish a link between the client and the server
After creating the above service, we need to reference socket.io so that the client and server can establish a long-term link. We transform app.js as follows:
/**
* Created by ddvdd on 2018-02-07.
*/
const express = require('express');
const app = express();    // 创建express实例,赋值给app。
const server = require('http').Server(app);
const io = require('socket.io')(server);  //将socket的监听加到app设置的模块里。这两句理解不了的可以去socket.io官网去看
const path = require('path');  // 这是node的路径处理模块,可以格式化路径

server.listen(3000,()=>{
 console.log("server running at 127.0.0.1:3000");  // 代表监听3000端口,然后执行回调函数在控制台输出。
});
...
...
app.use('/',express.static(path.join(__dirname,'./public')));  //一句话就搞定。

/*socket*/
io.on('connection',(socket)=>{    //监听客户端的连接事件

});o.on means listening for a certain event. Once the event occurs, the callback function is triggered. 'Connection' is an event name. It has been defined and will be triggered as long as the user is connected. Now that app.js is basically completed, we execute it in the root directory:
node app.js
>
Now access http ://127.0.0.1:3000/static/chat.html:
Hey? Nothing. . . That's no nonsense! We don’t have any static resources corresponding to url requests!
Add static html
We create a public folder in the project root directory, and create a new chat.html file in the public folder:
<!DOCTYPE html>
<html lang="en">
<head>
 <meta charset="UTF-8">
 <title>聊天室</title>
</head>
<body>
这是我们的聊天室
</body>
</html>
Now we refresh the page, you see the page appears:
>
At this point, in fact, the simplest browser and web server collaboration project is already Completed, we will continue to improve the page later and add business functions to the server backend to realize a multi-person chat room.
Basic function implementation
Login function, we need a user name (no password required), the user name must be stored on the client server. Every time you transmit information, you basically need to include the username, otherwise you won’t know who sent it.
Group chat function, we need to distinguish information between ourselves and each other
Login function implementation
login page Refactor
The most basic login interface consists of a username input box and login button:
##
//chat.html
<!DOCTYPE html>
<html lang="en">
<head>
<meta charset="UTF-8">
<title>聊天室</title>
<style>
*{
margin:0;
padding:0;
box-sizing: border-box;
-webkit-box-sizing: border-box;
-moz-box-sizing: border-box;
}
.container{
position: absolute;
top:0;
left:0;
right:0;
bottom:0;
background-color: grey;
padding: 50px;
}
.container .title{
width:300px;
margin: 0 auto;
font-size: 30px;
font-family: 'Franklin Gothic Medium';
font-weight: bold;
text-align: center;
margin-bottom:50px;
}
.container .login-wrap{
width:400px;
padding: 20px;
border: 1px solid #000;
margin: 0 auto;
text-align: center;
}
.login-wrap .user-ipt{
width:360px;
text-align: center;
vertical-align: middle;
}
.login-wrap .login-button{
width:60px;
height:24px;
line-height:20px;
font-size: 14px;
padding: 2px 0;
border-radius: 5px;
margin-top:10px;
}
</style>
</head>
<body>
<p class="container">
<p class="title">欢迎来到ddvdd聊天室</p>
<p class="login-wrap">
<p class="user-ipt">
<span class="user-name">用户名:</span>
<input id="name" class="name-ipt" type="text" />
</p>
<button id="loginbutton" class="login-button">登陆</button>
</p>
</p>
</body>
</html>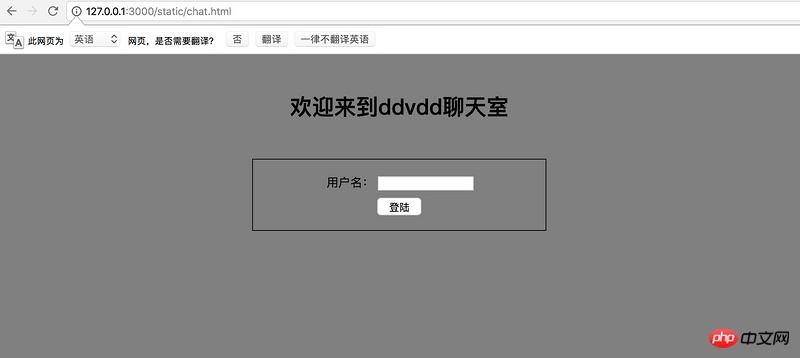
login page interaction
上面的服务器和客户端交互都是通过socket.io来实现通讯的,前端的业务交互我们这里就采用jquery来实现,在public文件夹下新建js文件夹,下载jquery-3.2.1.min.js、新建main.js。然后对chat.html引入需要的sdk:
<script src="js/jquery-3.2.1.min.js"></script>
<script src="js/main.js"></script>
//socket.io官网要求这么引入
<script src="/socket.io/socket.io.js"></script>
引入完sdk,我们对main的js添加登录功能:
//main.js
/**
* Created by ddvdd on 2018-02-08.
*/
$(function(){
const url = 'http://127.0.0.1:3000';
let _username = '';
let _$inputname = $('#name');
let _$loginButton = $('#loginbutton');
let socket = io.connect(url);
//设置用户名,当用户登录的时候触发
let setUsername = () => {
_username = _$inputname.val().trim(); //得到输入框中用户输入的用户名
//判断用户名是否存在
if(_username) {
socket.emit('login',{username: _username}); //如果用户名存在,就代表可以登录了,我们就触发登录事件,就相当于告诉服务器我们要登录了
}
else{
alert('请输入用户名!');
}
};
/*前端事件*/
_$loginButton.on('click',function (event) { //监听按钮的点击事件,如果点击,就说明用户要登录,就执行setUsername函数
setUsername();
});
/*socket.io部分逻辑*/
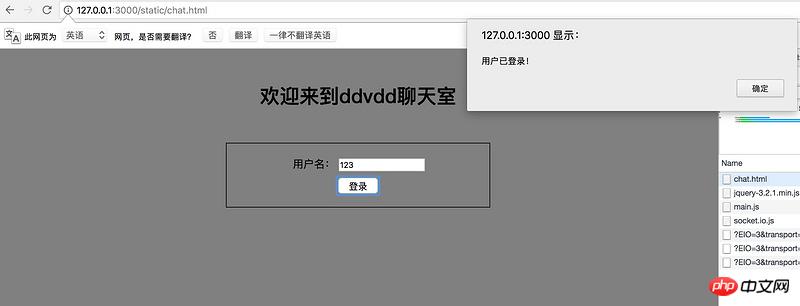
socket.on('loginResult',(data)=>{
/**
* 如果服务器返回的用户名和刚刚发送的相同的话,就登录
* 否则说明有地方出问题了,拒绝登录
*/
if(data.code === 0) {
// 登陆成功,切换至聊天室页面
}
else if(data.code ===1){
alert('用户已登录!');
}
else{
alert('登录失败!');
}
})
});
//app.js
/**
* Created by ddvdd on 2018-02-07.
*/
const express = require('express');
const app = express(); // 创建express实例,赋值给app。
const server = require('http').Server(app);
const io = require('socket.io')(server); //将socket的监听加到app设置的模块里。这两句理解不了的可以去socket.io官网去看
const path = require('path'); // 这是node的路径处理模块,可以格式化路径
const users = []; //用来保存所有的用户信息
let usersNum = 0; //统计在线登录人数
server.listen(3000,()=>{
console.log("server running at 127.0.0.1:3000"); // 代表监听3000端口,然后执行回调函数在控制台输出。
});
/**
* app.get(): express中的一个中间件,用于匹配get请求,说的简单点就是node处理请求的路由,对于不同url请求,让对应的不同app.get()去处理
* '/': 它匹配get请求的根路由 '/'也就是 127.0.0.1:3000/就匹配到它了
* req带表浏览器的请求对象,res代表服务器的返回对象
*/
app.get('/',(req,res)=>{
res.redirect('/static/chat.html'); // express的重定向函数。如果浏览器请求了根路由'/',浏览器就给他重定向到 '127.0.0.1:3000/chat.html'路由中
});
/**
* __dirname表示当前文件所在的绝对路径,所以我们使用path.join将app.js的绝对路径和public加起来就得到了public的绝对路径。
* 用path.join是为了避免出现 ././public 这种奇怪的路径
* express.static就帮我们托管了public文件夹中的静态资源。
* 只要有 127.0.0.1:3000/XXX/AAA 的路径都会去public文件夹下找XXX文件夹下的AAA文件然后发送给浏览器。
*/
app.use('/static',express.static(path.join(__dirname,'./public'))); //一句话就搞定。
/*socket*/
io.on('connection',(socket)=>{ //监听客户端的连接事件
socket.on('login',(data)=>{
if(checkUserName(data)){
socket.emit('loginResult',{code:1}); //code=1 用户已登录
}
else{
//将该用户的信息存进数组中
users.push({
username: data.username,
message: []
});
socket.emit('loginResult',{code:0}); //code=0 用户登录成功
usersNum = users.length;
console.log(`用户${data.username}登录成功,进入ddvdd聊天室,当前在线登录人数:${usersNum}`);
}
});
//断开连接后做的事情
socket.on('disconnect',()=>{ //注意,该事件不需要自定义触发器,系统会自动调用
usersNum = users.length;
console.log(`当前在线登录人数:${usersNum}`);
});
});
//校验用户是否已经登录
const checkUserName = (data) => {
let isExist = false;
users.map((user) => {
if(user.username === data.username){
isExist = true;
}
});
return isExist;
}上面代码大家需要了解以下几点:
socket.on 表示监听事件,后面接一个回调函数用来接收emit发出事件传递过来的对象。
socket.emit 用来触发事件,传递对象给on监听事件。
我们socket连接之后的监听触发事件都要写在io.on('connection')的回调里面,因为这些事件都是连接之后发生的,就算是断开连接的事件 disconnect 也是在连接事件中发生的,没有正在连接的状态,哪来的断开连接呢?
理解虽然服务器端只有app.js一个文件,但是不同的客户端连接后信息是不同的,所以我们必须要将一些公用的信息,比如说,储存所有登录用户的数组,所有用户发送的所有信息存储在外部,一定不能存储在connecion里
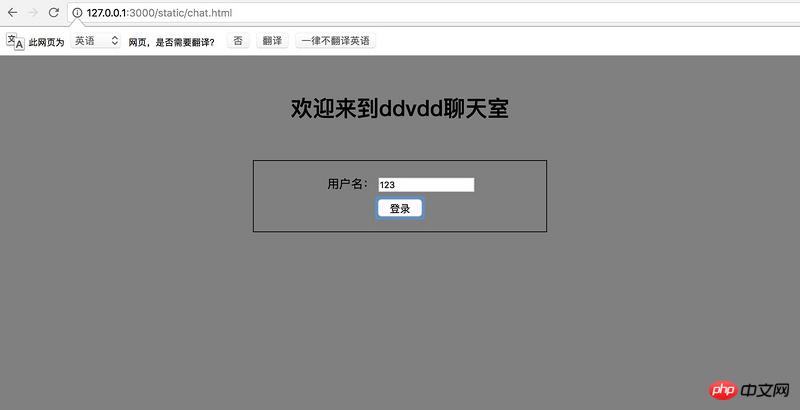
效果展示:

群聊功能实现
写完简单的登录功能,现在我们来写这项目最重要的功能群聊。首先我们先来处理下页面,因为功能简单,所以不单独建立html来显示聊天室,就直接写在login页面,通过class名称的变化来切换登录后,聊天室的显示。
聊天室页面重构
下面我们对chat.html进行整改:
<!DOCTYPE html>
<html lang="en">
<head>
<meta charset="UTF-8">
<title>聊天室</title>
<script src="js/jquery-3.2.1.min.js"></script>
<script src="js/main.js"></script>
<script src="/socket.io/socket.io.js"></script>
<style>
*{
margin:0;
padding:0;
box-sizing: border-box;
-webkit-box-sizing: border-box;
-moz-box-sizing: border-box;
}
.container{
position: absolute;
top:0;
left:0;
right:0;
bottom:0;
background-color: darkgrey;
padding: 50px;
overflow-y: scroll;
}
.container .title{
margin: 0 auto;
font-size: 30px;
font-family: 'Franklin Gothic Medium';
font-weight: bold;
text-align: center;
margin-bottom:20px;
}
.container .login-wrap{
width:400px;
padding: 20px;
border: 1px solid #000;
margin: 0 auto;
text-align: center;
}
.login-wrap .user-ipt{
width:360px;
text-align: center;
vertical-align: middle;
}
.login-wrap .login-button{
width:60px;
height:24px;
line-height:20px;
font-size: 14px;
padding: 2px 0;
border-radius: 5px;
margin-top:10px;
}
.chat-wrap .chat-content{
width:100%;
height:600px;
background-color: whitesmoke;
padding:10px;
}
.chat-wrap .send-wrap{
margin-top: 20px;
}
.message-ipt{
width: 200px;
height: 100px;
padding: 0 5px;
vertical-align: bottom;
}
.chat-content p{
display: block;
margin-bottom: 10px;
}
.chat-content p .msg{
display: inline-block;
padding: 8px 11px;
border-radius:6px;
}
.chat-content .self-message .msg{
background-color:#d0e7ff;
border: 1px solid #c9dfff;
}
.chat-content .other-message .msg{
background-color:white;
border: 1px solid #eee;
}
.chat-content .self-message{
text-align:right;
}
.chat-content .other-message{
text-align-last:left;
}
</style>
</head>
<body>
<p class="container">
<p id="loginbox" class="login-wrap">
<p class="title">登录</p>
<p class="user-ipt">
<span class="user-name">用户名:</span>
<input id="name" class="name-ipt" type="text" />
</p>
<button id="loginbutton" class="login-button">登录</button>
</p>
<p id="chatbox" class="chat-wrap" style="display:none">
<p id="content" class="chat-content">
<!-- 聊天内容 -->
</p>
<p class="send-wrap">
<textarea rows="3" cols="20" id="chatmessage" class="message-ipt" type="textarea" placeholder="请输入要发送的信息内容"></textarea>
</p>
</p>
</p>
</body>
</html>新增chatbox容器来作为聊天室,里面有一个群聊的聊天框,和一个发送消息的文本框。通过上面loginResult回调,对loginbox进行隐藏,显示chatbox:
//显示聊天室界面
let showChatRoom = () => {
/**
* 1.隐藏登录框,取消它绑定的事件
* 2.显示聊天界面
*/
$('#loginbox').hide('slow');
_$loginButton.off('click');
/**
* 显示聊天界面,并显示一行文字,欢迎用户
*/
$(`<p class="title">欢迎${_username}来到ddvdd聊天室</p>`).insertBefore($("#content"));
$("#chatbox").show('slow');
}消息事件发送监听机制
聊天一定是客户端触发的,所以发送信息是客户端触发,服务器监听。
服务器监听到发送信息的事件后会存储信息,然后触发发送信息成功事件广播给所有客户端,将信息传给所有客户端。
发送消息sendMessage事件
//main.js
//发送消息
let sendMessage = function () {
 /**
  * 得到输入框的聊天信息,如果不为空,就触发sendMessage
  * 将信息和用户名发送过去
  */
 let _message = _$chattextarea.val();

 if(_message) {
  socket.emit('sendMessage',{username: _username, message: _message});
 }
 else{
  alert('请输入发送消息!');
 }
};
...
/*聊天事件*/
_$chattextarea.on('keyup',function (event) {
 if(event.keyCode === 13) {
  sendMessage();
  _$chattextarea.val('');
 }
});服务器端监听sendMessage事件
//app.js
/**
 * 监听sendMessage,我们得到客户端传过来的data里的message,并存起来。
 */
socket.on('sendMessage',(data)=>{
 for(let _user of users) {
  if(_user.username === data.username) {
   _user.message.push(data.message);
   //信息存储之后触发receiveMessage将信息发给所有浏览器-广播事件
   io.emit('receiveMessage',data);
   break;
  }
 }
});我们是遍历服务器端的用户数组,找到该用户,将发送的信息存起来,然后触发receiveMessage事件广播到所有浏览器,sendMessage是写在connection里,login之外的,为什么这么做大家一定要理解,发送消息是连接时候做的事情,而不是登录时做的事情。
注意的是,我使用的是io.emit,他是真正的广播到所有浏览器,socket.broadcast.emit则不会广播到自己的浏览器。
客户端监听receiveMessage事件
//main.js
socket.on('receiveMessage',(data)=>{
/**
*
* 监听服务器广播的消息
*/
showMessage(data);
})
//显示消息
let showMessage = function (data) {
//先判断这个消息是不是自己发出的,然后再以不同的样式显示
if(data.username === _username){
$("#content").append(`<p class='self-message'><span class='msg'>${data.message}</span><span class='name'> :${data.username}</span></p>`);
}else {
$("#content").append(`<p class='other-message'><span class='name'>${data.username}: </span><span class='msg'>${data.message}</span></p>`);
}
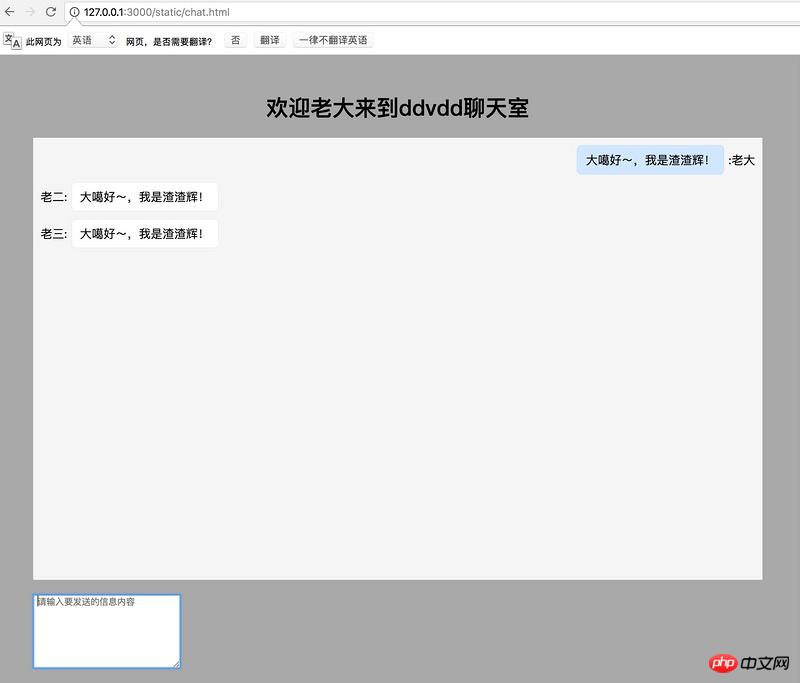
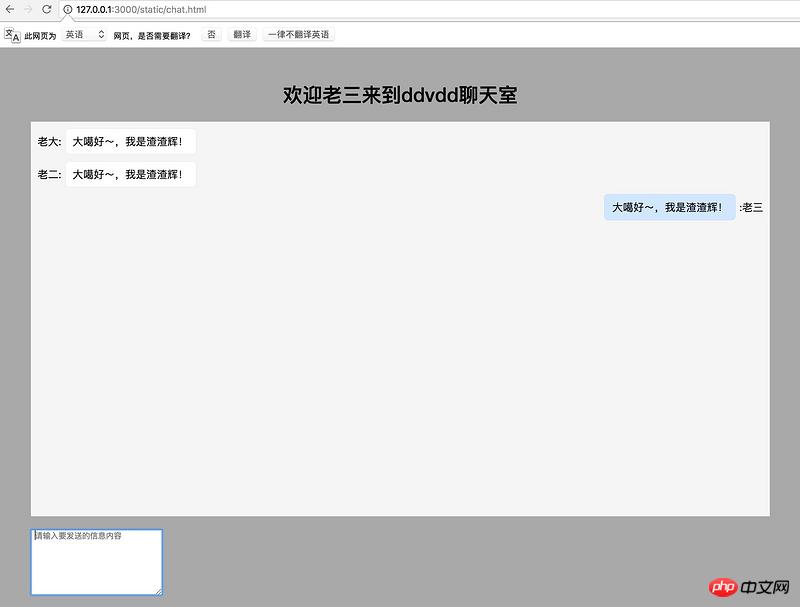
};写到这边,我们的聊天室基本功能已经完成了,来看看效果吧!打开三个浏览器,分别登录老大、老二、老三,发一句“大噶好~,我是渣渣辉!”。

相关推荐:
The above is the detailed content of Nodejs and express build a multi-person chat room. For more information, please follow other related articles on the PHP Chinese website!


![[Web front-end] Node.js quick start](https://img.php.cn/upload/course/000/000/067/662b5d34ba7c0227.png)


