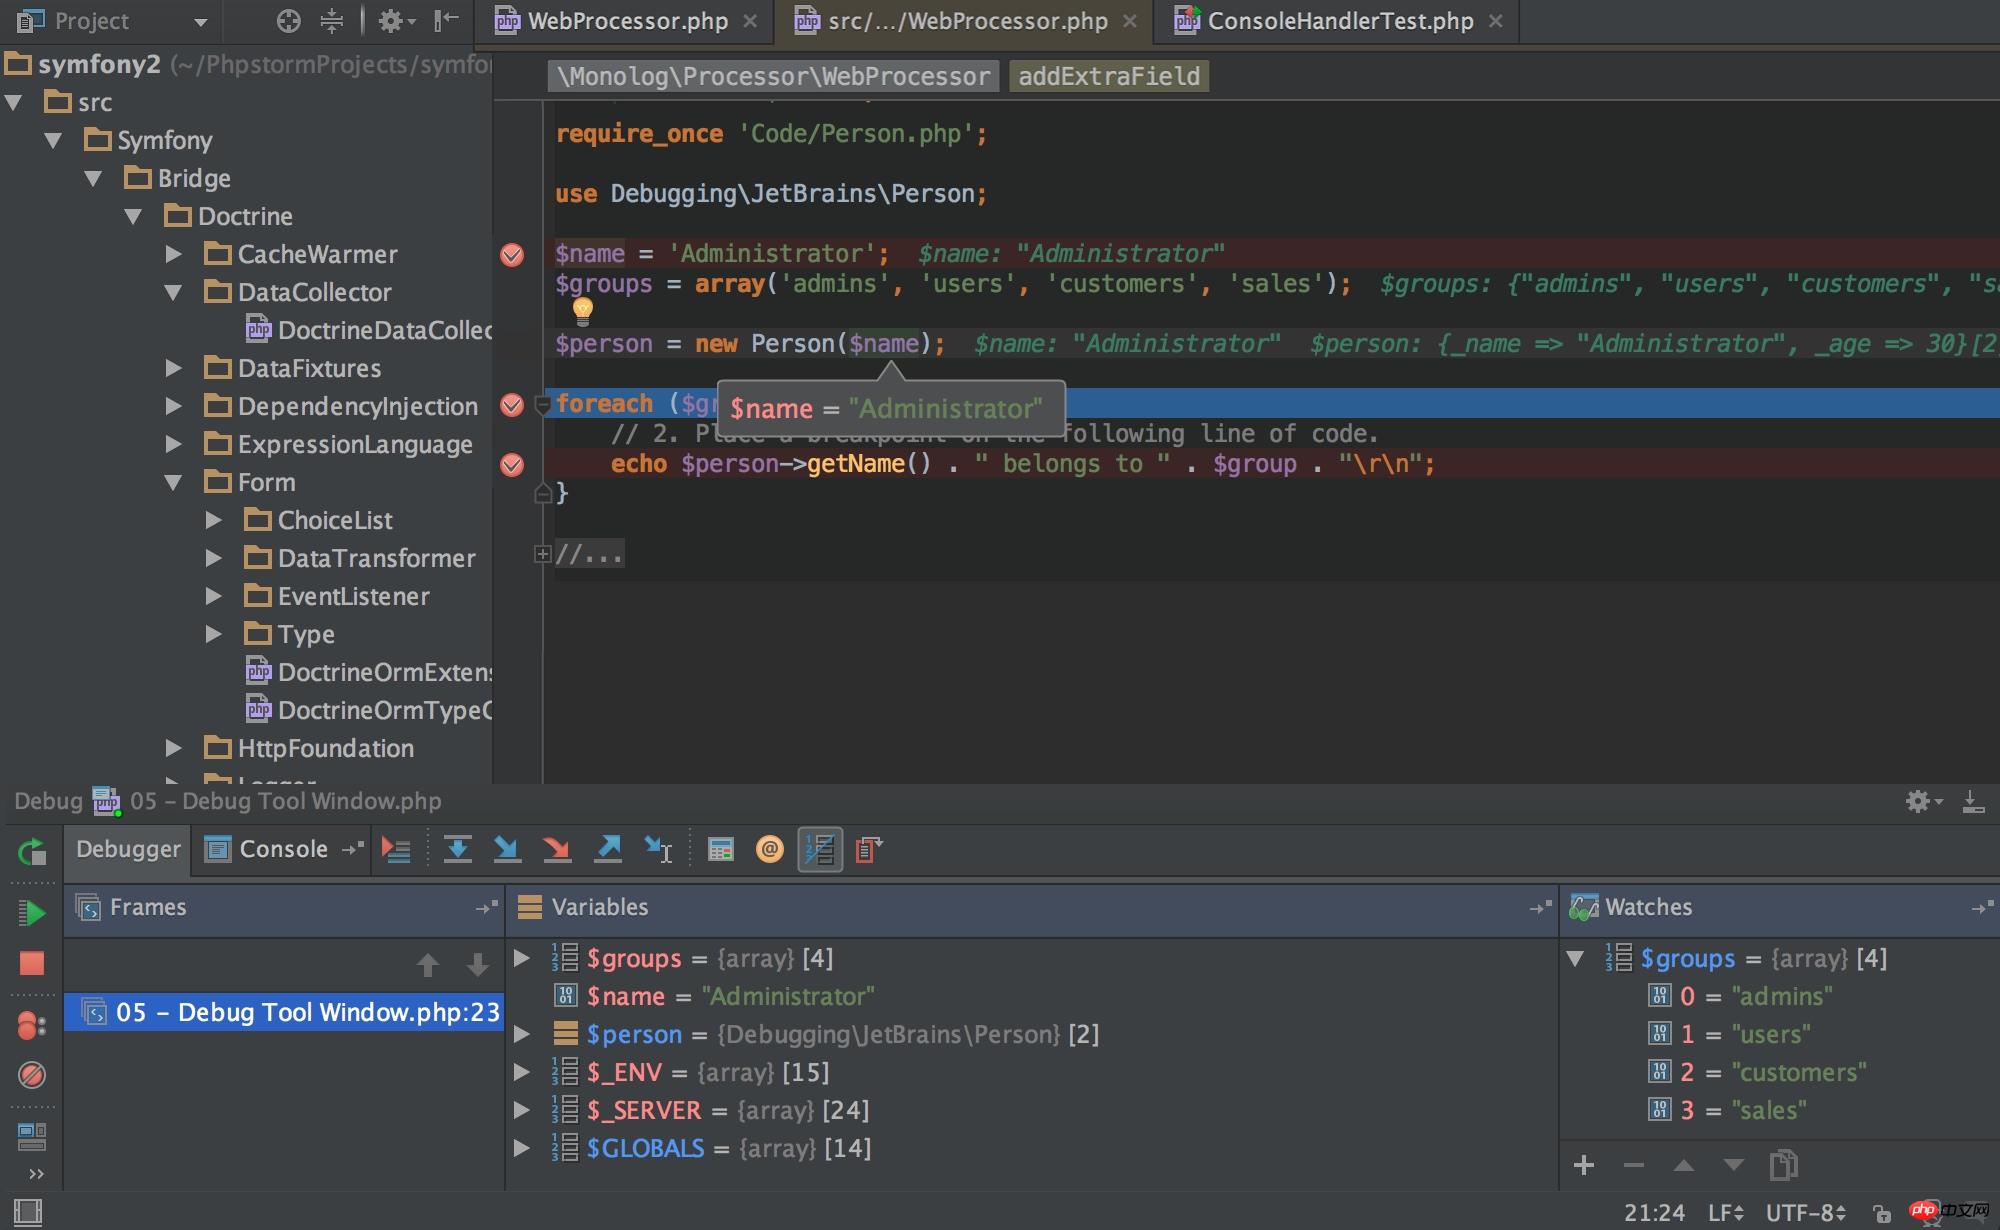
The correct way to operate phpStorm: first download the win version or mac version of phpstorm software; then crack it; then open the software and import the code file; finally query or modify it through "command+f" and other shortcut keys Just do it.

PhpStorm is a commercial PHP integrated development tool developed by JetBrains. PhpStorm can help users adjust their coding at any time, run unit tests or provide visual debug functions and intelligent HTML/CSS/JavaScript/PHP editing, code quality analysis, version control integration (SVN, GIT), debugging and testing functions. Plus, it's cross-platform. Available under both Windows and MacOS. PhpStorm - Make development smarter, not harder.
Download and free activation of phpstorm:
win version download address: http://www.php. cn/xiazai/gongju/122 (with installation, cracking and usage tutorials)
Mac version download address: http://www.php.cn/xiazai/gongju/510 (With installation, cracking and usage tutorials)

##I heard that phpStorm 10 supports php7 uh
AdvantagesIn short, it’s just awesome, it can do anything
phpStorm has many, many easy-to-use shortcut keys. I will give some examples of commonly used shortcut keys below. There are also some uncommon ones that I will not give examples. , can definitely improve the efficiency of your development...
(Windows is similar to Mac, just replace the command key with ctrl)
command + f Find the current file
##command + r Find and replace
command + e Open recent files
Quickly query files
Keyword search, more powerful query (if the machine is not good, it is best to determine the directory first)
Advanced replacement
Find the clipping class All subclasses
Find recently modified files
command + shift + tab Switch tab page files
##command + shift + +,- Expand Or collapse
command + . Collapse or expand the selected code


 #Auto code
Import package, automatically correct
Kuaishi generates getter and setter methods for each member attribute
Quickly generate insertion magic method
Override parent class method
Format the current file
/ Comment
Take command + n as an example
I created a Person class in /Entity/ directory, and then I set some private attributes as follows:
namespace Entity;class Person{    private $sign = '';    private $name = '';    private $age  = 0;
    private $work = '';
    private $sex  = '女';
} Then we use command + n to select "PHPDoc Blocks... "As shown below:

In the pop-up window, select all properties and click "OK":

namespace Entity;/**
 * Class Person
 * @package Entity
 */class Person{    /**
     * @var string
     */
    private $sign = '';    /**
     * @var string
     */
    private $name = '';    /**
     * @var int
     */
    private $age  = 0;    /**
     * @var string
     */
    private $work = '';
    /**
     * @var string
     */
    private $sex  = '女';
}Then it adds a comment to the attribute just selected... Isn't it very magical?
ok, let's continue, use the command + n key again to select Contructor...The properties that need to be passed and assigned will pop up:

    /**
     * Person constructor.
     * @param string $sign
     */
    public function __construct($sign)
    {        $this->sign = $sign;
}如果不选择的话将不需要对成员属性进行设置。
然后咱们再来看看其他功能,比如"Implement Methods..."这个是快速生成魔术方法。

通常咱们设置、获取一个成员属性时最好不要直接使用$person->name = $name 这种方式进行设置参数或取得参数值,建议是对每个属性都开放一个 getter 跟 setter 方法,这样可以很方便得对传进或传出去的值进行处理,这就是上面我为什么要把成员属性设置置为私有的原因之一
同样的command + n 选择"Getters and Stetters" 然后选择所有属性,它就会把所有的属性设置getter及setter方法,这里要注意的是Person的sign是唯一的,不可进行修改,所以咱们要把设置sign的方法去掉。注意: 最好setter方法设置完后返回当剪对象,这样的话咱们就可以连写了并且phpStorm的提示还相当友好下面有例子:
    /**
     * @return string
     */
    public function getSign()
    {        return $this->sign;
    }    /**
     * @return string
     */
    public function getName()
    {        return $this->name;
    }    /**
     * @param string $name
     * @return $this
     */
    public function setName($name)
    {        $this->name = $name;        return $this;
    }    /**
     * @return int
     */
    public function getAge()
    {        return $this->age;
    }    /**
     * @param int $age
     * @return $this
     */
    public function setAge($age)
    {        $this->age = $age;        return $this;
    }    /**
     * @return string
     */
    public function getWork()
    {        return $this->work;
    }    /**
     * @param string $work
     * @return $this
     */
    public function setWork($work)
    {        $this->work = $work;        return $this;
    }
    /**
     * @var string
     */
    private $sex  = '女';    /**
     * @return string
     */
    public function getSex()
    {        return $this->sex;
    }    /**
     * @param string $sex
     * @return $this
     */
    public function setSex($sex)
    {        $this->sex = $sex;
        return $this;
}连写的例子:
use Entity\Person;$person = new Person();
$person->setName("蛋蛋")
    ->setAge(17)
->setWork('student');最后再演示一个快速复写被继承类的功能。咱们新建一个Man类,然后继承Person类,上面的Person类缺省是女性别,所以我们需要重写它并且加上"中国男人"。同样的使用command + n打开快捷窗口选择 "Override Methods..." 弹出来可被复写的方法:

然后咱们选择getSex跟setSex方法,然后确定,在Man方法下生成以下方法。
namespace Entity;/**
 * Class Man
 * @package Entity
 */class Man extends Person{    /**
     * @return string
     */
    public function getSex()
    {        return parent::getSex(); // TODO: Change the autogenerated stub
    }    /**
     * @param int $sex
     * @return $this
     */
    public function setSex($sex)
    {        return parent::setSex($sex); // TODO: Change the autogenerated stub
    }
}咱们把return parent::getSex()跟return parent::setSex( $age )删除掉,不需要这样,然后改成如下模式。
    /**
     * @return string
     */
    public function getSex()
    {        if ( ! mb_strpos(parent::getSex(), "中国") )            return "中国".parent::getSex();        return parent::getSex();
    }    /**
     * @param int $sex
     * @return $this
     */
    public function setSex($sex)
    {        if( ! mb_strpos($sex, "中国") )
            $sex = "中国".$sex;        return parent::setSex($sex);
}碉堡了有木有。

看起来好多的样纸,我懒,不想讲可不可以?我就挑几个好不好?
Just pull ssh and follow the configuration, it’s very simple

DataGrip. Of course, it needs to be purchased independently. Our phpStorm has integration, so just use it haha... .(Our PhpStorm is bought with money, please support the genuine version)
Database tools are usually in the right column. If you don’t have them, just search for them. It’s such a simple thing...


Select the "+" sign as shown above, then select Data Sourcedata source, and then select the database type. Generally, we use mysql. This time we try new ones, such as SQLite

Select the address of the sqlite data file, and then select the driver. If not, you must download and install it first. SQLite driver plug-in, this is very simple, there is a prompt under the Driver, just follow it...
Let's take a look at the configuration of mysql first...

Mysql is also very simple. If you need ssh/ssl connection, you need to configure the connection password or sshkey on the SSH/SSL tab...
Configuration Okay, open the selected database:

The picture above is the table and table field information of the connected database... Let's demonstrate the query... . Clicking the "QL"-like DOS window icon will pop up a tab page where we can write sql statements.

Let’s query all the data under the User table. You can see that there will be quite a prompt, which is quite useful... After the query is completed, the following Database Console There will be display table data on it, which can be modified, and you can also add data through other operations.

Shortcut keyscommand + alt + lNot only formats the code, but also the sql statement is also very effective, as above picture.
Click the "Output" tab on the "Database Console" column to view the sql statement execution status, records, time spent, and other information...
command + Enter Execute sql statement or execute selected sql statement
There are many, many more usages of database tools, I will not cover them all. It’s explained, you can study it yourself, it’s really easy to use
##command + k
command + shift + k
Regarding the preparation of FTP, since I don’t recommend its use, I won’t say much here!
Now that we’re here, let’s talk about how to use git tools on phpStorm
Forget it, let’s give an example. It’s so spicy. I'm tired. I'll check if there is anything configured in a while. If so, I can pull it out and take a screenshot to see. Anyway, svn is used less now, and git is more comfortable to use. It's distributed. , offline, how good... Regarding svn -> git, you can refer to an article I wrote before
"Migrating the code base from Svn to Git"
SelectCVS -> Checkout from Version Control -> Git

Enter your own git warehouse information in the pop-up window:

Pay attention to the conle time if you have not set up your github account You may be prompted to enter your account information, just enter it. If you need to modify it, modify it in the settings. We can use command + , to open "Preferences" and then find "GitHub" in the "Version Control" option to set it, as well as the "Git" path.

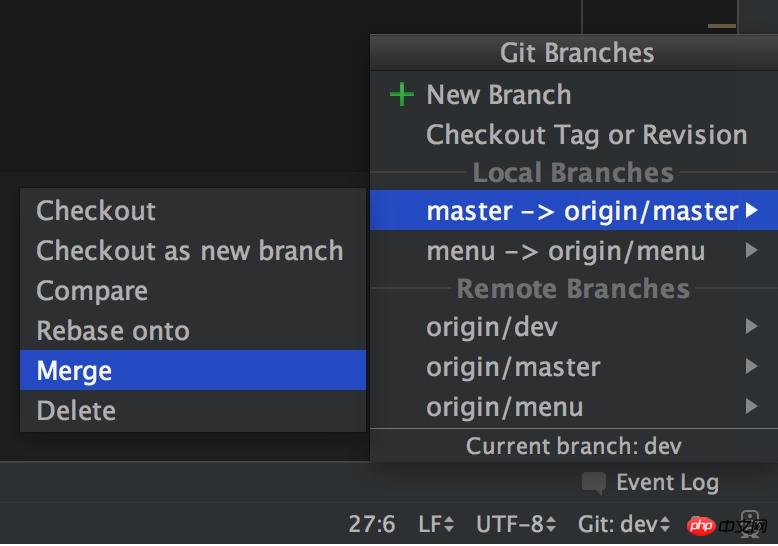
Create a branch to create through the command line. We can create it through the phpstrom window, as follows:

#This thing is in the lower right corner, "Git:master" and then the window above pops up, select "New Branch" and enter the name of the new branch. It It will automatically switch to the new branch.
Isn’t it super simple...
After we modify the code, we need to submit the code to the remote branch, use the quick Press command + k to submit the modified code. Double-click the file to compare. Write the modifications in "Commit Message" and click Submit. At this time, the code is submitted to the local branch.
If you do not use shortcut keys, you can use "CVS -> Commit Changes" to submit, and the following window will pop up...
 

After submitting to the local branch, we need to push the code to the remote branch, so we need to use the shortcut key: command + shif + kSubmit the remote branch...
 

You can also use "CVS -> Git -> Push" to submit...the effect is the same
Note that svn does not have command + shift + kThis step
It is very simple, just select the branch that needs to be merged, and then merge, as shown below:

In this way, the merge is completed. Of course, if there is a conflict, it will be submitted and let you resolve it. If not, the merge will be successful directly...and then you can Pushed...
Compare is to compare the merged branches...
Sorry, I can't find the code of the relevant Svn project on my computer, so I won't say more...
Here is a javascript installation, use the shortcut keycmd + , to open Preferences
Install the JavaScript plug-in
Languages & Frameworks -> Javascript -> Libraries

Gray + wavy line: variable is not used
Yellow wavy line: spelling problem of unnamed word of variable
Red wavy line: variable is undefined
There are many more that I won’t give examples one by one. It may be because I wrote the code too well and made an error. There are relatively few things...
The right column appears in red. This must be avoided. Good code should not have any red prompts...Once it appears It must be solved immediately. Good code should not have a yellow or red prompt.
TODO represents a to-do event. When submitting to vcs, svn or git, it will prompt that there are unprocessed events and the submission needs to be confirmed.
Related recommendations:
Using phpstorm for PHP breakpoint debugging
##Detailed explanation of PHP's automatic prompt function using PHPstorm
PHPstorm shortcut key introduction summary
The above is the detailed content of How to operate phpStorm correctly. For more information, please follow other related articles on the PHP Chinese website!


