
This time I will bring you a detailed explanation of webpack style loading. What are the precautions for webpack style loading? . Here is a practical case, let’s take a look.
You need to use css-loader and style-loader to load css. css-loader processes @import and url into regular ES6 imports. If @import points to an external resource, css-loader will skip it. Only internal resources will be processed. After css-loader processing, style-loader will inject the output css into the packaging file. CSS defaults to inline mode and implements the HMR interface. But inline is not suitable for production environments (all output is on the page). You will also need to generate a separate css file using the extracttextplugin, but let’s do it step by step first.
npm install css-loader style-loader --save-dev
Add a The regular expression of level sub-node
  module:{
       rules:[{
       test:/\.css$/,
       use: ['style-loader', 'css-loader'],
     }]
},test will match the .css file. The order of execution in use is from right to left. The execution of the loader is continuous, like a pipeline, first to css-loader and then to style-loader. loaders: ['style-loader', 'css-loader'] can be understood as: styleloader(cssloader(input)).
app/mian.css
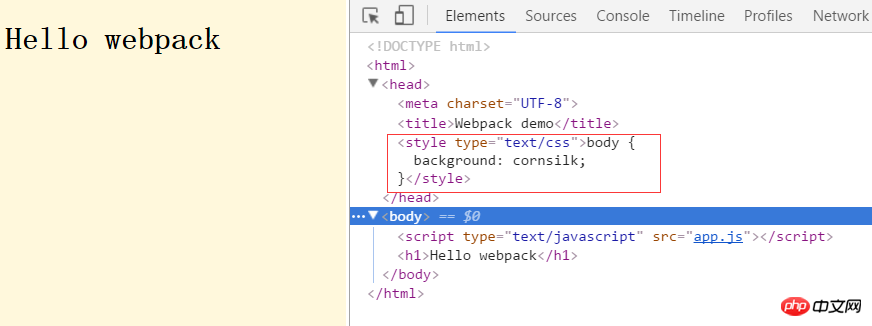
body {
  background: cornsilk;
}Then introduce
import './main.css';
in index.js and then run npm start, at http: Open

Update method.
2. Load less Let’s take a look at how to load less. First install less-loadernpm install less less-loader --save-dev
configuration file:
   module:{
       rules:[{
          test: /\.less$/,
       use: ['style-loader', 'css-loader', 'less-loader'],             }]
},@base: #f938ab;
.box-shadow(@style, @c) when (iscolor(@c)) {
-webkit-box-shadow: @style @c;
box-shadow: @style @c;
}.box-shadow(@style, @alpha: 50%) when (isnumber(@alpha)) {
.box-shadow(@style, rgba(0, 0, 0, @alpha));}.box {
color: saturate(@base, 5%);
border-color: lighten(@base, 30%);
p { .box-shadow(0 0 5px, 30%) }}
body {
background: cornsilk;
} import './less.less';
import component from './component';var ele=document.createElement("p");
ele.innerHTML="this is an box";
ele.className="box";
document.body.appendChild(ele);
let demoComponent=component();
document.body.appendChild(demoComponent);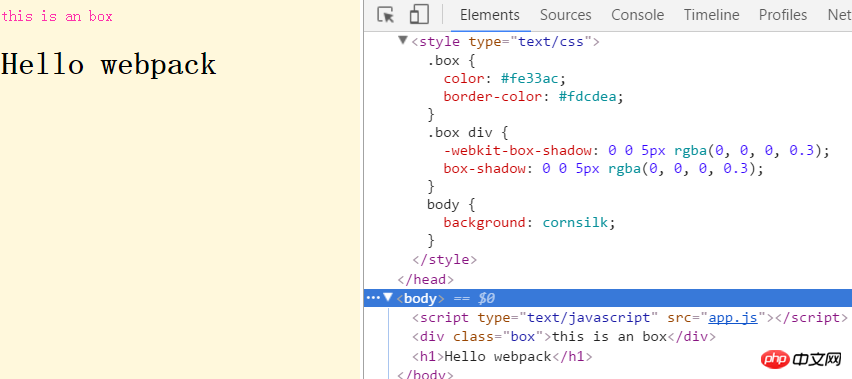
    module:{
       rules:[{
        test:/\.css$/,
        use: ['style-loader', {
        loader: 'css-loader',
          options: {          modules: true,//让css-loader支持Css Modules。
        },
},],body {
background: cornsilk;
}
.redButton { background: red;color:yellow;}import styles from './main.css';export default function () { var element = document.createElement('h1');
element.className=styles.redButton;
element.innerHTML = 'Hello webpack'; return element;
}
.redButton {
  background:rebeccapurple;color:snow;
}import './main.css';import styles from './other.css';import component from './component';var ele=document.createElement("p");
ele.innerHTML="this is an other button";ele.className=styles.redButton;document.body.appendChild(ele);
let demoComponent=component();
document.body.appendChild(demoComponent);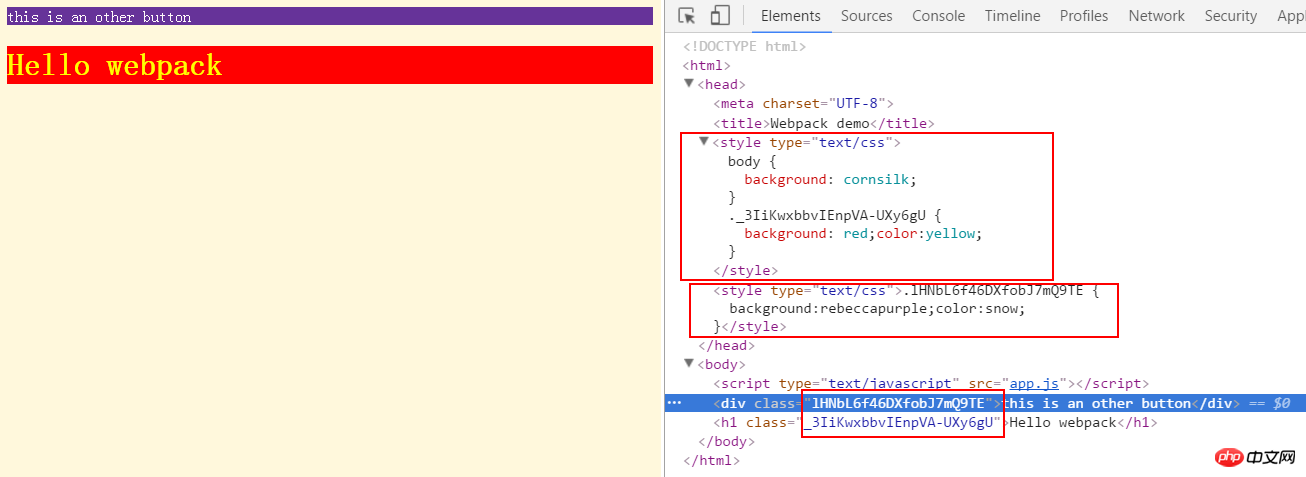
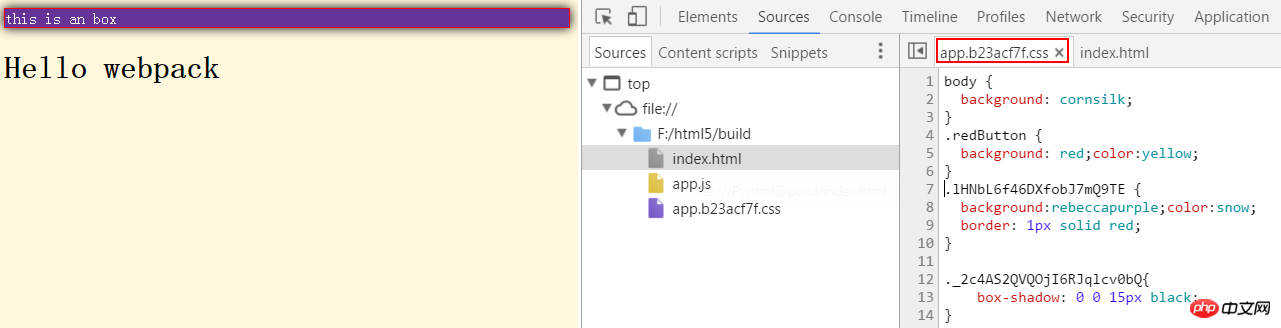
上面这个图说明了两问题,一个是我们在index.js中引入了2个样式文件,在index页面就输出了两个style,这让人有点不爽,但我们后面再解决。另外一个就是虽然两个样式文件中都有redButton这个类,但是这两者还是保持独立的。这样就避免了命名空间的相互干扰。如果你这个时候直接赋值
element.className="redButton";
这样是获取不到样式的。直接对元素的样式默认是全局的。
如果想让某个样式是全局的。可以通过:global来包住。
other.css
:global(.redButton) {
  background:rebeccapurple;color:snow;
  border: 1px solid red;
}main.css
:global(.redButton) {
  background: red;color:yellow;
}这个时候redbutton这两个样式就会合并。需要直接通过样式名来获取。
element.className="redButton";

我们再修改other.css,创建一个shadowButton 样式,内部通过composes组合redbutton类。
.redButton {
  background:rebeccapurple;color:snow;
  border: 1px solid red;
}
 .shadowButton{
    composes:redButton;
    box-shadow: 0 0 15px black;
}修改index.js:
var ele=document.createElement("p");
ele.innerHTML="this is an shadowButton button";console.log(styles);
ele.className=styles.shadowButton;
document.body.appendChild(ele);看一下是什么效果:

日志打印出来的是styles对象,它包含了两个类名。可以看见shadowButton是由两个类名组合而成的。p的class和下面的对应。
css嵌在页面里面不是我们想要的,我们希望能够分离,公共的部分能够分开。extracttextplugin 可以将多个css合成一个文件,但是它不支持HMR(直接注释掉hotOnly:true)。用在生产环境挺好的
npm install extract-text-webpack-plugin --save-dev
先安装extracttextplugin这个插件,然后再webpack.config.js中进行配置:
const ExtractTextPlugin = require('extract-text-webpack-plugin');
const extractTxtplugin = new ExtractTextPlugin({    filename: '[name].[contenthash:8].css',});
const commonConfig={
 entry: {
    app: PATHS.app,
  },
  output: {
    path: PATHS.build,
    filename: '[name].js',
  },
   module:{
       rules:[{
           test:/\.css$/,            use:extractTxtplugin.extract({
            use:'css-loader',
            fallback: 'style-loader',
          })
     }]},
  plugins: [    new HtmlWebpackPlugin({
      title: 'Webpack demo',
    }),    extractTxtplugin
  ],
}一开始看到这个配置,让人有点懵。首先看fileName,表示最后输出的文件按照这个格式'[name].[contenthash:8].css',name默认是对应的文件夹名称(这里是app),contenthash会返回特定内容的hash值,而:8表示取前8位。当然你也可以按照其他的格式写,比如直接命名:
new ExtractTextPlugin('style.css')而ExtractTextPlugin.extract本身是一个loader。fallback:'style-loader'的意思但有css没有被提取(外部的css)的时候就用style-loader来处理。注意到现在我们的index.js如下:
import  './main.css';
import styles from './other.css';
import component from './component';var ele=document.createElement("p");
ele.innerHTML="this is an box";
ele.className=styles.shadowButton;
document.body.appendChild(ele);
let demoComponent=component();
document.body.appendChild(demoComponent);//HMR 接口if(module.hot){
    module.hot.accept('./component',()=>{
        const nextComponent=component();
        document.body.replaceChild(nextComponent,demoComponent);
        demoComponent=nextComponent;
    })
}View Code
引入了两个css文件。
这个时候我们执行 npm run build
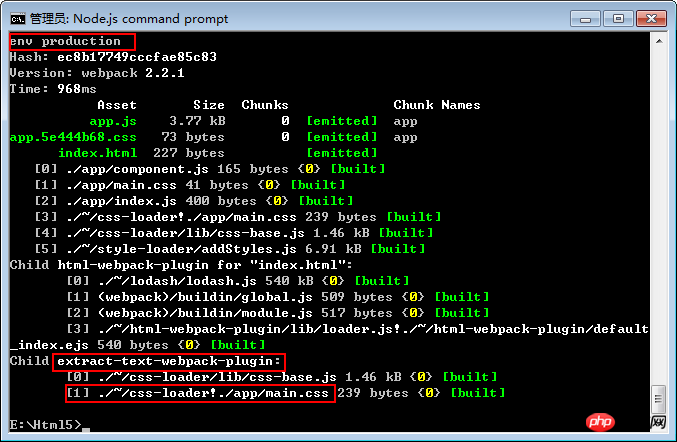
再看文件夹得到一个样式文件。(如果不想看到日志可以直接npm build)

但是我们在第三部分使用了CSS Modules,发现other.css的样式没有打包进来。所以,我们的webpack.config.js还要修改:
   module:{
       rules:[{
           test:/\.css$/,
           use:extractTxtplugin.extract({
            use:[ {            loader: 'css-loader',
            options: {
            modules: true,
        },
        }],
            fallback: 'style-loader',
          })
}]},再次build。
相信看了本文案例你已经掌握了方法,更多精彩请关注php中文网其它相关文章!
推荐阅读:
The above is the detailed content of Detailed explanation of webpack style loading. For more information, please follow other related articles on the PHP Chinese website!


![[Web front-end] Node.js quick start](https://img.php.cn/upload/course/000/000/067/662b5d34ba7c0227.png)


