

Nodejs uses Angular to create single-page applications
This time I will bring you Nodejs to use Angular to create a single-page application. What are the precautions for Nodejs to use Angular to create a single-page application. The following is a practical case, let's take a look.
Create a new app_client in the root directory to specifically place code related to a single page. Don’t forget to set it to static:app.use(express.static(path.join(dirname, 'app_client')))
module.exports.angularApp = function (req, res) {
    res.render('layout', { title: 'ReadingClub' });
};router.get('/', ctrlOthers.angularApp);/about
/#/about
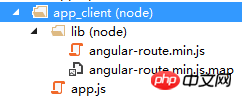
    script(src='/angular/angular.min.js')
    script(src='/lib/angular-route.min.js')
    script(src='/app.js')
angular.module('readApp', ['ngRoute']);function config($routeProvider) {
$routeProvider
.when('/', {})
.otherwise({ redirectTo: '/' });
}
angular
.module('readApp')
.config(['$routeProvider', config]);function parameters , Angular will automatically obtain instances for us. This is Angular's dependency injection mechanism; the config method defines routing. At present, this route does not do much work, but the syntax is very intuitive. When the URL is '/', it does nothing when accessing the homepage. And when accessed by another URL, it jumps to the home page. Next we let this route do some work.
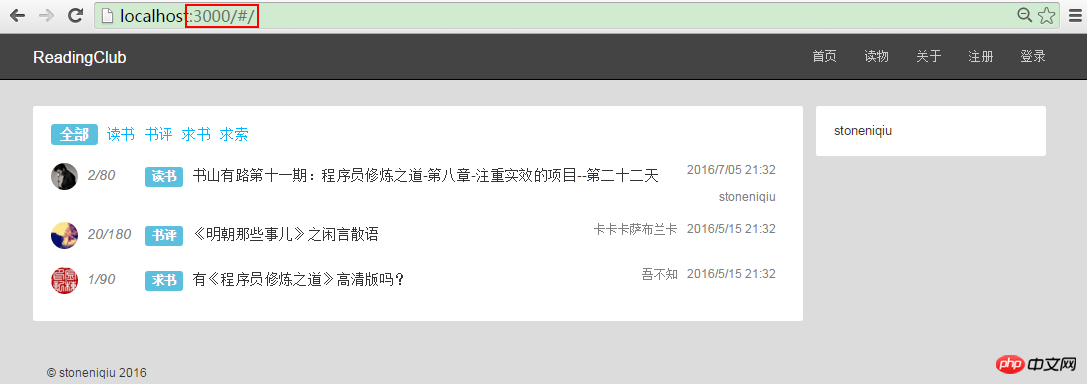
Angular View First create a home folder under the app_client folder to place some files on the home page. But currently the home page is still a jade view, we need to convert it to html, so first create a home.view.html:<p class="row" >
<p class="col-md-9 page" >
<p class="row topictype"><a href="/" class="label label-info">全部</a><a href="/">读书</a><a href="/">书评</a><a href="/">求书</a><a href="/">求索</a></p>
<p class="row topiclist" data-ng-repeat='topic in data'>
<img data-ng-src='{{topic.img}}'><span class="count"><i class="coment">{{topic.commentCount}}</i><i>/</i><i>{{topic.visitedCount}}</i></span>
<span class="label label-info">{{topic.type}}</span><a href="/">{{topic.title}}</a>
<span class="pull-right">{{topic.createdOn}}</span><a href="/" class="pull-right author">{{topic.author}}</a>
</p>
</p>
<p class="col-md-3">
<p class="userinfo">
<p>{{user.userName}}</p>
</p>
</p></p>function config($routeProvider) {
$routeProvider
.when('/', { templateUrl: 'home/home.view.html'
})
.otherwise({ redirectTo: '/' });
}@RenderBody tag in Net MVC, which is block content in jade. This requires the use of a directive in the ngRoute module: ng-view. The marked element will be used by Angular as a container to switch views. We might as well add it above the block content:
    #bodycontent.container      p(ng-view)
        block content
static data. After going through the previous section, this part is familiar.
angular
.module('readApp')
.controller('homeCtrl', homeCtrl);function homeCtrl($scope) {
$scope.data = topics;
$scope.user = {
userName: "stoneniqiu",
};
}function config($routeProvider) {
$routeProvider
.when('/', {
templateUrl: 'home/home.view.html', controller: 'homeCtrl',
})
.otherwise({ redirectTo: '/' });
}
controllerAs
Angular提供了一个创建视图模型的方法来绑定数据,这样就不用每次直接修改$scope 对象,保持$scope 干净。
function config($routeProvider) {
    $routeProvider
    .when('/', {
        templateUrl: 'home/home.view.html',
        controller: 'homeCtrl',        controllerAs: 'vm'
    })
    .otherwise({ redirectTo: '/' });
}红色代码表示启用controllerAs语法,对应的视图模型名称是vm。这个时候Angular会将控制器中的this绑定到$scope上,而this又是一个上下文敏感的对象,所以先定义一个变量指向this。controller方法修改如下
function homeCtrl() {    var vm = this;
    vm.data = topics;
    vm.user = {
        userName: "stoneniqiu",
    };
}注意我们已经拿掉了$scope参数。然后再修改下视图,加上前缀vm
<p class="row" >
<p class="col-md-9 page" >
<p class="row topictype"><a href="/" class="label label-info">全部</a><a href="/">读书</a><a href="/">书评</a><a href="/">求书</a><a href="/">求索</a></p>
<p class="error">{{ vm.message }}</p>
<p class="row topiclist" data-ng-repeat='topic in vm.data'>
<img data-ng-src='{{topic.img}}'><span class="count"><i class="coment">{{topic.commentCount}}</i><i>/</i><i>{{topic.visitedCount}}</i></span>
<span class="label label-info">{{topic.type}}</span><a href="/">{{topic.title}}</a>
<span class="pull-right">{{topic.createdOn}}</span><a href="/" class="pull-right author">{{topic.author}}</a>
</p>
</p>
<p class="col-md-3">
<p class="userinfo">
<p>{{vm.user.userName}}</p>
</p>
</p></p>service:
因为服务是给全局调用的,而不是只服务于home,所以再在app_clinet下新建一个目录:common/services文件夹,并创建一个ReadData.service.js :
angular
.module('readApp')
.service('topicData', topicData);function topicData ($http) {    return $http.get('/api/topics');
};直接拿来上一节的代码。注意function写法, 最好用function fool()的方式,而不要var fool=function() 前者和后者的区别是前者的声明会置顶。而后者必须写在调用语句的前面,不然就是undefined。修改layout
    script(src='/app.js')
    script(src='/home/home.controller.js')
    script(src='/common/services/ReadData.service.js')
相应的home.controller.js 改动:
function homeCtrl(topicData) {    var vm = this;
    vm.message = "loading...";
    topicData.success(function (data) {
        console.log(data);
        vm.message = data.length > 0 ? "" : "暂无数据";
        vm.data = data;
    }).error(function (e) {
        console.log(e);
        vm.message = "Sorry, something's gone wrong ";
    });
    vm.user = {
        userName: "stoneniqiu",
    };
}这个时候页面已经出来了,但是日期格式不友好。接下来添加过滤器和指令
filter&directive
在common文件夹创建一个filters目录,并创建一个formatDate.filter.js文件,同上一节一样
angular
.module('readApp')
.filter('formatDate', formatDate);function formatDate() {    return function (dateStr) {        var date = new Date(dateStr);        var d = date.getDate();        var monthNames = ["1", "2", "3", "4", "5", "6", "7", "8", "9", "10", "11", "12"];        var m = monthNames[date.getMonth()];        var y = date.getFullYear();        var output = y + '/' + m + '/' + d;        return output;
    };
};然后在common文件夹下新建一个directive文件夹,再在directive目录下新建一个ratingStars目录。ratingStars指令会在多个地方使用,它包含一个js文件和一个html文件,将上一节的模板文件复制过来,并命名为:ratingStars.template.html。然后新建一个ratingStars.directive.js文件,拷贝之前的指令代码,并改造两处。
angular
.module('readApp')
.directive('ratingStars', ratingStars);function ratingStars () {return {
restrict: 'EA',scope: {
thisRating : '=rating'},templateUrl: '/common/directive/ratingStars/ratingStars.template.html'};
}EA表示指令作用的范围,E表示元素(element),A表示属性(attribute),A是默认值。还C表示样式名(class),M表示注释(comment), 最佳实践还是EA。更多知识可以参考这篇博客 Angular指令详解
因为还没有创建booksController,先用topic.commentCount来测试ratingStars指令,并记得在layout下添加引用。
<p class="row topiclist" data-ng-repeat='topic in vm.data'>
<img data-ng-src='{{topic.img}}'><span class="count"><i class="coment">{{topic.commentCount}}</i><i>/</i><i>{{topic.visitedCount}}</i></span>
<small rating-stars rating="topic.commentCount"></small>
<span class="label label-info">{{topic.type}}</span><a href="/">{{topic.title}}</a>
<span class="pull-right">{{topic.createdOn | formatDate}}</span><a href="/" class="pull-right author">{{topic.author}}</a>
</p>
这个时候效果已经出来了。
有哪些优化?
这一节和上一节相比,展现的内容基本没有变化,但组织代码的结构变得更清晰好维护了,但还是不够好,比如layout里面我们增加了过多的js引用。这也是很烦的事情。所以我们可以做一些优化:
1.减少全局变量
第一点,在团队开发的时候要尽量减少全局变量,不然容易混淆和替换,最简单的办法就是用匿名函数包裹起来:
(function() { //....})();被包裹的内容会在全局作用域下隐藏起来。而且在这个Angular应用也不需要通过全局作用域关联,因为模块之间都是通过angular.module('readApp', ['ngRoute'])连接的。controller、service、directive这些js都可以处理一下。
2.减少JavaScript的尺寸
我们可以让js最小化,但有一个问题,在controller中的依赖注入会受影响。因为JavaScript在最小化的时候,会将一些变量替换成a,b,c
function homeCtrl ($scope, topicData, otherData)
会变成:
function homeCtrl(a,b,c){这样依赖注入就会失效。这个时候怎么办呢,就要用到$inject ,$inject作用在方法名称后面,等于是声明当前方法有哪些依赖项。
homeCtrl.$inject = ['$scope', 'topicData', 'otherData'];function homeCtrl ($scope, topicData, otherData) {$inject数组中的名字是不会在最小化的时候被替换掉的。但记住顺序要和方法的调用顺序一致。
topicData.$inject = ['$http'];function topicData ($http) {    return $http.get('/api/topics');
};做好了这个准备,接下来就可以最小化了
3.减少文件下载
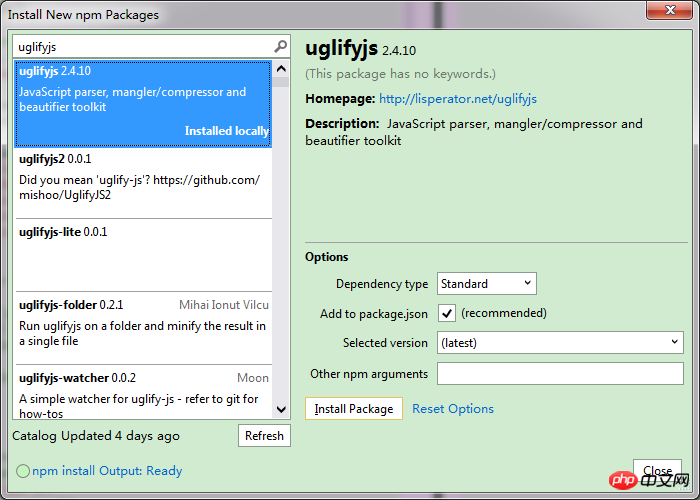
在layout中我们引用了好几个js,这样很烦,可以使用UglifyJS 去最小化JavaScript文件。 UglifyJS 能将Angular应用的源文件合并成一个文件然后压缩,而我们只需在layout中引用它的输出文件即可。
安装:
然后在根目录/app.js中引用
var uglifyJs = require("uglifyjs");var fs = require('fs');接下来有三步
1.列出需要合并的文件
2.调用uglifyJs 来合并并压缩文件。
3.然后保存在Public目录下。
在/app.js下var一个appClientFiles数组,包含要压缩的对象。然后调用uglifyjs.minify方法压缩,然后写入public/angular/readApp.min.js
var appClientFiles = [    'app_client/app.js',    'app_client/home/home.controller.js',    'app_client/common/services/ReadData.service.js',    'app_client/common/filters/formatDate.filter.js',    'app_client/common/directive/ratingStars/ratingStars.directive.js'];var uglified = uglifyJs.minify(appClientFiles, { compress : false });
fs.writeFile('public/angular/readApp.min.js', uglified.code, function (err) {    if (err) {
        console.log(err);
    } else {
        console.log('脚本生产并保存成功: readApp.min.js');
    }
});最后修改layout:
    script(src='/angular/readApp.min.js')    //script(src='/app.js')
    //script(src='/home/home.controller.js')
    //script(src='/common/services/ReadData.service.js')
    //script(src='/common/filters/formatDate.filter.js')
    //script(src='/common/directive/ratingStars/ratingStars.directive.js')
这里选择注释而不是删掉,为了便于后面的调试。但如果用nodemon启动,它会一直在重启。因为生产文件的时候触发了nodemon重启,如此循环。所以这里需要一个配置文件告诉nodemon忽略掉这个文件的改变。在根目录下新增一个文件nodemon.json
{  "verbose": true,  "ignore": ["public//angular/readApp.min.js"]
}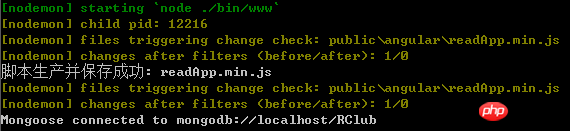
这样就得到了一个min.js 。原本5个文件是5kb,换成min之后是2kb。所以这个优化还是很明显的。
相信看了本文案例你已经掌握了方法,更多精彩请关注php中文网其它相关文章!
推荐阅读:
The above is the detailed content of Nodejs uses Angular to create single-page applications. For more information, please follow other related articles on the PHP Chinese website!

Hot AI Tools

Undresser.AI Undress
AI-powered app for creating realistic nude photos

AI Clothes Remover
Online AI tool for removing clothes from photos.

Undress AI Tool
Undress images for free

Clothoff.io
AI clothes remover

AI Hentai Generator
Generate AI Hentai for free.

Hot Article
Hot Tools

Notepad++7.3.1
Easy-to-use and free code editor

SublimeText3 Chinese version
Chinese version, very easy to use

Zend Studio 13.0.1
Powerful PHP integrated development environment

Dreamweaver CS6
Visual web development tools

SublimeText3 Mac version
God-level code editing software (SublimeText3)
Hot Topics
 1382
1382
 52
52

 Is nodejs a backend framework?
Apr 21, 2024 am 05:09 AM
Is nodejs a backend framework?
Apr 21, 2024 am 05:09 AM
Node.js can be used as a backend framework as it offers features such as high performance, scalability, cross-platform support, rich ecosystem, and ease of development.
 How to connect nodejs to mysql database
Apr 21, 2024 am 06:13 AM
How to connect nodejs to mysql database
Apr 21, 2024 am 06:13 AM
To connect to a MySQL database, you need to follow these steps: Install the mysql2 driver. Use mysql2.createConnection() to create a connection object that contains the host address, port, username, password, and database name. Use connection.query() to perform queries. Finally use connection.end() to end the connection.
 What is the difference between npm and npm.cmd files in the nodejs installation directory?
Apr 21, 2024 am 05:18 AM
What is the difference between npm and npm.cmd files in the nodejs installation directory?
Apr 21, 2024 am 05:18 AM
There are two npm-related files in the Node.js installation directory: npm and npm.cmd. The differences are as follows: different extensions: npm is an executable file, and npm.cmd is a command window shortcut. Windows users: npm.cmd can be used from the command prompt, npm can only be run from the command line. Compatibility: npm.cmd is specific to Windows systems, npm is available cross-platform. Usage recommendations: Windows users use npm.cmd, other operating systems use npm.
 What are the global variables in nodejs
Apr 21, 2024 am 04:54 AM
What are the global variables in nodejs
Apr 21, 2024 am 04:54 AM
The following global variables exist in Node.js: Global object: global Core module: process, console, require Runtime environment variables: __dirname, __filename, __line, __column Constants: undefined, null, NaN, Infinity, -Infinity
 Is there a big difference between nodejs and java?
Apr 21, 2024 am 06:12 AM
Is there a big difference between nodejs and java?
Apr 21, 2024 am 06:12 AM
The main differences between Node.js and Java are design and features: Event-driven vs. thread-driven: Node.js is event-driven and Java is thread-driven. Single-threaded vs. multi-threaded: Node.js uses a single-threaded event loop, and Java uses a multi-threaded architecture. Runtime environment: Node.js runs on the V8 JavaScript engine, while Java runs on the JVM. Syntax: Node.js uses JavaScript syntax, while Java uses Java syntax. Purpose: Node.js is suitable for I/O-intensive tasks, while Java is suitable for large enterprise applications.
 Is nodejs a back-end development language?
Apr 21, 2024 am 05:09 AM
Is nodejs a back-end development language?
Apr 21, 2024 am 05:09 AM
Yes, Node.js is a backend development language. It is used for back-end development, including handling server-side business logic, managing database connections, and providing APIs.
 How to deploy nodejs project to server
Apr 21, 2024 am 04:40 AM
How to deploy nodejs project to server
Apr 21, 2024 am 04:40 AM
Server deployment steps for a Node.js project: Prepare the deployment environment: obtain server access, install Node.js, set up a Git repository. Build the application: Use npm run build to generate deployable code and dependencies. Upload code to the server: via Git or File Transfer Protocol. Install dependencies: SSH into the server and use npm install to install application dependencies. Start the application: Use a command such as node index.js to start the application, or use a process manager such as pm2. Configure a reverse proxy (optional): Use a reverse proxy such as Nginx or Apache to route traffic to your application
 Which one to choose between nodejs and java?
Apr 21, 2024 am 04:40 AM
Which one to choose between nodejs and java?
Apr 21, 2024 am 04:40 AM
Node.js and Java each have their pros and cons in web development, and the choice depends on project requirements. Node.js excels in real-time applications, rapid development, and microservices architecture, while Java excels in enterprise-grade support, performance, and security.
