

Vue creates image carousel
This time I will bring you Vue to create a picture carousel. What are the precautions for making a picture carousel with Vue. The following is a practical case, let's take a look.
I have never written a component seriously before. In the past, when writing business code, I always used components packaged by others. This time I tried to write a picture carousel component. Although it is not as good as the well-known carousel component, its functions are basically complete, and it is In the process of writing this component, I learned a lot, and I will share it with you here. If there are any omissions, please correct me!
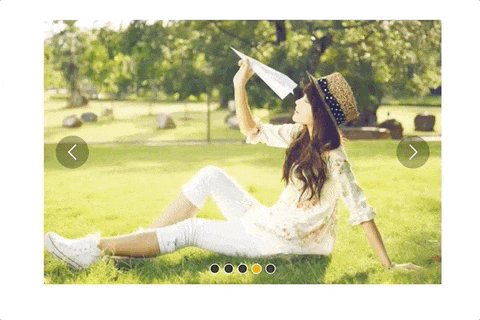
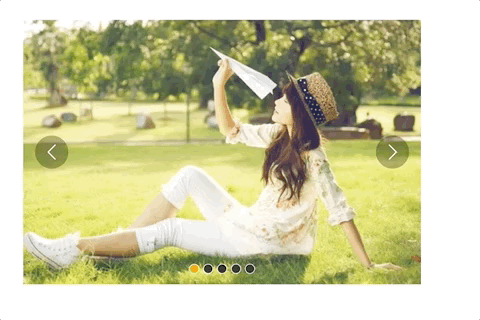
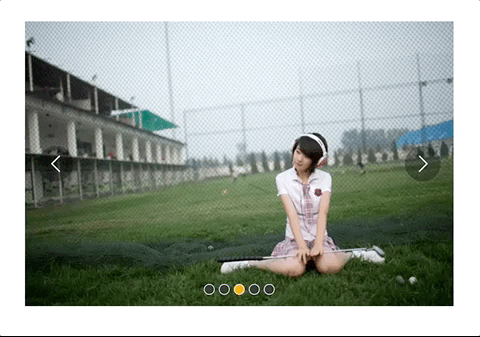
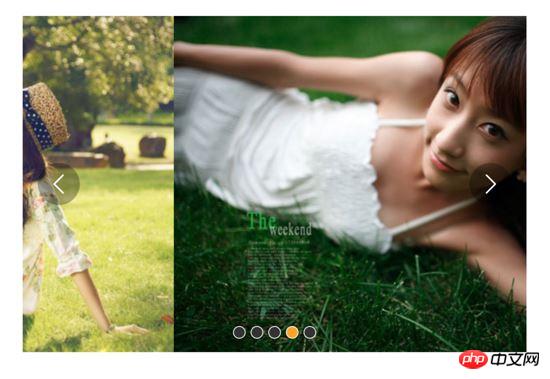
Before making this component, the author googled a lot of articles about carousels and found that although the ideas for implementing a carousel are different, the general logic is actually the same. This article is mainly based on the focus wheel on MOOC. For this lesson on special effects for broadcasting images, MOOC mainly uses native JS to write it, while the author reconstructed it using Vue and made some modifications. The completed component renderings are as follows:
1. Clarify your ideas and understand the needs and principles
1. What kind of carousel should I write?
When you click the arrow on the right, the picture slides to the left to the next one; when you click on the arrow on the left, the picture slides to the right to the next one
Click the small dot below, slide to the corresponding picture, and the style of the corresponding small dot will also change
Requires a transition effect, slide over slowly
When the mouse hovers over the picture, the carousel is paused, and when the mouse leaves, the carousel continues
Autoplay function
Infinite scrolling, that is, when scrolling to the last picture, when you click on the next picture, it will continue to slide to the left to the first picture, instead of pulling the entire One, it’s a bit difficult here
2. Understand the principle of infinite carousel
Let’s take a look at the schematic diagram first:

The red line area in the picture is the picture we see. This carousel only displays 5 pictures, but there are two pictures at the beginning and end of it. The picture is placed in front of Picture 1 5. Place Figure 1 behind Figure 5. The reason for doing this is to achieve infinite scrolling. The principle of infinite scrolling is: when the entire picture scrolls to the left to Figure 5 on the right, it will continue to move forward to Figure 1. After Figure 1 is fully displayed, it will be pulled back to the right at a speed invisible to the naked eye. Go to Figure 1 on the far left. In this way, even if you slide to the left, you will see Figure 2.
As shown below: After the last picture 1 completes the transition and is fully displayed, the entire list is instantly pulled to the right to picture 1 on the left. The scrolling of the other boundary map Figure 5 is also the same, but in the opposite direction.


2. Let the pictures switch first
1. Layout and Prepare
<template>
 <p id="slider">
  <p class="window">  // window上图中红线框
   <ul class="container" :style="containerStyle"> //注意这里的:style //这是图片列表,排成一排
    <li> //列表最前面的辅助图,它和图5一样,用于无限滚动
     <img :src="sliders[sliders.length - 1].img" alt="">
    </li>
    <li v-for="(item, index) in sliders" :key="index"> //通过v-for渲染的需要展示的5张图
     <img :src="item.img" alt="">
    </li>
    <li> //列表最后面的辅助图,它和图1一样,用于无限滚动
     <img :src="sliders[0].img" alt="">
    </li>
   </ul>
   <ul class="direction"> //两侧的箭头
    <li class="left">
     <svg class="icon" width="30px" height="30.00px" viewBox="0 0 1024 1024" version="1.1" xmlns="http://www.w3.org/2000/svg"><path fill="#ffffff" d="M481.233 904c8.189 0 16.379-3.124 22.628-9.372 12.496-12.497 12.496-32.759 0-45.256L166.488 512l337.373-337.373c12.496-12.497 12.496-32.758 0-45.255-12.498-12.497-32.758-12.497-45.256 0l-360 360c-12.496 12.497-12.496 32.758 0 45.255l360 360c6.249 6.249 14.439 9.373 22.628 9.373z" /></svg>
    </li>
    <li class="right">
     <svg class="icon" width="30px" height="30.00px" viewBox="0 0 1024 1024" version="1.1" xmlns="http://www.w3.org/2000/svg"><path fill="#ffffff" d="M557.179 904c-8.189 0-16.379-3.124-22.628-9.372-12.496-12.497-12.496-32.759 0-45.256L871.924 512 534.551 174.627c-12.496-12.497-12.496-32.758 0-45.255 12.498-12.497 32.758-12.497 45.256 0l360 360c12.496 12.497 12.496 32.758 0 45.255l-360 360c-6.249 6.249-14.439 9.373-22.628 9.373z" /></svg>
    </li>
   </ul>
   <ul class="dots"> //下面的小圆点
    <li v-for="(dot, i) in sliders" :key="i"
    :class="{dotted: i === (currentIndex-1)}"
    >
    </li>
   </ul>
  </p>
 </p>
</template>
<script>
export default {
 name: 'slider',
 data () {
  return {
   sliders:[
    {
     img:'../../static/images/1.jpg'
    },
    {
     img:'../../static/images/2.jpg'
    },
    {
     img:'../../static/images/3.jpg'
    },
    {
     img:'../../static/images/4.jpg'
    },
    {
     img:'../../static/images/5.jpg'
    }
   ],
   currentIndex:1,
   distance:-600
  }
 },
 computed:{
  containerStyle() { //这里用了计算属性,用transform来移动整个图片列表
   return {
    transform:`translate3d(${this.distance}px, 0, 0)`
   }
  }
 }
}
</script>Okay, the layout is probably like this, the rendering is as follows:

The above code has been commented, there are several points Let me mention it again:
window is a red line frame with a width of 600px. It will not move. What moves is the container wrapping the image. Its movement method is: style=" containerStyle", this is a calculated property, use transform:translate3d(${this.distance, 0, 0}) to control left and right movement
distance and currentIndex in data are the key, distance controls the moving distance, the default is -600, and displays the second of 7 pictures, which is Figure 1. currentIndex is the index of the picture displayed by the window. The default here is 1, which is also the second picture among the 7 pictures.
There are only 5 pictures that need to be displayed, but a picture 5 is placed in front of picture 1 and a picture 1 is placed after picture 5 for infinite scrolling. The principle is mentioned before
当点击右侧的箭头,container向左移动, distance 会越来越小;当点击左侧的箭头,container向右移动, distance 会越来越大,方向不要弄错
2. 图片切换
我们在左侧和右侧的箭头上添加点击事件:
<ul class="direction">
    <li class="left" @click="move(600, 1)">
     <svg class="icon" width="30px" height="30.00px" viewBox="0 0 1024 1024" version="1.1" xmlns="http://www.w3.org/2000/svg"><path fill="#ffffff" d="M481.233 904c8.189 0 16.379-3.124 22.628-9.372 12.496-12.497 12.496-32.759 0-45.256L166.488 512l337.373-337.373c12.496-12.497 12.496-32.758 0-45.255-12.498-12.497-32.758-12.497-45.256 0l-360 360c-12.496 12.497-12.496 32.758 0 45.255l360 360c6.249 6.249 14.439 9.373 22.628 9.373z" /></svg>
    </li>
    <li class="right" @click="move(600, -1)">
     <svg class="icon" width="30px" height="30.00px" viewBox="0 0 1024 1024" version="1.1" xmlns="http://www.w3.org/2000/svg"><path fill="#ffffff" d="M557.179 904c-8.189 0-16.379-3.124-22.628-9.372-12.496-12.497-12.496-32.759 0-45.256L871.924 512 534.551 174.627c-12.496-12.497-12.496-32.758 0-45.255 12.498-12.497 32.758-12.497 45.256 0l360 360c12.496 12.497 12.496 32.758 0 45.255l-360 360c-6.249 6.249-14.439 9.373-22.628 9.373z" /></svg>
    </li>
   </ul>
   ......
   methods:{
      move(offset, direction) {
        this.distance += this.distance * direction
        if (this.distance < -3000) this.distance = -600
        if (this.distance > -600) this.distance = -3000
      }
}解释下上面的代码:点击左侧或者右侧的箭头,调用move函数,move接收偏移量offset和方向direction两个参数。direction只传两个值,1表示container向右移动,-1表示container向左移动;偏移量是600,也就是一张图片的宽度。如果移动到7张图片的最后一张,就把container拉到7张图片里的第二张;如果移动到7张图片里第一张,就把container拉到7张图片里的第5张。
效果:
可以看到,图片切换效果已经出来了,但是下面的小圆点没有跟着变换。接下来我们把这个效果加上。从上面的html代码可以看到, :class="{dotted: i === (currentIndex - 1)}" ,小圆点的切换效果和data里的currentIndex值相关,我们只要随着图片切换变动currentIndex值就可以了。
修改move方法里的代码:
......
move(offset, direction) {
  direction === -1 ? this.currentIndex++ : this.currentIndex--
  if (this.currentIndex > 5) this.currentIndex = 1
  if (this.currentIndex < 1) this.currentIndex = 5
  this.distance = this.distance + offset * direction
  if (this.distance < -3000) this.distance = -600
  if (this.distance > -600) this.distance = -3000
}上面的添加的三行代码很好理解,如果是点击右侧箭头,container就是向左移动, this.currentIndex 就是减1,反之就是加1。
效果:
可以看到,小圆点的切换效果已经出来了。
三、过渡动画
上面的代码已经实现了切换,但是没有动画效果,显的非常生硬,接下来就是给每个图片的切换过程添加过渡效果。
这个轮播组件笔者并没有使用Vue自带的class钩子,也没有直接使用css的transition属性,而是用慕课网原作者讲的setTimeout方法加递归来实现。
其实我也试过使用Vue的钩子,但是总有一些小问题解决不掉;比如下面找到的这个例子:例子
这个例子在过渡的边界上有一些问题,我也遇到了,而且还是时有时无。而如果使用css的transition过渡方法,在处理边界的无限滚动上总会在chrome浏览器上有一下闪动,即使添加了 -webkit-transform-style:preserve-3d; 和 -webkit-backface-visibility:hidden 也还是没用,而且要配合transition的 transitionend 事件对于IE浏览器的支持也不怎么好。
如果大家有看到更好的办法,请在评论中留言哦~
下面我们来写这个过渡效果,主要是改写:
methods:{
  move(offset, direction) {
    direction === -1 ? this.currentIndex++ : this.currentIndex--
    if (this.currentIndex > 5) this.currentIndex = 1
    if (this.currentIndex < 1) this.currentIndex = 5
    const destination = this.distance + offset * direction
    this.animate(destination, direction)
  },
  animate(des, direc) {
    if ((direc === -1 && des < this.distance) || (direc === 1 && des > this.distance)) {
      this.distance += 30 * direc
      window.setTimeout(() => {
        this.animate(des, direc)
      }, 20)
    } else {
      this.distance = des
      if (des < -3000) this.distance = -600
      if (des > -600) this.distance = -3000
   }
  }
}上面的代码是这个轮播我觉得最麻烦、也是最难理解的地方。
来理解一下:首先,我们对于move方法进行了改写,因为要一点点的移动,所以要先算出要移动到的目标距离。然后,我们写一个animate函数来实现这个过渡。这个animate函数接收两个参数,一个是要移动到的距离,另一个是方向。 如果我们点击了右侧的箭头,container要向左侧移动,要是没有移动到目标距离,就在 this.distance 减去一定的距离,如果减去后还是没有到达,在20毫米以后再调用这个 this.animate ,如此不断移动,就形成了过渡效果。而如果移动到了目标距离,那就将目标距离赋值给 this.distance ,然后再进行边界和无限滚动的判断。
当然,使用 window.setInterval() 也可以实现这个效果,而且会稍微好理解一点,因为没有用到递归:
methods:{
  move(offset, direction) {
    direction === -1 ? this.currentIndex++ : this.currentIndex--
    if (this.currentIndex > 5) this.currentIndex = 1
    if (this.currentIndex < 1) this.currentIndex = 5
    const destination = this.distance + offset * direction
    this.animate(destination, direction)
  },
  animate(des, direc) {
    const temp = window.setInterval(() => {
      if ((direc === -1 && des < this.distance) || (direc === 1 && des > this.distance)) {
        this.distance += 30 * direc
      } else {
        window.clearInterval(temp)
        this.distance = des
        if (des < -3000) this.distance = -600
        if (des > -600) this.distance = -3000
      }
    }, 20)
  }
}实现出来的效果如下:

四、简单节流一下
写到这里,效果是出来了,但是会有一点问题,如果多次快速点击,就会有可能出现下面这种情况:
出现这种情况的原因很简单,因为是使用定时器过渡,所以连续快速点击就会出现错乱,简单节流一下就好了: 在过渡完成之前点击箭头无效,其实就是设了一个闸,第一次点击把闸打开,在闸再次打开之前,让一部分代码无法执行,然后再在恰当的时机把闸打开。
我们把这个闸设在move函数里:
move(offset, direction) {
  if (!this.transitionEnd) return //这里是闸
  this.transitionEnd = false    //开闸以后再把闸关上
  direction === -1 ? this.currentIndex++ : this.currentIndex--
  if (this.currentIndex > 5) this.currentIndex = 1
  if (this.currentIndex < 1) this.currentIndex = 5
  const destination = this.distance + offset * direction
  this.animate(destination, direction)
}this.transitionEnd 是这个闸的钥匙,我们把它放到data里:
this.transitionEnd: true
这个闸一开始默认的状态是开着的,第一次点击以后,这个闸就关上了, this.tranisitonEnd = false ,在再次打开之前,后面的代码都执行不了。接下来就是在恰当的时机把这个闸打开,而这个恰当的时机就是过渡完成时,也就是在 animate函数 里:
animate(des, direc) {
  if (this.temp) {
    window.clearInterval(this.temp)
    this.temp = null
  }
  this.temp = window.setInterval(() => {
    if ((direc === -1 && des < this.distance) || (direc === 1 && des > this.distance)) {
     this.distance += 30 * direc
    } else {
     this.transitionEnd = true   //闸再次打开
     window.clearInterval(this.temp)
     this.distance = des
     if (des < -3000) this.distance = -600
     if (des > -600) this.distance = -3000
    }
  }, 20)
}这下快速点击就没有之前的那个问题了:

五、点击小圆点实现图片过渡切换
到目前为止的代码:
<template>
 <p id="slider">
  <p class="window">
   <ul class="container" :style="containerStyle">
    <li>
     <img :src="sliders[sliders.length - 1].img" alt="">
    </li>
    <li v-for="(item, index) in sliders" :key="index">
     <img :src="item.img" alt="">
    </li>
    <li>
     <img :src="sliders[0].img" alt="">
    </li>
   </ul>
   <ul class="direction">
    <li class="left" @click="move(600, 1)">
     <svg class="icon" width="30px" height="30.00px" viewBox="0 0 1024 1024" version="1.1" xmlns="http://www.w3.org/2000/svg"><path fill="#ffffff" d="M481.233 904c8.189 0 16.379-3.124 22.628-9.372 12.496-12.497 12.496-32.759 0-45.256L166.488 512l337.373-337.373c12.496-12.497 12.496-32.758 0-45.255-12.498-12.497-32.758-12.497-45.256 0l-360 360c-12.496 12.497-12.496 32.758 0 45.255l360 360c6.249 6.249 14.439 9.373 22.628 9.373z" /></svg>
    </li>
    <li class="right" @click="move(600, -1)">
     <svg class="icon" width="30px" height="30.00px" viewBox="0 0 1024 1024" version="1.1" xmlns="http://www.w3.org/2000/svg"><path fill="#ffffff" d="M557.179 904c-8.189 0-16.379-3.124-22.628-9.372-12.496-12.497-12.496-32.759 0-45.256L871.924 512 534.551 174.627c-12.496-12.497-12.496-32.758 0-45.255 12.498-12.497 32.758-12.497 45.256 0l360 360c12.496 12.497 12.496 32.758 0 45.255l-360 360c-6.249 6.249-14.439 9.373-22.628 9.373z" /></svg>
    </li>
   </ul>
   <ul class="dots">
    <li v-for="(dot, i) in sliders" :key="i"
    :class="{dotted: i === (currentIndex-1)}"
    >
    </li>
   </ul>
  </p>
 </p>
</template>
<script>
export default {
 name: 'slider',
 data () {
  return {
   sliders:[
    {
     img:'../../static/images/1.jpg'
    },
    {
     img:'../../static/images/2.jpg'
    },
    {
     img:'../../static/images/3.jpg'
    },
    {
     img:'../../static/images/4.jpg'
    },
    {
     img:'../../static/images/5.jpg'
    }
   ],
   currentIndex:1,
   distance:-600,
   transitionEnd: true
  }
 },
 computed:{
  containerStyle() {
   return {
    transform:`translate3d(${this.distance}px, 0, 0)`
   }
  }
 },
 methods:{
  move(offset, direction) {
   if (!this.transitionEnd) return
   this.transitionEnd = false
   direction === -1 ? this.currentIndex++ : this.currentIndex--
   if (this.currentIndex > 5) this.currentIndex = 1
   if (this.currentIndex < 1) this.currentIndex = 5
   const destination = this.distance + offset * direction
   this.animate(destination, direction)
  },
  animate(des, direc) {
   if (this.temp) {
    window.clearInterval(this.temp)
    this.temp = null
   }
   this.temp = window.setInterval(() => {
    if ((direc === -1 && des < this.distance) || (direc === 1 && des > this.distance)) {
     this.distance += 30 * direc
    } else {
     this.transitionEnd = true
     window.clearInterval(this.temp)
     this.distance = des
     if (des < -3000) this.distance = -600
     if (des > -600) this.distance = -3000
    }
   }, 20)
  }
 }
}
</script>接下来我们要实现点击下面的小圆点来实现过渡和图片切换。
<ul class="dots">
  <li v-for="(dot, i) in sliders" :key="i"
  :class="{dotted: i === (currentIndex-1)}"
  @click = jump(i+1)>
  </li>
</ul>在点击小圆点的时候我们调用 jump 函数,并将索引 i+1 传给它。 这里需要特别注意,小圆点的索引和图片对应的索引不一致,图片共7张,而5个小圆点对应的是图片中中间的5张,所以我们才传 i+1 。
jump(index) {
  const direction = index - this.currentIndex >= 0 ? -1 : 1 //获取滑动方向
  const offset = Math.abs(index - this.currentIndex) * 600  //获取滑动距离
  this.move(offset, direction)
}上面的代码有一个问题,在jump函数里调用move方法,move里对于currentIndex的都是 +1 ,而点击小圆点可能是将 currentIndex 加或者减好多个,所以要对move里的代码修改下:
direction === -1 ? this.currentIndex += offset/600 : this.currentIndex -= offset/600
改一行,根据offset算出currentIndex就行了。
但是又有一个问题,长距离切换速度太慢,如下:

所以我们需要控制一下速度,让滑动一张图片耗费的时间和滑动多张图片耗费的时间一样,给move和animate函数添加一个speed参数,还要再算一下:
jump(index) {
  const direction = index - this.currentIndex >= 0 ? -1 : 1
  const offset = Math.abs(index - this.currentIndex) * 600
  const jumpSpeed = Math.abs(index - this.currentIndex) === 0 ? this.speed : Math.abs(index - this.currentIndex) * this.speed
  this.move(offset, direction, jumpSpeed)
}六、自动播放与暂停
前面的写的差不多了,到这里就非常简单了,写一个函数play:
play() {
  if (this.timer) {
    window.clearInterval(this.timer)
    this.timer = null
  }
  this.timer = window.setInterval(() => {
    this.move(600, -1, this.speed)
  }, 4000)
}除了初始化以后自动播放,还要通过mouseover和mouseleave来控制暂停与播放:
stop() {
  window.clearInterval(this.timer)
  this.timer = null
}七、 两处小坑
1. window.onblur 和 window.onfocus
写到这里,基本功能都差不多了。但是如果把页面切换到别的页面,导致轮播图所在页面失焦,过一段时间再切回来会发现轮播狂转。原因是页面失焦以后,setInterval停止运行,但是如果切回来就会一次性把该走的一次性走完。解决的方法也很简单,当页面失焦时停止轮播,页面聚焦时开始轮播。
window.onblur = function() { this.stop() }.bind(this)
window.onfocus = function() { this.play() }.bind(this)2. window.setInterval() 小坑
当定时器 window.setInterval() 在多个异步回调中使用时,就有可能在某种机率下开启多个执行队列, 所以为了保险起见,不仅应该在该清除时清除定时器,还要在每次使用之前也清除一遍 。
八、用props简单写两个对外接口
props: {
  initialSpeed: {
   type: Number,
   default: 30
  },
  initialInterval: {
   type: Number,
   default: 4
  }
},
data() {
  ......
  speed: this.initialSpeed
},
computed:{
  interval() {
    return this.initialInterval * 1000
  }
}然后再在相应的地方修改下就可以了。
完整的代码如下:
<template>
 <p id="slider">
  <p class="window" @mouseover="stop" @mouseleave="play">
   <ul class="container" :style="containerStyle">
    <li>
     <img :src="sliders[sliders.length - 1].img" alt="">
    </li>
    <li v-for="(item, index) in sliders" :key="index">
     <img :src="item.img" alt="">
    </li>
    <li>
     <img :src="sliders[0].img" alt="">
    </li>
   </ul>
   <ul class="direction">
    <li class="left" @click="move(600, 1, speed)">
     <svg class="icon" width="30px" height="30.00px" viewBox="0 0 1024 1024" version="1.1" xmlns="http://www.w3.org/2000/svg"><path fill="#ffffff" d="M481.233 904c8.189 0 16.379-3.124 22.628-9.372 12.496-12.497 12.496-32.759 0-45.256L166.488 512l337.373-337.373c12.496-12.497 12.496-32.758 0-45.255-12.498-12.497-32.758-12.497-45.256 0l-360 360c-12.496 12.497-12.496 32.758 0 45.255l360 360c6.249 6.249 14.439 9.373 22.628 9.373z" /></svg>
    </li>
    <li class="right" @click="move(600, -1, speed)">
     <svg class="icon" width="30px" height="30.00px" viewBox="0 0 1024 1024" version="1.1" xmlns="http://www.w3.org/2000/svg"><path fill="#ffffff" d="M557.179 904c-8.189 0-16.379-3.124-22.628-9.372-12.496-12.497-12.496-32.759 0-45.256L871.924 512 534.551 174.627c-12.496-12.497-12.496-32.758 0-45.255 12.498-12.497 32.758-12.497 45.256 0l360 360c12.496 12.497 12.496 32.758 0 45.255l-360 360c-6.249 6.249-14.439 9.373-22.628 9.373z" /></svg>
    </li>
   </ul>
   <ul class="dots">
    <li v-for="(dot, i) in sliders" :key="i"
    :class="{dotted: i === (currentIndex-1)}"
    @click = jump(i+1)
    >
    </li>
   </ul>
  </p>
 </p>
</template>
<script>
export default {
 name: 'slider',
 props: {
  initialSpeed: {
   type: Number,
   default: 30
  },
  initialInterval: {
   type: Number,
   default: 4
  }
 },
 data () {
  return {
   sliders:[
    {
     img:'../../static/images/1.jpg'
    },
    {
     img:'../../static/images/2.jpg'
    },
    {
     img:'../../static/images/3.jpg'
    },
    {
     img:'../../static/images/4.jpg'
    },
    {
     img:'../../static/images/5.jpg'
    }
   ],
   currentIndex:1,
   distance:-600,
   transitionEnd: true,
   speed: this.initialSpeed
  }
 },
 computed:{
  containerStyle() {
   return {
    transform:`translate3d(${this.distance}px, 0, 0)`
   }
  },
  interval() {
   return this.initialInterval * 1000
  }
 },
 mounted() {
  this.init()
 },
 methods:{
  init() {
   this.play()
   window.onblur = function() { this.stop() }.bind(this)
   window.onfocus = function() { this.play() }.bind(this)
  },
  move(offset, direction, speed) {
   if (!this.transitionEnd) return
   this.transitionEnd = false
   direction === -1 ? this.currentIndex += offset/600 : this.currentIndex -= offset/600
   if (this.currentIndex > 5) this.currentIndex = 1
   if (this.currentIndex < 1) this.currentIndex = 5
   const destination = this.distance + offset * direction
   this.animate(destination, direction, speed)
  },
  animate(des, direc, speed) {
   if (this.temp) {
    window.clearInterval(this.temp)
    this.temp = null
   }
   this.temp = window.setInterval(() => {
    if ((direc === -1 && des < this.distance) || (direc === 1 && des > this.distance)) {
     this.distance += speed * direc
    } else {
     this.transitionEnd = true
     window.clearInterval(this.temp)
     this.distance = des
     if (des < -3000) this.distance = -600
     if (des > -600) this.distance = -3000
    }
   }, 20)
  },
  jump(index) {
   const direction = index - this.currentIndex >= 0 ? -1 : 1
   const offset = Math.abs(index - this.currentIndex) * 600
   const jumpSpeed = Math.abs(index - this.currentIndex) === 0 ? this.speed : Math.abs(index - this.currentIndex) * this.speed
   this.move(offset, direction, jumpSpeed)
  },
  play() {
   if (this.timer) {
    window.clearInterval(this.timer)
    this.timer = null
   }
   this.timer = window.setInterval(() => {
    this.move(600, -1, this.speed)
   }, this.interval)
  },
  stop() {
   window.clearInterval(this.timer)
   this.timer = null
  }
 }
}
</script>github地址
九、结语
After I finished writing this component, I found that there are still many places that can be optimized. This.distance and this.currentIndex are highly coupled and can be connected through calculated properties. There is also a transition method. The timer method is still a bit stiff and does not take advantage of Vue. However, the first component has been written, and it took a lot of effort.
I believe you have mastered the method after reading the case in this article. For more exciting information, please pay attention to other related articles on the php Chinese website!
Recommended reading:
Singleton encapsulation of addition, deletion, modification and checking
JS imitation of Toutiao mobile home page interface
Detailed explanation of the scope and pre-parsing of js
The above is the detailed content of Vue creates image carousel. For more information, please follow other related articles on the PHP Chinese website!

Hot AI Tools

Undresser.AI Undress
AI-powered app for creating realistic nude photos

AI Clothes Remover
Online AI tool for removing clothes from photos.

Undress AI Tool
Undress images for free

Clothoff.io
AI clothes remover

Video Face Swap
Swap faces in any video effortlessly with our completely free AI face swap tool!

Hot Article
Hot Tools

Notepad++7.3.1
Easy-to-use and free code editor

SublimeText3 Chinese version
Chinese version, very easy to use

Zend Studio 13.0.1
Powerful PHP integrated development environment

Dreamweaver CS6
Visual web development tools

SublimeText3 Mac version
God-level code editing software (SublimeText3)
Hot Topics
 1392
1392
 52
52

 How to solve the problem of automatically saving pictures when publishing on Xiaohongshu? Where is the automatically saved image when posting?
Mar 22, 2024 am 08:06 AM
How to solve the problem of automatically saving pictures when publishing on Xiaohongshu? Where is the automatically saved image when posting?
Mar 22, 2024 am 08:06 AM
With the continuous development of social media, Xiaohongshu has become a platform for more and more young people to share their lives and discover beautiful things. Many users are troubled by auto-save issues when posting images. So, how to solve this problem? 1. How to solve the problem of automatically saving pictures when publishing on Xiaohongshu? 1. Clear the cache First, we can try to clear the cache data of Xiaohongshu. The steps are as follows: (1) Open Xiaohongshu and click the "My" button in the lower right corner; (2) On the personal center page, find "Settings" and click it; (3) Scroll down and find the "Clear Cache" option. Click OK. After clearing the cache, re-enter Xiaohongshu and try to post pictures to see if the automatic saving problem is solved. 2. Update the Xiaohongshu version to ensure that your Xiaohongshu
 How to post pictures in TikTok comments? Where is the entrance to the pictures in the comment area?
Mar 21, 2024 pm 09:12 PM
How to post pictures in TikTok comments? Where is the entrance to the pictures in the comment area?
Mar 21, 2024 pm 09:12 PM
With the popularity of Douyin short videos, user interactions in the comment area have become more colorful. Some users wish to share images in comments to better express their opinions or emotions. So, how to post pictures in TikTok comments? This article will answer this question in detail and provide you with some related tips and precautions. 1. How to post pictures in Douyin comments? 1. Open Douyin: First, you need to open Douyin APP and log in to your account. 2. Find the comment area: When browsing or posting a short video, find the place where you want to comment and click the "Comment" button. 3. Enter your comment content: Enter your comment content in the comment area. 4. Choose to send a picture: In the interface for entering comment content, you will see a "picture" button or a "+" button, click
 6 Ways to Make Pictures Sharper on iPhone
Mar 04, 2024 pm 06:25 PM
6 Ways to Make Pictures Sharper on iPhone
Mar 04, 2024 pm 06:25 PM
Apple's recent iPhones capture memories with crisp detail, saturation and brightness. But sometimes, you may encounter some issues that may cause the image to look less clear. While autofocus on iPhone cameras has come a long way, allowing you to take photos quickly, the camera can mistakenly focus on the wrong subject in certain situations, making the photo blurry in unwanted areas. If your photos on your iPhone look out of focus or lack sharpness overall, the following post should help you make them sharper. How to Make Pictures Clearer on iPhone [6 Methods] You can try using the native Photos app to clean up your photos. If you want more features and options
 How to make ppt pictures appear one by one
Mar 25, 2024 pm 04:00 PM
How to make ppt pictures appear one by one
Mar 25, 2024 pm 04:00 PM
In PowerPoint, it is a common technique to display pictures one by one, which can be achieved by setting animation effects. This guide details the steps to implement this technique, including basic setup, image insertion, adding animation, and adjusting animation order and timing. Additionally, advanced settings and adjustments are provided, such as using triggers, adjusting animation speed and order, and previewing animation effects. By following these steps and tips, users can easily set up pictures to appear one after another in PowerPoint, thereby enhancing the visual impact of the presentation and grabbing the attention of the audience.
 What should I do if the images on the webpage cannot be loaded? 6 solutions
Mar 15, 2024 am 10:30 AM
What should I do if the images on the webpage cannot be loaded? 6 solutions
Mar 15, 2024 am 10:30 AM
Some netizens found that when they opened the browser web page, the pictures on the web page could not be loaded for a long time. What happened? I checked that the network is normal, so where is the problem? The editor below will introduce to you six solutions to the problem that web page images cannot be loaded. Web page images cannot be loaded: 1. Internet speed problem The web page cannot display images. It may be because the computer's Internet speed is relatively slow and there are more softwares opened on the computer. And the images we access are relatively large, which may be due to loading timeout. As a result, the picture cannot be displayed. You can turn off the software that consumes more network speed. You can go to the task manager to check. 2. Too many visitors. If the webpage cannot display pictures, it may be because the webpages we visited were visited at the same time.
 How to convert pdf documents into jpg images with Foxit PDF Reader - How to convert pdf documents into jpg images with Foxit PDF Reader
Mar 04, 2024 pm 05:49 PM
How to convert pdf documents into jpg images with Foxit PDF Reader - How to convert pdf documents into jpg images with Foxit PDF Reader
Mar 04, 2024 pm 05:49 PM
Are you also using Foxit PDF Reader software? So do you know how Foxit PDF Reader converts pdf documents into jpg images? The following article brings you how Foxit PDF Reader converts pdf documents into jpg images. For those who are interested in the method of converting jpg images, please come and take a look below. First start Foxit PDF Reader, then find "Features" on the top toolbar, and then select the "PDF to Others" function. Next, open a web page called "Foxit PDF Online Conversion". Click the "Login" button on the upper right side of the page to log in, and then turn on the "PDF to Image" function. Then click the upload button and add the pdf file you want to convert into an image. After adding it, click "Start Conversion"
 How to arrange two pictures side by side in wps document
Mar 20, 2024 pm 04:00 PM
How to arrange two pictures side by side in wps document
Mar 20, 2024 pm 04:00 PM
When using WPS office software, we found that not only one form is used, tables and pictures can be added to the text, pictures can also be added to the table, etc. These are all used together to make the content of the entire document look richer. , if you need to insert two pictures into the document and they need to be arranged side by side. Our next course can solve this problem: how to place two pictures side by side in a wps document. 1. First, you need to open the WPS software and find the picture you want to adjust. Left-click the picture and a menu bar will pop up, select "Page Layout". 2. Select "Tight wrapping" in text wrapping. 3. After all the pictures you need are confirmed to be set to "Tight text wrapping", you can drag the pictures to the appropriate position and click on the first picture.
 How to make Win11 automatically display a picture at startup
Dec 31, 2023 pm 10:54 PM
How to make Win11 automatically display a picture at startup
Dec 31, 2023 pm 10:54 PM
Some users want to automatically open a picture when turning on the computer without changing the desktop wallpaper. We can use this function to enjoy pictures or prompt memos. In fact, the setting method is very simple. Just put the picture in the corresponding Just put it in the startup folder. Let’s take a look at it below. How to automatically open a picture when Windows 11 starts: 1. First, we need to double-click to open "This Computer" on the desktop. 2. After entering this computer, double-click to enter the system "c drive" 3. Then locate the following location "C:\Users\Administrator" \AppData\Roaming\Microsoft\Windows\StartMenu\Programs\Start
