This time I will bring you the most basic introductory knowledge points of PHP. The following is a practical case. Let's follow the editor and take a look.
Everyone knows that setting up a PHP environment is quite troublesome. Our front-end siege lions don’t need to delve into setting up the environment. There are already integrated PHP environments on the Internet that can be downloaded directly, wamp and phpstudy (click to enter the download page), installation only requires the next step.
Because I have always used wamp, I will use wamp as an example to explain.
After installing wamp, this icon will appear in the lower right corner of the screen.

#If your English is not very good, you can right-click the icon and select Chinese.
After wamp is opened, all services will be enabled by default. You can also left-click the icon and select Start all services, and switch to online status.
#At this point, the environment for PHP to run is ready.
Let’s start writing the demo.
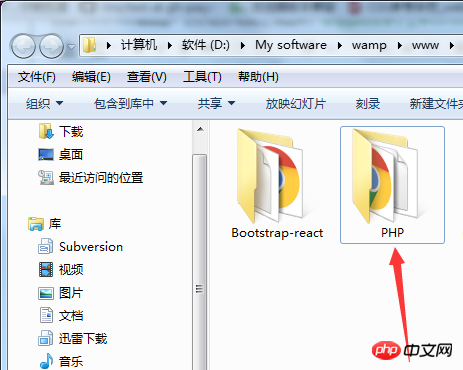
Click on the small icon in the lower right corner. There is a www directory. After entering it, create a project folder called php:

Create these files in the folder File:

Let’s open login.html first and write a simple form:
  <!DOCTYPE html>
  <html lang="en">
  <head>
      <meta charset="UTF-8">
      <title>Document</title>
  </head>
  <body>
      <form action="success.php" method="post">
            用户名:<input type="text" name="username"><br/><br/>
            密码:<input type="password" name="pwd"><br/><br/>
            <input type="submit" name="submit" value="提交">
      </form>
  </body>
 </html>
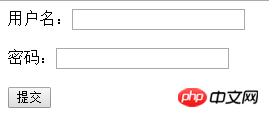
The effect is as follows:

We need to implementWhen the user clicks submit, the user name and password entered by the user are saved in the local data.txt file, and the user is prompted to log in successfully on the success.php page.
Let’s start the key php code, open the success.php file, and type in the following code:
  <!DOCTYPE html>
  <html lang="en">
  <head>
      <meta charset="UTF-8">
      <title>Document</title>
  </head>
  <body>
      <?php
          $name = $_POST["username"];
          $pwd = $_POST["pwd"];
          $fp = fopen("./data.txt", "a");
          $str = "user:".$name."&password:".$pwd."\r\n";
          fwrite($fp,$str);
          fclose($fp);
          echo "<h1>欢迎回来,".$name."!</h1>";
      ?>
  </body>
</html>大家要注意,PHP代码可以和HTML代码混合使用,包裹在标签内的代码,服务器就会用PHP的解析器去解析,我们来分析一下上面的代码。
因为表单使用post方式提交的,所以我们需要用POST方式去接收,PHP接收POST发送过来的数据使用$_POST[""];语句,get用法一样,把POST改成GET,在中括号内填写你需要获取表单项的name名。
接下来我们要把所得到的数据写入到data.txt文件内,实际项目开发中,这些数据都是写入到数据库中。
我们用fopen命令打开一个文件,fopen接收两个参数,第一个是要打开文件的路径;第二个是打开的方式,这里使用"a"写入方式打开,将文件指针指向文件末尾,如果文件不存在,则会尝试创建这个文件。(其他参数详情请到W3school查看)
还需要注意的是,PHP中的变量声明并不是用var,而是$+变量名。
接下来把用户名和密码拼接成字符串,PHP中的字符串拼接和JavaScript也有差异,PHP使用"."来做拼接符。
我们用fwrite命令来写入文件,它接收两个参数,第一个是要打开的文件,也就是我们前面定义的$fp;第二个是要写入的内容,把之前拼接好的字符串放入。
最后还需要关闭文件,使用fclose命令,传入需要关闭的文件。如果不关闭文件的话,这个文件就会一直被占用,别人就不能读写这个文件了,所以这一步千万不能忘记。
最后,我么在success.php页面输出一条消息,JavaScript中可以用document.write来输出内容,PHP使用echo语句来输出内容,支持输入HTML标签。
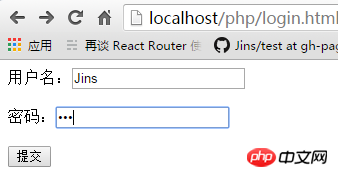
到此,一个简单的PHP_Demo就写好了,我们来测试一下吧。

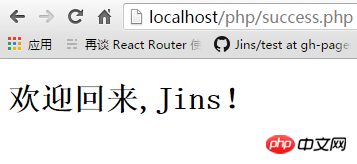
After submission, the page jumps to success.php, and we see the following content:

We open data .txt file to see if the data is written.

The data is indeed written according to the format we specified. Let me log in a few more times to try:

Test success!
The above is the detailed content of The most basic entry knowledge points of PHP. For more information, please follow other related articles on the PHP Chinese website!


