

Canvas realizes the drawing of rotating windmill
This time I will bring you the drawing of rotating windmills with Canvas. What are the precautions for drawing rotating windmills with Canvas? Here are the actual cases, let’s take a look.
Before teaching, I think if you are smart, you have mastered the basic basic operation methods of Canvas. If you don’t know much about Canvas, then I suggest you go to http://www.w3school.com.cn /tags/html_ref_canvas.asp Get familiar with it first; okey! The picture below is the simple effect after we complete it. Action is not as good as action, so let’s do a simple drawing!
1. Define the canvas
First of all, we insert the
Hot AI Tools

Undresser.AI Undress
AI-powered app for creating realistic nude photos

AI Clothes Remover
Online AI tool for removing clothes from photos.

Undress AI Tool
Undress images for free

Clothoff.io
AI clothes remover

AI Hentai Generator
Generate AI Hentai for free.

Hot Article
Hot Tools

Notepad++7.3.1
Easy-to-use and free code editor

SublimeText3 Chinese version
Chinese version, very easy to use

Zend Studio 13.0.1
Powerful PHP integrated development environment

Dreamweaver CS6
Visual web development tools

SublimeText3 Mac version
God-level code editing software (SublimeText3)
Hot Topics
 1381
1381
 52
52

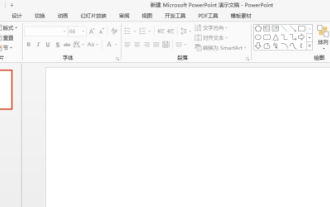 Can the floor plan be drawn directly in architectural ppt?
Mar 20, 2024 am 08:43 AM
Can the floor plan be drawn directly in architectural ppt?
Mar 20, 2024 am 08:43 AM
ppt is widely used in many fields and work, especially in education, architecture, etc. When it comes to architectural ppt, we must first think of the presentation of some architectural drawings. If we do not use professional drawing software, can we directly draw a simple architectural plan? In fact, we can complete the operation here. Below, we will draw a relatively simple floor plan to give you an idea. I hope you can complete better floor plan drawings based on this idea. 1. First, we double-click to open the ppt software on the desktop and click to create a new presentation blank document. 2. We find Insert→Shape→Rectangle in the menu bar. 3. After drawing the rectangle, double-click the graphic and modify the fill color type. Here we can modify
 Learn to draw dendrograms and radar charts in Python in five minutes
Sep 27, 2023 pm 12:48 PM
Learn to draw dendrograms and radar charts in Python in five minutes
Sep 27, 2023 pm 12:48 PM
Learn to draw dendrograms and radar charts with Python in five minutes. In data visualization, dendrograms and radar charts are two commonly used chart forms. Treemaps are used to show hierarchical structures, while radar charts are used to compare data across multiple dimensions. This article will introduce how to draw these two charts using Python and provide specific code examples. 1. Drawing dendrograms There are multiple libraries in Python that can be used to draw dendrograms, such as matplotlib and graphviz. The following uses the matplotlib library as an example to demonstrate
 How to draw a 3D geographic chart with Python
Sep 28, 2023 am 10:19 AM
How to draw a 3D geographic chart with Python
Sep 28, 2023 am 10:19 AM
Overview of how to draw 3D geographic charts with Python: Drawing 3D geographic charts can help us understand geographic data and spatial distribution more intuitively. Python, as a powerful and easy-to-use programming language, provides many libraries and tools for drawing various types of geographical charts. In this article, we will learn how to draw 3D geographic charts using the Python programming language and some popular libraries such as Matplotlib and Basemap. Environment preparation: Before starting, we need to make sure
 What versions of html2canvas are there?
Aug 22, 2023 pm 05:58 PM
What versions of html2canvas are there?
Aug 22, 2023 pm 05:58 PM
The versions of html2canvas include html2canvas v0.x, html2canvas v1.x, etc. Detailed introduction: 1. html2canvas v0.x, which is an early version of html2canvas. The latest stable version is v0.5.0-alpha1. It is a mature version that has been widely used and verified in many projects; 2. html2canvas v1.x, this is a new version of html2canvas.
 Learn the canvas framework and explain the commonly used canvas framework in detail
Jan 17, 2024 am 11:03 AM
Learn the canvas framework and explain the commonly used canvas framework in detail
Jan 17, 2024 am 11:03 AM
Explore the Canvas framework: To understand what are the commonly used Canvas frameworks, specific code examples are required. Introduction: Canvas is a drawing API provided in HTML5, through which we can achieve rich graphics and animation effects. In order to improve the efficiency and convenience of drawing, many developers have developed different Canvas frameworks. This article will introduce some commonly used Canvas frameworks and provide specific code examples to help readers gain a deeper understanding of how to use these frameworks. 1. EaselJS framework Ea
 uniapp implements how to use canvas to draw charts and animation effects
Oct 18, 2023 am 10:42 AM
uniapp implements how to use canvas to draw charts and animation effects
Oct 18, 2023 am 10:42 AM
How to use canvas to draw charts and animation effects in uniapp requires specific code examples 1. Introduction With the popularity of mobile devices, more and more applications need to display various charts and animation effects on the mobile terminal. As a cross-platform development framework based on Vue.js, uniapp provides the ability to use canvas to draw charts and animation effects. This article will introduce how uniapp uses canvas to achieve chart and animation effects, and give specific code examples. 2. canvas
 Learn to draw line charts, bar charts and pie charts with Python in three minutes
Sep 27, 2023 am 09:29 AM
Learn to draw line charts, bar charts and pie charts with Python in three minutes
Sep 27, 2023 am 09:29 AM
Learn to draw line charts, bar charts, and pie charts with Python in three minutes. Python is a very popular programming language that is widely used in data analysis and visualization. In this article, we will learn how to draw three common types of charts using Python: line charts, bar charts, and pie charts. I'll provide you with specific code examples to help you get started quickly. Line Chart A line chart is a type of chart that shows trend changes by connecting data points. In Python, we can use the matplotlib library to plot
 How to draw animated charts with Python
Sep 27, 2023 am 09:53 AM
How to draw animated charts with Python
Sep 27, 2023 am 09:53 AM
How to Draw Animated Charts with Python As a powerful programming language, Python can be used for various data visualization and chart drawing. Among them, drawing animated charts can make the data more vivid and interesting. This article will introduce how to use Python to draw animated charts and provide specific code examples. First, we need to install the matplotlib library, which is one of the most commonly used charting libraries in Python. Run the following command in the terminal to install matplotlib: pipinsta
