 Backend Development
 PHP Tutorial
 PHP environment building tutorial-detailed graphic and text explanation
PHP environment building tutorial-detailed graphic and text explanation
This article uses a combination of pictures and text to introduce you in detail about how to build an environment with PHP. It also introduces you to some of the advantages of PHP. Interested friends can refer to it.

Related recommendations:
●《The 6 best php environment building tools in 2021 Recommended》
●《mac php environment setup Tutorial: mac php development environment setup and configuration tutorial》
Overview of what is PHP
PHP is a B/S (Browser/Server, browser/server) architecture and a three-tier structure. After the server is started, users can access it using only a browser without using client software, which not only maintains the graphical user interface, but also greatly reduces the amount of application maintenance.
Advantages of PHP language
PHP originated from free software and open source code. Using PHP to develop Web applications has the following advantages .High security: PHP is open source software, everyone can see all PHP source code, the way the program code is compiled with Apache makes it The security settings are more flexible. PHP has recognized security properties.
Cross-platform features: PHP supports almost all operating system platforms, and supports multiple web servers such as Apache and IIS.
Supports a wide range of databases: Can operate a variety of mainstream and non-mainstream databases, such as MySQL, Access, SQL Server, Oracle, DB2, etc., among which PHP and MySQL is currently the best combination, and their combination can run across platforms.
Easy to learn: PHP is embedded in HTML language, mainly scripting language, with rich built-in functions, simple syntax and easy writing, making it easy for readers to learn and master.
Fast execution speed: It takes up less system resources and the code execution speed is fast.
Free: In the popular enterprise application LAMP platform, Linux, Apache, MySQL, and PHP are all free software. This open source free framework can provide Website operators save a lot of money.
Templating: Realizes the separation of program logic and user interface.
Supports object-oriented and process: Supports two development styles, object-oriented and process, and is backward compatible.
Built-in Zend acceleration engine, stable and fast performance.New features of PHP5
·Constructor and destructor.
#·Object reference.
#·Clone of the object.
#·Private, public and protected modes in objects.
·interface.
·Abstract class.
·__call.
·__set and __get.
·Static member.
Click here to view the PHP Chinese manual
Using the AppServ combination package under Windows
Combination package is to package Apache, PHP, MySQL and other server software and tools after installation. Developers only need to unzip the configured package to the local hard drive and use it without further configuration. The combination package enables the rapid establishment of a PHP development environment. For programmers who have just started learning PHP, it is recommended to use this method to build a PHP development environment. Although the combination package is much less flexible, it is easy to install, fast and stable, so it is more suitable for beginners.There are many popular combination packages on the Internet. Here are three recommended combination packages: EasyPHP, AppServ and XAMPP. For novices, it is recommended to use EasyPHP or AppServ, while XAMPP is more complicated.
Click to download the AppServ package:
As shown below:
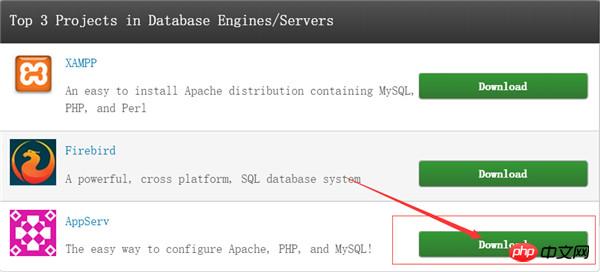
AppSer integrated installation package construction
1. Double-click the AppServ file , open the startup page as shown below:
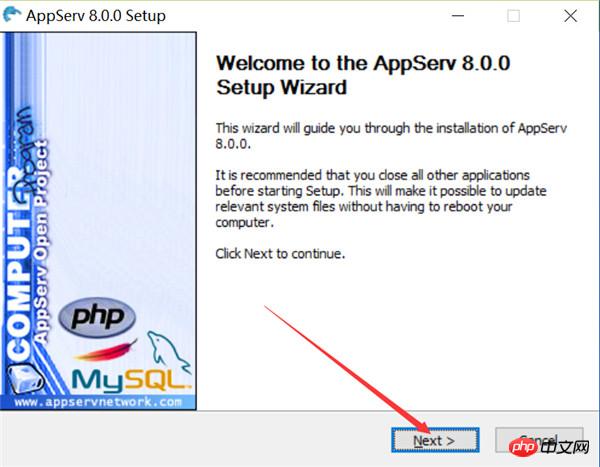
2. Click the Next button to open the AppServ installation agreement page as shown below:
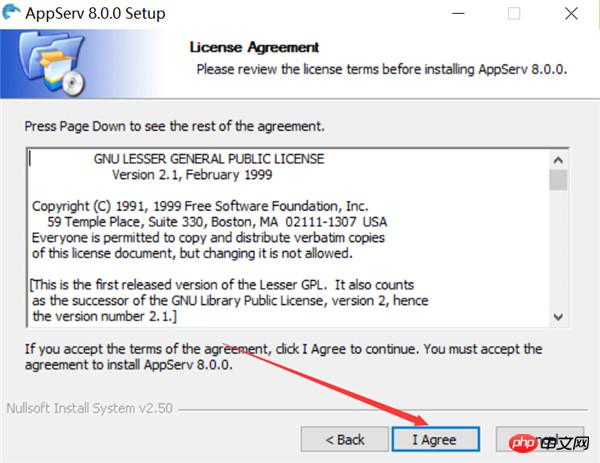
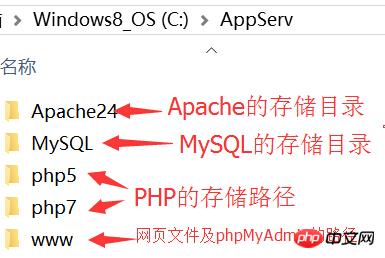
3. Click the I Agree button to open the page as shown below. On this page, you can set the installation path of AppServ (the default installation path is generally c:\AppServ). After the AppServ installation is completed, Apache, MySQL, and PHP will be stored in this directory in the form of subdirectories:
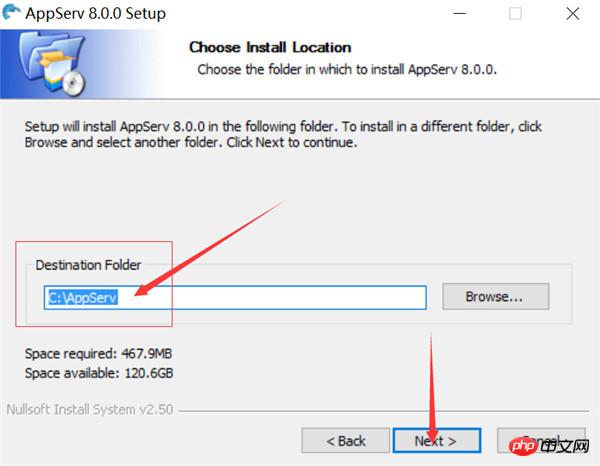
4. Click the Next button to open the page as shown below, where you can select the programs and components to be installed (the default is all selected):
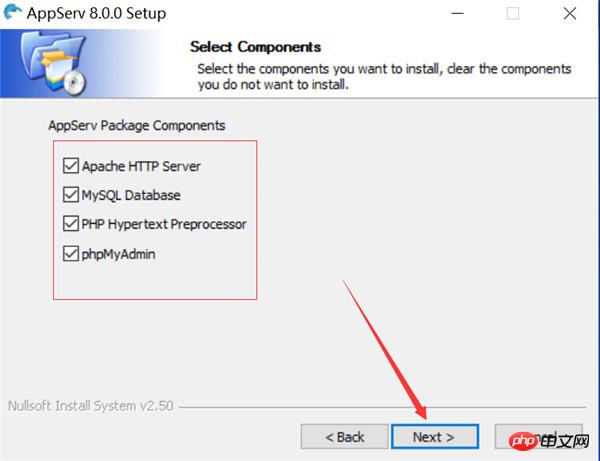
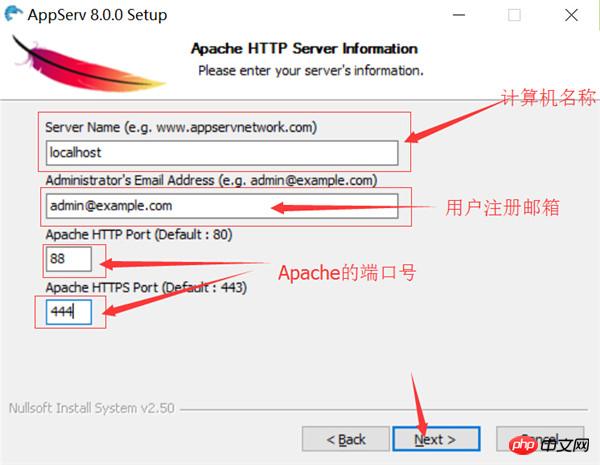
5. Click the Next button to open the page as shown below. This page mainly sets the Apache port number:
The setting of the Apache port number is very important, it directly It is related to whether the Apache server can be started successfully. If port 80 on this machine is occupied by IIS or Thunder, then the server configuration cannot be completed if port 80 is still used here. This problem can be solved by modifying the port number here, or modifying the port number of IIS or Thunder.
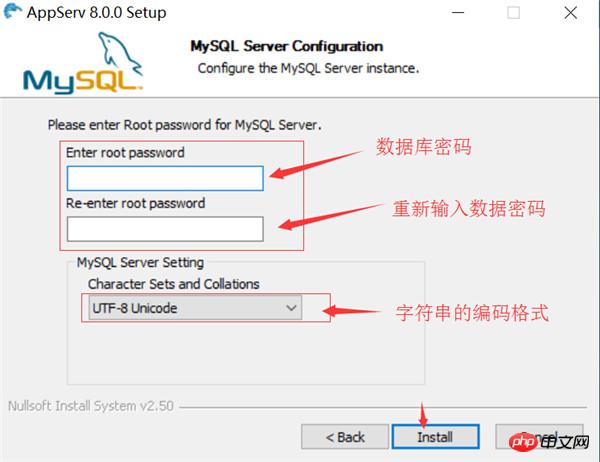
#6. Click the Next button to open as shown in the figure below. This page mainly sets the login password and character set of the root user of the MySQL database. Here, the character set Set to
"GB2312 Simplified Chinese", which means that the character set of the MySQL database will be in Simplified Chinese form:
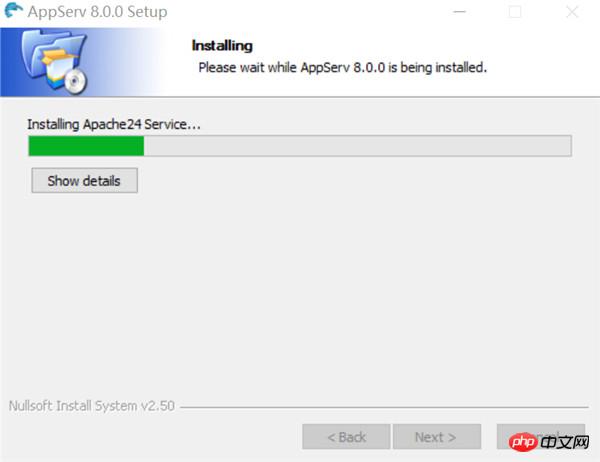
7. Click the Install button to start the installation. , as shown below:
8. The following picture shows the interface after the installation is completed:
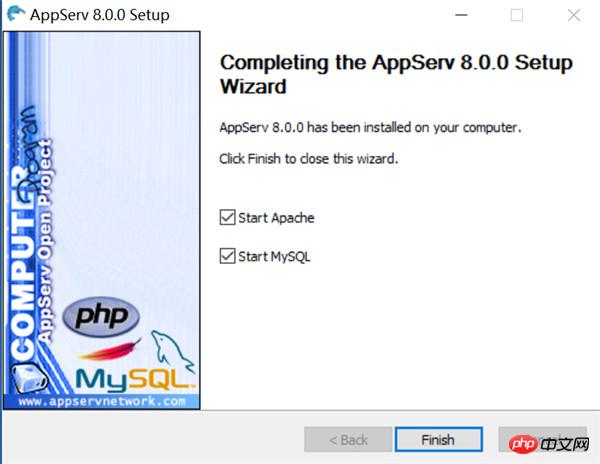
After installing AppServ, the entire The directory is installed in the "c:AppServ" path by default. This directory contains several subdirectories:
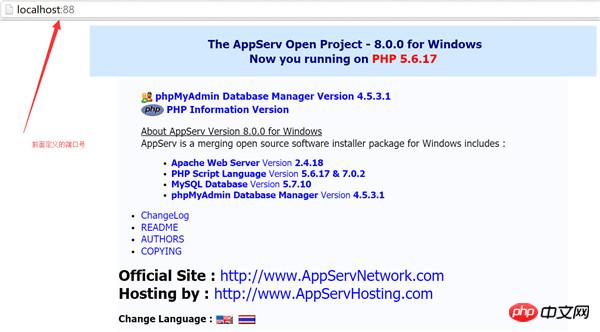
Open the browser and enter "http://localhost/" in the address bar [The port number you set, if it is 80, you don’t need to fill it in]". If you open the following picture, it means that the AppServ installation is successful:
With the development of PHP, a large number of excellent Development tools have emerged one after another. Finding a tool that suits you will not only speed up your learning progress, but also enable you to discover problems in time during the future development process and avoid detours. The development tool we choose is Dreamweaver. Please refer to the online information for detailed project creation.
Related recommendations:
PHP development kit php7 php environment construction PHP from entry to proficiency
PHP environment construction (php+Apache+ mysql) Detailed introduction
PHP environment construction-WAMP+Zend
The above is the detailed content of PHP environment building tutorial-detailed graphic and text explanation. For more information, please follow other related articles on the PHP Chinese website!

Hot AI Tools

Undresser.AI Undress
AI-powered app for creating realistic nude photos

AI Clothes Remover
Online AI tool for removing clothes from photos.

Undress AI Tool
Undress images for free

Clothoff.io
AI clothes remover

AI Hentai Generator
Generate AI Hentai for free.

Hot Article

Hot Tools

Notepad++7.3.1
Easy-to-use and free code editor

SublimeText3 Chinese version
Chinese version, very easy to use

Zend Studio 13.0.1
Powerful PHP integrated development environment

Dreamweaver CS6
Visual web development tools

SublimeText3 Mac version
God-level code editing software (SublimeText3)

Hot Topics
 CakePHP Project Configuration
Sep 10, 2024 pm 05:25 PM
In this chapter, we will understand the Environment Variables, General Configuration, Database Configuration and Email Configuration in CakePHP.
 PHP 8.4 Installation and Upgrade guide for Ubuntu and Debian
Dec 24, 2024 pm 04:42 PM
PHP 8.4 brings several new features, security improvements, and performance improvements with healthy amounts of feature deprecations and removals. This guide explains how to install PHP 8.4 or upgrade to PHP 8.4 on Ubuntu, Debian, or their derivati
 CakePHP Date and Time
Sep 10, 2024 pm 05:27 PM
To work with date and time in cakephp4, we are going to make use of the available FrozenTime class.
 CakePHP File upload
Sep 10, 2024 pm 05:27 PM
To work on file upload we are going to use the form helper. Here, is an example for file upload.
 CakePHP Routing
Sep 10, 2024 pm 05:25 PM
In this chapter, we are going to learn the following topics related to routing ?
 Discuss CakePHP
Sep 10, 2024 pm 05:28 PM
CakePHP is an open-source framework for PHP. It is intended to make developing, deploying and maintaining applications much easier. CakePHP is based on a MVC-like architecture that is both powerful and easy to grasp. Models, Views, and Controllers gu
 How To Set Up Visual Studio Code (VS Code) for PHP Development
Dec 20, 2024 am 11:31 AM
Visual Studio Code, also known as VS Code, is a free source code editor — or integrated development environment (IDE) — available for all major operating systems. With a large collection of extensions for many programming languages, VS Code can be c
 CakePHP Creating Validators
Sep 10, 2024 pm 05:26 PM
Validator can be created by adding the following two lines in the controller.


