

Using Ajax to implement registration and avatar upload functions
This time I will bring you the use of Ajax to implement the registration and avatar upload functions. What are the precautions for Ajax to implement the registration and avatar upload functions. The following is a practical case, let's take a look.
After the first contact with ajax, we did a CRM training project. Most groups have registered users, but they all ignored one function, that is, registrations for many websites can be uploaded. For avatars, here I made a small CRM that selects pictures from the existing avatar array and uploads them as avatars (of course, I haven’t made one that can be uploaded and cropped from local photos, but I will as long as I have time. Research, I believe it won’t take too long).
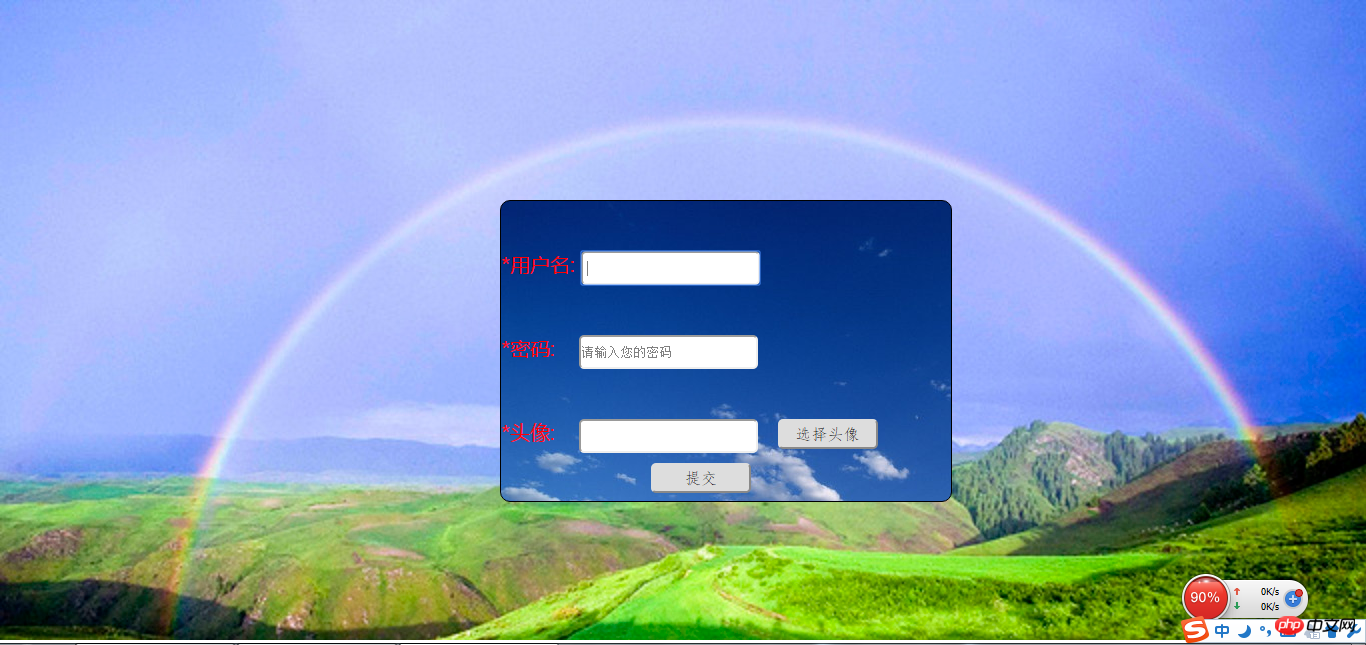
1. First write a registration page and css style. I named it regist.html, and the css file is named regist.css. I omit the specific code here. See the effect in the picture above. Bar: (The page is a bit ugly, don’t mind)
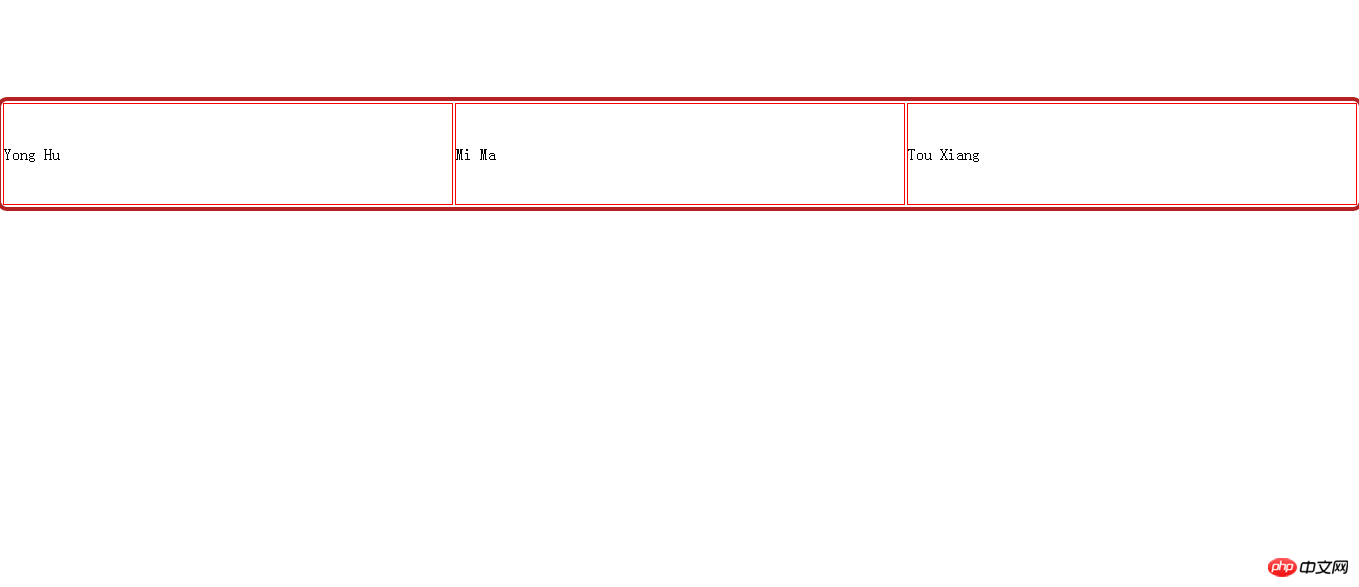
There is also an information.html page used to display the added records. At this time, there is only the header:
2. Write the creation connection pool module (dbutil.js), which is the js file for establishing the link. What I built here is the users_infor table, and the database used is test.
var mysql = require('mysql');
var pool = mysql.createPool({
host : 'localhost',
user : 'root',
password : 'lovo',
database:"test",
port:3306
});
exports.pool=pool;3. Write a module to connect to the database and process (add, delete, modify, and query) user data (Userdao.js). All functions that operate the database are named getAllUser:
var db = require("../DBUtil/dbutil.js");
//var conn = db.conn;
var mypool =db.pool;
function getAllUser(sql,arg,fun){
mypool.getConnection(function(err,conn){
conn.query(sql,arg,fun);
conn.end();
})
}
exports.getAllUser=getAllUser;4. Write the module to operate the database, that is, add, delete, modify, and query the data table (Userservice.js):
var dao = require("../dao/UserDao.js");Define the registration function, that is, go to the data table user_infor The function of adding new records
exports.regist = function(req,res){
var arg;
if (req.method == "get" || req.method == "GET") {
arg = [req.query.username, req.query.pwd, req.query.pics];
} else {
arg = [req.body.username, req.body.pwd, req.body.pics];
}
var sql = "insert into user_infor(u_name,u_pwd,u_pics) values(?,?,?)"
dao.getAllUser(sql, arg, function (err, result) {
if (err) {
console.log(err);
} else {
if (result.affectedRows>0){
res.sendfile("./static/html/information.html")
} else {
res.sendfile("./static/html/regist.html")
}
}
})
}Define the function that displays all the records of the information.html page, that is, the function that queries all the contents of the user_infor table
exports.listAll=function(req,res){
var sql = " select * from user_infor ";
dao.getAllUser(sql,function (err, result, fields) {
if (err){
console.log(err);
} else {
if (result.length>0){
res.json(result);console.log(result)
} else {
res.send("failed");
}
}
})
}5. Of course, don’t forget to introduce the 2 modules express and mysql, create a new folder node_module and include these two modules in it.
6. Then, write a main js file (main.js), which is the js that interacts with the user:
var http = require("http");
var express = require("express");
var userser = require("./route/UserService.js");
var url= require("url");
var app = express();
app.use(express.cookieParser());
app.use(express.session({
secret:"123456",
name:"userLogin",
cookie:{maxAge:9999999}
}))
app.set("port",8888);
app.use(express.static(dirname+"/static"));
app.use(express.methodOverride());
app.use(express.bodyParser());
app.post("/regist",userser.regist);
app.post("/list",userser.listAll);
http.createServer(app).listen(app.get("port"),function(){
console.log("服务启动成功!监听"+app.get("port")+"端口");
})7. The following js file is for register and information, respectively:
--------------------------------regist page selection avatar function -------------------------------------------------- ----------
function xuanze() {
var pics=document.getElementById("pics");
var picsp = document.getElementById("login_pics");
picsp.style.display = 'block';
var img=document.getElementsByTagName("img");
var picarrs=["../img/user1.jpg",
"../img/user2.jpg",
"../img/user3.jpg",
"../img/user4.jpg",
"../img/user5.jpg",
"../img/user6.jpg",
"../img/user7.jpg",
"../img/user8.jpg",
"../img/user9.jpg",
"../img/user10.jpg",
"../img/user11.jpg",
"../img/user12.jpg",
"../img/user13.jpg",
"../img/user14.jpg",
"../img/user15.jpg",
"../img/user16.jpg",
"../img/user17.jpg",
"../img/user18.jpg",
"../img/user19.jpg",
"../img/user20.jpg",
"../img/user21.jpg",
"../img/user22.jpg",
"../img/user23.jpg",
"../img/user24.jpg"];
for(var i=0;i<picarrs.length;i++){
img[i].src=picarrs[i];
}
for(var j=0;j<img.length;j++){
img[j].onclick=function(e){
var target= e.target|| e.srcElement;
var imgroute=target.src;//此处若弹出imgroute,可以看到完全路径是http:localhost:8888/img/users20.jpg
pics.value=".."+imgroute.substr(21);/*此处要截取后面的部分才是图片的路径,前面的http:localhost:8888要省去,不是我们需要的路径,若不截取将无法识别*/
}
}
}-----------------------The information page displays all recorded functions, window one Load to display all------------------------------------------------- --
window.onload=function(){
var xmlhttpReq;
if (window.XMLHttpRequest)
xmlhttpReq=new XMLHttpRequest();
else
xmlhttpReq=new ActiveXObject("Microsoft.XMLHTTP");
var url="http://localhost:8888/list";
//初始化信息
xmlhttpReq.open("post",url,true);
//添加请求头
xmlhttpReq.setRequestHeader("Content-type","application/x-www-form-urlencoded");
xmlhttpReq.send(null);
xmlhttpReq.onreadystatechange = function(){
if (xmlhttpReq.readyState==4 && xmlhttpReq.status==200) {
if (xmlhttpReq.responseText != "failed"){
var userinfor = document.getElementById("userinfor");
var users = eval("(" + xmlhttpReq.responseText + ")");
for (var i = 0; i < users.length; i++){
var newRow = userinfor.insertRow();
newRow.style.height = "100px";
newRow.style.backgroundColor = "skyblue";
newRow.insertCell(newRow.cells.length).innerHTML =users[i].u_name;
newRow.insertCell(newRow.cells.length).innerHTML =users[i].u_pwd;
newRow.insertCell(newRow.cells.length).innerHTML ="<img src='"+users[i].u_pics+"'>";//此处要在这个单元格里插入img元素,将提交传过来的路径指定为此img的src, if there is no such img element, the path displayed here is still the path, and no picture will appear.
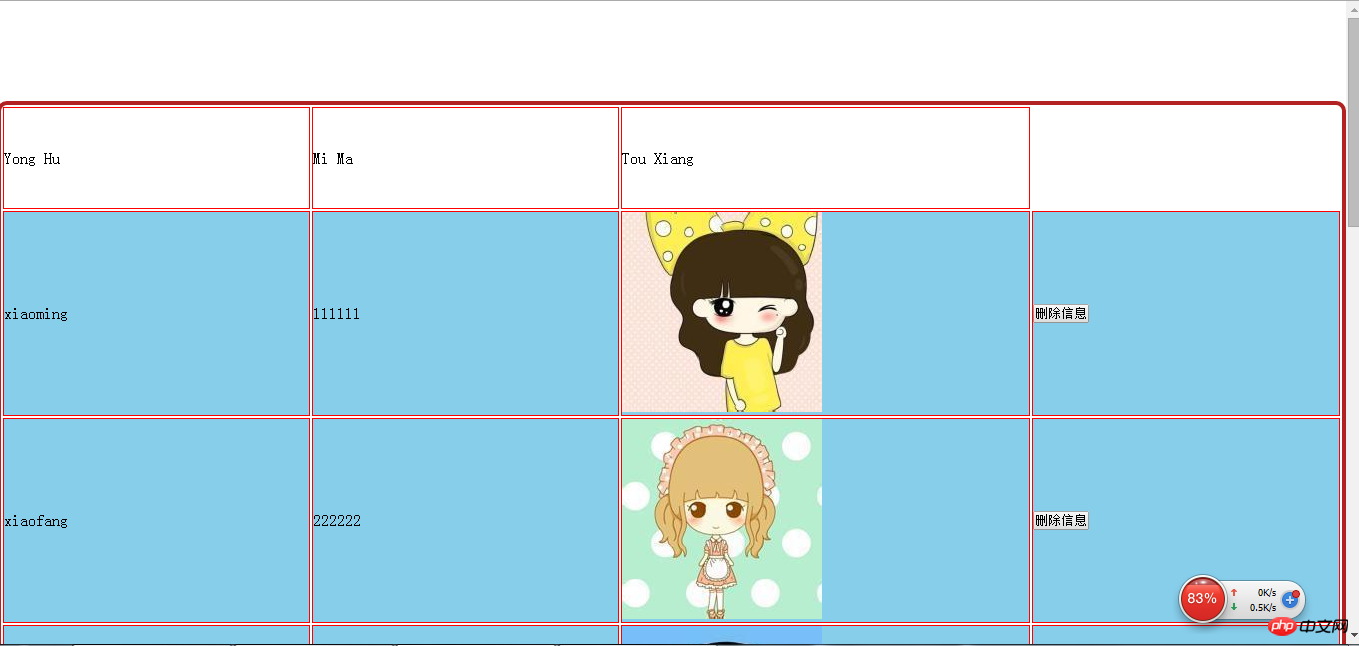
newRow.insertCell(newRow.cells.length).innerHTML ="<input type='button' id='del' id='" + users[i].u_id + "' value='删除信息' onclick='shanchu(this)'/>";
}
} else if (xmlhttpReq.responseText == "failed") {
alert("添加新用户失败");
}
}
}
}8. The most important point is that when creating a new user_infor table in the database, specify the user_pics field to specify the path where the pictures are stored:
USE test;
DROP TABLE IF EXISTS user_infor;
CREATE TABLE user_infor(
u_id INT PRIMARY KEY AUTO_INCREMENT,
u_name CHAR(20) NOT NULL,
u_pwd CHAR(20) NOT NULL,
u_pics CHAR(100) NOT NULL
)
INSERT INTO user_infor(u_name,u_pwd,u_pics) VALUES
('xiaoming','111111','../img/user12.jpg'),
('xiaofang','222222','../img/user13.jpg'),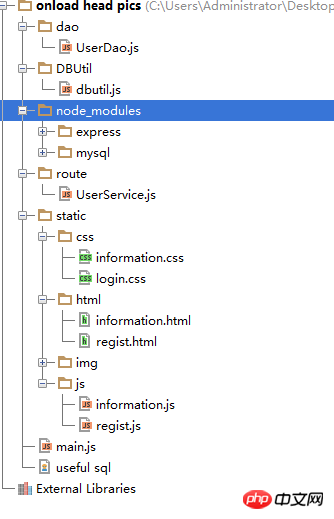
('xiaozhou','333333','../img/user14.jpg')The file storage relationship of the entire project is as follows:
Open the database with SQLyog, run main.js, open register.html in the browser, start registration and select the avatar:

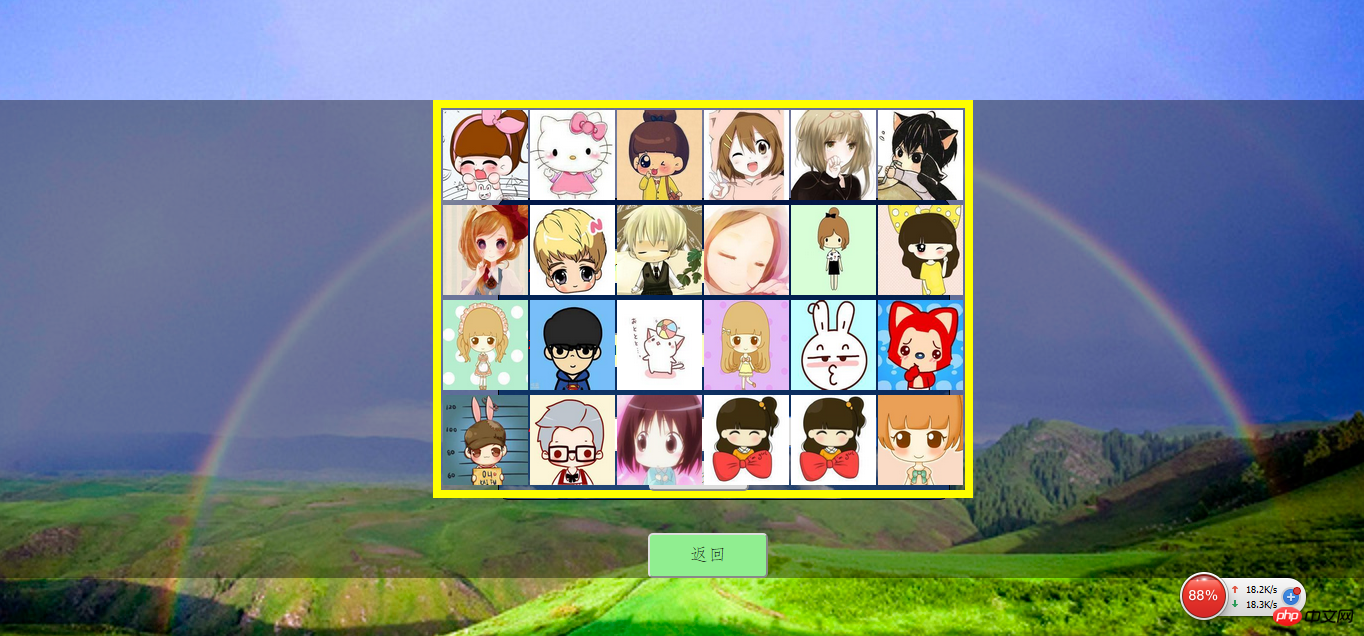
After clicking on an avatar and returning, the path to the image will be generated in the text box of the avatar, as follows:

Click submit to complete the registration. The page will jump to the information page. After several successful registrations, the page will appear as follows:
Believe it or not After reading the case in this article, you have mastered the method. For more exciting information, please pay attention to other related articles on the PHP Chinese website!
Recommended reading:
Detailed explanation of the steps of using ajax to implement paging technology (With code)
The above is the detailed content of Using Ajax to implement registration and avatar upload functions. For more information, please follow other related articles on the PHP Chinese website!

Hot AI Tools

Undresser.AI Undress
AI-powered app for creating realistic nude photos

AI Clothes Remover
Online AI tool for removing clothes from photos.

Undress AI Tool
Undress images for free

Clothoff.io
AI clothes remover

AI Hentai Generator
Generate AI Hentai for free.

Hot Article
Hot Tools

Notepad++7.3.1
Easy-to-use and free code editor

SublimeText3 Chinese version
Chinese version, very easy to use

Zend Studio 13.0.1
Powerful PHP integrated development environment

Dreamweaver CS6
Visual web development tools

SublimeText3 Mac version
God-level code editing software (SublimeText3)
Hot Topics
 1382
1382
 52
52

 Simple steps to upload your own music on Kugou
Mar 25, 2024 pm 10:56 PM
Simple steps to upload your own music on Kugou
Mar 25, 2024 pm 10:56 PM
1. Open Kugou Music and click on your profile picture. 2. Click the settings icon in the upper right corner. 3. Click [Upload Music Works]. 4. Click [Upload Works]. 5. Select the song and click [Next]. 6. Finally, click [Upload].
 How to upload lyrics to QQ Music
Feb 23, 2024 pm 11:45 PM
How to upload lyrics to QQ Music
Feb 23, 2024 pm 11:45 PM
With the advent of the digital age, music platforms have become one of the main ways for people to obtain music. However, sometimes when we listen to songs, we find that there are no lyrics, which is very disturbing. Many people hope that lyrics can be displayed when listening to songs to better understand the content and emotions of the songs. QQ Music, as one of the largest music platforms in China, also provides users with the function of uploading lyrics, so that users can better enjoy music and feel the connotation of the songs. The following will introduce how to upload lyrics on QQ Music. first
 How to solve the 403 error encountered by jQuery AJAX request
Feb 20, 2024 am 10:07 AM
How to solve the 403 error encountered by jQuery AJAX request
Feb 20, 2024 am 10:07 AM
Title: Methods and code examples to resolve 403 errors in jQuery AJAX requests. The 403 error refers to a request that the server prohibits access to a resource. This error usually occurs because the request lacks permissions or is rejected by the server. When making jQueryAJAX requests, you sometimes encounter this situation. This article will introduce how to solve this problem and provide code examples. Solution: Check permissions: First ensure that the requested URL address is correct and verify that you have sufficient permissions to access the resource.
 How to solve jQuery AJAX request 403 error
Feb 19, 2024 pm 05:55 PM
How to solve jQuery AJAX request 403 error
Feb 19, 2024 pm 05:55 PM
jQuery is a popular JavaScript library used to simplify client-side development. AJAX is a technology that sends asynchronous requests and interacts with the server without reloading the entire web page. However, when using jQuery to make AJAX requests, you sometimes encounter 403 errors. 403 errors are usually server-denied access errors, possibly due to security policy or permission issues. In this article, we will discuss how to resolve jQueryAJAX request encountering 403 error
 How to change boss direct recruitment avatar back to default
Feb 23, 2024 pm 04:07 PM
How to change boss direct recruitment avatar back to default
Feb 23, 2024 pm 04:07 PM
How to change the boss direct recruitment avatar back to the default? The boss direct recruitment avatar can be adjusted at will, but most friends don’t know how to change the boss direct recruitment avatar back to the default. Next is the boss direct recruitment avatar brought to players by the editor. Change back to the default method tutorial, interested players come and take a look! How to change the Boss Direct Recruitment avatar back to the default 1. First open the Boss Direct Recruitment APP, click on the avatar above in the [My] area in the lower right corner of the main page; 2. Then enter the personal information interface and continue to click on the avatar; 3. Then select [ Take photo] and [Select from album] to change back to the default.
 How to solve the problem of jQuery AJAX error 403?
Feb 23, 2024 pm 04:27 PM
How to solve the problem of jQuery AJAX error 403?
Feb 23, 2024 pm 04:27 PM
How to solve the problem of jQueryAJAX error 403? When developing web applications, jQuery is often used to send asynchronous requests. However, sometimes you may encounter error code 403 when using jQueryAJAX, indicating that access is forbidden by the server. This is usually caused by server-side security settings, but there are ways to work around it. This article will introduce how to solve the problem of jQueryAJAX error 403 and provide specific code examples. 1. to make
 PHP and Ajax: Building an autocomplete suggestion engine
Jun 02, 2024 pm 08:39 PM
PHP and Ajax: Building an autocomplete suggestion engine
Jun 02, 2024 pm 08:39 PM
Build an autocomplete suggestion engine using PHP and Ajax: Server-side script: handles Ajax requests and returns suggestions (autocomplete.php). Client script: Send Ajax request and display suggestions (autocomplete.js). Practical case: Include script in HTML page and specify search-input element identifier.
 How to get variables from PHP method using Ajax?
Mar 09, 2024 pm 05:36 PM
How to get variables from PHP method using Ajax?
Mar 09, 2024 pm 05:36 PM
Using Ajax to obtain variables from PHP methods is a common scenario in web development. Through Ajax, the page can be dynamically obtained without refreshing the data. In this article, we will introduce how to use Ajax to get variables from PHP methods, and provide specific code examples. First, we need to write a PHP file to handle the Ajax request and return the required variables. Here is sample code for a simple PHP file getData.php:
