

SpringMVC + summernote implements visual editor

This article shares with you a detailed explanation of the operation of the visual editor implemented by SpringMVC + summernote. The content is quite good. I hope it can help friends in need. This time we will focus on the integrated summernote editor under the springmvc framework: as follows
This editor is similar to the editor on the Zhihu platform and can be controlled by yourself in JS Control related controls in the file.
This summernote version is: /*! Summernote v0.8.1 | (c) 2013-2015 Alan Hong and other contributors | MIT license */
with the current The method of the official website version is basically the same. First of all, regarding the summer visual editor, the official website is https://summernote.org/
The problem solved this time is:
When uploading images in the editor, you need to rewrite the onImageUpload method in the js. However, on Baidu and other platforms, because the version of summernote used by many people is too old, As a result, many problems occurred during my work, and they were finally solved on the official website's API, demo, and GitHub. Thank you very much for sharing!
-
After uploading the image in the editor, if you don’t want the image after uploading, or you want to replace the image , when deleting the picture in the edit box, the picture uploaded in the local file will be deleted simultaneously. (The solution is: in the summernote control file, add AJAX under the removeMedia method to specify the url in the background and send the image name. If the local resource has the file, delete it)
Next, we will explain step by step how to configure the summernote editor and how to rewrite it
Section 1: Installation And download and configure summernote visual editor
##Open the official website, as shown in the figure
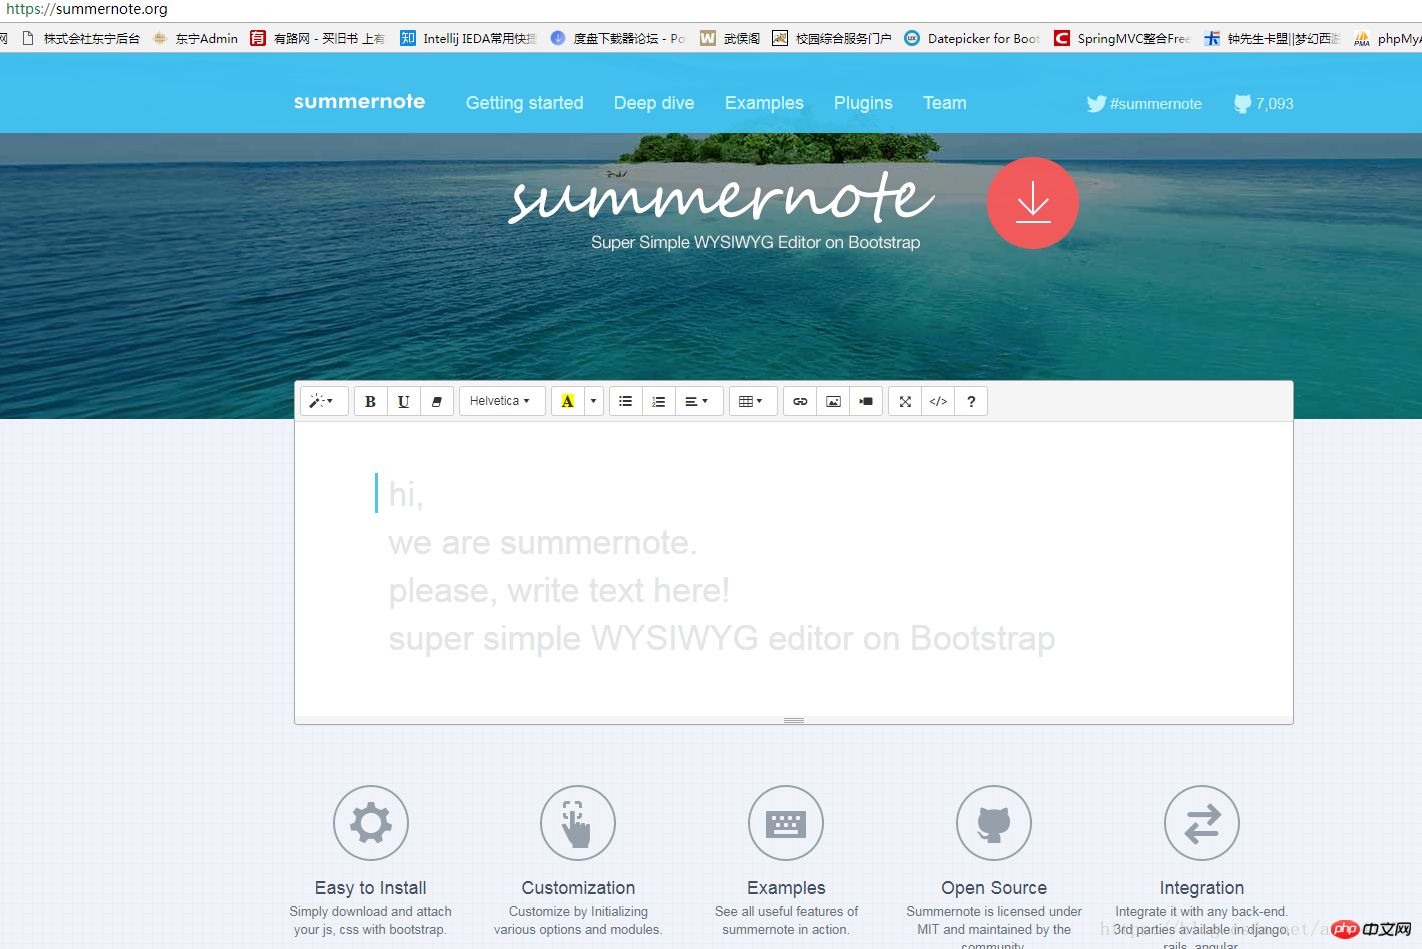
This editor is relatively simple and easy to use. If you like something more powerful and complex, you can consider Baidu team's UE or UM.
We choose the above Getting started
to get the files that need to be loaded by the editor. You can do this in a variety of ways To load, I use the direct download configuration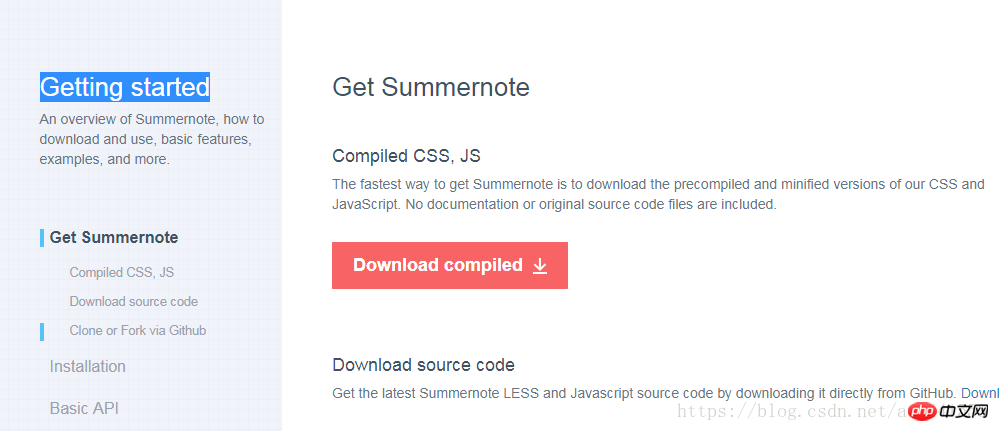
<!-- include libraries(jQuery, bootstrap) -->
<link href="http://netdna.bootstrapcdn.com/bootstrap/3.3.5/css/bootstrap.css" rel="stylesheet">
<script src="http://cdnjs.cloudflare.com/ajax/libs/jquery/3.2.1/jquery.js"></script>
<script src="http://netdna.bootstrapcdn.com/bootstrap/3.3.5/js/bootstrap.js"></script>

<!-- include summernote css/js -->
<link href="http://cdnjs.cloudflare.com/ajax/libs/summernote/0.8.9/summernote.css" rel="stylesheet">
<script src="http://cdnjs.cloudflare.com/ajax/libs/summernote/0.8.9/summernote.js"></script>
Section 2: Integrate springmvc
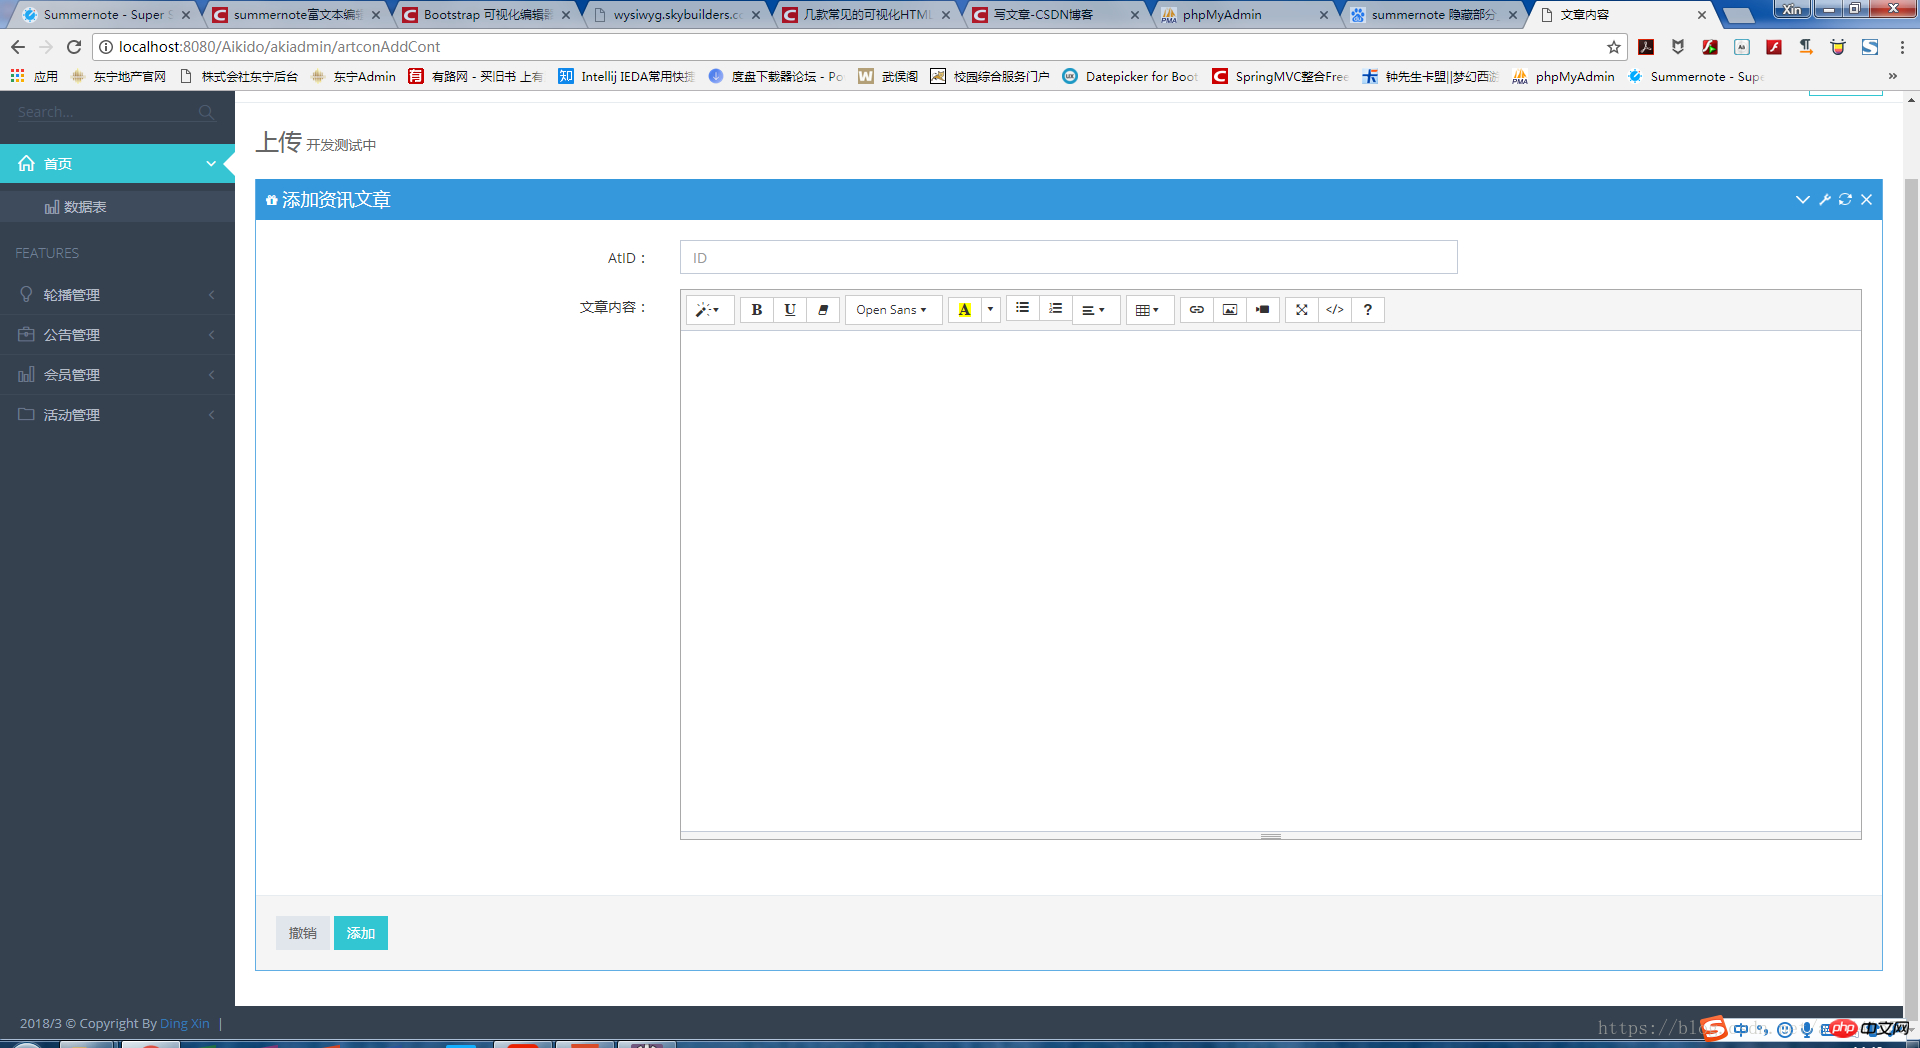
##Next, first we open our own project and directly add the relevant The HTML code can be placed in its own view layer, and the view can be accessed through the path. My own code is: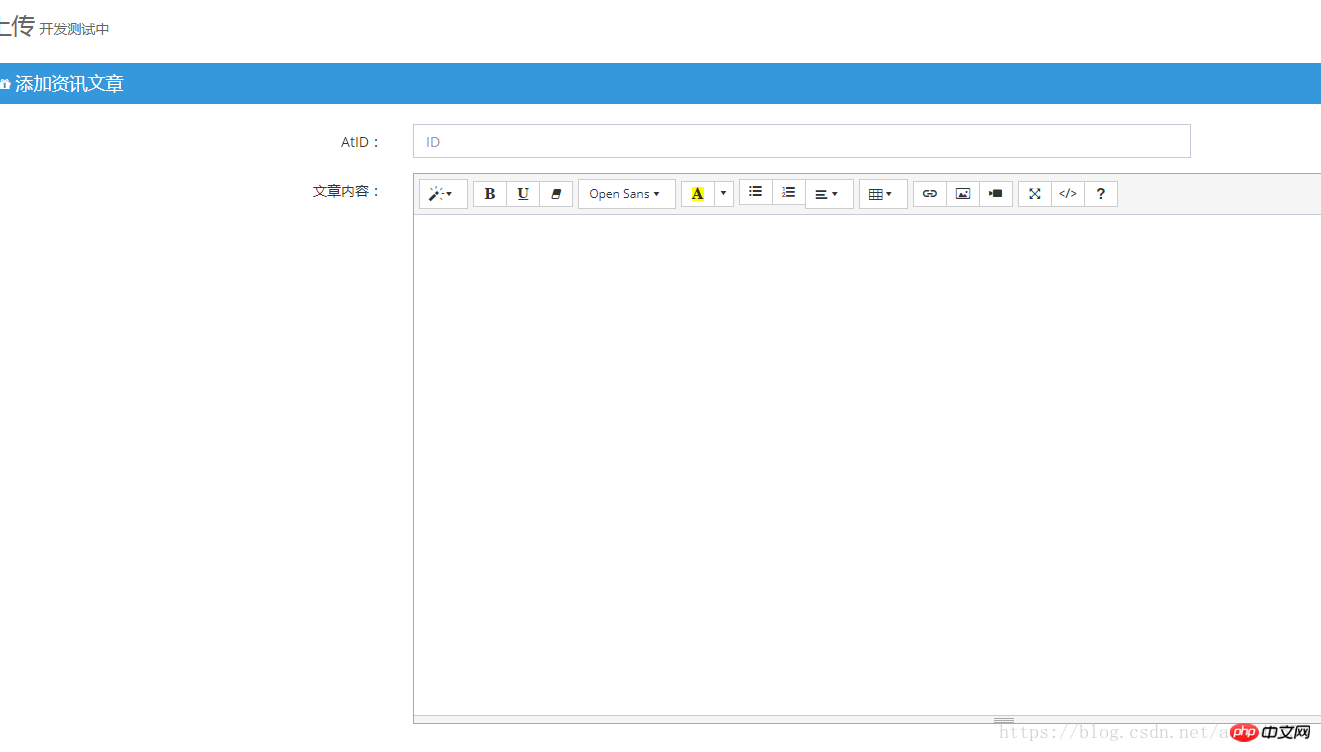 The relevant JavaScript code is: (callbacks are new functions, please refer to summernote for details. js core file, pull it to the bottom)
    	$("#summernote_1").summernote({
		      //height:500 //不建议填写,如果上传图片高度比较大,编辑器则不会自动调整高度的
		      focus:true,  //启动时自动获取焦点
		      maxHeight:null,  //编辑器最大高度
		      minHeight:500,//编辑器最小高度,会跟随内容和图片大小自动调整编辑器高度
			}
});There are 3 files loaded in my JS:
 zh-CN is a Chinese file. If you need to convert the language, please pay attention Take out the downloaded lang folder, load it, and change the final code
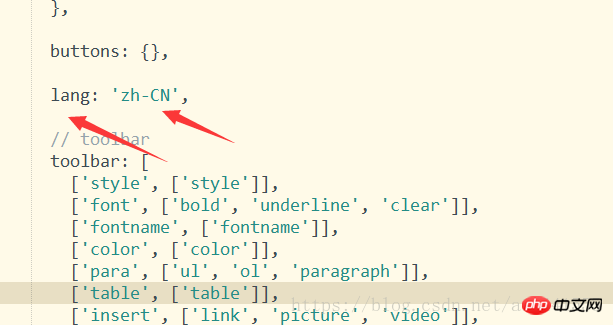
in summernote.js or summernote.min.js to what you need An introduction to the language file is sufficient.
Here we have put the editor into our own project
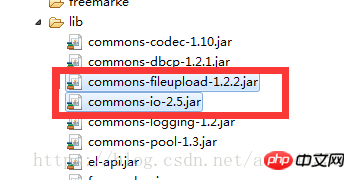
Section 3: Introduce relevant jar packages and configure the springmvc.xml core file- First we need to put the following two jars into the lib directory of our project
 Configuring the springmvc file
- Then we start writing the execution code related to uploading images in our control layer/Action control file
<!-- 配置MultipartResolver -->
     <bean id="multipartResolver" class="org.springframework.web.multipart.commons.CommonsMultipartResolver">
     	<!-- property 一共有4个属性
     	maxUploadSize 上传的最大字节数,-1代表没有任何限制
     	maxInMemorySize 读取文件到内存中最大的字节数,默认是1024
     	defaultEncoding 文件上传头部编码,默认是iso-8859-1,注意defaultEncoding必须和用户的jsp的pageEncoding属性一致,以便能正常读取文件
     	uploadTempDir文件上传暂存目录,文件上传完成之后会清除该目录,模式是在servlet容器的临时目录,例如tomcat的话,就是在tomcat文件夹的temp目录
     	 -->
     	<property name="defaultEncoding" value="UTF-8"></property>
     	<property name="maxUploadSize" value="15728640"></property> <!-- 15MB -->
     </bean>
Copy after loginThe above is the detailed content of SpringMVC + summernote implements visual editor. For more information, please follow other related articles on the PHP Chinese website!

Hot AI Tools

Undresser.AI Undress
AI-powered app for creating realistic nude photos

AI Clothes Remover
Online AI tool for removing clothes from photos.

Undress AI Tool
Undress images for free

Clothoff.io
AI clothes remover

AI Hentai Generator
Generate AI Hentai for free.

Hot Article
Hot Tools

Notepad++7.3.1
Easy-to-use and free code editor

SublimeText3 Chinese version
Chinese version, very easy to use

Zend Studio 13.0.1
Powerful PHP integrated development environment

Dreamweaver CS6
Visual web development tools

SublimeText3 Mac version
God-level code editing software (SublimeText3)
Hot Topics
 1386
1386
 52
52

 Comparison and difference analysis between SpringBoot and SpringMVC
Dec 29, 2023 am 11:02 AM
Comparison and difference analysis between SpringBoot and SpringMVC
Dec 29, 2023 am 11:02 AM
SpringBoot and SpringMVC are both commonly used frameworks in Java development, but there are some obvious differences between them. This article will explore the features and uses of these two frameworks and compare their differences. First, let's learn about SpringBoot. SpringBoot was developed by the Pivotal team to simplify the creation and deployment of applications based on the Spring framework. It provides a fast, lightweight way to build stand-alone, executable
 What are the differences between SpringBoot and SpringMVC?
Dec 29, 2023 am 10:46 AM
What are the differences between SpringBoot and SpringMVC?
Dec 29, 2023 am 10:46 AM
What is the difference between SpringBoot and SpringMVC? SpringBoot and SpringMVC are two very popular Java development frameworks for building web applications. Although they are often used separately, the differences between them are obvious. First of all, SpringBoot can be regarded as an extension or enhanced version of the Spring framework. It is designed to simplify the initialization and configuration process of Spring applications to help developers
 How to use Vue to implement a drag-and-drop visual editor?
Jun 25, 2023 pm 08:22 PM
How to use Vue to implement a drag-and-drop visual editor?
Jun 25, 2023 pm 08:22 PM
Vue is a modern JavaScript framework. When implementing a visual editor, it can provide a rich set of components, instructions, life cycle hooks and other functions. It also provides some convenient APIs for the implementation of drag-and-drop interaction. In this article, we will introduce how to use Vue2.x to implement a drag-and-drop visual editor to facilitate web developers to quickly implement corresponding functions in their projects. Component structure First, we need to split the component structure of the visual editor, which usually consists of the following
 What are the differences between spring and springmvc
Dec 29, 2023 pm 05:02 PM
What are the differences between spring and springmvc
Dec 29, 2023 pm 05:02 PM
The difference between spring and springmvc: 1. Positioning and functions; 2. Core functions; 3. Application areas; 4. Extensibility. Detailed introduction: 1. Positioning and functions. Spring is a comprehensive application development framework that provides dependency injection, aspect-oriented programming, transaction management and other functions. It is designed to simplify the development of enterprise-level applications, and Spring MVC is the Spring framework. A module in it is used for the development of Web applications and implements the MVC pattern; 2. Core functions and so on.
 What is the difference between SpringBoot and SpringMVC?
Dec 29, 2023 pm 05:19 PM
What is the difference between SpringBoot and SpringMVC?
Dec 29, 2023 pm 05:19 PM
SpringBoot and SpringMVC are two frameworks commonly used in Java development. They are both provided by the Spring framework, but they have some differences in functions and usage methods. This article will introduce the characteristics and differences of SpringBoot and SpringMVC respectively. 1. Features of SpringBoot: Simplified configuration: SpringBoot greatly simplifies the project configuration process through the principle of convention over configuration. It can automatically configure the parameters required by the project, and developers
 What are the differences between springboot and springmvc
Jun 07, 2023 am 10:10 AM
What are the differences between springboot and springmvc
Jun 07, 2023 am 10:10 AM
The differences between springboot and springmvc are: 1. Different meanings; 2. Different configurations; 3. Different dependencies; 4. Different development times; 5. Different productivity; 6. Different ways to implement JAR packaging function; 7. Whether batch processing is provided Function; 8. Different functions; 9. Different community and documentation support; 10. Whether deployment descriptors are required.
 Using SpringMVC for Web service processing in Java API development
Jun 17, 2023 pm 11:38 PM
Using SpringMVC for Web service processing in Java API development
Jun 17, 2023 pm 11:38 PM
With the development of the Internet, Web services are becoming more and more common. As an application programming interface, JavaAPI is constantly launching new versions to adapt to different application scenarios. As a popular open source framework, SpringMVC can help us easily build web applications. This article will explain in detail how to use SpringMVC for Web service processing in JavaAPI development, including configuring SpringMVC, writing controllers, and using
 How to use Java's SpringMVC interceptor
May 13, 2023 pm 02:55 PM
How to use Java's SpringMVC interceptor
May 13, 2023 pm 02:55 PM
The role of interceptor SpringMVC's interceptor is similar to the filter in Servlet development, which is used to pre-process and post-process the processor. Interceptors are connected into a chain in a certain order, and this chain is called an interceptor chain (InterceptorChain). When an intercepted method or field is accessed, the interceptors in the interceptor chain will be called in the order they were previously defined. Interceptors are also the specific implementation of AOP ideas. The difference between interceptors and filters: Filter (Filter) The scope of use of interceptor (Intercepter) is part of the servlet specification and can be used by any JavaWeb project. Spri
