This time I will show you how to implement cross-page submission of forms with ajax. What are the precautions for ajax to implement cross-page submission of forms? The following is a practical case, let's take a look.
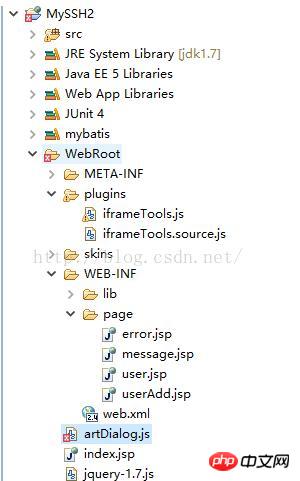
As mentioned earlier, the problem of repeated form submissions. In addition to handling token password verification and redirection, another frequently used method is to process form submissions on a new page. After completion, close the current page and refresh the previous page. The page to send the request to.artDialog.js
 ##2, user.jsp
<%@ page language="java" import="java.util.*" pageEncoding="UTF-8"%>
<%@ taglib uri="/struts-tags" prefix="s"%>
<%@ taglib uri="http://java.sun.com/jsp/jstl/core" prefix="c"%>
<!DOCTYPE HTML PUBLIC "-//W3C//DTD HTML 4.01 Transitional//EN">
<html>
 <head>
 <title>user列表</title>

 <meta http-equiv="pragma" content="no-cache">
 <meta http-equiv="cache-control" content="no-cache">
 <meta http-equiv="expires" content="0">
 <script type="text/javascript" src="/MySSH2/jquery-1.7.js"></script>
 <script type="text/javascript" src="/MySSH2/artDialog.js?skin=default"></script>
 <script type="text/javascript">
 function openA(){
 window.open("/MySSH2/user/manage_addUI");
 }
 </script>
 </head>
 <body>
 <br/>
 <a href="<s:url action="manage_addUI" namespace="/user"/>">添加用户</a>
 <a href="javascript:void(0)" onclick="openA()">添加用户</a>
  <br/>
  用户列表:<br/>
 <s:iterator value="#request.users">
 id:<s:property value="id"/><br/>
 name:<s:property value="name"/><br/>
 </s:iterator>


 </body>
</html>3, userAdd are used here. jsp
<%@ page language="java" import="java.util.*" pageEncoding="UTF-8"%>
<%@ taglib uri="/struts-tags" prefix="s"%>
<%@ taglib uri="http://java.sun.com/jsp/jstl/core" prefix="c"%>
<!DOCTYPE HTML PUBLIC "-//W3C//DTD HTML 4.01 Transitional//EN">
<html>
 <head>
 <title>用户添加</title>

 <meta http-equiv="pragma" content="no-cache">
 <meta http-equiv="cache-control" content="no-cache">
 <meta http-equiv="expires" content="0">
 <script type="text/javascript" src="/MySSH2/jquery-1.7.js"></script>
 <script type="text/javascript">
 function AddUser(){
 var submitData = $('#userForm').serialize();
 console.log(submitData);
 $.ajax({
    type : "post",
    url : "/MySSH2/user/manage_add",
    cache : false,
    data: submitData,
    dataType : 'json',
    success : function(result) {
    <span style="white-space:pre">  </span>if(result.success){
       window.opener.art.dialog({time:2,content:'保存成功'});
       setTimeout(function(){window.opener.location.reload();},3);
      }
      else{
      <span style="white-space:pre"> </span> window.opener.art.dialog({time:2,content:'保存失败'});
        setTimeout(function(){window.opener.location.reload();},3);
       }
       window.close();
      },
    error : function(XMLHttpRequest, textStatus,
      errorThrown) {
        alert("error");
      }
    });
 }
 </script>
 </head>

 <body>
 <s:form id="userForm" action="manage_add" namespace="/user" method="post">
  用户名:<s:textfield name="user.name"/><br/><s:token></s:token>
  <input type="button" value="保存" onclick="AddUser()"/>
 </s:form>
 </body>
</html>4, UserManageAction.java
package com.myssh2.action;

import java.io.IOException;
import java.io.PrintWriter;

import javax.annotation.Resource;
import javax.servlet.ServletException;

import org.apache.struts2.ServletActionContext;
import org.springframework.context.annotation.Scope;
import org.springframework.stereotype.Controller;

import com.myssh2.bean.User;
import com.myssh2.service.UserService;
import com.opensymphony.xwork2.ActionContext;
import com.opensymphony.xwork2.ActionSupport;


@Controller @Scope("prototype")
public class UserManageAction extends ActionSupport{
 @Resource UserService userService;
 private User user;

 public User getUser() {
  return user;
 }

 public void setUser(User user) {
  this.user = user;
 }

 public String addUI(){
  return "add";
 }

 public void add() throws ServletException, IOException{

  ServletActionContext.getResponse().setContentType("text/html;charset=utf-8");
  PrintWriter out = ServletActionContext.getResponse().getWriter();
  try {
   userService.addUser(user);
   ActionContext.getContext().put("message", "保存成功");
   out.write("{\"success\":true}");
  } catch (Exception e) {
    e.printStackTrace();
    out.write("{\"success\":false,\"msg\":\"error\"}");
  }
 }
}Page effect
 Use $('#userForm').serialize when submitting the form ();Serialized form data
setTimeout(function(){window.opener.location.reload();},3); Use a timer to refresh the page using window.open (or understand it as the parent page), dialog and reload time setting issues need to be readjusted.
I believe you have mastered the method after reading the case in this article. For more exciting information, please pay attention to other related articles on the php Chinese website!
Recommended reading:
How does ajax submit the form and implement file uploadHow does ajax background success upload json data deal withThe above is the detailed content of How to implement cross-page form submission with ajax. For more information, please follow other related articles on the PHP Chinese website!
 ajax tutorial
 Ajax Chinese garbled code solution
 What to do if an error occurs in the script of the current page
 What to do if ajax transmits Chinese garbled characters
 How to use panel control
 Advantages and Disadvantages of Free Overseas Website Servers
 How to build a database in MySQL
 How to use mysql workbench


