

How to use specified component cache of vue
This time I will bring you how to use vue's specified component cache. What are the precautions for using vue's specified component cache? . The following is a practical case, let's take a look.
keep-alive Introduction
keep-alive is a built-in component of Vue that allows included components to retain their state or avoid re- render.
Usage is also very simple:
<keep-alive>
 <component>
 <!-- 该组件将被缓存! -->
 </component>
</keep-alive>
props
##include - String or regular expression , only matching components will be cachedexclude - string or
regular expression, any matching components will not be cached
// 组件 a
export default {
 name: 'a',
 data () {
 return {}
 }
}
<keep-alive include="a">
 <component>
 <!-- name 为 a 的组件将被缓存! -->
 </component>
</keep-alive>可以保留它的状态或避免重新渲染
<keep-alive exclude="a">
 <component>
 <!-- 除了 name 为 a 的组件都将被缓存! -->
 </component>
</keep-alive>可以保留它的状态或避免重新渲染
<keep-alive include="test-keep-alive">
 <!-- 将缓存name为test-keep-alive的组件 -->
 <component></component>
</keep-alive>
<keep-alive include="a,b">
 <!-- 将缓存name为a或者b的组件,结合动态组件使用 -->
 <component :is="view"></component>
</keep-alive>
<!-- 使用正则表达式,需使用v-bind -->
<keep-alive :include="/a|b/">
 <component :is="view"></component>
</keep-alive>
<!-- 动态判断 -->
<keep-alive :include="includedComponents">
 <router-view></router-view>
</keep-alive>
<keep-alive exclude="test-keep-alive">
 <!-- 将不缓存name为test-keep-alive的组件 -->
 <component></component>
</keep-alive>meet vue-router
router-view is also a component. If it is directly wrapped in keep-alive, allview components matching the path will be cached:
<keep-alive>
 <router-view>
 <!-- 所有路径匹配到的视图组件都会被缓存! -->
 </router-view>
</keep-alive>
Question
What should I do if I only want a certain component in the router-view to be cached? ? Use include/excludeAdd the router.meta attribute
Use include/exclude
// 组件 a
export default {
 name: 'a',
 data () {
 return {}
 }
}
<keep-alive include="a">
 <router-view>
 <!-- 只有路径匹配到的视图 a 组件会被缓存! -->
 </router-view>
</keep-alive>// routes 配置
export default [
{
path: '/',
name: 'home',
component: Home,
meta: {
keepAlive: true // 需要被缓存
}
}, {
path: '/:id',
name: 'edit',
component: Edit,
meta: {
keepAlive: false // 不需要被缓存
}
}
]
<keep-alive>
<router-view v-if="$route.meta.keepAlive">
<!-- 这里是会被缓存的视图组件,比如 Home! -->
</router-view>
</keep-alive>
<router-view v-if="!$route.meta.keepAlive">
<!-- 这里是不被缓存的视图组件,比如 Edit! -->
</router-view>B jumps to A, A does not refresh
C jumps to A, A refreshes
Implementation method
{
 path: '/',
 name: 'A',
 component: A,
 meta: {
 keepAlive: true // 需要被缓存
 }
}export default {
data() {
return {};
},
methods: {},
beforeRouteLeave(to, from, next) {
// 设置下一个路由的 meta
to.meta.keepAlive = true; // 让 A 缓存,即不刷新
next();
}
};export default {
data() {
return {};
},
methods: {},
beforeRouteLeave(to, from, next) {
// 设置下一个路由的 meta
to.meta.keepAlive = false; // 让 A 不缓存,即刷新
next();
}
};Summary
The routing method is good, you don’t need to care about which page jumps to, just router.go(-1) can go back , no additional parameters are required. However, in non-single-page applications, keep-alive cannot be cached effectively = = I believe you have mastered the method after reading the case in this article. For more exciting information, please pay attention to php Chinese Other related articles online! Recommended reading:How to call child components from Angular parent components
How to learn vue for beginners
The above is the detailed content of How to use specified component cache of vue. For more information, please follow other related articles on the PHP Chinese website!

Hot AI Tools

Undresser.AI Undress
AI-powered app for creating realistic nude photos

AI Clothes Remover
Online AI tool for removing clothes from photos.

Undress AI Tool
Undress images for free

Clothoff.io
AI clothes remover

AI Hentai Generator
Generate AI Hentai for free.

Hot Article
Hot Tools

Notepad++7.3.1
Easy-to-use and free code editor

SublimeText3 Chinese version
Chinese version, very easy to use

Zend Studio 13.0.1
Powerful PHP integrated development environment

Dreamweaver CS6
Visual web development tools

SublimeText3 Mac version
God-level code editing software (SublimeText3)
Hot Topics
 1386
1386
 52
52

 How to use DirectX repair tool? Detailed usage of DirectX repair tool
Mar 15, 2024 am 08:31 AM
How to use DirectX repair tool? Detailed usage of DirectX repair tool
Mar 15, 2024 am 08:31 AM
The DirectX repair tool is a professional system tool. Its main function is to detect the DirectX status of the current system. If an abnormality is found, it can be repaired directly. There may be many users who don’t know how to use the DirectX repair tool. Let’s take a look at the detailed tutorial below. 1. Use repair tool software to perform repair detection. 2. If it prompts that there is an abnormal problem in the C++ component after the repair is completed, please click the Cancel button, and then click the Tools menu bar. 3. Click the Options button, select the extension, and click the Start Extension button. 4. After the expansion is completed, re-detect and repair it. 5. If the problem is still not solved after the repair tool operation is completed, you can try to uninstall and reinstall the program that reported the error.
 How to view and refresh dns cache in Linux
Mar 07, 2024 am 08:43 AM
How to view and refresh dns cache in Linux
Mar 07, 2024 am 08:43 AM
DNS (DomainNameSystem) is a system used on the Internet to convert domain names into corresponding IP addresses. In Linux systems, DNS caching is a mechanism that stores the mapping relationship between domain names and IP addresses locally, which can increase the speed of domain name resolution and reduce the burden on the DNS server. DNS caching allows the system to quickly retrieve the IP address when subsequently accessing the same domain name without having to issue a query request to the DNS server each time, thereby improving network performance and efficiency. This article will discuss with you how to view and refresh the DNS cache on Linux, as well as related details and sample code. Importance of DNS Caching In Linux systems, DNS caching plays a key role. its existence
 How to use Baidu Netdisk-How to use Baidu Netdisk
Mar 04, 2024 pm 09:28 PM
How to use Baidu Netdisk-How to use Baidu Netdisk
Mar 04, 2024 pm 09:28 PM
Many friends still don’t know how to use Baidu Netdisk, so the editor will explain how to use Baidu Netdisk below. If you are in need, hurry up and take a look. I believe it will be helpful to everyone. Step 1: Log in directly after installing Baidu Netdisk (as shown in the picture); Step 2: Then select "My Sharing" and "Transfer List" according to the page prompts (as shown in the picture); Step 3: In "Friend Sharing", you can share pictures and files directly with friends (as shown in the picture); Step 4: Then select "Share" and then select computer files or network disk files (as shown in the picture); Fifth Step 1: Then you can find friends (as shown in the picture); Step 6: You can also find the functions you need in the "Function Treasure Box" (as shown in the picture). The above is the editor’s opinion
 What is the KMS activation tool? How to use the KMS activation tool? How to use KMS activation tool?
Mar 18, 2024 am 11:07 AM
What is the KMS activation tool? How to use the KMS activation tool? How to use KMS activation tool?
Mar 18, 2024 am 11:07 AM
The KMS Activation Tool is a software tool used to activate Microsoft Windows and Office products. KMS is the abbreviation of KeyManagementService, which is key management service. The KMS activation tool simulates the functions of the KMS server so that the computer can connect to the virtual KMS server to activate Windows and Office products. The KMS activation tool is small in size and powerful in function. It can be permanently activated with one click. It can activate any version of the window system and any version of Office software without being connected to the Internet. It is currently the most successful and frequently updated Windows activation tool. Today I will introduce it Let me introduce to you the kms activation work
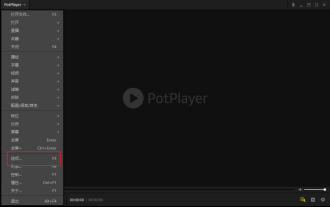 How to use potplayer-How to use potplayer
Mar 04, 2024 pm 06:10 PM
How to use potplayer-How to use potplayer
Mar 04, 2024 pm 06:10 PM
Potplayer is a very powerful media player, but many friends still don’t know how to use potplayer. Today I will introduce how to use potplayer in detail, hoping to help everyone. 1. PotPlayer shortcut keys. The default common shortcut keys for PotPlayer player are as follows: (1) Play/pause: space (2) Volume: mouse wheel, up and down arrow keys (3) forward/backward: left and right arrow keys (4) bookmark: P- Add bookmarks, H-view bookmarks (5) full screen/restore: Enter (6) multiple speeds: C-accelerate, 7) Previous/next frame: D/
 How to merge cells using shortcut keys
Feb 26, 2024 am 10:27 AM
How to merge cells using shortcut keys
Feb 26, 2024 am 10:27 AM
How to use the shortcut keys for merging cells In daily work, we often need to edit and format tables. Merging cells is a common operation that can merge multiple adjacent cells into one cell to improve the beauty of the table and the information display effect. In mainstream spreadsheet software such as Microsoft Excel and Google Sheets, the operation of merging cells is very simple and can be achieved through shortcut keys. The following will introduce the shortcut key usage for merging cells in these two software. exist
 Angular components and their display properties: understanding non-block default values
Mar 15, 2024 pm 04:51 PM
Angular components and their display properties: understanding non-block default values
Mar 15, 2024 pm 04:51 PM
The default display behavior for components in the Angular framework is not for block-level elements. This design choice promotes encapsulation of component styles and encourages developers to consciously define how each component is displayed. By explicitly setting the CSS property display, the display of Angular components can be fully controlled to achieve the desired layout and responsiveness.
 How to use Xiaoma win7 activation tool - How to use Xiaoma win7 activation tool
Mar 04, 2024 pm 06:16 PM
How to use Xiaoma win7 activation tool - How to use Xiaoma win7 activation tool
Mar 04, 2024 pm 06:16 PM
I believe that many users are using the Xiaoma win7 activation tool, but do you know how to use the Xiaoma win7 activation tool? Then, the editor will bring you how to use the Xiaoma win7 activation tool. For those who are interested in this, please come to the following article Let's see. The first step is to go to "My Computer" after reinstalling the system, click "System Properties" in the upper menu, and check the Windows activation status. In the second step, click to download the win7 activation tool online and click to open it (there are many resources available everywhere). The third step is to open the Xiaoma activation tool and click "Activate Windows permanently". The fourth step is to wait for the activation process to complete activation. Step 5: Check the Windows activation status again and find that the system has been activated.
