

How to implement webpack 4.0 packaging optimization
This time I will show you how to implement webpack 4.0 packaging optimization. What are the precautions for implementing webpack 4.0 packaging optimization? Here are practical cases, let’s take a look.
This article introduces a summary of webpack4.0 packaging optimization strategies and shares them with everyone. The details are as follows:
Introduction to new features of webapck4 - reference materials
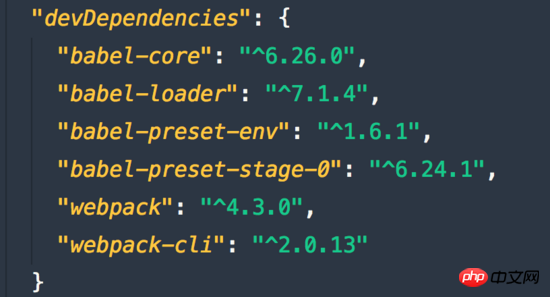
The version of the current dependent package
1. Optimize loader configuration
1.1 Narrow file matching range (include/exclude)
By excluding files under node_modules, the loader loading search range is narrowed down and the high probability of hitting files
  module: {
    rules: [
      {
        test: /\.js$/,
        use: 'babel-loader',
        exclude: /node_modules/, // 排除不处理的目录
        include: path.resolve(dirname, 'src') // 精确指定要处理的目录
      }
    ]
}1.2 Cache the execution results of the loader (cacheDirectory)
cacheDirectory is a specific option of the loader, and the default value is false. The specified directory (use: 'babel-loader?cacheDirectory=cacheLoader') will be used to cache the execution results of the loader, reducing the Babel recompilation process during webpack build. If set to an empty value (use: 'babel-loader?cacheDirectory') or true (use: 'babel-loader?cacheDirectory=true') the default cache directory (node_modules/.cache/babel-loader) will be used, if in If the node_modules directory is not found in any root directory, it will downgrade and fall back to the operating system's default temporary file directory.
module: {
  rules: [
    {
      test: /\.js$/,
      use: 'babel-loader?cacheDirectory', // 缓存loader执行结果 发现打包速度已经明显提升了
      exclude: /node_modules/,
      include: path.resolve(dirname, 'src')
    }
  ]
}2.resolve optimization configuration
2.1 Optimization module search path resolve.modules
Webpack's resolve.modules configures the location of the module library (i.e. node_modules). When import 'vue' appears in js, which is neither a relative nor an absolute path, it will be found in the node_modules directory. However, the default configuration will be found through upward recursive search, but usually there is only one node_modules in the project directory, and it is in the project root directory. In order to reduce the search scope, you can directly specify the full path of node_modules; similarly, for aliases ( alias) configuration, the same should be true:

const path = require('path');
function resolve(dir) { // 转换为绝对路径
  return path.join(dirname, dir);
}
resolve: {
  modules: [ // 优化模块查找路径
    path.resolve('src'),
    path.resolve('node_modules') // 指定node_modules所在位置 当你import 第三方模块时 直接从这个路径下搜索寻找
  ]
}After configuring the location of the src directory, since the util directory is in src, you can use the following method to introduce the tools in util Function
// main.js
import dep1 from 'util/dep1';
import add from 'util/add';
2.2 resolve.alias Configure path alias
Create a path alias for import or require to ensure that module introduction becomes easier. The configuration item maps the original import path to a new import path through aliases. This optimization method will affect the use of Tree-Shaking to remove invalid code
For example, some common modules located in the src/ folder:
alias: {
 Utilities: path.resolve(dirname, 'src/utilities/'),
 Templates: path.resolve(dirname, 'src/templates/')
}Now, replace the "use relative path when importing" method with something like this:
import Utility from '../../utilities/utility';
You can use the alias like this:
import Utility from 'Utilities/utility';
resolve: {
  alias: { // 别名配置 通过别名配置 可以让我们引用变的简单
    'vue$': 'vue/dist/vue.common.js', // $表示精确匹配
    src: resolve('src') // 当你在任何需要导入src下面的文件时可以 import moduleA from 'src/moduleA' src会被替换为resolve('src') 返回的绝对路径 而不需要相对路径形式导入
  }
}Also in the given object Add $ at the end after the key to indicate an exact match:
alias: {
  util$: resolve('src/util/add.js')
}This will produce the following results:
import Test1 from 'util'; // 精确匹配,所以 src/util/add.js 被解析和导入
import Test2 from 'util/dep1.js'; // 精确匹配,触发普通解析 util/dep1.js
2.3resolve.extensions
When introduced When the module does not have a file suffix, webpack will automatically parse the determined file suffix according to this configuration
The suffix list should be as small as possible
The most frequent Preface
as much as possible with the suffix
resolve: {
  extensions: ['.js', '.vue']
}3.module.noParse
Modules that use noParse will not be parsed by loaders, so if the library we use is too large and does not contain import require and define calls, we can use this configuration to improve performance. , let Webpack ignore the recursive parsing of some files that do not use Modularization.
// 忽略对jquery lodash的进行递归解析
module: {
  // noParse: /jquery|lodash/
  // 从 webpack 3.0.0 开始
  noParse: function(content) {
    return /jquery|lodash/.test(content)
  }
}4.HappyPack
HappyPack allows webpack to expand the execution process of the loader from a single process form to a multi-process mode, that is Decompose the task to multiple sub-processes for concurrent execution. After the sub-processes complete the processing, the results are sent to the main process. This speeds up code construction and is better used in combination with DLL dynamic link libraries.
npm i happypack@next -D
webpack.config.js
const HappyPack = require('happypack');
const os = require('os'); // node 提供的系统操作模块
 // 根据我的系统的内核数量 指定线程池个数 也可以其他数量
const happyThreadPool = HappyPack.ThreadPool({size: os.cpus().lenght})
module: {
  rules: [
    {
      test: /\.js$/,
      use: 'happypack/loader?id=babel',
      exclude: /node_modules/,
      include: path.resolve(dirname, 'src')
    }
  ]
},
plugins: [
  new HappyPack({ // 基础参数设置
    id: 'babel', // 上面loader?后面指定的id
    loaders: ['babel-loader?cacheDirectory'], // 实际匹配处理的loader
    threadPool: happyThreadPool,
    // cache: true // 已被弃用
    verbose: true
  });
]happypack提供的loader,是对文件实际匹配的处理loader。这里happypack提供的loader与plugin的衔接匹配,则是通过id=happypack来完成。
npm run dev
5.DLL动态链接库
在一个动态链接库中可以包含其他模块调用的函数和数据,动态链接库只需被编译一次,在之后的构建过程中被动态链接库包含的模块将不会被重新编译,而是直接使用动态链接库中的代码。
将web应用依赖的基础模块抽离出来,打包到单独的动态链接库中。一个链接库可以包含多个模块。
当需要导入的模块存在于动态链接库,模块不会再次打包,而是去动态链接库中去获取。
页面依赖的所有动态链接库都需要被加载。
5.1 定义DLL配置
依赖的两个内置插件:DllPlugin 和 DllReferencePlugin
5.1.1 创建一个DLL配置文件webpack_dll.config.js
module.exports = {
entry: {
react: ['react', 'react-dom']
},
output: {
filename: '[name].dll.js', // 动态链接库输出的文件名称
path: path.join(dirname, 'dist'), // 动态链接库输出路径
libraryTarget: 'var', // 链接库(react.dll.js)输出方式 默认'var'形式赋给变量 b
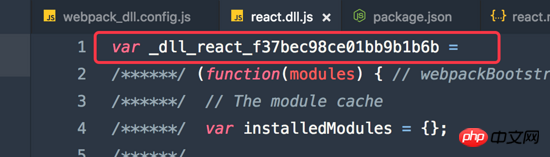
library: '_dll_[name]_[hash]' // 全局变量名称 导出库将被以var的形式赋给这个全局变量 通过这个变量获取到里面模块
},
plugins: [
new webpack.DllPlugin({
// path 指定manifest文件的输出路径
path: path.join(dirname, 'dist', '[name].manifest.json'),
name: '_dll_[name]_[hash]', // 和library 一致,输出的manifest.json中的name值
})
]
}5.1.2 output.libraryTarget 规定了以哪一种导出你的库 默认以全局变量形式 浏览器支持的形式
具体包括如下:
"var" - 以直接变量输出(默认library方式) var Library = xxx (default)
"this" - 通过设置this的属性输出 this["Library"] = xxx
"commonjs" - 通过设置exports的属性输出 exports["Library"] = xxx
"commonjs2" - 通过设置module.exports的属性输出 module.exports = xxx
"amd" - 以amd方式输出
"umd" - 结合commonjs2/amd/root
5.1.3 打包生成动态链接库
webpack --config webpack_dll.config.js --mode production
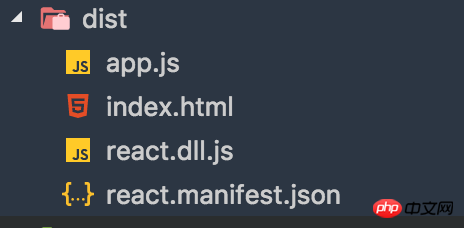
在dist目录下 多出react.dll.js 和 react.manifest.json
react.dll.js 动态链接库 里面包含了 react和react-dom的内容
react.manifest.json 描述链接库(react.dll)中的信息
5.2 在主配置文件中使用动态链接库文件
// webpack.config.js
const webpack = require('webpack');
plugins: [
  // 当我们需要使用动态链接库时 首先会找到manifest文件 得到name值记录的全局变量名称 然后找到动态链接库文件 进行加载
  new webpack.DllReferencePlugin({
    manifest: require('./dist/react.manifest.json')
  })
]5.3 将动态链接库文件加载到页面中
需要借助两个webpack插件
html-webpack-plugin 产出html文件
html-webpack-include-assets-plugin 将js css资源添加到html中 扩展html插件的功能
npm i html-webpack-plugin html-webpack-include-assets-plugin -D
配置webpack.config.js
const webpack = require('webpack');
const HtmlWebpackPlugin = require('html-webpack-plugin');
const HtmlIncludeAssetsPlugin = require('html-webpack-include-assets-plugin');
pluings: [
  new webpack.DllReferencePlugin({
    manifest: require('./dist/react.manifest.json')
  }),
  new HtmlWebpackPlugin({
    template: path.join(dirname, 'src/index.html')
  }),
  new HtmlIncludeAssetsPlugin({
    assets: ['./react.dll.js'], // 添加的资源相对html的路径
    append: false // false 在其他资源的之前添加 true 在其他资源之后添加
  });
]此时react.dll.js和main.js被自动引入到页面中,并且dll文件在main.js之前加载

6.ParallelUglifyPlugin
这个插件可以帮助有很多入口点的项目加快构建速度。把对JS文件的串行压缩变为开启多个子进程并行进行uglify。
cnpm i webpack-parallel-uglify-plugin -D
// webpck.config.js
const ParallelUglifyPlugin = require('webpack-parallel-uglify-plugin');
plugins: [
  new ParallelUglifyPlugin({
    workerCount: 4,
    uglifyJS: {
      output: {
        beautify: false, // 不需要格式化
        comments: false // 保留注释
      },
      compress: { // 压缩
        warnings: false, // 删除无用代码时不输出警告
        drop_console: true, // 删除console语句
        collapse_vars: true, // 内嵌定义了但是只有用到一次的变量
        reduce_vars: true // 提取出出现多次但是没有定义成变量去引用的静态值
      }
    }
  });
]执行压缩
webpack --mode production
7.Tree Shaking
剔除JavaScript中用不上的代码。它依赖静态的ES6模块化语法,例如通过impot和export导入导出
commonJS模块 与 es6模块的区别
commonJS模块:
1.动态加载模块 commonJS 是运行时加载 能够轻松实现懒加载,优化用户体验
2.加载整个模块 commonJS模块中,导出的是整个模块
3.每个模块皆为对象 commonJS模块被视作一个对象
4.值拷贝 commonJS的模块输出和函数的值传递相似,都是值得拷贝
es6模块
1.静态解析 es6模块时 编译时加载 即在解析阶段就确定输出的模块的依赖关系,所以es6模块的import一般写在被引入文件的开头
2.模块不是对象 在es6里,每个模块并不会当做一个对象看待
3.加载的不是整个模块 在es6模块中 一个模块中有好几个export导出
4.模块的引用 es6模块中,导出的并不是模块的值得拷贝,而是这个模块的引用
7.1 保留ES6模块化语法
// .babelrc
{
  "presets": [
    [
      "env", {
        modules: false // 不要编译ES6模块
      },
      "react",
      "stage-0"
    ]
  ]
}7.2 执行生产编译 默认已开启Tree Shaking
webpack --mode production
什么是Tree Shaking?
有个funs.js 里面有两个函数
// funs.js
export const sub = () => 'hello webpack!';
export const mul = () => 'hello shaking!';
main.js 中依赖funs.js
// main.js
import {sub} from './funs.js'
sub();在main.js只使用了里面的 sub函数 默认情况下也会将funs.js里面其他没有的函数也打包进来, 如果开启tree shaking 生产编译时
webpack --mode production //此时funs.js中没有被用到的代码并没打包进来 而被剔除出去了
相信看了本文案例你已经掌握了方法,更多精彩请关注php中文网其它相关文章!
推荐阅读:
The above is the detailed content of How to implement webpack 4.0 packaging optimization. For more information, please follow other related articles on the PHP Chinese website!

Hot AI Tools

Undresser.AI Undress
AI-powered app for creating realistic nude photos

AI Clothes Remover
Online AI tool for removing clothes from photos.

Undress AI Tool
Undress images for free

Clothoff.io
AI clothes remover

AI Hentai Generator
Generate AI Hentai for free.

Hot Article
Hot Tools

Notepad++7.3.1
Easy-to-use and free code editor

SublimeText3 Chinese version
Chinese version, very easy to use

Zend Studio 13.0.1
Powerful PHP integrated development environment

Dreamweaver CS6
Visual web development tools

SublimeText3 Mac version
God-level code editing software (SublimeText3)
Hot Topics
 1371
1371
 52
52

 How to implement dual WeChat login on Huawei mobile phones?
Mar 24, 2024 am 11:27 AM
How to implement dual WeChat login on Huawei mobile phones?
Mar 24, 2024 am 11:27 AM
How to implement dual WeChat login on Huawei mobile phones? With the rise of social media, WeChat has become one of the indispensable communication tools in people's daily lives. However, many people may encounter a problem: logging into multiple WeChat accounts at the same time on the same mobile phone. For Huawei mobile phone users, it is not difficult to achieve dual WeChat login. This article will introduce how to achieve dual WeChat login on Huawei mobile phones. First of all, the EMUI system that comes with Huawei mobile phones provides a very convenient function - dual application opening. Through the application dual opening function, users can simultaneously
 How to implement the WeChat clone function on Huawei mobile phones
Mar 24, 2024 pm 06:03 PM
How to implement the WeChat clone function on Huawei mobile phones
Mar 24, 2024 pm 06:03 PM
How to implement the WeChat clone function on Huawei mobile phones With the popularity of social software and people's increasing emphasis on privacy and security, the WeChat clone function has gradually become the focus of people's attention. The WeChat clone function can help users log in to multiple WeChat accounts on the same mobile phone at the same time, making it easier to manage and use. It is not difficult to implement the WeChat clone function on Huawei mobile phones. You only need to follow the following steps. Step 1: Make sure that the mobile phone system version and WeChat version meet the requirements. First, make sure that your Huawei mobile phone system version has been updated to the latest version, as well as the WeChat App.
 PHP Programming Guide: Methods to Implement Fibonacci Sequence
Mar 20, 2024 pm 04:54 PM
PHP Programming Guide: Methods to Implement Fibonacci Sequence
Mar 20, 2024 pm 04:54 PM
The programming language PHP is a powerful tool for web development, capable of supporting a variety of different programming logics and algorithms. Among them, implementing the Fibonacci sequence is a common and classic programming problem. In this article, we will introduce how to use the PHP programming language to implement the Fibonacci sequence, and attach specific code examples. The Fibonacci sequence is a mathematical sequence defined as follows: the first and second elements of the sequence are 1, and starting from the third element, the value of each element is equal to the sum of the previous two elements. The first few elements of the sequence
 Master how Golang enables game development possibilities
Mar 16, 2024 pm 12:57 PM
Master how Golang enables game development possibilities
Mar 16, 2024 pm 12:57 PM
In today's software development field, Golang (Go language), as an efficient, concise and highly concurrency programming language, is increasingly favored by developers. Its rich standard library and efficient concurrency features make it a high-profile choice in the field of game development. This article will explore how to use Golang for game development and demonstrate its powerful possibilities through specific code examples. 1. Golang’s advantages in game development. As a statically typed language, Golang is used in building large-scale game systems.
 PHP Game Requirements Implementation Guide
Mar 11, 2024 am 08:45 AM
PHP Game Requirements Implementation Guide
Mar 11, 2024 am 08:45 AM
PHP Game Requirements Implementation Guide With the popularity and development of the Internet, the web game market is becoming more and more popular. Many developers hope to use the PHP language to develop their own web games, and implementing game requirements is a key step. This article will introduce how to use PHP language to implement common game requirements and provide specific code examples. 1. Create game characters In web games, game characters are a very important element. We need to define the attributes of the game character, such as name, level, experience value, etc., and provide methods to operate these
 How to implement exact division operation in Golang
Feb 20, 2024 pm 10:51 PM
How to implement exact division operation in Golang
Feb 20, 2024 pm 10:51 PM
Implementing exact division operations in Golang is a common need, especially in scenarios involving financial calculations or other scenarios that require high-precision calculations. Golang's built-in division operator "/" is calculated for floating point numbers, and sometimes there is a problem of precision loss. In order to solve this problem, we can use third-party libraries or custom functions to implement exact division operations. A common approach is to use the Rat type from the math/big package, which provides a representation of fractions and can be used to implement exact division operations.
 Is PHP front-end or back-end in web development?
Mar 24, 2024 pm 02:18 PM
Is PHP front-end or back-end in web development?
Mar 24, 2024 pm 02:18 PM
PHP belongs to the backend in web development. PHP is a server-side scripting language, mainly used to process server-side logic and generate dynamic web content. Compared with front-end technology, PHP is more used for back-end operations such as interacting with databases, processing user requests, and generating page content. Next, specific code examples will be used to illustrate the application of PHP in back-end development. First, let's look at a simple PHP code example for connecting to a database and querying data:
 How to enable administrative access from the cockpit web UI
Mar 20, 2024 pm 06:56 PM
How to enable administrative access from the cockpit web UI
Mar 20, 2024 pm 06:56 PM
Cockpit is a web-based graphical interface for Linux servers. It is mainly intended to make managing Linux servers easier for new/expert users. In this article, we will discuss Cockpit access modes and how to switch administrative access to Cockpit from CockpitWebUI. Content Topics: Cockpit Entry Modes Finding the Current Cockpit Access Mode Enable Administrative Access for Cockpit from CockpitWebUI Disabling Administrative Access for Cockpit from CockpitWebUI Conclusion Cockpit Entry Modes The cockpit has two access modes: Restricted Access: This is the default for the cockpit access mode. In this access mode you cannot access the web user from the cockpit
