This article is mainly for everyone to get started quickly with Threejs. It has certain reference value. Interested friends can refer to it.
Now everything is 3D, watching movies in 3D, playing games in 3D, I guess 3D taxi hailing will be available soon. So as the standard languages for front-end development, can JS and 3D also make some big news? Just recently when I was doing an event, I encountered the need to play 3D panoramic video, and by the way, I studied Threejs, A JS library for drawing 3D images in the browser (https://github.com/mrdoob/three.js), this article can be regarded as a note, and I hope it can help those students who want to get started quickly.
First of all, before formally learning Threejs, there are several concepts that need to be explained. Threejs actually calls the canvas api in HTML5 at the bottom level to implement drawing. But unlike our general drawing of 2D images, Threejs uses the webgl context of canvas at the bottom layer to implement 3D drawing. The webgl context itself is more of a direct operation of the GPU, which is quite unintuitive to use. For this reason, Threejs handles various elements required for 3D drawing at the top level (such as Scenes, cameras, lights, geometric images, materials, etc.) are encapsulated. If we need to use Threejs to draw, we only need to create a minimum drawing environmentThat’s it, this minimal drawing environment contains three elements:
1. Scene – a container containing all 3D objects that need to be displayed and other related elements
2. Camera--Determines how the 3D scene is projected onto the 2D canvas
3. Renderer- -The brush used for the final drawing
The specific code is as follows:
<p class="km_insert_code">    import { Scene, PerspectiveCamera, WebGLRenderer } from ‘three’;    var scene = new Scene(); // 创建场景

    var camera = new PerspectiveCamera(45, window.innerWidth / window.innerHeight, 1, 1000); // 创建摄影机
    camera.position.z = 8;    var renderer = new WebGLRenderer(); // 创建渲染器
    renderer.setSize(window.innerWidth, window.innerHeight); // 设置画布大小
    renderer.setPixelRatio(window.devicePixelRatio); // 设置像素比,针对高清屏
    renderer.setClearColor(0x000000, 1); // 设置默认背景色

document.body.appendChild(renderer.domElement); // 把画笔插入到dom中</p>With a few simple codes, you can create aminimum drawing Environment, as long as we put the 3D objects that need to be displayed into this environment, these objects will be drawn in the canvas and displayed on the screen.
3D**Object**
With the environment, we also need to tell Threejs what objects need to be displayed. To do this, we first need to define the object for display and then add it to the scene.
<p class="km_insert_code">    import { Mesh, MeshBasicMaterial, BoxGeometry } from ‘three’;    var geometry = new BoxGeometry(1, 1, 1); // 创建一个长方体,用来定义物体的形状

    var material = new MeshBasicMaterial({ color: 0xff0000 }); // 创建一个材质,用来定义物体的颜色

    var mesh = new Mesh(geometry, material); // 使用形状和素材,来定义物体

    scene.add(mesh);

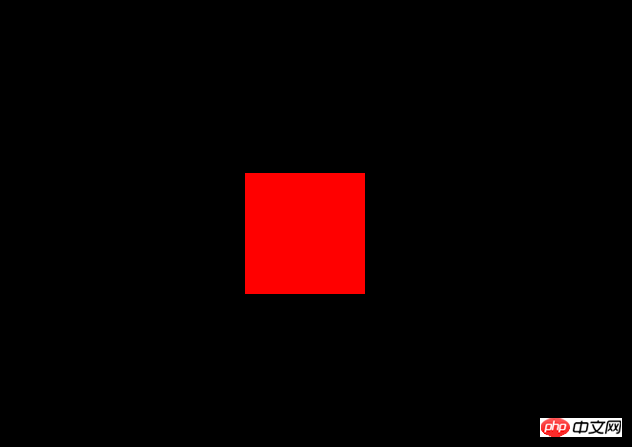
renderer.render(scene, camera);</p>Let’s take a look at the effect first

Why it feels so boring, hahaha, but no matter what, we can already draw things.
I guess everyone will have some questions after reading the above code, thattexture# What the hell is ##, and what are geometry and material used for. In fact, when Threejs defines a 3D object, it needs to provide two pieces of information. The first is the shape information, that is, the coordinate information of each point and each face on the object,The second is the material information, which is used to tell Threejs the color, texture, reflection and other information of the object. With this information, Threejs knows how to render this object. The new BoxGeometry(1, 1, 1) above tells Threejs that I want to display a rectangle with a length, width and height of 1. And new MeshBasicMaterial({ color: 0xff0000}) is to tell Threejs that this cuboid is red. Finally, based on the shape and material, new Mesh(geometry, material), the object to be displayed is generated.
As mentioned above, if you want to generate a cuboid in Threejs, you need to define a BoxGeometry. In addition to the cuboid, Threejs can also generate shapes:1.BoxGeometry --cuboid
2.CircleGeometry--圆形平面
3.CylinderGeometry--圆柱体
4.PlaneGeometry--方形平面
5.RingGeometry--环形平面
6.SphereGeometry--球形
7.TextGeometry--文字
8.TorusGeometry--圆环
9.TubeGeometry--圆管
另外上面写到的MeshBasicMaterial,其实是指一个直接就能显示颜色的材质。什么叫直接显示颜色呢?这里要涉及到Threejs里的灯光设置。物体的材质由于确定物体的颜色,纹理,以及反光等属性。要反光,首先需要有一个光源:
<p class="km_insert_code">    import { SpotLight } from ‘three’;    var light = new SpotLight(0xffffff);
    light.position.z = 5;
    light.position.x = 5;
    light.position.y = 5;

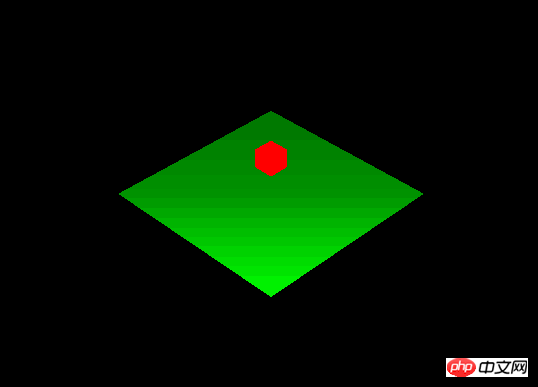
scene.add(light);</p>这里我们定义了一个白光源,具体的效果如下:

为了可以看清楚效果,我在场景中加入了一个绿色平面,可以看到,这个绿色平面上的反光是从下到上减弱,可见,这个光源是在画面的下方。
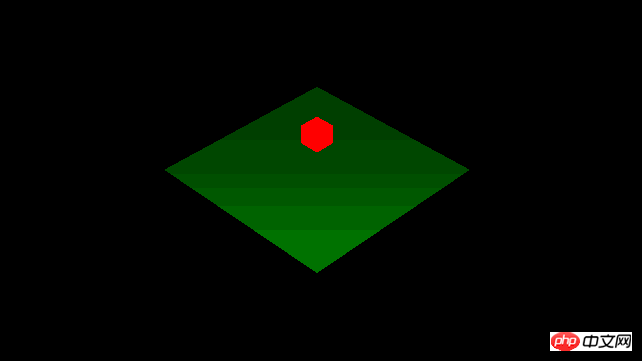
如果我把光源的强度减弱,那么平面上的反光也会跟着减弱:

但不知大家有木有发现,绿色平面上的反光是减弱了,但红色的那个长方体,还是一样的红,完全没有变化。其实这就体现出不同材质的区别了,在红色长方体上,我采用的是MeshBasicMaterial这种材质,而在绿色平面上,我采用的是另一种称为MeshLambertMaterial的材质,这种材质的特点是漫反射强烈,主要用来模拟真实环境下的物体,例如木材,石料等物质的反光情况。另外Threejs还有另外一种材质叫MeshPhongMaterial,这种材质主要是镜面反射强烈,用来模拟镜子,金属等拥有高光的物体就比较合适。
MeshLambertMaterial和MeshPhongMaterial两种材质,都是需要光照才能看到的,如果场景中没有光源,你将会什么都看不到。相反我们在红色长方体上采用的材质是MeshBasicMaterial,这种材质即使没有光,也可以看到,你可以想象为它自己发光吧,如果用技术一点的话来说,就是MeshLambertMaterial和MeshPhongMaterial两种材质需要根据场景光线的数值来计算显示在屏幕上的颜色,而MeshBasicMaterial则忽略光线的作用,是什么颜色,就直接显示什么颜色,但也由于这种材质忽略了光照的作用,那么它也不会有任何阴影的效果。所以这种材质就叫Basic,用来做演示就十分合适。一下就是Threejs提供给我们用到的其他材质
1.MeshBasicMaterial
2.MeshLambertMaterial--漫反射材质
3.MeshPhongMaterial--镜面反射材质
4.MeshDepthMaterial--根据物体上每一点到摄像机的远近来显示颜色,远的显示黑色,近的显示白色
5.MeshNormalMaterial--根据物体上每一面的法向量方向来显示颜色
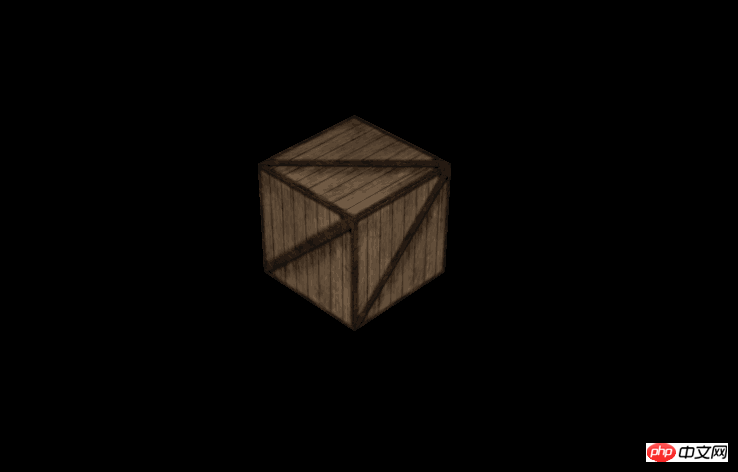
如果绘制3D物体时,只能使用纯色,那也未免太单调了,没关系,Threejs提供了接口来帮忙解决这个问题。Threejs的材质,除了可以设置颜色,还支持纹理贴图,我们可以把一个图片,覆盖在3D物体上作为他的纹理,这样就可以利用这些贴图来模拟更真实的场景
<p class="km_insert_code"> import { TextureLoader, MeshLambertMaterial } from ‘three’; var texture = new TextureLoader().load(‘./assets/texture/crate.gif’); var material = new MeshLambertMaterial({ map: texture });</p>上面的代码中,我们通过TextureLoader来加载一个gif图作为纹理,并且把这个纹理通过map属性映射到了材质上,加上材质后,整个物体就更加真实了

3D动画
能绘图了,但如何加入动画呢?其实很简单,在之前的代码中已经讲解过,Threejs是通过渲染器来绘图的,你可以想象成拍照。我们在场景中摆好灯光,摆好道具,渲染器咔嚓一下,就把当前的画面绘制下来了。那如果要做成动画,只需要在渲染器来个定时连拍就可以拉。具体如下。
<p class="km_insert_code">    function render() {
        requestAnimationFrame(render);
        update();
        renderer.render(scene, camera);
    }    function update() {        // update your view
    }

</p>这里我们通过requestAnimationFrame接口,来做定时刷新,每次进入render方法,都会先去执行update方法(用于更新场景),然后让渲染器拍照(renderer.render(scene, camera)),最后等待下一次render。在update方法中,我们可以修改场景中所有物体的参数,例如,我们可以试着让盒子在屏幕中转动:
<p class="km_insert_code">    function update() {
        box.rotation.x += 0.005;
        box.rotation.y += 0.01;
    }

</p>最后的最后,其实Threejs还有很多额外的能力,例如刚刚我们使用图片作为纹理,那么我们也可以使用视频作为纹理,把这个纹理贴到一个盒子上,通过陀螺仪来控制摄像机的拍摄方向,就可以作出一个全景视频啦。Threejs也支持粒子系统,模型数据导入,自定义着色器等一系列高级功能,大家也赶快掌握起来吧。
The above is the detailed content of Quick Start with Threejs. For more information, please follow other related articles on the PHP Chinese website!


