Illustration of npm installation tutorial in vue.js
This article mainly introduces the npm installation tutorial diagram in vue.js. Now I share it with everyone. Friends in need can refer to it
First clarify the relationship between nodejs and npm:
Node.js is a running environment for JavaScript and an encapsulation of the Google V8 engine. It is a server-side JavaScript interpreter.
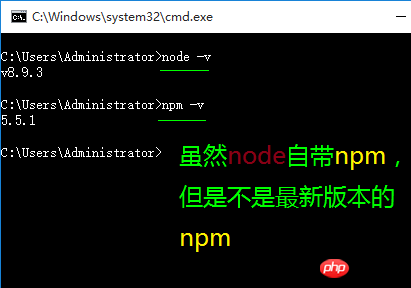
Inclusion relationship, nodejs contains npm. For example, if you install nodejs, you will find the version number of npm when you open cmd and enter npm -v, indicating that npm has been installed.
Quote from the master’s summary:
In fact, npm is the package manager of nodejs. When we develop on Node.js, we will use a lot of javascript codes that have been written by others. If every time we need someone else's code, we have to search it by name, download the source code, decompress it, and then use it, it will be very troublesome. So the package manager npm appeared. Everyone uploads the source code they have written to the npm official website. If you want to use one or more of them, you can install it directly through npm, regardless of where the source code is. And if we want to use module A, and module A depends on module B, and module B depends on modules C and D, npm will download and manage all dependent packages based on the dependency relationships. Just imagine how troublesome it would be if we had to do all this work ourselves!
node -v View node version, built-in package npm Manager to install dependent packages.
npm install -g typescript
1. Before using it, let’s first understand what the three things are used for.
npm: Package manager under Nodejs. webpack: Its main purpose is to prepare all static resources that need to be published by the browser through CommonJS syntax, such as merging and packaging resources. vue-cli: User-generated Vue project template. (Helps you quickly start a vue project, that is, it gives you a set of vue structures, including basic dependency libraries, which can be installed with just npm install) Start:
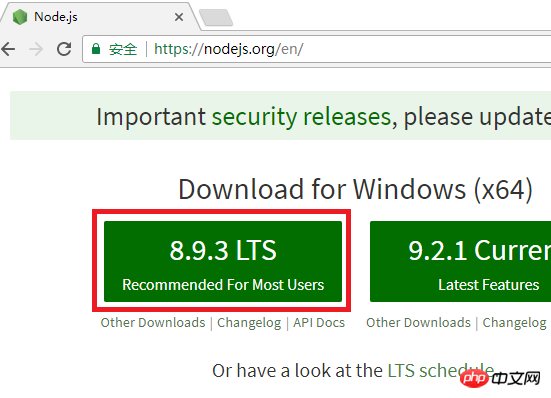
As shown in the picture, download 8.9.3 LTS (recommended for most users)
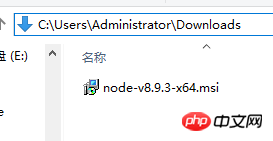
Double-click to install
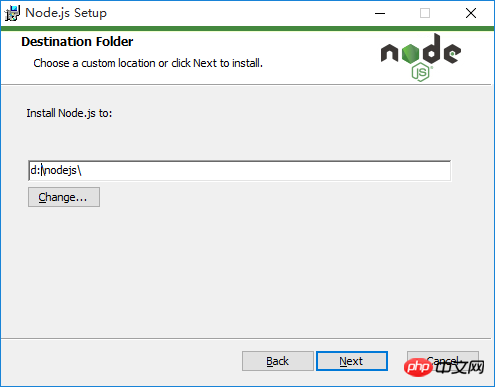
You can use the default path. In this example, modify it to d:\nodejs
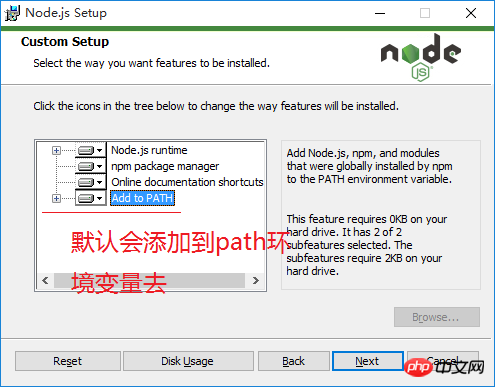
Click Next
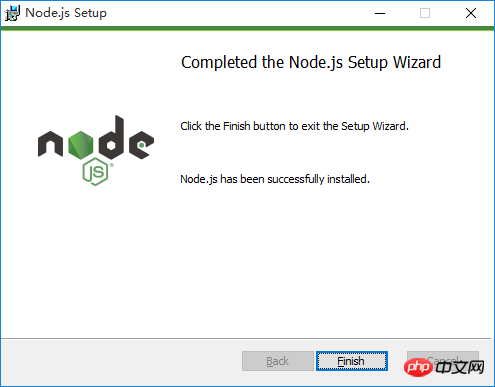
Click Finish Complete
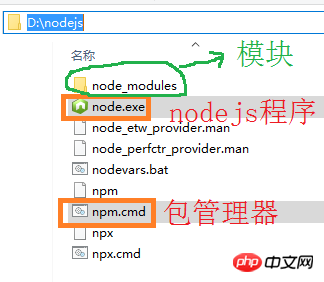
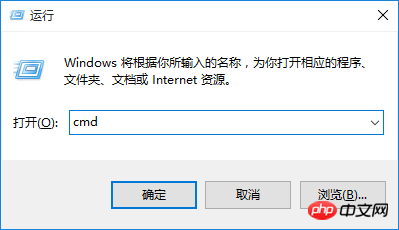
Open CMD and check if it is normal
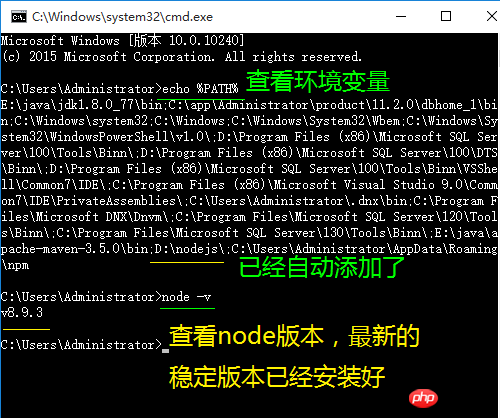
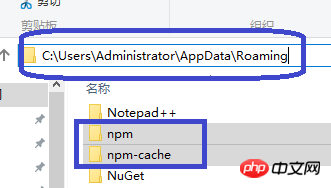
Looking at the other two directories, npm’s local warehouse is running in the user directory of the system disk c drive (I didn’t see npm-cache because I haven’t used it before. Generated using the cache directory), we tried to move these two directories back to D:\nodejs. First create the two directories as shown below
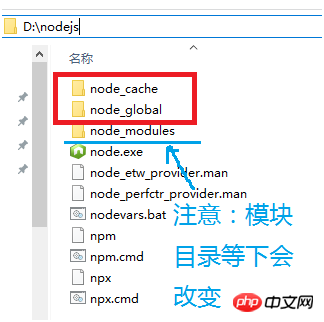
and then run the following two commands. npm config set prefix "D:\nodejs\node_global" npm config set cache "D:\nodejs\node_cache"
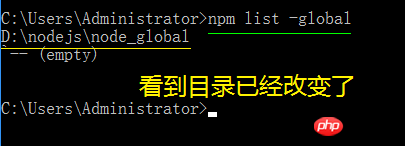
As shown above, let's pay attention to npm's local warehouse , enter the command npm list -global

Enter the command npm config set registry=http://registry.npm.taobao.org to configure the mirror station
 Enter
Enter
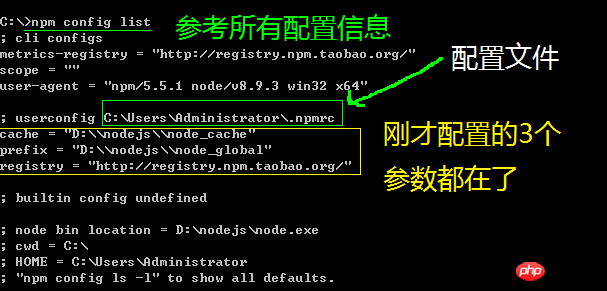
The command npm config list displays all configuration information. We focus on a configuration file C:\Users\Administrator\.npmrc
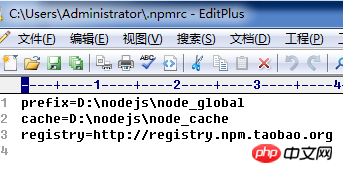
Use a text editor to edit it, you can see Go to the configuration information just now

Check whether the mirror station is OK. Command 1 npm config get registry

Check if the mirror station works. Command 2 Npm info vue to see if you can get vue information
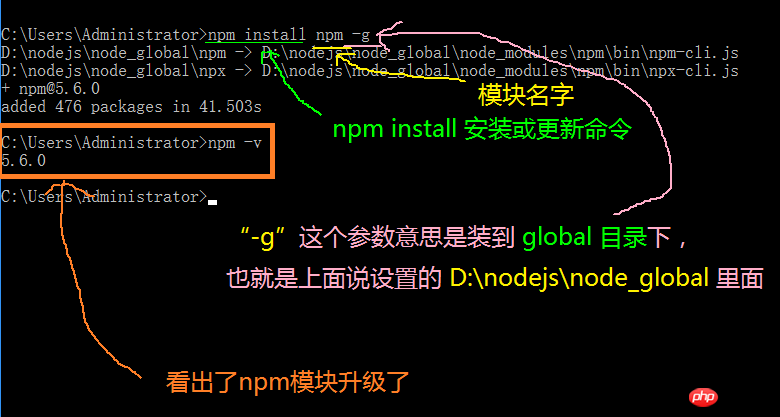
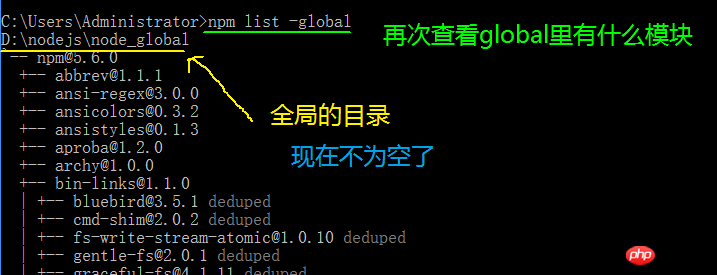
Note At this time, the default module directory D:\nodejs\node_modules will be changed to the directory D:\nodejs\node_global\node_modules. If you directly run commands such as npm install, an error will be reported. We need to do one thing: 1. Add the environment variable NODE_PATH. The content is: D:\nodejs\node_global\node_modules
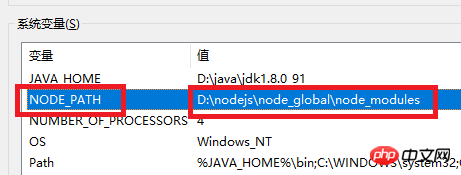
(Note that you need to reopen CMD for this operation. The environment variables take effect) 1. Test the NPM installation vue.js command: npm install vue -g The -g here refers to installing to the global global directory
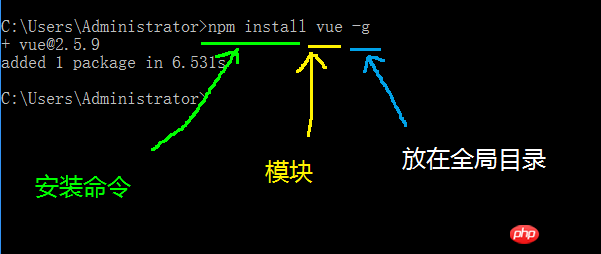
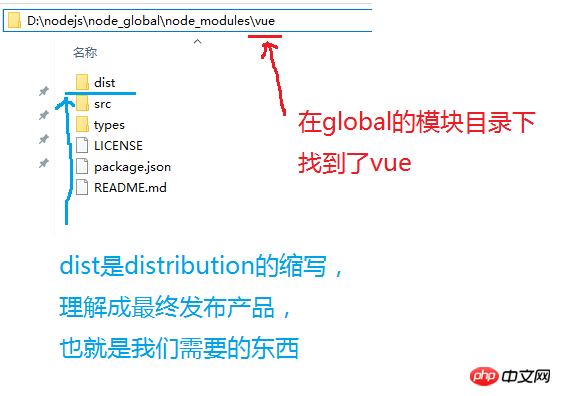
2. Test NPM installation vue-router command: npm install vue-router -g

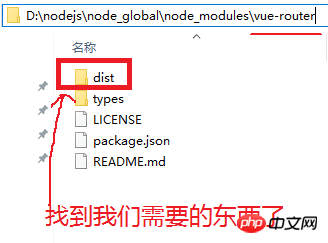
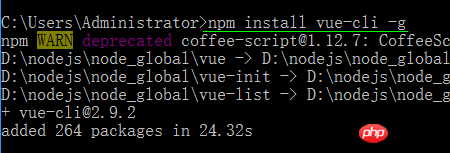
Run npm install vue-cli -g to install vue scaffolding
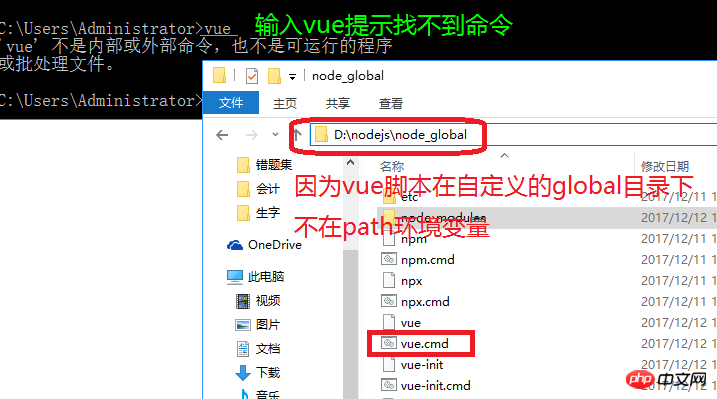

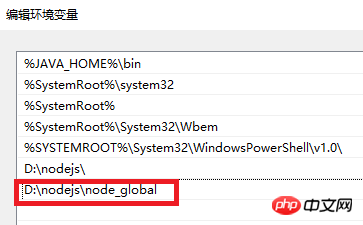
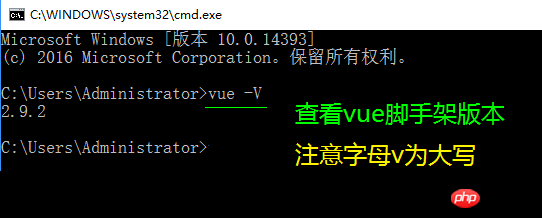

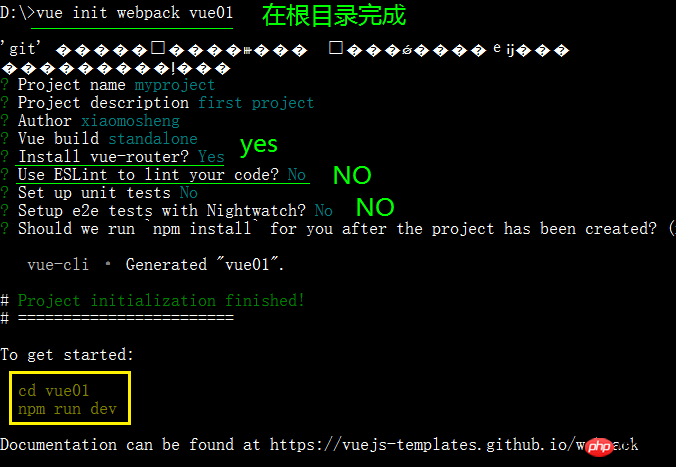
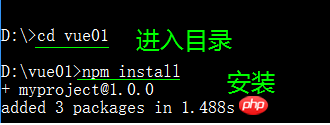


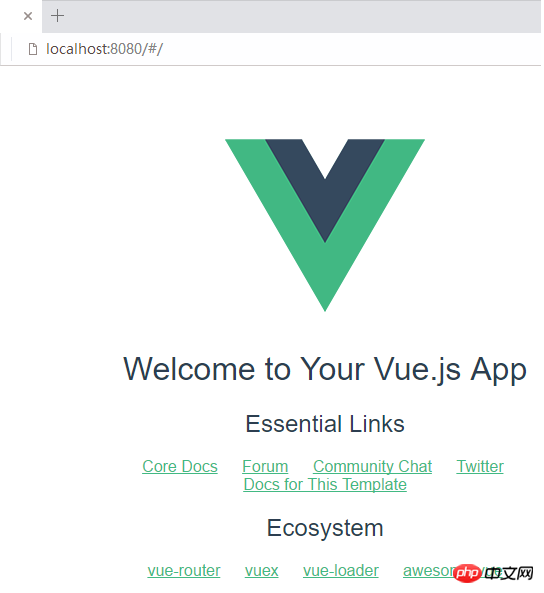

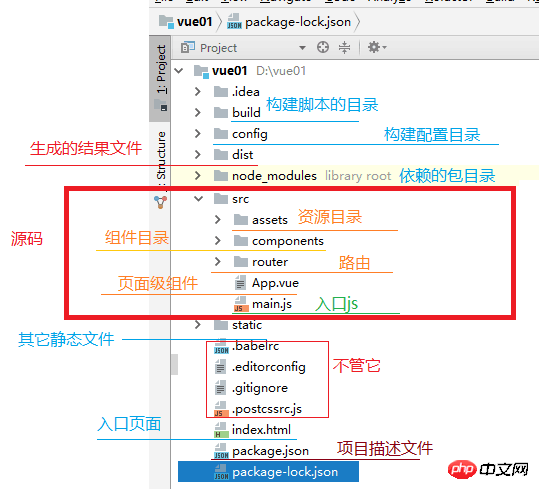
npm run build generates static files, open the newly generated index.html file in the dist folder, and the directory description of the newly created vue01 under nmp:
Related recommendations:
How to solve npm install installation failure
npm installation of Electron failed due to slow network timeout
The above is the detailed content of Illustration of npm installation tutorial in vue.js. For more information, please follow other related articles on the PHP Chinese website!

Hot AI Tools

Undresser.AI Undress
AI-powered app for creating realistic nude photos

AI Clothes Remover
Online AI tool for removing clothes from photos.

Undress AI Tool
Undress images for free

Clothoff.io
AI clothes remover

AI Hentai Generator
Generate AI Hentai for free.

Hot Article

Hot Tools

Notepad++7.3.1
Easy-to-use and free code editor

SublimeText3 Chinese version
Chinese version, very easy to use

Zend Studio 13.0.1
Powerful PHP integrated development environment

Dreamweaver CS6
Visual web development tools

SublimeText3 Mac version
God-level code editing software (SublimeText3)

Hot Topics
 How to implement an online speech recognition system using WebSocket and JavaScript
Dec 17, 2023 pm 02:54 PM
How to use WebSocket and JavaScript to implement an online speech recognition system Introduction: With the continuous development of technology, speech recognition technology has become an important part of the field of artificial intelligence. The online speech recognition system based on WebSocket and JavaScript has the characteristics of low latency, real-time and cross-platform, and has become a widely used solution. This article will introduce how to use WebSocket and JavaScript to implement an online speech recognition system.
 WebSocket and JavaScript: key technologies for implementing real-time monitoring systems
Dec 17, 2023 pm 05:30 PM
WebSocket and JavaScript: Key technologies for realizing real-time monitoring systems Introduction: With the rapid development of Internet technology, real-time monitoring systems have been widely used in various fields. One of the key technologies to achieve real-time monitoring is the combination of WebSocket and JavaScript. This article will introduce the application of WebSocket and JavaScript in real-time monitoring systems, give code examples, and explain their implementation principles in detail. 1. WebSocket technology
 How to implement an online reservation system using WebSocket and JavaScript
Dec 17, 2023 am 09:39 AM
How to use WebSocket and JavaScript to implement an online reservation system. In today's digital era, more and more businesses and services need to provide online reservation functions. It is crucial to implement an efficient and real-time online reservation system. This article will introduce how to use WebSocket and JavaScript to implement an online reservation system, and provide specific code examples. 1. What is WebSocket? WebSocket is a full-duplex method on a single TCP connection.
 How to use JavaScript and WebSocket to implement a real-time online ordering system
Dec 17, 2023 pm 12:09 PM
Introduction to how to use JavaScript and WebSocket to implement a real-time online ordering system: With the popularity of the Internet and the advancement of technology, more and more restaurants have begun to provide online ordering services. In order to implement a real-time online ordering system, we can use JavaScript and WebSocket technology. WebSocket is a full-duplex communication protocol based on the TCP protocol, which can realize real-time two-way communication between the client and the server. In the real-time online ordering system, when the user selects dishes and places an order
 JavaScript and WebSocket: Building an efficient real-time weather forecasting system
Dec 17, 2023 pm 05:13 PM
JavaScript and WebSocket: Building an efficient real-time weather forecast system Introduction: Today, the accuracy of weather forecasts is of great significance to daily life and decision-making. As technology develops, we can provide more accurate and reliable weather forecasts by obtaining weather data in real time. In this article, we will learn how to use JavaScript and WebSocket technology to build an efficient real-time weather forecast system. This article will demonstrate the implementation process through specific code examples. We
 Simple JavaScript Tutorial: How to Get HTTP Status Code
Jan 05, 2024 pm 06:08 PM
JavaScript tutorial: How to get HTTP status code, specific code examples are required. Preface: In web development, data interaction with the server is often involved. When communicating with the server, we often need to obtain the returned HTTP status code to determine whether the operation is successful, and perform corresponding processing based on different status codes. This article will teach you how to use JavaScript to obtain HTTP status codes and provide some practical code examples. Using XMLHttpRequest
 How to use insertBefore in javascript
Nov 24, 2023 am 11:56 AM
Usage: In JavaScript, the insertBefore() method is used to insert a new node in the DOM tree. This method requires two parameters: the new node to be inserted and the reference node (that is, the node where the new node will be inserted).
 How to get HTTP status code in JavaScript the easy way
Jan 05, 2024 pm 01:37 PM
Introduction to the method of obtaining HTTP status code in JavaScript: In front-end development, we often need to deal with the interaction with the back-end interface, and HTTP status code is a very important part of it. Understanding and obtaining HTTP status codes helps us better handle the data returned by the interface. This article will introduce how to use JavaScript to obtain HTTP status codes and provide specific code examples. 1. What is HTTP status code? HTTP status code means that when the browser initiates a request to the server, the service


