

Laravel deployment under CentOS7 and forwarding with nginx

This article introduces the content of Laravel deployment under CentOS7 and forwarding with nginx. It has certain reference value. Now I share it with everyone. Friends in need can refer to it.
This article is only for personal notes
Build php running environment
Run service php-fpm start to start the php-fpm service, run ps aux | grep php-fpm Verify whether the php-fpm service is successfully installed.

-
If you use the second option to install the source, please use the following script
yum install php72-php-cli.x86_64 php72-php-common.x86_64 php72-php-fpm.x86_64 php72-php-devel.x86_64 php72-php-gd.x86_64 php72-php-intl.x86_64 php72-php-mbstring.x86_64 php72-php-pecl-mcrypt.x86_64 php72-php-mysqlnd.x86_64 php72-php-opcache.x86_64 php72-php-pdo.x86_64 php72-php-pear.noarch php72-php-xml.x86_64 -y
Copy after login There is a php source
-
It is also possible that some users cannot access these two files. In this case, you can use the following method (7.2), so some of the following tutorials may be different. Please note
yum install epel-release -y
rpm -Uvh http://rpms.famillecollet.com/enterprise/remi-release-7.rpm
Copy after login php source is relatively old
php:
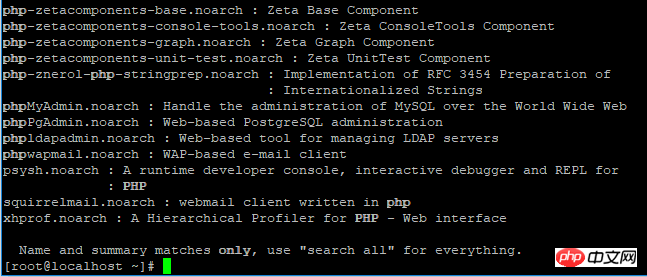
Determine whether there is php yum source:
yum search phpThe system itself comes with the yum source of php, but the version is too old, it is still 5.4. In order to install the latest source, prepare to install it here New yum source.
Install the yum source of php:
rpm -Uvh https://mirror.webtatic.com/yum/el7/epel-release.rpm
rpm -Uvh https://mirror.webtatic.com/yum/el7/webtatic-release.rpm
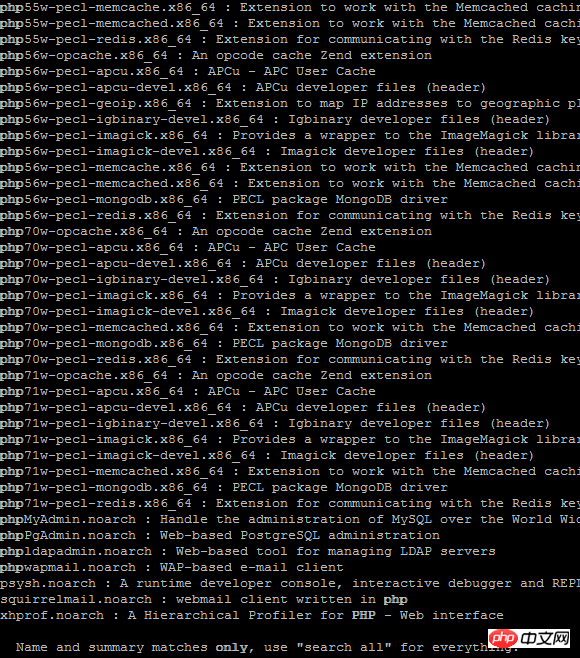
Copy after loginRun yum search php at this time and you will find more options
Install php and some related plug-ins (php-cli is related to shell, php-common is related to common functions, php-devel is related to compilation, php-fpm is related to service, php -gd is related to image processing, php-intl is related to internationalization, php-mbstring is related to multi-string processing, php-mcrypt is related to encryption, php-mysqlnd is related to mysql, php-opcache is related to performance acceleration, php-pdo It is related to data objects, php-pear is related to php application extension, and php-xml is related to xml) (php7.1 is installed here) If you use the first type, please use the first script:
yum install php71w-cli.x86_64 php71w-common.x86_64 php71w-fpm.x86_64 php71w-devel.x86_64 php71w-gd.x86_64 php71w-mbstring.x86_64 php71w-mcrypt.x86_64 php71w-mysqlnd.x86_64 php71w-opcache .x86_64 php71w-pdo.x86_64 php71w-pear.noarch php71w-xml.x86_64 -yRun php –version to check whether php is installed and configured. The appearance of version information similar to the screenshot indicates that the installation of PHP configuration is complete,
php version
php -fpm test
Install peripheral services (nginx/composer/git/mysql/redis)
These services can basically be installed in the basic yum source. If there is no composer, you can run cd /tmp
curl –sShttps://getcomposer.org/installer| php
mv composer.phar/usr/local/ bin/composer to complete the composer installationService code preparation
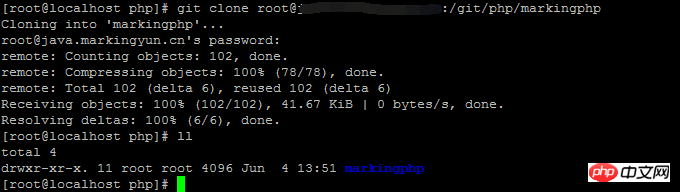
In order to facilitate the PHP service For deployment and update, the author uses git to download and update the project.
Enter the folder where the service is to be deployed and run git clone git address (for example: git clone root@www.temp.com:/git/php/markingphp)
Download php code
At this time, the project permissions are root. If you run php-fpm like this, you may not have enough permissions. I am here for simplicity. And manage the static resource nginx of the PHP project, change the project permissions to nginx, and change the operator permissions of php-fpm to nginx.
php and project related configuration
- ##nginx error log
- Service forwarding failed
- Initialize mysql
- Run chown nginx:nginx - Rf folder name (for example: chown nginx:nginx -Rf markingphp)
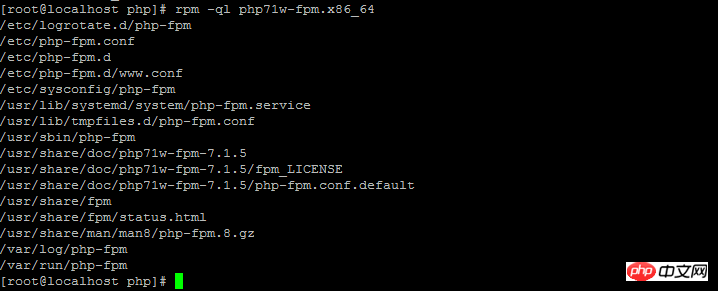
- Run rpm -ql php17w-fpm.x86_64 to get the php-fpm installation address
- Get the php-fpm installation address
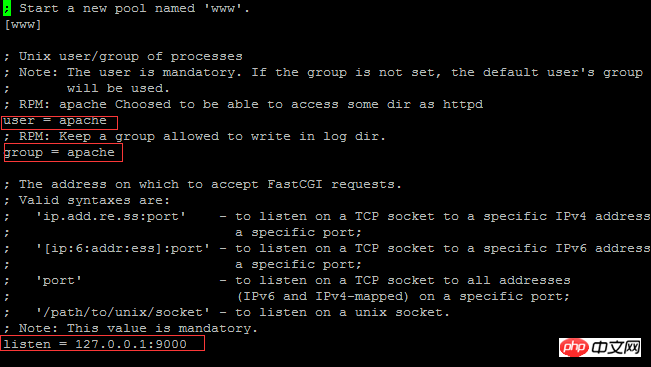
- Try to learn that /etc/php-fpm.d/www.conf is the configuration file
- php-fpm configuration file
更改user = apache与 group = pache 为 user = nginx group = nginx 如果有必要可以更改127.0.0.1:9000为想要的端口
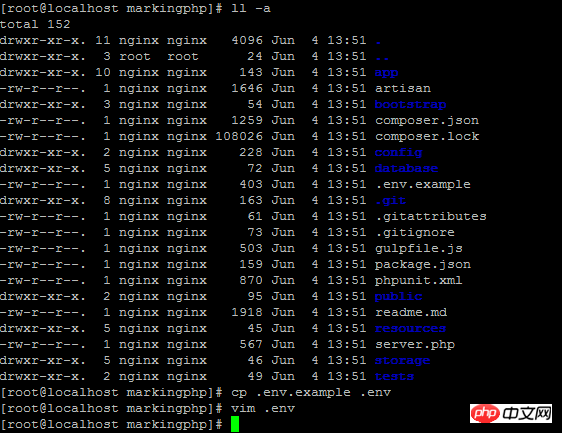
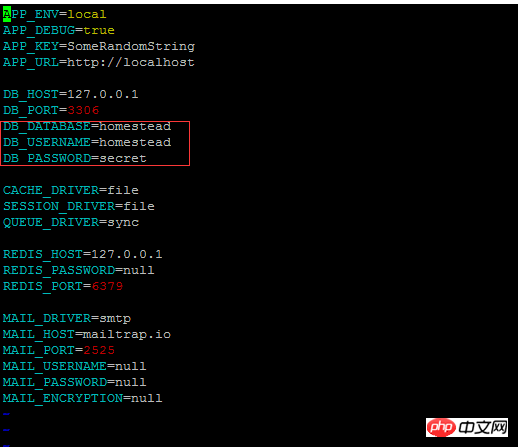
为了服务器信息安全及项目大小控制,git项目未上传项目配置与项目引用库,所以需要重新新建项目配置文件并配置
项目结构
配置文件
运行 composer update -vvv 下载库
下载库失败
如果库下载失败,可能是库被墙的原因,更改composer.json添加国内源再运行即可。
国内源
再运行 php artisan serve 可测试当前项目库是否完整,出现如下说明项目库下载完成。
尝试启动项目测试
初始化项目mysql表(php artisan migrate:refresh)
配置nginx以转发80端口服务到php-fpm的服务,
运行curl localhost 判断服务是否正常转发。
运行 vim /var/log/nginx/error.log 检查nginx的log会发现log提示权限不足,可是我们已经把文件权限付给了nginx。
最终得知是因为selinux的缘故,此时只需运行 setenforce 0 即可关闭selinux(临时),再修改配置文件 /etc/selinux/config,将SELINUX=enforcing改为SELINUX=disabled,这样下次重启selinux依然是关闭的。再运行curl localhost 会发现服务已经可以正常服务了。


“repositories”: {
   “packagist”: {
      “type”: “composer”,
      “url”: “https://packagist.phpcomposer.com”
   }
}

  server {
      listen 80;
      location / {
         root /php/markingphp/public/;
         index index.php index.html index.jsp;
      }
      location ~ .php{
           root html;
           fastcgi_pass 127.0.0.1:9000;
           fastcgi_index index.php;
           fastcgi_param SCRIPT_FILENAME
document_root$fastcgi_script_name;
          include fastcgi_params;
     }
}The above is the detailed content of Laravel deployment under CentOS7 and forwarding with nginx. For more information, please follow other related articles on the PHP Chinese website!

Hot AI Tools

Undresser.AI Undress
AI-powered app for creating realistic nude photos

AI Clothes Remover
Online AI tool for removing clothes from photos.

Undress AI Tool
Undress images for free

Clothoff.io
AI clothes remover

Video Face Swap
Swap faces in any video effortlessly with our completely free AI face swap tool!

Hot Article
Hot Tools

Notepad++7.3.1
Easy-to-use and free code editor

SublimeText3 Chinese version
Chinese version, very easy to use

Zend Studio 13.0.1
Powerful PHP integrated development environment

Dreamweaver CS6
Visual web development tools

SublimeText3 Mac version
God-level code editing software (SublimeText3)
Hot Topics
 1387
1387
 52
52

 How to check the name of the docker container
Apr 15, 2025 pm 12:21 PM
How to check the name of the docker container
Apr 15, 2025 pm 12:21 PM
You can query the Docker container name by following the steps: List all containers (docker ps). Filter the container list (using the grep command). Gets the container name (located in the "NAMES" column).
 How to create a mirror in docker
Apr 15, 2025 am 11:27 AM
How to create a mirror in docker
Apr 15, 2025 am 11:27 AM
Steps to create a Docker image: Write a Dockerfile that contains the build instructions. Build the image in the terminal, using the docker build command. Tag the image and assign names and tags using the docker tag command.
 How to start containers by docker
Apr 15, 2025 pm 12:27 PM
How to start containers by docker
Apr 15, 2025 pm 12:27 PM
Docker container startup steps: Pull the container image: Run "docker pull [mirror name]". Create a container: Use "docker create [options] [mirror name] [commands and parameters]". Start the container: Execute "docker start [Container name or ID]". Check container status: Verify that the container is running with "docker ps".
 How to create containers for docker
Apr 15, 2025 pm 12:18 PM
How to create containers for docker
Apr 15, 2025 pm 12:18 PM
Create a container in Docker: 1. Pull the image: docker pull [mirror name] 2. Create a container: docker run [Options] [mirror name] [Command] 3. Start the container: docker start [Container name]
 Laravel's Primary Function: Backend Development
Apr 15, 2025 am 12:14 AM
Laravel's Primary Function: Backend Development
Apr 15, 2025 am 12:14 AM
Laravel's core functions in back-end development include routing system, EloquentORM, migration function, cache system and queue system. 1. The routing system simplifies URL mapping and improves code organization and maintenance. 2.EloquentORM provides object-oriented data operations to improve development efficiency. 3. The migration function manages the database structure through version control to ensure consistency. 4. The cache system reduces database queries and improves response speed. 5. The queue system effectively processes large-scale data, avoid blocking user requests, and improve overall performance.
 Choosing Between NGINX and Apache: The Right Fit for Your Needs
Apr 15, 2025 am 12:04 AM
Choosing Between NGINX and Apache: The Right Fit for Your Needs
Apr 15, 2025 am 12:04 AM
NGINX and Apache have their own advantages and disadvantages and are suitable for different scenarios. 1.NGINX is suitable for high concurrency and low resource consumption scenarios. 2. Apache is suitable for scenarios where complex configurations and rich modules are required. By comparing their core features, performance differences, and best practices, you can help you choose the server software that best suits your needs.
 How to install mirror offline in docker
Apr 15, 2025 am 11:36 AM
How to install mirror offline in docker
Apr 15, 2025 am 11:36 AM
Installing Docker images offline requires the following steps: 1. Obtain the mirror TAR file; 2. Export the mirror file; 3. Transfer the mirror file; 4. Import the mirror file; 5. Verify the mirror installation.
 Docker uses yaml
Apr 15, 2025 am 07:21 AM
Docker uses yaml
Apr 15, 2025 am 07:21 AM
YAML is used to configure containers, images, and services for Docker. To configure: For containers, specify the name, image, port, and environment variables in docker-compose.yml. For images, basic images, build commands, and default commands are provided in Dockerfile. For services, set the name, mirror, port, volume, and environment variables in docker-compose.service.yml.
