
The content introduced in this article is a summary of the PHP interview, which has certain reference value. Now I share it with everyone. Friends in need can refer to it
id
select_type
##table
type
possible_keys
key
key_len
ref
rows
Extra
##Environment preparation
 ##Create test table
CREATE TABLE people(
id bigint auto_increment primary key,
zipcode char(32) not null default '',
address varchar(128) not null default '',
lastname char(64) not null default '',
firstname char(64) not null default '',
birthdate char(10) not null default '' );
 CREATE TABLE people_car(
  people_id bigint,
   plate_number varchar(16) not null default '',
   engine_number varchar(16) not null default '',
   lasttime timestamp );

 Insert Test data
insert into people (zipcode,address,lastname,firstname,birthdate)
values ('230031','anhui','zhan','jindong','1989-09-15'), ('100000','beijing','zhang','san','1987-03-11'), ('200000','shanghai','wang','wu','1988-08-25')
insert into people_car (people_id,plate_number,engine_number,lasttime)
values (1,'A121311','12121313','2013-11-23 :21:12:21'), (2,'B121311','1S121313','2011-11-23 :21:12:21'), (3,'C121311','1211SAS1','2012-11-23 :21:12:21')

 Create index for testing
alter table people add key(zipcode,firstname,lastname);
EXPLAIN Introduction
Query-1 explain select zipcode,firstname,lastname from people;
 EXPLAIN output results include id, select_type, table, type, possible_keys, key, key_len, ref, rows and Extra List.
id
Query-2 explain select zipcode from (select * from people a) b;
 ##id is used to sequentially identify the entire query SELELCT statement, through the simple nested query above, you can see that the statement with the larger ID is executed first. This value may be NULL if this row is used to describe the union result of other rows, such as a UNION statement:
Query-3 explain select * from people where zipcode = 100000 union select * from people where zipcode = 200000;

select_type
SIMPLE
The simplest SELECT query, without using UNION or subquery. See Query-1
.
PRIMARY
In the nested query is The outermost SELECT statement is the frontmost SELECT statement in a UNION query. See Query-2
andQuery-3.
UNION
The second and subsequent ones in UNION SELECT statement. See Query-3
.
DERIVED
FROM sub-statement in the derived table SELECT statement SELECT statement in the sentence. See Query-2
.
UNION RESULT
一个UNION查询的结果。见Query-3。 DEPENDENT UNION 顾名思义,首先需要满足UNION的条件,及UNION中第二个以及后面的SELECT语句,同时该语句依赖外部的查询。 Query-4中select id from people where zipcode = 200000的select_type为DEPENDENT UNION。你也许很奇怪这条语句并没有依赖外部的查询啊。 这里顺带说下MySQL优化器对IN操作符的优化,优化器会将IN中的uncorrelated subquery优化成一个correlated subquery(关于correlated subquery参见这里)。 类似这样的语句会被重写成这样: 所以Query-4实际上被重写成这样: 题外话:有时候MySQL优化器这种太过“聪明” 的做法会导致WHERE条件包含IN()的子查询语句性能有很大损失。可以参看《高性能MySQL第三版》6.5.1关联子查询一节。 SUBQUERY 子查询中第一个SELECT语句。 DEPENDENT SUBQUERY 和DEPENDENT UNION相对UNION一样。见Query-5。 除了上述几种常见的select_type之外还有一些其他的这里就不一一介绍了,不同MySQL版本也不尽相同。 显示的这一行信息是关于哪一张表的。有时候并不是真正的表名。 可以看到如果指定了别名就显示的别名。 还有 注意:MySQL对待这些表和普通表一样,但是这些“临时表”是没有任何索引的。 type列很重要,是用来说明表与表之间是如何进行关联操作的,有没有使用索引。MySQL中“关联”一词比一般意义上的要宽泛,MySQL认为任何一次查询都是一次“关联”,并不仅仅是一个查询需要两张表才叫关联,所以也可以理解MySQL是如何访问表的。主要有下面几种类别。 const 当确定最多只会有一行匹配的时候,MySQL优化器会在查询前读取它而且只读取一次,因此非常快。const只会用在将常量和主键或唯一索引进行比较时,而且是比较所有的索引字段。people表在id上有一个主键索引,在(zipcode,firstname,lastname)有一个二级索引。因此Query-8的type是const而Query-9并不是: 注意下面的Query-10也不能使用const table,虽然也是主键,也只会返回一条结果。 system 这是const连接类型的一种特例,表仅有一行满足条件。 eq_ref eq_ref类型是除了const外最好的连接类型,它用在一个索引的所有部分被联接使用并且索引是UNIQUE或PRIMARY KEY。 需要注意InnoDB和MyISAM引擎在这一点上有点差别。InnoDB当数据量比较小的情况type会是All。我们上面创建的people 和 people_car默认都是InnoDB表。 我们创建两个MyISAM表people2和people_car2试试: 我想这是InnoDB对性能权衡的一个结果。 eq_ref可以用于使用 = 操作符比较的带索引的列。比较值可以为常量或一个使用在该表前面所读取的表的列的表达式。如果关联所用的索引刚好又是主键,那么就会变成更优的const了: ref 这个类型跟eq_ref不同的是,它用在关联操作只使用了索引的最左前缀,或者索引不是UNIQUE和PRIMARY KEY。ref可以用于使用=或<=>操作符的带索引的列。 为了说明我们重新建立上面的people2和people_car2表,仍然使用MyISAM但是不给id指定primary key。然后我们分别给id和people_id建立非唯一索引。 然后再执行下面的查询: 看上面的Query-15,Query-16和Query-17,Query-18我们发现MyISAM在ref类型上的处理也是有不同策略的。 对于ref类型,在InnoDB上面执行上面三条语句结果完全一致。 fulltext 链接是使用全文索引进行的。一般我们用到的索引都是B树,这里就不举例说明了。 ref_or_null 该类型和ref类似。但是MySQL会做一个额外的搜索包含NULL列的操作。在解决子查询中经常使用该联接类型的优化。(详见这里)。 注意Query-20使用的并不是ref_or_null,而且InnnoDB这次表现又不相同(数据量大的情况下有待验证)。 index_merger 该联接类型表示使用了索引合并优化方法。在这种情况下,key列包含了使用的索引的清单,key_len包含了使用的索引的最长的关键元素。关于索引合并优化看这里。 unique_subquery 该类型替换了下面形式的IN子查询的ref: unique_subquery是一个索引查找函数,可以完全替换子查询,效率更高。 index_subquery 该联接类型类似于unique_subquery。可以替换IN子查询,但只适合下列形式的子查询中的非唯一索引:<br/> range 只检索给定范围的行,使用一个索引来选择行。key列显示使用了哪个索引。key_len包含所使用索引的最长关键元素。在该类型中ref列为NULL。当使用=、<>、>、>=、<、<=、IS NULL、<=>、BETWEEN或者IN操作符,用常量比较关键字列时,可以使用range: 注意在我的测试中:发现只有id是主键或唯一索引时type才会为range。 这里顺便挑剔下MySQL使用相同的range来表示范围查询和列表查询。 但事实上这两种情况下MySQL如何使用索引是有很大差别的: 我们不是挑剔:这两种访问效率是不同的。对于范围条件查询,MySQL无法使用范围列后面的其他索引列了,但是对于“多个等值条件查询”则没有这个限制了。 ——出自《高性能MySQL第三版》 index 该联接类型与ALL相同,除了只有索引树被扫描。这通常比ALL快,因为索引文件通常比数据文件小。这个类型通常的作用是告诉我们查询是否使用索引进行排序操作。 至于什么情况下MySQL会利用索引进行排序,等有时间再仔细研究。最典型的就是order by后面跟的是主键。 ALL The slowest way is full table scan. In general: the performance of the above connection types decreases in sequence (system>const), different MySQL versions , different storage engines and even different data volumes may perform differently. The possible_keys column indicates which index MySQL can use to find the index in the table OK. The key column displays the key (index) that MySQL actually decided to use. If no index is selected, the key is NULL. To force MySQL to use or ignore the index on the possible_keys column, use FORCE INDEX, USE INDEX, or IGNORE INDEX in the query. ##The key_len column displays the key length that MySQL decides to use. If the key is NULL, the length is NULL. The length of the index used. The shorter the length the better without losing accuracy. The ref column shows which column or constant is used with the key from the table Select rows in . <br/> The rows column shows what MySQL thinks it must do when executing the query Number of rows to check. Note that this is an estimate. Using filesort Using temporary Not exists Using index Using index condition Using where Note: Using where appears in the Extra column indicates that the MySQL server will return the storage engine to the service layer and then apply WHERE condition filtering. The output content of EXPLAIN has been basically introduced. It also has an extended command called EXPLAIN EXTENDED, which can be combined with the SHOW WARNINGS command. See some more information. One of the more useful things is that you can see the SQL after reconstruction by the MySQL optimizer. Ok, that’s it for EXPLAIN. In fact, these contents are available online, but you will be more impressed by practicing them yourself. The next section will introduce SHOW PROFILE, slow query logs and some third-party tools. <br/> OAuth is about authorization (authorization) The open network standard is widely used around the world. The current version is version 2.0. This article provides a concise and popular explanation of the design ideas and operation process of OAuth 2.0. The main reference material is RFC 6749. In order to understand the applicable situations of OAuth, let me give a hypothetical example. There is a "cloud printing" website that can print out photos stored by users on Google. In order to use this service, users must let "Cloud Print" read their photos stored on Google. #The problem is that Google will only allow "Cloud Print" to read these photos with the user's authorization. So, how does "Cloud Print" obtain the user's authorization? The traditional method is for the user to tell "Cloud Print" their Google username and password, and the latter can read the user's photos. This approach has several serious shortcomings. (1) "Cloud Printing" will save the user's password for subsequent services, which is very unsafe. (2) Google has to deploy password login, and we know that simple password login is not safe. (3) "Cloud Print" has the right to obtain all the user's data stored in Google, and users cannot limit the scope and validity period of "Cloud Print" authorization. (4) Only by changing the password can the user take back the power granted to "Cloud Printing". However, doing so will invalidate all other third-party applications authorized by the user. (5) As long as a third-party application is cracked, it will lead to the leakage of user passwords and the leakage of all password-protected data. OAuth was born to solve the above problems. Before explaining OAuth 2.0 in detail, you need to understand several special nouns. They are crucial for understanding the following explanations, especially the several pictures. (1) Third-party application: Third-party application, also called "client" in this article, which is the "cloud printing" in the example in the previous section ". (2)HTTP service: HTTP service provider, referred to as "service provider" in this article, which is Google in the example in the previous section. (3)Resource Owner: Resource owner, also called "user" in this article. (4)User Agent: User agent, in this article refers to the browser. (5)Authorization server: Authentication server, that is, a server specially used by the service provider to handle authentication. (6)Resource server: Resource server, that is, the server where the service provider stores user-generated resources. It and the authentication server can be the same server or different servers. Knowing the above terms, it is not difficult to understand that the function of OAuth is to allow the "client" to securely and controllably obtain the authorization of the "user" and interact with the "service provider". OAuth sets an authorization layer between the "client" and the "service provider". The "client" cannot directly log in to the "service provider", but can only log in to the authorization layer to distinguish the user from the client. The token used by the "client" to log in to the authorization layer is different from the user's password. Users can specify the permission scope and validity period of the authorization layer token when logging in. After the "client" logs in to the authorization layer, the "service provider" opens the user's stored information to the "client" based on the authority scope and validity period of the token. The operation process of OAuth 2.0 is as shown below, excerpted from RFC 6749. # (A) After the user opens the client, the client requires the user to grant authorization. (B) The user agrees to grant authorization to the client. (C) The client uses the authorization obtained in the previous step to apply for a token from the authentication server. (D) After the authentication server authenticates the client, it confirms that it is correct and agrees to issue the token. (E) The client uses the token to apply to the resource server to obtain resources. (F)资源服务器确认令牌无误,同意向客户端开放资源。 不难看出来,上面六个步骤之中,B是关键,即用户怎样才能给于客户端授权。有了这个授权以后,客户端就可以获取令牌,进而凭令牌获取资源。 下面一一讲解客户端获取授权的四种模式。 客户端必须得到用户的授权(authorization grant),才能获得令牌(access token)。OAuth 2.0定义了四种授权方式。 授权码模式(authorization code) 简化模式(implicit) 密码模式(resource owner password credentials) 客户端模式(client credentials) 授权码模式(authorization code)是功能最完整、流程最严密的授权模式。它的特点就是通过客户端的后台服务器,与"服务提供商"的认证服务器进行互动。 它的步骤如下: (A)用户访问客户端,后者将前者导向认证服务器。 (B)用户选择是否给予客户端授权。 (C)假设用户给予授权,认证服务器将用户导向客户端事先指定的"重定向URI"(redirection URI),同时附上一个授权码。 (D)客户端收到授权码,附上早先的"重定向URI",向认证服务器申请令牌。这一步是在客户端的后台的服务器上完成的,对用户不可见。 (E)认证服务器核对了授权码和重定向URI,确认无误后,向客户端发送访问令牌(access token)和更新令牌(refresh token)。 下面是上面这些步骤所需要的参数。 A步骤中,客户端申请认证的URI,包含以下参数: response_type:表示授权类型,必选项,此处的值固定为"code" client_id:表示客户端的ID,必选项 redirect_uri:表示重定向URI,可选项 scope:表示申请的权限范围,可选项 state:表示客户端的当前状态,可以指定任意值,认证服务器会原封不动地返回这个值。 下面是一个例子。 C步骤中,服务器回应客户端的URI,包含以下参数: code:表示授权码,必选项。该码的有效期应该很短,通常设为10分钟,客户端只能使用该码一次,否则会被授权服务器拒绝。该码与客户端ID和重定向URI,是一一对应关系。 state:如果客户端的请求中包含这个参数,认证服务器的回应也必须一模一样包含这个参数。 下面是一个例子。 D步骤中,客户端向认证服务器申请令牌的HTTP请求,包含以下参数: grant_type:表示使用的授权模式,必选项,此处的值固定为"authorization_code"。 code:表示上一步获得的授权码,必选项。 redirect_uri:表示重定向URI,必选项,且必须与A步骤中的该参数值保持一致。 client_id:表示客户端ID,必选项。 下面是一个例子。 E步骤中,认证服务器发送的HTTP回复,包含以下参数: access_token:表示访问令牌,必选项。 token_type:表示令牌类型,该值大小写不敏感,必选项,可以是bearer类型或mac类型。 expires_in:表示过期时间,单位为秒。如果省略该参数,必须其他方式设置过期时间。 refresh_token:表示更新令牌,用来获取下一次的访问令牌,可选项。 scope:表示权限范围,如果与客户端申请的范围一致,此项可省略。 下面是一个例子。 从上面代码可以看到,相关参数使用JSON格式发送(Content-Type: application/json)。此外,HTTP头信息中明确指定不得缓存。 简化模式(implicit grant type)不通过第三方应用程序的服务器,直接在浏览器中向认证服务器申请令牌,跳过了"授权码"这个步骤,因此得名。所有步骤在浏览器中完成,令牌对访问者是可见的,且客户端不需要认证。 它的步骤如下: (A)客户端将用户导向认证服务器。 (B)用户决定是否给于客户端授权。 (C)假设用户给予授权,认证服务器将用户导向客户端指定的"重定向URI",并在URI的Hash部分包含了访问令牌。 (D)浏览器向资源服务器发出请求,其中不包括上一步收到的Hash值。 (E)资源服务器返回一个网页,其中包含的代码可以获取Hash值中的令牌。 (F)浏览器执行上一步获得的脚本,提取出令牌。 (G)浏览器将令牌发给客户端。 下面是上面这些步骤所需要的参数。 A步骤中,客户端发出的HTTP请求,包含以下参数: response_type:表示授权类型,此处的值固定为"token",必选项。 client_id:表示客户端的ID,必选项。 redirect_uri:表示重定向的URI,可选项。 scope:表示权限范围,可选项。 state:表示客户端的当前状态,可以指定任意值,认证服务器会原封不动地返回这个值。 下面是一个例子。 C步骤中,认证服务器回应客户端的URI,包含以下参数: access_token:表示访问令牌,必选项。 token_type:表示令牌类型,该值大小写不敏感,必选项。 expires_in:表示过期时间,单位为秒。如果省略该参数,必须其他方式设置过期时间。 scope:表示权限范围,如果与客户端申请的范围一致,此项可省略。 state:如果客户端的请求中包含这个参数,认证服务器的回应也必须一模一样包含这个参数。 下面是一个例子。 在上面的例子中,认证服务器用HTTP头信息的Location栏,指定浏览器重定向的网址。注意,在这个网址的Hash部分包含了令牌。 根据上面的D步骤,下一步浏览器会访问Location指定的网址,但是Hash部分不会发送。接下来的E步骤,服务提供商的资源服务器发送过来的代码,会提取出Hash中的令牌。 密码模式(Resource Owner Password Credentials Grant)中,用户向客户端提供自己的用户名和密码。客户端使用这些信息,向"服务商提供商"索要授权。 在这种模式中,用户必须把自己的密码给客户端,但是客户端不得储存密码。这通常用在用户对客户端高度信任的情况下,比如客户端是操作系统的一部分,或者由一个著名公司出品。而认证服务器只有在其他授权模式无法执行的情况下,才能考虑使用这种模式。 它的步骤如下: (A)用户向客户端提供用户名和密码。 (B)客户端将用户名和密码发给认证服务器,向后者请求令牌。 (C)认证服务器确认无误后,向客户端提供访问令牌。 B步骤中,客户端发出的HTTP请求,包含以下参数: grant_type:表示授权类型,此处的值固定为"password",必选项。 username:表示用户名,必选项。 password:表示用户的密码,必选项。 scope:表示权限范围,可选项。 下面是一个例子。 C步骤中,认证服务器向客户端发送访问令牌,下面是一个例子。 上面代码中,各个参数的含义参见《授权码模式》一节。 整个过程中,客户端不得保存用户的密码。 客户端模式(Client Credentials Grant)指客户端以自己的名义,而不是以用户的名义,向"服务提供商"进行认证。严格地说,客户端模式并不属于OAuth框架所要解决的问题。在这种模式中,用户直接向客户端注册,客户端以自己的名义要求"服务提供商"提供服务,其实不存在授权问题。 它的步骤如下: (A)客户端向认证服务器进行身份认证,并要求一个访问令牌。 (B)认证服务器确认无误后,向客户端提供访问令牌。 A步骤中,客户端发出的HTTP请求,包含以下参数: granttype:表示授权类型,此处的值固定为"clientcredentials",必选项。 scope:表示权限范围,可选项。 认证服务器必须以某种方式,验证客户端身份。 B步骤中,认证服务器向客户端发送访问令牌,下面是一个例子。 上面代码中,各个参数的含义参见《授权码模式》一节。 如果用户访问的时候,客户端的"访问令牌"已经过期,则需要使用"更新令牌"申请一个新的访问令牌。 客户端发出更新令牌的HTTP请求,包含以下参数: granttype:表示使用的授权模式,此处的值固定为"refreshtoken",必选项。 refresh_token:表示早前收到的更新令牌,必选项。 scope:表示申请的授权范围,不可以超出上一次申请的范围,如果省略该参数,则表示与上一次一致。 下面是一个例子。 (完) <br/> yii2框架的安装我们在之前文章中已经提到下面我们开始了解YII2框架 强大的YII2框架网上指南:http://www.yii-china.com/doc/detail/1.html?postid=278或者<br/> http://www.yiichina.com/doc/guide/2.0<br/> Yii2的应用结构:<br/> 目录篇:<br/> <br/> <br/> <br/>3.console The console application contains the console commands required by the system. <br/> Among them: config is the general configuration. These configurations will apply to the front and backend and the command line. mail is the mail-related layout files of the front and backend of the application and the command line. models is the data model that may be used in both the front and backend and the command line. This is also the most important part of common. <br/> The files contained in the public directory (Common) are used for sharing between other applications. For example, each application may need to access the database using ActiveRecord. Therefore, we can place the AR model class in the common directory. Similarly, if some helpers or widgets are used in multiple applications, we should also place these in a common directory to avoid duplication of code. As we will explain shortly, applications can also share parts of a common configuration. Therefore, we can also store common common configurations in the config directory. <br/>When developing a large-scale project with a long development cycle, we need to constantly adjust the database structure. For this reason, we can also use the DB migrations feature to keep track of database changes. We also place all DB migrations directories under the common directory. <br/><br/>5.environment Each Yii environment is a set of configuration files, including the entry script index.php and various configuration files. In fact, they are all placed under the /environments directory. <br/> Directory dev Directory prod <br/>6.vendor 1、入口文件路径:<br/> http://127.0.0.1/yii2/advanced/frontend/web/index.php 每个应用都有一个入口脚本 web/index.PHP,这是整个应用中唯一可以访问的 PHP 脚本。一个应用处理请求的过程如下: 1.用户向入口脚本 web/index.php 发起请求。 <br/>2.入口脚本加载应用配置并创建一个应用实例去处理请求。 <br/>3.应用通过请求组件解析请求的路由。 <br/>4.应用创建一个控制器实例去处理请求。 <br/>5.控制器创建一个操作实例并针对操作执行过滤器。 <br/>6.如果任何一个过滤器返回失败,则操作退出。 <br/>7.如果所有过滤器都通过,操作将被执行。 <br/>8.操作会加载一个数据模型,或许是来自数据库。<br/>9.操作会渲染一个视图,把数据模型提供给它。 <br/>10.渲染结果返回给响应组件。 <br/>11.响应组件发送渲染结果给用户浏览器 可以看到中间有模型-视图-控制器 ,即常说的MVC。入口脚本并不会处理请求,而是把请求交给了应用主体,在处理请求时,会用到控制器,如果用到数据库中的东西,就会去访问模型,如果处理请求完成,要返回给用户信息,则会在视图中回馈要返回给用户的内容。<br/> 2、为什么我们访问方法会出现url加密呢? 我们找到文件:vendor/yiisoft/yii2/web/UrlManager.php <br/> MVC篇: 一、控制器详解: 1、修改默认控制器和方法 修改全局控制器:打开vendor/yiisoft/yii2/web/Application.php eg: 2、建立控制器示例:StudentController.php //命名空间<br/> <br/> <br/><br/> //显示视图<br/> return $this->render('add'); 默认.php<br/> return $this->render('upda',["data"=>$data]); <br/><br/> } <br/>}<br/><br/> 二、模型层详解 简单模型建立: <br/> <br/><br/> 三、视图层详解首先在frontend下建立与控制器名一致的文件(小写)eg:student 在文件下建立文件<br/> eg:index.php<br/>每一个controller对应一个view的文件夹,但是视图文件yii不要求是HTML,而是php,所以每个视图文件php里面都是视图片段: 当然了,视图与模板之间还有数据传递以及继承覆盖的功能。<br/><br/><br/><br/><br/><br/> YII2框架数据的运用 1、数据库连接 简介 一个项目根据需要会要求连接多个数据库,那么在yii2中如何链接多数据库呢?其实很简单,在配置文件中稍加配置即可完成。 配置 打开数据库配置文件common\config\main-local.php,在原先的db配置项下面添加db2,配置第二个数据库的属性即可 [php] view plain copy 如上配置就可以完成yii2连接多个数据库的功能,但还是需要注意几个点 如果使用的数据库前缀 在建立模型时 这样: eg:这个库叫 haiyong_test return {{%test}}<br/> 应用 1.我们在hyii数据库中新建一个测试表test 2.通过gii生成模型,这里需要注意的就是数据库链接ID处要改成db2<br/> 3.查看生成的模型,比正常的model多了红色标记的地方 所以各位童鞋,如果使用多数据配置,在建db2的模型的时候,也要加上上图红色的代码。 好了,以上步骤就完成了,yii2的多数据库配置,配置完成之后可以和原因一样使用model或者数据库操作 2、数据操作: <br/>方式一:使用createCommand()函数<br/> 增加 <br/> 获取自增id [php] view plain copy 批量插入数据 [php] view plain copy 修改 [php] view plain copy 方式二:模型处理数据(优秀程序媛必备)!! <br/> 新增(因为save方法有点low)所以自己在模型层中定义:add和addAll方法<br/> 注意:!!!当setAttributes($attributes,fase);时不用设置rules规则,否则则需要设置字段规则;<br/> 删除<br/> 使用model::delete()进行删除 [php] view plain copy 直接删除:删除年龄为30的所有用户 [php] view plain copy 根据主键删除:删除主键值为1的用户<br/> [php] view plain copy <br/> <br/> <br/> <br/> <br/> 修改<br/> 使用model::save()进行修改 <br/> <br/> <br/> 直接修改:修改用户test的年龄为40<br/> <br/> <br/> 基础查询 <br/> <br/> 关联查询 <br/> <br/> <br/> 翻译 2015年07月30日 10:29:03 <br/> yii2 rbac 详解DbManager <br/> 1.yii config文件配置(我用的高级模板)(配置在common/config/main-local.php或者main.php) 'authManager' => [ 'class' => 'yii\rbac\DbManager', 'itemTable' => 'auth_item', 'assignmentTable' => 'auth_assignment', 'itemChildTable' => 'auth_item_child', ],<br/> 2. Of course, you can also set the default role in the configuration, just I didn't write it. Rbac supports two classes, PhpManager and DbManager. Here I use DbManager. yii migrate (run this command to generate the user table)<br/>yii migrate --migrationPath=@yii/rbac/migrations/ Run this command to generate the permission data table in the figure below<br/>3.yii rbac actually operates 4 tables <br/> 推荐文章 微信H5支付完整版含PHP回调页面.代码精简2018年2月 <br/>支付宝手机支付,本身有提供一个手机网站支付DEMO,是lotusphp版本的,里面有上百个文件,非常复杂.本文介绍的接口, <br/>只需通过一个PHP文件即可实现手机支付宝接口的付款,非常简洁,并兼容微信. <br/>代码在最下面. 注意事项(重要): <br/>一,支付宝接口已经升级了加密方式,现在申请的接口都是公钥加私钥的加密形式.公钥与私钥都需要申请者自己生成,而且是成对的,不能拆开用.并把公钥保存到支付宝平台,该公钥对应的私钥不需要保存在支付宝,只能自己保存,并放在api支付宝接口文件中使用.下面会提到. APPID 应该填哪个呢? 这个是指开放平台id,格式应该填2018或2016等日期开头的,不要填合作者pid,那个pid新版不需要的.APPID下面还对应一个网关.这个也要对应填写.正式申请通过的网关为https://openapi.alipay.com/gateway.do 如果你是沙箱测试账号, <br/>则填https://openapi.alipaydev.com/gateway.do 注意区别 <br/>密钥生成方式为, https://docs.open.alipay.com/291/105971 打开这个地址,下载该相应工具后,解压打开文件夹,运行“RSA签名验签工具.bat”这个文件后.打开效果如下图 <br/>如果你的网站是jsp的,密钥格式如下图,点击选择第一个pkcs8的,如果你的网站是php,asp等,则点击pkcs1 <br/>密钥长度统一为2048位. <br/>然后点击 生成密钥 <br/>然后,再点击打开密钥文件路径按钮.即可看到生成的密钥文件,打开txt文件.即可看到生成的公钥与私钥了. <br/>公钥复制后(注意不要换行),需提供给支付宝账号管理者,并上传到支付宝开放平台。如下图第二 <br/>界面示例: <br/> 二,如下,同步回调地址与异步回调地址的区别. <br/>同步地址是指用户付款成功,他自动跳转到这个地址,以get方式返回,你可以设置为跳转回会员中心,也可以转到网站首页或充值日志页面,通过$_GET 的获取支付宝发来的签名,金额等参数.然后进本地数据库验证支付是否正常. <br/>而异步回调地址指支付成功后,支付宝会自动多次的访问你的这个地址,以静默方式进行,用户感受不到地址的跳转.注意,异步回调地址中不能有问号,&等符号,可以放在根目录中.如果你设置为notify_url.php,则你也需要在notify_url.php这个文件中做个判断.比如如果用户付款成功了.则用户的余额则增加多少,充值状态由付款中.修改为付款成功等. 1 2 三,orderName 订单名称,注意编码,否则签名可能会失败 <br/>向支付宝发起支付请求时,有个orderName 订单名称参数.注意这个参数的编码,如果你的本页面是gb2312编码,$this->charset = ‘UTF-8’这个参数最好还是UTF-8,不需要修改.否则签名时,可能会出现各种问题.,可用下面的方法做个转码. 1 四,微信中如何使用支付宝 <br/>支付宝有方案,可以进这个页面把ap.js及pay.htm下载后,保存到你的支付文件pay.php文件所在的目录中. <br/>方案解释,会员在微信中打开你网站的页面,登录,并点击充值或购买链接时,他如果选择支付宝付款,则ap.js会自动弹出这个pay.htm页面,提示你在右上角选择用浏览器中打开,打开后,自动跳转到支付宝app中,不需要重新登录原网站的会员即可完成充值,并跳转回去. <br/>注意,在你的客户从微信转到手机浏览器后,并没有让你重新登录你的商城网站,这是本方案的优势所在. <br/>https://docs.open.alipay.com/203/105285/ 五,如果你申请的支付宝手机支付接口在审核中,则可以先申请一个沙箱测试账号,该账号申请后就可以使用非常方便.同时会提供你一个支付宝商家账号及买家测试账号.登录即可测试付款情况. 代码如下(参考) <br/>一.表单付款按钮所在页面代码 <br/> 二,pay.php页面代码(核心代码) 三,回调页面案例一,即notify_url.php文件. post回调, 四.异步回调案例2, 与上面三是重复的,可选择其中一个.本回调可直接放根目录中 如果你服务器不支持mysqli 就替换为mysql 测试回调时, 请先直接访问本页面,进行测试.订单号可以先写一个固定值. 参考原文 <br/>http://blog.csdn.net/jason19905/article/details/78636716 <br/>https://github.com/dedemao/alipay <br/> 抓包就是把网络数据包用软件截住或者纪录下来,这样做我们可以分析网络数据包,可以修改它然后发送一个假包给服务器,这种技术多应用于网络游戏外挂的制作方面或者密码截取等等 常用的几款抓包工具!<br/>标签: 软件测试软件测试方法软件测试学习<br/>原创来自于我们的微信公众号:软件测试大师 <br/>最近很多同学,说面试的时候被问道,有没有用过什么抓包工具,其实抓包工具并没有什么很难的工具,只要你知道你要用抓包是干嘛的,就知道该怎么用了!一般<br/>对于测试而言,并不需要我们去做断点或者是调试代码什么的,只需要用一些抓包工具抓取发送给服务器的请求,观察下它的请求时间还有发送内容等等,有时候,<br/>可能还会用到这个去观察某个页面下载组件消耗时间太长,找出原因,要开发做性能调优。那么下面就给大家推荐几款抓包工具,好好学习下,下次面试也可以拿来<br/>装一下了! <br/>1<br/>Flidder<br/>Fiddler是位于客户端和服务器端的HTTP代理,也是目前最常用的http抓包工具之一 。 它能够记录客户端和服务器之间的所有 <br/>HTTP请求,可以针对特定的HTTP请求,分析请求数据、设置断点、调试web应用、修改请求的数据,甚至可以修改服务器返回的数据,功能非常强大,是<br/>web调试的利器。<br/>小编发现了有个兄台写的不错的文章,分享给大家,有兴趣的同学,可以自己去查阅并学习下,反正本小编花了点时间就学会了,原来就这么回事!作为测试学会这点真的是足够用了!<br/>学习链接如下:<br/>http://blog.csdn.net/ohmygirl/article/details/17846199<br/>http://blog.csdn.net/ohmygirl/article/details/17849983<br/>http://blog.csdn.net/ohmygirl/article/details/17855031 2<br/>Httpwatch<br/>火狐浏览器下有著名的httpfox,而HttpWatch则是IE下强大的网页数据分析工具。教程小编也不详述了,找到了一个超级棒的教程!真心很赞!要想学习的同学,可以点击链接去感受下!<br/>http://jingyan.baidu.com/article/5553fa820539ff65a339345d.html <br/>3其他浏览器的内置抓包工具<br/>如果用过Firefox的F12功能键,应该也知道这里也有网络抓包的工具,是内置在浏览器里面的,貌似现在每款浏览器都有这个内置的抓包工具,虽然没有上面两个工具强大,但是对于测试而言,我觉得是足够了!下面是一个非常详细的教程,大家可以去学习下。<br/>http://jingyan.baidu.com/article/3c343ff703fee20d377963e7.html 对于想学习点新知识去面试装逼的同学,小编只能帮你们到这里了,要想学习到新知识,除了动手指去点击这些链接,还需要你们去动脑好好学习下! <br/> <br/> 超文本传输协议HTTP协议被用于在Web浏览器和网站服务器之间传递信息,HTTP协议以明文方式发送内容,不提供任何方式的数据加密,如果攻击者截取了Web浏览器和网站服务器之间的传输报文,就可以直接读懂其中的信息,因此,HTTP协议不适合传输一些敏感信息,比如:信用卡号、密码等支付信息。 为了解决HTTP协议的这一缺陷,需要使用另一种协议:安全套接字层超文本传输协议HTTPS,为了数据传输的安全,HTTPS在HTTP的基础上加入了SSL协议,SSL依靠证书来验证服务器的身份,并为浏览器和服务器之间的通信加密。 一、HTTP和HTTPS的基本概念 HTTP:是互联网上应用最为广泛的一种网络协议,是一个客户端和服务器端请求和应答的标准(TCP),用于从WWW服务器传输超文本到本地浏览器的传输协议,它可以使浏览器更加高效,使网络传输减少。 HTTPS: It is an HTTP channel aimed at security. Simply put, it is a secure version of HTTP, that is, an SSL layer is added to HTTP. The security foundation of HTTPS is SSL, so the details of encryption require SSL. The main functions of the HTTPS protocol can be divided into two types: one is to establish an information security channel to ensure the security of data transmission; the other is to confirm the authenticity of the website. 2. What is the difference between HTTP and HTTPS? The data transmitted by the HTTP protocol is unencrypted, that is, in plain text. Therefore, it is very unsafe to use the HTTP protocol to transmit private information. In order to ensure that these private data can be encrypted and transmitted, Netscape designed The SSL (Secure Sockets Layer) protocol was used to encrypt data transmitted by the HTTP protocol, thus HTTPS was born. Simply put, the HTTPS protocol is a network protocol built from the SSL HTTP protocol that can perform encrypted transmission and identity authentication. It is more secure than the http protocol. The main differences between HTTPS and HTTP are as follows: 1. The https protocol requires applying for a certificate from CA. Generally, there are fewer free certificates, so a certain fee is required. 2. http is a hypertext transfer protocol, and information is transmitted in plain text, while https is a secure SSL encrypted transmission protocol. 3. http and https use completely different connection methods and use different ports. The former is 80 and the latter is 443. 4. The http connection is very simple and stateless; the HTTPS protocol is a network protocol built from the SSL HTTP protocol that can perform encrypted transmission and identity authentication, and is more secure than the http protocol. 3. How HTTPS works We all know that HTTPS can encrypt information to prevent sensitive information from being obtained by third parties, so many bank websites or email addresses are safe. Higher-level services will use the HTTPS protocol. 1. The client initiates an HTTPS request There is nothing to say about this. The user enters an https URL in the browser and then connects to the 443 port of the server. 2. Server configuration The server that uses the HTTPS protocol must have a set of digital certificates. You can make them yourself or apply to the organization. The difference is that they are issued by yourself. The certificate needs to be verified by the client before you can continue to access it. If you use a certificate applied by a trusted company, the prompt page will not pop up (startssl is a good choice, with a 1-year free service). This set of certificates is actually a pair of public keys and private keys. If you don’t understand the public keys and private keys, you can imagine them as a key and a lock, but you are the only one in the world who has this Key, you can give the lock to others, and others can use this lock to lock important things and then send them to you. Because you are the only one who has this key, only you can see what is locked by this lock. thing. 3. Transfer the certificate This certificate is actually a public key, but it contains a lot of information, such as the issuing authority of the certificate, expiration time, etc. 4. Client parsing certificate This part of the work is completed by the client's TLS. First, it will verify whether the public key is valid, such as the issuing authority and expiration time. Wait, if an exception is found, a warning box will pop up, indicating that there is a problem with the certificate. If there is no problem with the certificate, then generate a random value, and then use the certificate to encrypt the random value. As mentioned above, lock the random value with a lock, so that unless you have a key, you cannot see it. Locked content is not available. 5. Transmit encrypted information This part transmits a random value encrypted with a certificate. The purpose is to let the server get this random value. In the future, the client and Communication on the server side can be encrypted and decrypted through this random value. 6. Service segment decryption information After the server decrypts it with the private key, it gets the random value (private key) passed by the client, and then passes the content through This value is symmetrically encrypted. The so-called symmetric encryption is to mix the information and the private key through a certain algorithm, so that unless the private key is known, the content cannot be obtained, and both the client and the server know the private key, so as long as The encryption algorithm is powerful enough, the private key is complex enough, and the data is secure enough. 7. Transmit encrypted information This part of the information is the information encrypted by the private key in the service segment and can be restored on the client. 8. Client decrypts information The client uses the previously generated private key to decrypt the information passed by the service segment, and then obtains the decrypted content. The entire process Even if a third party monitors the data, there is nothing they can do. 6. Advantages of HTTPS It is precisely because HTTPS is very secure that attackers cannot find a place to start. From the perspective of the webmaster, the advantages of HTTPS The advantages are as follows: 1. In terms of SEO Google adjusted the search engine algorithm in August 2014 and said that "compared to the same HTTP website, using HTTPS-encrypted websites will rank higher in search results." 2. Security Although HTTPS is not absolutely secure, institutions that master the root certificate and organizations that master encryption algorithms can also carry out man-in-the-middle attacks, but HTTPS is still It is the safest solution under the current architecture and has the following main benefits: (1), Use HTTPS protocol to authenticate users and servers, ensuring that data is sent to the correct client and server; (2), HTTPS protocol is built from SSL HTTP protocol and can perform encrypted transmission , The network protocol for identity authentication is more secure than the http protocol, which can prevent data from being stolen or changed during transmission and ensure the integrity of the data. (3) HTTPS is the most secure solution under the current architecture. Although it is not absolutely safe, it greatly increases the cost of man-in-the-middle attacks. 7. Disadvantages of HTTPS Although HTTPS has great advantages, relatively speaking, it still has some shortcomings. Specifically, there are The following 2 points: 1. SEO aspects According to ACM CoNEXT data, using the HTTPS protocol will extend the page loading time by nearly 50%, increasing by 10% to 20% power consumption. In addition, the HTTPS protocol will also affect caching, increase data overhead and power consumption, and even existing security measures will be affected. Moreover, the encryption scope of the HTTPS protocol is also relatively limited, and it has little effect on hacker attacks, denial of service attacks, server hijacking, etc. The most critical thing is that the credit chain system of the SSL certificate is not secure, especially when some countries can control the CA root certificate, man-in-the-middle attacks are also feasible. 2. Economic aspects (1) SSL certificates cost money. The more powerful the certificate, the higher the cost. Personal websites and small websites generally do not need it. use. (2). SSL certificates usually need to be bound to an IP. Multiple domain names cannot be bound to the same IP. IPv4 resources cannot support this consumption (SSL has extensions that can partially solve this problem, but it is more troublesome. It also requires browser and operating system support. Windows XP does not support this extension. Considering the installed capacity of XP, this feature is almost useless). (3) HTTPS connection caching is not as efficient as HTTP. High-traffic websites will not use it unless necessary, and the traffic cost is too high. (4) HTTPS connection server-side resources are much higher, and supporting websites with slightly more visitors requires greater costs. If all HTTPS is used, the average cost of VPS is based on the assumption that most computing resources are idle. Will go up. (5) The handshake phase of the HTTPS protocol is time-consuming and has a negative impact on the corresponding speed of the website. There is no reason to sacrifice user experience if it is not necessary. <br/> <br/> using msyql When doing fuzzy queries, it is natural to use the like statement. Normally, when the amount of data is small, it is not easy to see the efficiency of the query, but when the amount of data reaches millions or tens of millions, the efficiency of the query is Efficiency is easily apparent. At this time, the efficiency of query becomes very important! <br/><br/> <br/><br/>Generally, like fuzzy query is written as (field has been indexed): <br/><br/>SELECT `column` FROM `table` WHERE `field` like '%keyword %';<br/><br/>The above statement can be explained by explain. The SQL statement does not use an index, and it is a full table search. If the amount of data is extremely large, it is conceivable that the final efficiency will be like this. <br/><br/>Compare the following writing: <br/><br/>SELECT `column` FROM `table` WHERE `field` like 'keyword%';<br/><br/>Use explain to see this writing. SQL statements use indexes, and the search efficiency is greatly improved! <br/><br/> <br/><br/>But sometimes, when we do fuzzy queries, we don’t want all the keywords to be queried at the beginning, so if there are no special requirements, "keywork%" is not appropriate. All fuzzy queries<br/><br/> <br/><br/>At this time, we can consider using other methods<br/><br/>1.LOCATE('substr',str,pos) method<br/>Copy code <br/><br/>SELECT LOCATE('xbar',`foobar`); <br/><br/>Return 0 <br/><br/>SELECT LOCATE('bar',`foobarbar`); <br/><br/> Return 4<br/><br/>SELECT LOCATE('bar',`foobarbar`,5);<br/><br/>Return 7<br/><br/>Copy code<br/><br/>Remarks: Return substr in str The position of the first occurrence in str. If substr does not exist in str, the return value is 0. If pos exists, return the position where substr first appears after the pos-th position in str. If substr does not exist in str, the return value is 0. <br/><br/>SELECT `column` FROM `table` WHERE LOCATE('keyword', `field`)>0<br/><br/>Note: keyword is the content to be searched, and field is the matched field. Query all data with keyword<br/><br/> <br/><br/>2.POSITION('substr' IN `field`) method<br/><br/>position can be regarded as an alias of locate, and its function is the same as locate Same<br/><br/>SELECT `column` FROM `table` WHERE POSITION('keyword' IN `filed`)<br/><br/>3.INSTR(`str`,'substr') method<br/><br/>SELECT `column` FROM `table` WHERE INSTR(`field`, 'keyword' )>0 <br/><br/> <br/><br/>In addition to the above methods, there is also a function FIND_IN_SET<br/><br/>FIND_IN_SET(str1,str2):<br/><br/>Returns the position index of str1 in str2, where str2 must be separated by ",". April 30, 15:36:36 #A: UNIONoperator# The ##UNION <br/> operator works by combining two other result tables, such as TABLE1 and TABLE2 ) and derive a result table by eliminating any duplicate rows in the table. When ALL is used with UNION (that is, UNION ALL), no Eliminate duplicate rows. In both cases, each row of the derived table comes either from TABLE1 or from TABLE2. ##B<br/>: EXCEPToperator# The ##EXCEPT operator works by including all rows that are in <br/> TABLE1 but not in TABLE2 and eliminates all Repeat rows to derive a result table. When ALL is used with EXCEPT (EXCEPT ALL), does not eliminate Repeat rows. C:<br/> INTERSECToperator# The ##INTERSECT operator works by including only the rows that are present in both <br/> TABLE1 and TABLE2 and eliminates all duplications rows to derive a result table. When ALL is used with INTERSECT (INTERSECT ALL), does not eliminate Repeat rows. Note: Several query result rows using operator words must be consistent. <br/>It is better to change it to the following statement Union the two result sets Operations, including duplicate rows, are not sorted; SELECT * dbo.banji UNION ALL SELECT* FROM dbo.banjinew; -- Perform an intersection operation on the two result sets, excluding duplicate rows, and sort by default rules; SELECT *FROM dbo.banji INTERSECT SELECT * FROM dbo.banjinew; --运算符通过包括所有在TABLE1中但不在TABLE2中的行并消除所有重复行而派生出一个结果表 SELECT * FROM dbo.banji EXCEPT SELECT * FROM dbo.banjinew;<br/>有些DBMS不支持except all和intersect all <br/> 1. 接口<br/> 在php编程语言中接口是一个抽象类型,是抽象方法的集合。接口通常以interface来声明。一个类通过实现接口的方式,从而来实现接口的方法(抽象方法)。<br/> 接口定义: 特别注意:<br/> * 类全部为抽象方法(不需要声明abstract) <br/> * 接口抽象方法是public <br/> * 成员(字段)必须是常量 2. 继承<br/> 继承自另一个类的类被称为该类的子类。这种关系通常用父类和孩子来比喻。子类将继 <br/>承父类的特性。这些特性由属性和方法组成。子类可以增加父类之外的新功能,因此子类也 <br/>被称为父类的“扩展”。<br/> 在PHP中,类继承通过extends关键字实现。继承自其他类的类成为子类或派生类,子 <br/>类所继承的类成为父类或基类。 特别注意:<br/> 有时候并不需要父类的字段和方法,那么可以通过子类的重写来修改父类的字段和方法。 通过重写调用父类的方法<br/> 有的时候,我们需要通过重写的方法里能够调用父类的方法内容,这个时候就必须使用<br/> 语法:父类名::方法()、parent::方法()即可调用。<br/>final关键字可以防止类被继承,有些时候只想做个独立的类,不想被其他类继承使用。 3. 抽象类和方法<br/>抽象类特性:<br/>* 抽象类不能产生实例对象,只能被继承; <br/>* 抽象方法一定在抽象类中,抽象类中不一定有抽象方法; <br/>* 继承一个抽象类时,子类必须重写父类中所有抽象方法; <br/>* 被定义为抽象的方法只是声明其调用方式(参数),并不实现。 3. 多态<br/>多态是指OOP 能够根据使用类的上下文来重新定义或改变类的性质或行为,或者说接口的多种不同的实现方式即为多态。<br/> Related recommendations: <br/> PHP object-oriented identification object php object-oriented programming development ideas and example analysis PHP object-oriented practical basic knowledge The above is the detailed content of PHP object-oriented inheritance, polymorphism, and encapsulation introduction. For more information, please pay attention to other related articles on the PHP Chinese website! Tags: Polymorphic encapsulation PHP Previous article: PHP implements WeChat applet payment code sharing Next article: PHP session control session and cookie introduction Recommended for you 2018-02-1174 2018 -02-1074 2018-02-1059 2018-01-0567 <br/> MVC pattern (Model-View-Controller) is a software architecture pattern in software engineering. The system is divided into three basic parts: Model, View and Controller. The MVC model was first proposed by Trygve Reenskaug in 1978[1], which is Xerox Palo Alto Research Center (Xerox PARC) is a software design pattern invented for the programming language Smalltalk in the 1980s. MVC patternThe purpose is to implement a dynamic programming design, simplify subsequent modifications and expansions of the program, and make it possible to reuse a certain part of the program. In addition, this mode makes the program structure more intuitive by simplifying the complexity. The software system separates its basic parts and also gives each basic part its due functions. Professionals can be grouped by their own expertise: (Controller) - Responsible for forwarding requests and processing them. # (View) - Interface designers design graphical interfaces. (Model) - Programmers write the functions that the program should have (implement algorithms, etc.), database experts perform data management and database design (can implement specific function). view: No real processing occurs in the view, whether the data is stored online or a list of employees. As a view, it is just a way to output data and allow users to manipulate it. <br/>Model: <br/> Model represents enterprise data and business rules. Among the three components of MVC, the model has the most processing tasks. For example, it might use component objects like EJBs and ColdFusionComponents to handle databases. The data returned by the model is neutral, that is to say, the model has nothing to do with the data format, so that a model can provide data for multiple views. Code duplication is reduced because the code applied to the model only needs to be written once and can be reused by multiple views. Controller: <br/>ControllerAccepts user input and calls models and views to complete the user The needs<br/>. So when a hyperlink in a Web page is clicked and an HTML form is sent, the controller itself does not output anything or do any processing. It just receives the request and decides which model component to call to handle the request, and then determines which view to use to display the returned data. Advantages of MVC<br/>1. Low coupling<br/> The view layer and the business layer are separated, which allows the view to be changed layer code without having to recompile the model and controller code . Similarly, changes to an application's business process or business rules only require changes to the MVC model layer. Because the model is separated from the controller and view, it is easy to change the application's data layer and business rules. <br/>2. High reusability and applicability<br/> With the continuous advancement of technology, more and more methods are now needed. Access the application. The MVC pattern allows you to use a variety of different styles of views to access the same server-side code. It includes any WEB (HTTP) browser or wireless browser (wap). For example, users can order a certain product through a computer or a mobile phone. Although the ordering methods are different, the way to process the ordered products is the same. Since the data returned by the model is not formatted, the same component can be used by different interfaces. For example, a lot of data may be represented by HTML, but it may also be represented by WAP. The commands required for these representations are to change the implementation of the view layer, but the control layer and model layer do not need to make any changes. <br/>3. Lower life cycle cost<br/> MVC reduces the technical content of developing and maintaining user interfaces. <br/>4. Rapid deployment<br/> Using the MVC model can greatly reduce development time. It enables programmers (Java developers) Focusing on business logic, interface programmers (HTML and JSP developers) focus on presentation. <br/>5. Maintainability<br/> Separating the view layer and business logic layer also makes WEB applications easier to maintain and modify. <br/>6. Conducive to software engineering management<br/>Since different layers perform their own duties, different applications at each layer have certain The same characteristics are conducive to managing program code through engineering and tooling. Extension: WAP (Wireless Application Protocol) is Wireless Application Protocol is a global network communication protocol. WAP provides a common standard for the mobile Internet, and its goal is to introduce the rich information and advanced services of the Internet into wireless terminals such as mobile phones. WAP defines a universal platform that converts the current HTML language information on the Internet into information described in WML (Wireless Markup Language), and displays it on the mobile phone's display. WAP only requires the support of mobile phones and WAP proxy servers, and does not require any changes to the existing mobile communication network network protocols. Therefore, it can be widely used in GSM, CDMA, TDMA, 3G and other networks. As mobile Internet access becomes the new darling of the Internet era, various application requirements for WAP have emerged. Some handheld devices, such as PDA, after installing a micro-browser, use WAP to access the Internet. The micro-browser file is very small, which can better solve the limitations of small memory of handheld devices and insufficient wireless network bandwidth. Although WAP can support HTHL and XML, WML is a language specifically designed for small screens and keyboard-less handheld devices. WAP also supports WMLScript. This scripting language is similar to JavaScript, but has lower memory and CPU requirements because it basically has no other scripting language Contains useless features. <br/> 11. <br/> Under normal circumstances, browsers will determine the number of concurrent requests (file loading) under a single domain name. Limit, usually up to 4 5th add-in will be blocked until a previous file is loaded. Because CDN IP), so for the browser It can load all the files required for the page at the same time (far more than 4), thereby improving the page loading speed. 2. The file may have been loaded and cached Some commonjs css style library, such as jQuery, is very commonly used on the Internet of. When a user is browsing one of your web pages, it is very likely that he has visited another website through the CDN used by your website. It happens that this website has also If jQuery is used, then the user's browser has already cached the jQuery file (same as IP# If the file with the same name as ## is cached, the browser will directly use the cached file and will not load it again), so it will not be loaded again, thus indirectly improving the access speed of the website. The best your website can beNB Nor will NB pass BaiduNBpass Google, right? A good CDNs will provide higher efficiency, lower network delay and smaller packet loss rate. 4. Distributed data center If your site is deployed in Beijing, when a user from Hong Kong or further away When accessing your site, his data request is bound to be very slow. And CDNs will allow the user to load the required files from the node closest to him, so it is natural that the loading speed will be improved. 5. Built-in version control Usually, for CSSFiles and JavaScript libraries all have version numbers. You can load the required files from CDNs through a specific version number. file, you can also use latest to load the latest version (not recommended). 6. Usage analysis CDNs Providers (such as Baidu Cloud Acceleration) will provide data statistics functions, which can learn more about users' visits to their own websites, and make timely and appropriate adjustments to their own sites based on statistical data. 7. Effectively prevent the website from being attacked CDNs The provider will also provide website security services. <br/> <br/> Why does not directly deliver the data, that is, let the user get the data directly from the source station ? <br/>The Internet we often say is actually composed of two layers. One is the network layer with TCP/IP as the core, which is the Internet, and the other is the application layer represented by the World Wide Web WWW. When data is delivered from the server to the client, there are at least four places where network congestion may occur. <br/>1. "The first mile" refers to the first exit of World Wide Web traffic to users. It is the link for the website server to access the Internet. This egress bandwidth determines the access speed and concurrent visits a website can provide to users. When user requests exceed the egress bandwidth of the website, congestion will occur at the egress. <br/>2. "The last mile", the last link through which World Wide Web traffic is transmitted to users, that is, the link through which users access the Internet. The bandwidth of a user's access affects the user's ability to receive traffic. With the vigorous development of telecom operators, user access bandwidth has been greatly improved, and the "last mile" problem has been basically solved. <br/>3. ISP interconnection is the interconnection between Internet service providers, such as the interconnection between China Telecom and China Unicom. When a website server is deployed in the computer room of operator A, and users of operator B want to access the website, they must go through the interconnection point between A and B for cross-network access. From the perspective of the architecture of the Internet, the interconnection bandwidth between different operators accounts for a very small proportion of any operator's network traffic. Therefore, this is often a congestion point for network transmission. <br/>4. Long-distance backbone transmission. The first is the problem of long-distance transmission delay, and the second is the congestion problem of the backbone network. These problems will cause congestion in the World Wide Web traffic transmission. <br/>From the above analysis of network congestion, if the data on the network is delivered directly from the source site to the user, access congestion will most likely occur. The process for users to access traditional (without CDN) websites through a browser is as follows. <br/> If a CDN is used, the process will become as follows. <br/> After introducing CDN between the website and the user, the user will not feel any different from the original one. <br/>Websites that use CDN services only need to hand over the resolution rights of their domain names to the CDN's load balancing device. The CDN load balancing device will select a suitable cache server for the user. The user obtains their own information by accessing this cache server. required data. <br/>Since the cache server is deployed in the computer room of network operators, and these operators are users' network service providers, users can access the website through the shortest path and the fastest speed. Therefore, CDN can speed up user access and reduce the load pressure on the origin center. <br/> <br/> Load balancing strategy: 6. Least Connection: Each request service at the client may have a large difference when the server stays. As the working time is lengthened, if a simple round of round or random equilibrium algorithm is used, the algorithm is used. The connection process on each server may vary greatly, and true load balancing is not achieved. The minimum number of connections balancing algorithm has a data record for each server that needs to be loaded internally, recording the number of connections currently being processed by the server. When there is a new service connection request, the current request will be assigned to the server with the least number of connections. The server makes the balance more consistent with the actual situation and the load is more balanced. This balancing algorithm is suitable for long-term processing request services, such as FTP. 7. Processing capacity balancing: This balancing algorithm will allocate service requests to the server with the lightest internal processing load (based on the server CPU model, number of CPUs, memory size, current number of connections, etc.) , because it takes into account the processing power of the internal server and the current network operating conditions, this balancing algorithm is relatively more accurate, especially suitable for layer 7 (application layer) load balancing. 8. DNS response balancing (Flash DNS): On the Internet, whether it is HTTP, FTP or other service requests, the client generally finds the exact IP address of the server through domain name resolution. Under this balancing algorithm, load balancing devices located in different geographical locations receive a domain name resolution request from the same client, and resolve the domain name into the IP address of their corresponding server (that is, the load balancing device) at the same time. The IP address of the server in the same geographical location) and returns it to the client, the client will continue to request services with the first received domain name resolution IP address, and ignore other IP address responses. When this balancing strategy is suitable for global load balancing, it is meaningless for local load balancing. Service fault detection methods and capabilities: 1. Ping detection: Detect server and network system status through ping. This method is simple and fast, but It can only roughly detect whether the operating system on the network and server is normal, but it cannot detect the application services on the server. 2. TCP Open detection: Each service will open a TCP connection and detect whether a certain TCP port on the server (such as Telnet port 23, HTTP port 80, etc.) is open to determine whether the service is normal. 3. HTTP URL detection: For example, if an access request to the main.html file is sent to the HTTP server, if an error message is received, the server is considered to be faulty. <br/> <br/> First of all, let’s briefly talk about caching. The idea of caching has been around for a long time. It saves calculation results that require a lot of time and can be used directly when needed in the future to avoid repeated calculations. In computer systems, cache applications are numerous, such as the computer's three-level storage structure and cache in Web services. This article mainly discusses the use of cache in the Web environment, including browser cache, server cache, reverse proxy cache and Distributed cache and other aspects. 1. Dynamic content caching 1.1 Page Cache There are many implementation methods for page caching, such as template engines like Smarty or MVC frameworks like Zend and Diango. The controller and the view are separated, and the controller can conveniently have its own cache control. Usually, we store the cache of dynamic content on the disk. The disk provides a cheap way to store a large number of files, so don’t worry Eliminating caching due to space issues is a simple and easy-to-deploy approach. However, it is still possible that there are a large number of cache files in the cache directory, causing the CPU to spend a lot of time traversing the directory. To address this problem, cache directory hierarchies can be used to solve this problem, so that the subdirectories under each directory are Or keep the number of files within a small range. In this way, when a large number of cache files are stored, the time consumption of CPU traversing the directory can be reduced. When the cache data is stored in a disk file, there is disk I/O overhead for each cache load and expiration check, and it is also affected by the disk load. If the disk I/O load is large, the cache file There will be a certain delay in I/O operations. In addition, you canplace the cache in the local memory, which can be easily implemented with the help of PHP's APC module or PHP cache extension XCache, so that there is no disk I when loading the cache. /O operations. Finally, the cache can also be stored in a independent cache server. Memcached can be used to easily store the cache in other servers through TCP. Using memcached will be slightly slower than using local memory, but compared to storing the cache in local memory, using memcached to implement caching has two advantages: Web server memory is precious , unable to provide a large amount of space for HTML caching. Using a separate cache server can provide good scalability. Since we talk about cache, we have to talk about expiration check. The cache expiration check is mainly based on the cache validity period mechanism. Check, there are two main mechanisms: Determine whether it has expired based on the cache creation time, the length of the cache validity period setting, and the current time. That is to say, if the current time is far from the cache creation time If the length exceeds the validity period, the cache is considered expired. Judgment based on cache expiration time and current time. It is not easy to set the cache validity period. If it is too long, although the cache hit rate is high, the dynamic content will not be updated in time; if it is too short, although the dynamic content will be updated, Timely, but the cache hit rate is reduced. Therefore, it is very important to set a reasonable validity period, but more importantly, we need to have the ability to realize when the validity period needs to be changed, and then find a suitable value at any time. In addition to the cache validity period, the cache also provides a control method for forcibly clearing the cache at any time. In some cases, the content of a certain area of the page needs to be updated in time. If the entire page cache is rebuilt because an area needs to be updated in time, it will appear that not worth it. Popular template frameworks provide partial cache-free support, such as Smary. The previous method needs to dynamically control whether to use cache. The static method generates static content from dynamic content, and then allows users to directly request static content, greatly improving the throughput rate. . Similarly, static content also needs to be updated. There are generally two methods: Regenerate static content when the data is updated. Regenerate static content regularly. Like the dynamic cache mentioned earlier, static pages do not need to update the entire page. Each partial page can be updated independently through server inclusion (SSI) technology, thus greatly reducing reconstruction. Computational overhead and disk I/O overhead for the entire page, as well as network I/O overhead during distribution. Nowadays, mainstream web servers support SSI technology, such as Apache, lighttpd, etc. From a collusion point of view, people are used to looking at the browser as just a software on the PC, but in fact, The browser is an important part of the Web site component. If you cache content on the browser, you can not only reduce server computing overhead, but also avoid unnecessary transmission and bandwidth waste. In order to store cached content on the browser side, a directory is generally created in the user's file system to store cached files, and each cached file is given some necessary tags, such as expiration time, etc. Additionally, different browsers have subtle differences in how they store cache files. Browser cache content is stored on the browser side, and the content is generated by the Web server. To use the browser cache, the browser and the Web server must communicate. This is HTTP "Cache Negotiation" in . 当 Web 服务器接收到浏览器请求后,Web 服务器需要告知浏览器哪些内容可以缓存,一旦浏览器知道哪些内容可以缓存后,下次当浏览器需要请求这个内容时,浏览器便不会直接向服务器请求完整内容,二是询问服务器是否可以使用本地缓存,服务器在收到浏览的询问后回应是使用浏览器本地缓存还是将最新内容传回给浏览器。 Last-Modified Last-Modified 是一种协商方式。通过动态程序为 HTTP 相应添加最后修改时间的标记 此时,Web 服务器的响应头部会多出一条: 这代表 Web 服务器对浏览器的暗示,告诉浏览器当前请求内容的最后修改时间。收到 Web 服务器响应后,再次刷新页面,注意到发出的 HTTP 请求头部多了一段标记: 这表示浏览器询问 Web 服务器在该时间后是否有更新过请求的内容,此时,Web 服务器需要检查请求的内容在该时间后是否有过更新并反馈给浏览器,这其实就是缓存过期检查。 如果这段时间里请求的内容没有发生变化,服务器做出回应,此时,Web 服务器响应头部: 注意到此时的状态码是304,意味着 Web 服务器告诉浏览器这个内容没有更新,浏览器使用本地缓存。如下图所示: ETag HTTP/1.1 还支持ETag缓存协商方法,与最后过期时间不同的是,ETag不再采用内容的最后修改时间,而是采用一串编码来标记内容,称为ETag,如果一个内容的 ETag 没有变化,那么这个内容就一定没有更新。 ETag 由 Web 服务器生成,浏览器在获得内容的 ETag 后,会在下次请求该内容时,在 HTTP 请求头中附加上相应标记来询问服务器该内容是否发生了变化: 这时,服务器需要重新计算这个内容的 ETag,并与 HTTP 请求中的 ETag 进行对比,如果相同,便返回 304,若不同,则返回最新内容。如下图所示,服务器发现请求的 ETag 与重新计算的 ETag 不同,返回最新内容,状态码为200。 Last-Modified VS ETag 基于最后修改时间的缓存协商存在一些缺点,如有时候文件需频繁更新,但内容并没有发生变化,这种情况下,每次文件修改时间变化后,无论内容是否发生变化,都会重新获取全部内容。另外,在采用多台 Web 服务器时,用户请求可能在多台服务器间变化,而不同服务器上同一文件最后修改时间很难保证完全一样,便会导致重新获取所有内容。采用 ETag 方法就可以避免这些问题。 首先,原本使用浏览器缓存的动态内容,在使用浏览器缓存后,能否获得大的吞吐率提升,关键在于是否能避免一些额外的计算开销,同事,还取决于 HTTP 响应正文的长度,若 HTTP 响应较长,如较长的视频,则能带来大的吞吐率提到。 但使用浏览器缓存的最大价值并不在此,而在于减少带宽消耗。使用浏览器缓存后,如果 Web 服务器计算后发现可以使用浏览器端缓存,则返回的响应长度将大大减少,从而,大大减少带宽消耗。 The goal of caching in HTTP/1.1 is to eliminate the need to send requests in many cases. 在上面两图中,有个 对于主流浏览器,有三种请求页面方式: Ctrl + F5:强制刷新,使网页以及所有组件都直接向 Web 浏览器发送请求,并且不适用缓存协商,从而获取所有内容的最新版本。等价于按住 Ctrl 键后点击浏览器刷新按钮。 F5:允许浏览器在请求中附加必要的缓存协商,但不允许直接使用本地缓存,即让Last-Modified生效、Expires无效。等价于单击浏览器刷新按钮。 单击浏览器地址栏“转到”按钮或通过超链接跳转:浏览器对于所有没过期的内容直接使用本地缓存,Expires只对这种方式生效。等价于在地址栏输入 URL 后回车。 Expires指定的过期时间来源于 Web 服务器的系统时间,如果与用户本地时间不一致,就会影响到本地缓存的有效期检查。 一般情况下,操作系统都使用基于 GMT 的标准时间,然后通过时区来进行偏移计算,HTTP 中也使用 GMT 时间,所以,一般不会因为时区导致本地与服务器相差数个小时,但没人能保证本地时间与服务器一直,甚至有时服务器时间也是错误的。 针对这个问题,HTTP/1.1 添加了标记 Cache-Control,如上图1所示, HTTP 是浏览器与 Web 服务器沟通的语言,且是它们唯一的沟通方式,好好学学 HTTP 吧! 前面提到的动态内容缓存和静态化基本都是通过动态程序来实现的,下面讨论 Web 服务器自己实现缓存机制。 Web 服务器接收到 HTTP 请求后,需要解析 URL,然后将 URL 映射到实际内容或资源,这里的“映射”指服务器处理请求并生成响应内容的过程。很多时候,在一段时间内,一个 URL 对应一个唯一的响应内容,比如静态内容或更新不频繁的动态内容,如果将最终内容缓存起来,下次 Web 服务器接收到请求后可以直接将响应内容返回给浏览器,从而节省大量开销。现在,主流 Web 服务器都提供了对这种类型缓存的支持。 当使用 Web 服务器缓存时,如果直接命中,那么将省略后面的一系列操作,如 CPU 计算、数据库查询等,所以,Web 服务器缓存能带来较大性能提升,但对于普通 HTML 也,带来的性能提升较有限。 那么,缓存内容存储在什么位置呢?一般来说,本机内存和磁盘是主要选择,也可以采用分布式设计,存储到其它服务器的内存或磁盘中,这点跟前面提到的动态内容缓存类似,Apache、lighttpd 和 Nginx 都提供了支持,但配置上略有差别。 提到缓存,就不得不提有效期控制。与浏览器缓存相似,Web 服务器缓存过期检查仍然建立在 HTTP/1.1 协议上,要指定缓存有效期,仍然是在 HTTP 响应头中加入 这样一来,Web服务器就不会将这个动态内容缓存起来,当然,也有其它方法实现这个功能。 如果动态内容没有输出 Expires 标记,也可以采用 那么,是否可以使用 Web 服务器缓存取代动态程序自身的缓存机制呢?当然可以,但有些注意: 让动态程序依赖特定 Web 服务器,降低应用的可移植性。 Web 服务器缓存机制实质上是以 URL 为键的 key-value 结构缓存,所以,必须保证所有希望缓存的动态内容有唯一的 URL。 编写面向 HTTP 缓存友好的动态程序是唯一需要考虑的事。 对静态内容,特别是大量小文件站点, Web 服务器很大一部分开销花在了打开文件上,所以,可以考虑将打开后的文件描述符直接缓存到 Web 服务器的内存中,从而减少开销。但是,缓存文件描述符仅仅适用于静态内容,而且仅适用于小文件,对大文件,处理它们的开销主要在传送数据上,打开文件开销小,缓存文件描述符带来的收益小。 代理(Proxy),也称网络代理,是一种特殊的网络服务,允许一个网络终端(一般为客户端)通过这个服务与另一个网络终端(一般为服务器)进行非直接的连接。提供代理服务的电脑系统或其它类型的网络终端称为代理服务器(Proxy Server)。 The above is Wikipedia's definition of proxy. In this case, the user is hidden behind the proxy server. Then, the reverse proxy server is just the opposite. The Web server is hidden behind the proxy server. This kind of The mechanism is Reverse Proxy. Similarly, the server that implements this mechanism is called Reverse Proxy Server. We usually call the Web server behind the reverse proxy server as the back-end server (Back-end Server). Correspondingly, the reverse proxy server is called the front-end server (Front-end Server). Usually, the reverse proxy server is exposed to the Internet , the back-end Web server is connected to it through the internal network, and users will access the Web server indirectly through the reverse proxy server, which not only brings a certain degree of security, but also enables cache-based acceleration. There are many ways to implement reverse proxy. For example, the most common Nginx server can be used as a reverse proxy server. If the user browser and Web server want to work normally, they need to go through the reverse proxy server. Therefore, the reverse proxy server has great control. HTTP header information passing through it can be rewritten by any means, or other custom mechanisms can be used to directly intervene in the cache strategy. As we know from the previous content, the HTTP header information determines whether the content can be cached. Therefore, in order to improve performance, the reverse proxy server can modify the HTTP header information of the data passing through it to determine which content can be cached and which cannot be cached. . The reverse proxy server also provides the function of clearing the cache. However, unlike the dynamic content cache, in the dynamic content cache, we can actively delete The caching method implements updates before the cache expires, but the HTTP-based reverse proxy caching mechanism is not easy to do. The back-end dynamic program cannot actively delete a cached content unless the cache area on the reverse proxy server is cleared. . There are many mature distributed caching systems, such as memcached. In order to achieve caching, we will not put the cache content on the disk. Based on this principle, memcached uses physical memory as the cache area and uses key-value to store data. This is a single-index structure and data organization form. We call each key and corresponding value together a data item. All data items are independent of each other. Each data item uses key as a unique index. Users can read or update this data item through key. Memcached uses key-based The hash algorithm is used to design the storage data structure and a carefully designed memory allocator is used to make the data item query time complexity reach O(1). memcached uses an elimination mechanism based on the LRU (Lease Recently Used) algorithm to eliminate data. At the same time, the expiration time can also be set for data items. Similarly, the setting of the expiration time has been discussed previously. As a distributed cache system, memcached can run on an independent server, and dynamic content is accessed through TCP Socket. In this case, memcached's own network concurrency processing model is very important. Memcached uses the libevent function library to implement the network concurrency model. Memcached can be used in environments with a large number of concurrent users. When using the cache system to implement read operations, it is equivalent to using the "pre-read cache" of the database, which can greatly improve the throughput rate. For write operations, the cache system can also bring huge benefits. Common data write operations include inserts, updates, and deletes. These write operations are often accompanied by searches and index updates, often resulting in huge overhead. When using distributed cache, we can temporarily store data in the cache and then perform batch write operations. memcached As a distributed cache system, it can complete tasks well. At the same time, memcached also provides protocols that allow us to obtain its real-time status, including several Important information: Space usage: Paying attention to the cache space usage can let us know when we need to expand the cache system to avoid passive elimination of data due to the cache space being full. Cache hit rate I/O traffic: reflects the workload of the cache system, from which you can know whether memcached is idle or busy. Concurrent processing capabilities, cache space capacity, etc. may reach their limits, and expansion is inevitable. When there are multiple cache servers, the problem we face is, how to distribute the cache data evenly across multiple cache servers? In this case, you can choose a key-based partitioning method to evenly distribute the keys of all data items on different servers, such as taking the remainder method. In this case, when we expand the system, due to changes in the partitioning algorithm, we will need to migrate the cached data from one cache server to another cache server. In fact, there is no need to consider migration at all. Because it is cached data, just rebuild the cache. How to use cache requires detailed analysis of specific issues. For example, when I was an intern at Baidu, the use of dynamic content caching was divided into many layers for just the results of a search. In short, use caching if you can, and use caching as soon as possible; but in my current job The startup company Youzan now uses redis for dynamic content caching. As the business volume increases, it is improving step by step. Oh, I almost forgot, there is also browser caching. <br/> Speed up page opening and browsing speed. Static pages do not need to connect to the database and are significantly faster than dynamic pages. It is conducive to search engine optimization and SEO , Baidu and Google will give priority to including static pages, which are not only included quickly but also included completely; Reduce the burden on the server, browsing the web without calling the system database; The website is more secure, and HTML pages will not be affected by PHP-related vulnerabilities; if you look at larger websites, they are basically all static pages, and they can reduce attacks and prevent SQL injection. Of course there are advantages, but also disadvantages? The information is out of sync. Only by regenerating the HTML page can the information be kept in sync. Server storage problem. Data keeps increasing, and static HTML pages will continue to increase, taking up a lot of disk space. This issue needs to be considered #The precision of the static algorithm. To properly handle data, web page templates, and various file link paths, this requires us to consider all aspects in the static algorithm. A slight oversight may lead to incorrect links of one kind or another in the generated pages, or even dead links. Therefore, we must solve these problems appropriately. It cannot increase the possibilities of the algorithm, but it must also take into account all aspects. It is indeed not easy to do this. Reference article: "Sharing several common methods of page staticization" The simple understanding of PHP static is to make the website-generated pages displayed in front of visitors in the form of static HTML. PHP static is divided into pure static and pseudo-static. The difference between the two is PHP has different processing mechanisms for generating static pages. Pure static: PHP generates HTML files<br/>Pseudo-static: Store the content in nosql memory (memcached), and then directly access the page when Read from memory. Reference article: "Static processing of large-scale websites" Large-scale websites (high traffic, high concurrency ), if it is a static website, you can expand enough web servers to support extremely large-scale concurrent access. If it is a dynamic website, especially a website that uses a database, it is difficult to effectively increase the concurrent access capability of the website by increasing the number of web servers. For example, Taobao and JD.com. The reason why large static websites can respond quickly and with high concurrency is because they try to make dynamic websites static. js, css, img and other resources, the server merges them and returns CDN Content Distribution Network Technology [The efficiency of network transmission and the distance Related principles, through algorithms, calculate the nearest static server node】 Web server dynamic and static combination. Some parts of the page remain unchanged, such as the header and footer parts. So whether this part can be placed in the cache. The web server apache or ngnix, appache has a module called ESI, CSI. Able to splice dynamically and statically. Cache the static part on the web server, and then splice it together with the dynamic page returned by the server. The browser realizes the combination of dynamic and static, front-end MVC. 1. Static pages Advantages: Compared with the other two pages (dynamic pages and pseudo-static pages), it is the fastest and does not need to extract data from the database. It is fast and will not put pressure on the server. Disadvantages: Because the data is stored in HTML, the file is very large. And the most serious problem is that if you change the source code, you must change the entire source code. You cannot change one place, and the static pages of the entire site will be automatically changed. If it is a large website with a lot of data, it will take up a lot of server space, and a new HTML page will be generated every time content is added. Maintenance is troublesome if you are not a professional. 2. Dynamic page Advantages:The space usage is very small, generally for websites with tens of thousands of data, Using dynamic pages, the file size may be only a few M, while using static pages can be as little as ten M, as many as dozens of M or even more. Because the database is called out from the database, if you need to modify some values and change the database directly, then all dynamic web pages will be automatically updated. This advantage over static pages is obvious. Disadvantages: The user access speed is slow, why is it slow to access dynamic pages? This problem starts with the access mechanism of dynamic pages. In fact, there is an interpretation engine on our server. When a user accesses it, this interpretation engine will translate the dynamic page into a static page, so that everyone can view it in the browser. View the source code. And this source code is the source code after translation by the interpretation engine. In addition to the slow access speed, the data of dynamic pages is called from the database. If there are more people visiting, the pressure on the database will be very high. However, most of today's dynamic programs use caching technology. But generally speaking, dynamic pages put greater pressure on the server. At the same time, websites with dynamic pages generally have higher requirements for servers. The more people visiting at the same time, the greater the pressure on the server. 3. Pseudo-static page Through url rewriting, index.php becomes index.html<br/> Pseudo-static pageDefinition: "Fake" static page, which is essentially a dynamic page. Advantages:Compared with static pages, there is no obvious improvement in speed, because it is a "fake" static page, but it is actually a dynamic page, and it also needs to be translated into a static page. of. The biggest advantage is that it allows search engines to treat your web pages as static pages. Disadvantages:As the name suggests, "pseudo-static" is "pseudo-static". Search engines will not treat it as a static page. This is just what we analyze based on empirical logic, and Not necessarily accurate. Maybe search engines directly think of it as a dynamic page. Simple summary: Static pages are the fastest to access; maintenance is more troublesome. Dynamic pages take up little space and are simple to maintain; the access speed is slow. If many people visit, it will put pressure on the database. There is no essential difference between using pure static and pseudo-static for SEO (Search Engine Optimization: Search Engine Optimization). Using pseudo-static will occupy a certain amount of CPU usage, and heavy use will cause CPU overload. <br/> I came into contact with the concept of css sprites several times during this period. One was when using css to make a sliding door, and the other was when using YSlow to analyze website performance, so I The concept of css sprites has generated strong interest. I searched a lot of information on the Internet, but unfortunately most of it was just a few words. Many of them were direct translations of foreign information, and some directly recommended foreign information websites. Unfortunately, I didn’t pass the English language, and basically didn’t understand css sprites. Not to mention how to use it. Finally, I was inspired by an article in Blue Ideal, and after thinking about it for a long time, I finally figured out the connotation. I will use my understanding to help others master css sprites more quickly. Let me briefly introduce the concept first. Regarding its concept, it is everywhere on the Internet, so I will briefly mention it here. What are css sprites css The literal translation of sprites is CSS sprites, but this translation is obviously not enough. In fact, it is by fusing multiple pictures into one picture, and then through CSS Some techniques for laying out onto web pages. The benefits of doing this are also obvious, because if there are many pictures, it will increase http requests, which will undoubtedly reduce the performance of the website, especially for websites with a lot of pictures. If you can use css sprites to reduce the number of pictures, it will bring speed. improvement. 下面我们来用一个实例来理解css sprites,受蓝色理想中的《制作一副扑克牌系列教程》启发。 我们仅仅只需要制作一个扑克牌,拿黑桃10为例子。 可以直接把蓝色理想中融合好的一幅大图作为背景,这也是css sprites的一个中心思想,就是把多个图片融进一个图里面。 这就是融合后的图,相信对PS熟悉的同学应该很容易的理解,通过PS我们就可以组合多个图为一个图。 现在我们书写html的结构: 在这里我们来分析强调几点: 一:card为这个黑桃十的盒子或者说快,对p了解的同学应该很清楚这点。 二:我用span,b,em三种标签分别代表三种不同类型的图片,span用来表标中间的图片,b用来表示数定,em用来表示数字下面的小图标。 三:class里面的声明有2种,一个用来定位黑桃10中间的图片的位置,一个用来定义方向(朝上,朝下)。 上面是p基本概念,这还不是重点,不过对p不太清楚的同学可以了解。 下面我们重点谈下定义CSS: span{display:block;width:20px;height:21px; osition:absolute;background:url(images/card.gif) no-repeat;} 这个是对span容器的CSS定义,其他属性就不说了,主要谈下如何从这个里面来理解css sprites。 背景图片,大家看地址就是最开始我们融合的一张大图,那么如何将这个大图中的指定位置显示出来呢?因为我们知道我们做的是黑桃10,这个大图其他的图像我们是不需要的,这就用到了css中的overflow:hidden; 但大家就奇怪了span的CSS定义里面没有overflow:hidden啊,别急,我们已经在定义card的CSS里面设置了(这是CSS里面的继承关系): .card{width:125px;height:170px; position:absolute;overflow:hidden;border:1px #c0c0c0 solid;} 理解到这点还不够,还要知道width:125px;height:170px; 这个可以理解成是对这个背景图片的准确切割,当然其实并不是切割,而是把多余其他的部分给隐藏了,这就是overflow:hidden的妙用。 通过以上的部分的讲解,你一定可以充分的把握css sprites的运用,通过这个所谓的“切割”,然后再通过CSS的定位技术将这些图准确的分散到这个card里面去! PS:CSS的定位技术,大家可以参考其他资料,例如相对定位和绝对定位,这里我们只能尝试用绝对定位。 最后我们来补充一点: 为什么要采取这样的结构? span这个容器是主要作用就是存放这张大的背景图片,并在里面实现”切割“,span里面切割后的背景是所有内容块里面通用的! 后面class为什么要声明2个属性? 很显然,一个是用来定位内容块的位置,一个是用来定义内容块中的图像的朝上和朝下,方位的! 下面我们附上黑桃10的完整源码: 最后感谢蓝色理想提供的参考资料! <br/> <br/> 1、前言 Recently, I have used reverse proxy at work and found that there are many ways to play with network proxy. There is a lot behind the network that needs to be learned. Before this, I had only used proxy software. In order to access Google, I used proxy software and needed to configure the proxy address in the browser. I only knew about the concept of agency, but I didn’t know that there were forward and reverse agency, so I quickly learned about it and supplemented my knowledge. First, figure out what a forward proxy is and what a reverse proxy is, then how the two are demonstrated in actual use, and finally summarize what the forward proxy is used for and what the reverse proxy can do. 2. Forward proxy The forward proxy is similar to a springboard, and the proxy accesses external resources. For example: I am a user. I cannot access a certain website, but I can access a proxy server. What about this proxy server? I could access the website that I couldn't access, so I first connected to the proxy server and told him that I needed the content of the website that I couldn't access. The proxy server went to get it back and then returned it to me. From the website's perspective, there is only one record when the proxy server comes to retrieve the content. Sometimes it is not known that it is the user's request, and the user's information is also hidden. This depends on whether the proxy tells the website or not. The client must set up a forward proxy server. Of course, the premise is to know the IP address of the forward proxy server and the port of the agent program. For example, if you have used this type of software before, such as CCproxy, http://www.ccproxy.com/ needs to configure the proxy address in the browser. In summary: Forward proxy is a server located between the client and the origin server (origin server), in order to The original server obtains the content, the client sends a request to the proxy and specifies the target (original server), and then the proxy forwards the request to the original server and returns the obtained content to the client. The client must make some special settings to use the forward proxy. Purpose of forward proxy: (1) Access resources that were originally inaccessible, such as google 3. Reverse proxy 4. The difference between the two 5. Reverse proxy of nginx As the name suggests, "Agent" means that it does not use itself, but uses a third party to perform what it wants to do on its behalf. It can be imagined as having an additional intermediate server (proxy server) between the local machine and the target server. The forward proxy is a server (proxy server) located between the client and the original server. The client must first make some necessary settings (must know the proxy server IP and port), Send each request to the proxy server first. The proxy server forwards it to the real server and obtains the response result, and then returns it to the client. Simple explanation is that the proxy server replaces the client to access the target server. (Hide the client) Bypass inaccessible nodes and access the target server from another routing path (such as over the wall) Accelerate access and improve access speed through different routing paths (now By increasing the bandwidth, etc., this method is basically not used to speed up) Caching function, the data is cached in the proxy server. If the data requested by the client is in the cache, the target host will not be accessed. . Permission control, the firewall authorizes proxy server access permissions, and the client can pass the firewall through the forward proxy (such as ISA SERVER permission judgment adopted by some companies) Hide visitors. Through configuration, the target server can only obtain the information of the proxy server and cannot obtain the information of the real visitors. The reverse proxy is just the opposite. For the client, it is like the original server, and The client does not need to make any special settings. The client sends a normal message to the reverse proxy request, and then the reverse proxy will transfer the request to the original server and return the obtained content to the client, as if the content was originally its own. A simple explanation is that the proxy server replaces the target server To accept and return the client's request. (Hide the target server) Hide the original server and prevent the server from Malicious attacks, etc., make the client think that the proxy server is the original server. Cache left and right, cache the original server data to reduce the access pressure of the original server. Transparent proxy means that the client does not need to know the existence of a proxy server at all. It adapts your request fields (messages) and transmits the real IP. Note that encryption The transparent proxy is an anonymous proxy, which means that there is no need to set up and use the proxy. An example of transparent proxy practice is the behavior management software used by many companies nowadays. As shown in Figure 3.1 below The full name of CDN is Content Delivery Network, which is content distribution network. The basic idea is to avoid bottlenecks and links on the Internet that may affect the speed and stability of data transmission as much as possible, so that content transmission can be faster and more stable. By placing node servers throughout the network to form a layer of intelligent virtual network based on the existing Internet, the CDN system can real-time analyze the network traffic and the connection and load status of each node, as well as the distance to the user and response time. and other comprehensive information to redirect the user's request to the service node closest to the user. Its purpose is to enable users to obtain the required content nearby, solve the congestion situation of the Internet network, and improve the response speed of users' access to the website. Typical use is to provide access to the Internet for LAN clients within the firewall. Use buffering features to reduce network usage. The typical use is to provide access to the server behind the firewall to Internet users. Provide load balancing for multiple servers on the backend, or provide buffering services for servers with slower backends. Allows clients to access any website through it and The client itself is hidden, so you must take security measures to ensure that only authorized clients are served. It is transparent to the outside world, and visitors do not know that they are visiting a proxy. Simply put, CDN is a current network acceleration solution, reverse proxy is Technology that forwards user requests to the backend server. CDN uses the technical principle of reverse proxy, and its most critical core technology is intelligent DNS and so on. <br/><br/> mysql The practice of using master-slave synchronization to separate reading and writing and reduce the pressure on the main server is now popular in the industry Very commonly done. Master-slave synchronization can basically achieve real-time synchronization. I borrowed the master-slave synchronization schematic from another website. <br/> <br/> After the configuration is complete, the master server will write the update statement after the master-slave synchronization Enter the binlog, and read from the server's IO thread (It should be noted here that there was only one IO thread before 5.6.3, but after 5.6.3, there are multiple threads to read, and the speed will naturally be accelerated) Go back and read the binlog of the master server and write it to the relay log of the slave server. Then the SQL thread of the slave server will execute the sql in the relay log one by one to perform data recovery. <br/> relay means transmission, relay race means relay race <br/> 1. Master-slave synchronization The reason for the delay We know that a server opens N links for clients to connect. In this way, there will be large concurrent update operations, but the threads that read the binlog from the server are only One, when a certain SQL takes a little longer to execute on the slave server or because a certain SQL needs to lock the table, it will cause a large backlog of SQL on the master server and not be synchronized to the slave server. This leads to master-slave inconsistency, that is, master-slave delay. <br/> 2. Solution to master-slave synchronization delay In fact, there is no one-stop solution to master-slave synchronization delay. This method is because all SQL must be executed in the slave server, but if the master server continues to have update operations written continuously, once a delay occurs, the possibility of aggravating the delay will be greater. Of course we can take some mitigation measures. a. We know that because the master server is responsible for update operations, it has higher security requirements than the slave server, so some settings can be modified, such as sync_binlog=1, innodb_flush_log_at_trx_commit = 1 Class settings, and slave does not require such high data security. You can set sync_binlog to 0 or turn off binlog, i##nnodb_flushlog, innodb_flush_log_at_trx_commit can also be set to 0 to improve the execution efficiency of sql. This can greatly improve the efficiency . The other is to use a better hardware device than the main library as the slave. <br/> 3. Method to determine master-slave delay MySQL provides The slave server status command can be viewed through show slave status. For example, you can look at the value of the Seconds_Behind_Master parameter to determine whether there is a master-slave delay. <br/>The values are as follows: <br/>NULL - indicates that either io_thread or sql_thread has failed, that is, the running status of the thread is No, not Yes.<br/>0 - This value is zero, which is what we are extremely eager to see, indicating that the master-slave replication status is normal <br/> <br/> > 1. Redis supports richer data storage types, String, Hash, List, Set and Sorted Set . Memcached only supports simple key-value structures. <br/>> 2. Memcached key-value storage has higher memory utilization than Redis which uses hash structure for key-value storage. <br/>> 3. Redis provides the transaction function, which can ensure the atomicity of a series of commands. <br/>> 4. Redis supports data persistence and can keep the data in the memory on the disk. <br/>> ; 5. Redis only uses a single core, while Memcached can use multiple cores, so on average Redis has higher performance than Memcached when storing small data on each core. <br/><br/>- How does Redis achieve persistence? <br/><br/>> 1. RDB persistence, saving the state of Redis in memory to the hard disk, which is equivalent to backing up the database state. <br/>> 2. AOF persistence (Append-Only-File), AOF persistence records the database by saving the write status of Redis server lock execution. Equivalent to the commands received by the backup database, all commands written to AOF are saved in the Redis protocol format. <br/> <br/> <br/> Apache HTTP server is a modular server that can run on almost all widely used Computer platform. It belongs to the application server. Apache supports many modules and has stable performance. Apache itself is a static analysis, suitable for static HTML, pictures, etc., but can support dynamic pages, etc. through extended scripts, modules, etc. (Apche can support PHPcgiperl, but you need to use ## If #Java, you need Tomcat to be supported in the Apache background, and Java The request is forwarded by Apache to Tomcat for processing.) Disadvantages: The configuration is relatively complex and does not support dynamic pages. Tomcat is an application (Java) server, it is just A Servlet (JSP is also translated into Servlet) container, which can be considered as Apache extension, but can run independently of Apache. Nginx is a very lightweight HTTP## written by Russians #Server,Nginx, which is pronounced "engine X", is a high-performance HTTP And reverse proxy server, it is also an IMAP/POP3/SMTP proxy server. 2. Comparison l Both are developed by Apache Both are HTTPService functions Both are Free Differences: l Apache is specially used to provide HTTP services, and related configurations (such as virtual host, URL forwarding, etc.), and Tomcat is Apache is organized in JSP, Servlet that conforms to Java EE AJSPserver developed under the standard. l Apache is a Web server environment program,enable it as Web The server uses , but only supports static web pages such as (ASP,PHP,CGI,JSP) and other dynamic pages The web page doesn't work. If you want to run JSP in the Apache environment, you need an interpreter to execute JSP Webpage,And thisJSP interpreter isTomcat. l Apache:Focus on HTTPServer ,Tomcat : focuses on the Servlet engine. If run in Standalone mode, it is functionally the same as Apache Equivalent, supports JSP, but is not ideal for static web pages; l Apache is the Web server, Tomcat is the application (Java) server, it is just a Servlet (JSP is also translated into Servlet) container, which can be considered as ## An extension of #Apache, but can run independently of Apache. In actual use, Apache and Tomcat are often used together: l If the client requests a static page, you only needApacheThe server responds to the request . l If the client requests a dynamic page, the Tomcat server responds to the request. l Because JSP interprets the code on the server side, so integration can reduce ## Service overhead of #Tomcat. It can be understood that Tomcat is an extension of Apache. l Lightweight, same as web service, better than apacheOccupies less memory and resources l Anti-concurrency, nginx processes requests asynchronously and non-blockingly, while apache is blocking type , under high concurrencynginx can maintain low resources, low consumption and high performance l Highly modular design, writing modules is relatively simple ##l Provide load balancing l The community is active and various high-performance modules are produced quickly l apache rewrite is more powerful than nginx ; l Support dynamic pages; l Supports many modules, basically covering all applications; l The performance is stable, but nginx has relatively more bugs. l Nginx Configuration is simple, Apache Complex ; l Nginx Static processing performance is higher than 3 more than ;l Apache supports PHP is relatively simple, Nginx Needs to be used with other backends; l Apache has more components than Nginx 多 ;l apache is a synchronous multi-process model, one connection corresponds to one process; nginx is asynchronous, multiple connections (10,000 levels) can correspond to one process; l nginx Processes static files well, consumes less memory; l Dynamic requests are done by apache, nginx is only suitable for static and reverse; l Nginx Suitable for front-end server, load performance is very good; l NginxItself is a reverse proxy server , and supports load balancing l NginxAdvantages: Load balancing, reverse proxy, static file processing advantages. nginx processes static requests faster than apache; l ApacheAdvantages: Compared with the Tomcat server, processing static files is its advantage and is fast. Apache is static analysis, suitable for static HTML, pictures, etc. l Tomcat: Dynamically parse the container, handle dynamic requests, and compile JSP\Servlet container, Nginx has a dynamic separation mechanism, static requests can be processed directly through Nginx, and dynamic requests are forwarded to The background is handled by Tomcat. Apache is processing dynamic Advantages, Nginx has better concurrency, CPUlow memory usage, ifrewriteFrequently, then Apache is more suitable. <br/> <br/> 1. Use lsof <br/>lsof -i:port number to check whether a port is occupied<br/> For more information, you can click here: http://www.findme.wang/blog/detail/id/1.html View CPU<br/> The top command is a commonly used performance analysis tool under Linux. It can display the resource usage of each process in the system in real time, similar to the Windows Task Manager You can directly use the top command to view the contents of %MEM. You can choose to view by process or by user. If you want to view the process memory usage of the oracle user, you can use the following command: <br/>$ top -u oracle <br/> 1. 在 LINUX 命令平台输入 1-2 个字符后按 Tab 键会自动补全后面的部分(前提是要有这个东西,例如在装了 tomcat 的前提下, 输入 tomcat 的 to 按 tab)。<br/>2. ps 命令用于查看当前正在运行的进程。<br/>grep 是搜索<br/>例如: ps -ef | grep java<br/>表示查看所有进程里 CMD 是 java 的进程信息<br/>ps -aux | grep java<br/>-aux 显示所有状态<br/>ps<br/>3. kill 命令用于终止进程<br/>例如: kill -9 [PID]<br/>-9 表示强迫进程立即停止<br/>通常用 ps 查看进程 PID ,用 kill 命令终止进程<br/>网上关于这两块的内容<br/> <br/> <br/> <br/> 优化手段主要有缓存、集群、异步等。 网站性能优化第一定律:优先考虑使用缓存。 1 2 <br/> <br/> <br/> 任何可以晚点做的事情都应该晚点再做。 摘自《大型网站技术架构》–李智慧 <br/> 手机网站支付主要应用于手机、掌上电脑等无线设备的网页上,通过网页跳转或浏览器自带的支付宝快捷支付实现买家付款的功能,资金即时到账。 1、您申请前必须拥有企业支付宝账号(不含个体工商户账号),且通过支付宝实名认证审核。<br/>2、如果您有已经建设完成的无线网站(非淘宝、天猫、诚信通网店),网站经营的商品或服务内容明确、完整(古玩、珠宝等奢侈品、投资类行业无法申请本产品)。<br/>3、网站必须已通过ICP备案,备案信息与签约商户信息一致。 假设我们已经成功申请到手机网站支付接口,在进行开发之前,需要使用公司账号登录支付宝开放平台。 1、开发者登录开放平台,点击右上角的“账户及密钥管理”。<br/> 2、选择“合作伙伴密钥”,即可查询到合作伙伴身份(PID),以2088开头的16位纯数字。<br/> 支付宝提供了DSA、RSA、MD5三种签名方式,本次开发中,我们使用RSA签名和加密,那就只配置RSA密钥就好了。 关于RSA加密的详解,参见《支付宝签名与验签》。 本节可以忽略,本节可以忽略,本节可以忽略!因为官方文档并没有提及应用环境配置的问题。 进入管理中心,对应用进行设置。<br/> return_url,支付完成后的回调url;notify_url,支付完成后通知的url。支付宝发送给两个url的参数是一样的,只不过一个是get,一个是post。 以上两种发起请求的方式中,return_url在Node端,notify_url在后端。我们也可以根据需要,把两个url都放在后端,或者都放在Node端,改变相应业务逻辑即可。 Node端发起支付请求有两种选择,一种是获取到后端给的参数后,通过request模块发起get请求,获取到支付宝返回的支付页面,然后显示到页面上;另一种是获取到后端给的参数后,把参数全部输出到页面中的form表单,然后通过js自动提交表单,获取到支付宝返回的支付页面(同时显示出来)。 理论上完全正确的请求,然而,获取到的支付页面,输出到页面上,却是乱码。没错,还是一个错误提示页面。<br/> 神奇的地方在于,在刷新页面多次后,正常了!!!啊嘞,这是什么鬼? 先解决乱码问题,看看报什么错! 很遗憾,无效!乱码依然是乱码。。。和沈晨帅哥讨论很久,最终决定换一种方案——利用表单提交。 开始时,打算把alidata直接输出到form表单的action中接口的后面,因为这样似乎最简便。但是,提交表单时,后面的参数全部被丢弃了。所以,不得不得把所有参数放在form表单中。Node端拆分了一下参数,组装成了一个alipayParam对象,这个工作也可以交给后端来做。 显然,request模拟表单提交和真实表单提交结果的不同,得出的结论是,request并不能完全模拟表单提交。或者,request可以模拟,而我不会-_-|||。 以上,大功告成?不!还有一个坑要填,因为微信屏蔽了支付宝!<br/>在电脑上,跳转支付宝支付页面正常,很完美!然而,在微信浏览器中测试时,却没有跳转,而是出现如下信息。<br/> 微信端支付宝支付,iframe改造<br/>http://www.cnblogs.com/jiqing9006/p/5584268.html 该办法的核心在于:把微信屏蔽的链接,赋值给iframe的src属性。 然而,在改造时,先是报错ILLEGAL_SIGN,于是利用urlencode处理了字符串。接着,又报错ILLEGAL_EXTERFACE,没有找到解决办法。 暂时放弃,以后如果有了解决办法再补上。 关于微信公众平台无法使用支付宝收付款的解决方案说明<br/>https://cshall.alipay.com/enterprise/help_detail.htm?help_id=524702 该方法的核心在于:确认支付时,提示用户打开外部系统浏览器,在系统浏览器中支付。 该页面会自动跳转到同一文件夹下的pay.htm,该文件官方已经提供,把其中的引入ap.js的路径修改一下即可。最终效果如下:<br/> 支付宝的支付流程和微信的支付流程,有很多相似之处。沈晨指出一点不同:支付宝支付完成后有return_url和notify_url;微信支付完成后只有notify_url。 研读了一下微信支付的开发文档,确实如此。微信支付完成后的通知也分成两路,一路通知到notify_url,另一路返回给调用支付接口的JS,同时发微信消息提示。也就是说,跳转return_url的工作我们需要自己做。 最后,感谢沈晨帅哥提供的思路和帮助,感谢体超帅哥辛苦改后端。 Alipay Open Platform<br/>https://openhome.alipay.com/platform/home.htm Alipay Open Platform-Mobile Website Payment-Document Center<br/> https://doc.open.alipay.com/doc2/detail?treeId=60&articleId=103564&docType=1 Alipay WAP payment interface development<br/>http://blog.csdn.net/tspangle/article /details/39932963 wap h5 mobile website payment interface evokes Alipay wallet payment Merchant service-Alipay knows the entrustment! <br/>https://b.alipay.com/order/techService.htm WeChat Payment-Development Document<br/>https://pay.weixin.qq.com/wiki/doc/api/ jsapi.php?chapter=7_1 WeChat Alipay payment, iframe transformation<br/>http://www.cnblogs.com/jiqing9006/p/5584268.html How WeChat breaks through Alipay Blockade<br/>http://blog.csdn.net/lee_sire/article/details/49530875 JavaScript Special Topic (2): In-depth understanding of iframe<br/>http://www.cnblogs.com/ fangjins/archive/2012/08/19/2645631.html Solution instructions for the inability to use Alipay to receive and pay on the WeChat public platform<br/>https://cshall.alipay.com/enterprise/help_detail.htm ?help_id=524702 <br/> For today’s high-traffic websites , with tens of millions or even hundreds of millions of traffic every day, how to solve the traffic problem? The following are some summary methods: First, confirm whether the server hardware is enough to support the current traffic. Ordinary P4 servers can generally support up to 100,000 independent IPs per day. If the number of visits is greater than this, you must first configure a higher-performance dedicated server to solve the problem. Otherwise, no matter how you optimize it, it is impossible to completely solve the performance problem. Second, optimize database access. An important reason for the excessive load on the server is that the CPU load is too high. Only by reducing the load on the server CPU can the bottleneck be effectively broken. Using static pages can minimize the load on the CPU. It is of course best to achieve complete staticization of the front desk, as there is no need to access the database at all. However, for websites that are frequently updated, staticization often cannot satisfy certain functions. Caching technology is another solution, which is to store dynamic data in cache files. Dynamic web pages directly call these files without having to access the database. Both WordPress and Z-Blog use this caching technology extensively. I have also written a Z-Blog counter plug-in, which is also based on this principle. If it is indeed unavoidable to access the database, you can try to optimize the query SQL of the database. Avoid using statements such as Select *from. Each query only returns the results you need, avoiding a large number of SQL queries in a short period of time. Third, prohibit external hot links. Hotlinking of pictures or files from external websites often brings a lot of load pressure. Therefore, hotlinking of pictures or files from external websites should be strictly restricted. Fortunately, hotlinking can be controlled simply through refer, and Apache itself can configure it. To prohibit hot links, IIS also has some third-party ISAPIs that can achieve the same function. Of course, forged references can also be used to achieve hotlinking through code, but currently there are not many people who deliberately forge referential hotlinks. You can ignore it for now, or use non-technical means to solve it, such as adding watermarks to pictures. Fourth, control the download of large files. Downloading large files will take up a lot of traffic, and for non-SCSI hard drives, downloading a large number of files will consume the CPU and reduce the website's responsiveness. Therefore, try not to provide downloads of large files exceeding 2M. If you need to provide them, it is recommended to place the large files on another server. There are currently many free Web2.0 websites that provide image sharing and file sharing functions, so you can try to upload images and files to these sharing websites. Fifth, use different hosts to divert the main traffic. Place files on different hosts and provide different images for users to download. For example, if you feel that RSS files take up a lot of traffic, then use services such as FeedBurner or FeedSky to place the RSS output on other hosts. In this way, most of the traffic pressure of other people's access will be concentrated on FeedBurner's host, and RSS will not occupy too many resources. Sixth, use traffic analysis and statistics software. Installing a traffic analysis and statistics software on the website can instantly know where a lot of traffic is consumed and which pages need to be optimized. Therefore, accurate statistical analysis is required to solve the traffic problem. The traffic analysis and statistics software I recommend is Google Analytics. I feel that the effect is very good during use. Later I will introduce in detail some common sense and skills of using Google Analytics. 1. Split tables 2. Separation of reading and writing 3. Front-end optimization. Nginx replaces Apache (front-end load balancing). Personally, I think the main thing is whether the distributed architecture is in place. The optimization of mysql and cache are both limited optimizations. However, after the distributed architecture is built, after the PV grows, only heap machines are needed to expand the capacity. . Attached are some optimization experiences. First, learn to use explain statements to analyze select statements and optimize indexes and table structures. Secondly, rationally use caches such as memcache to reduce the load of mysql. Finally, if possible, try to use Facebook's hiphop-php. Compile PHP to improve program efficiency. <br/> Comparison of NoSQL and relational database design concepts <br/> ##In relational database The tables store some formatted data structures. The composition of each tuple's fields is the same. Even if not every tuple requires all fields, the database will allocate all fields to each tuple. Such a structure It can facilitate operations such as connections between tables, but from another perspective, it is also a factor in the performance bottleneck of relational databases. Non-relational databases store key-value pairs, and their structure is not fixed. Each tuple can have different fields. Each tuple can add some of its own key-value pairs as needed, so it is not limited to a fixed structure. The structure can reduce some time and space overhead. Features: <br/>They can handle extremely large amounts of data. <br/>They run on clusters of cheap PC servers. <br/>They break performance bottlenecks. <br/>No excessive operations. <br/>Bootstrap support <br/><br/>Disadvantages: <br/>But some people admit that without formal official support, it can be terrible if something goes wrong, at least that is how many managers see it. <br/>In addition, nosql has not formed a certain standard. Various products are emerging one after another, and the internal chaos is internal. It takes time to test various projects<br/><br/> Summary: MySQL , relational database, has a huge number of supporters. NoSQL, a non-relational database, is regarded as a database revolutionary. The two seem destined to fight each other, but they both belong to the open source family, but they can go hand in hand, live in harmony, and work together to provide developers with better services. <br/> Choose one? Or do you want both? Whether the application should be consistent with a relational database or NoSQL (perhaps both) depends, of course, on the nature of the data being generated or retrieved . As with most things in tech, there are tradeoffs when making decisions. If scale and performance are more important than 24-hour data consistency, then NoSQL is an ideal choice (NoSQL relies on the BASE model-basically available, soft state, eventual consistency). #But if you want to ensure "always consistent", especially for confidential information and financial information, then MySQL is probably the best choice (MySQL relies on ACID model - Atomicity, Consistency, Independence and Durability). As an open source database, both relational and non-relational databases are constantly maturing. We can expect that there will be a large number of databases based on ACID and BASE models. New applications are generated. Although a relatively radical article "Relational Database is Dead" appeared in 2009, we all know in our hearts that relational databases are actually still alive and well. You can't do without a relational database yet. But it also illustrates the fact that bottlenecks have indeed appeared in relational databases when processing WEB2.0 data. So should we use NoSQL or relational database? I don't think we need to give an absolute answer. We need to decide what we use based on our application scenarios. If the relational database can work very well in your application scenario, and you are very good at using and maintaining the relational database, then I think there is no need for you to migrate to NoSQL unless you He is a person who likes to toss. If you are in key fields where data is king, such as finance and telecommunications, you are currently using Oracle database to provide high reliability. Unless you encounter a particularly big bottleneck, don't rush to try NoSQL. However, in WEB2.0 websites, most relational databases have bottlenecks. Developers spend a lot of effort to optimize disk IO and database scalability, such as database sharding, master-slave replication, heterogeneous replication, etc. However, these tasks require more technical capabilities. It gets higher and more challenging. If you are going through these situations, then I think you should give NoSQL a try. <br/> Compared with structured In terms of data (that is, row data, stored in the database, the implemented data can be logically expressed using a two-dimensional table structure), data that is inconvenient to be expressed using a two-dimensional logical table in the database is called unstructured data, including all formats Office documents, text, pictures, XML, HTML, various reports, images and audio/video information, etc. The unstructured database refers to a database whose field lengths are variable, and the records of each field can be composed of repeatable or non-repeatable subfields. It can not only process structured data (such as numbers) , symbols and other information) and is more suitable for processing unstructured data (full-text text, images, sounds, film and television, hypermedia and other information). The unstructured WEB database is mainly produced for unstructured data. Compared with the popular relational databases in the past, its biggest difference is that it breaks through the limitations of the relational database structure definition that is not easy to change and the fixed length of the data. , supports repeated fields, subfields and variable-length fields, and implements the processing of variable-length data and repeated fields and the variable-length storage management of data items, while processing continuous information (including full-text information) and unstructured information (including various multimedia information) has advantages that traditional relational databases cannot match. Structured data (i.e. row data, stored in the database, can use a two-dimensional table structure to logically express the implemented data) Unstructured data, including all formats of office documents, text, pictures, XML, HTML, various reports, images and audio/video information, etc. The so-called semi-structured data is Data between fully structured data (such as data in relational databases and object-oriented databases) and completely unstructured data (such as sounds, image files, etc.), HTML documents are semi-structured data. It is generally self-describing, and the structure and content of the data are mixed together without obvious distinction. Structured data: two-dimensional table (relational) <br/> Semi-structured data: tree, graph<br/> Unstructured data: None The data models of RMDBS include: network data model, hierarchical data model, relational Others: Structured data: Structure first, then data<br/> Semi-structured data: Data first, then structure With the development of network technology, especially The rapid development of Internet and Intranet technology has caused the amount of unstructured data to increase day by day. At this time, the limitations of relational databases, which are primarily used to manage structured data, became increasingly apparent. Therefore, database technology has accordingly entered the "post-relational database era" and developed into the era of unstructured databases based on network applications. my country's unstructured database is represented by the IBase database of Beijing Guoxin Base (iBase) Software Co., Ltd. IBase database is an unstructured database for end users. It is at the internationally advanced level in the fields of processing unstructured information, full-text information, multimedia information and massive information, as well as Internet/Intranet applications. It is at the international advanced level in the management and management of unstructured data. A breakthrough in full-text retrieval. It mainly has the following advantages: (1) In Internet applications, there are a large number of complex data types. iBase can manage various document information and multimedia information through its external file data types, and for various Document information resources with retrieval significance, such as HTML, DOC, RTF, TXT, etc., also provide powerful full-text retrieval capabilities. (2) It uses the mechanism of subfields, multi-valued fields and variable-length fields, allowing the creation of many different types of unstructured or arbitrary format fields, thereby breaking through the very strict table structure of relational databases , allowing unstructured data to be stored and managed. (3)iBase defines both unstructured and structured data as resources, so that the basic element of the unstructured database is the resource itself, and the resources in the database can contain both structured and unstructured information. . Therefore, unstructured databases can store and manage a variety of unstructured data, realizing the transformation from database system data management to content management. (4)iBase adopts the object-oriented cornerstone to closely integrate enterprise business data and business logic, and is particularly suitable for expressing complex data objects and multimedia objects. (5)iBase is a database produced to meet the needs of the development of the Internet. Based on the idea that the Web is a massive database of a wide area network, it provides an online resource management system iBase Web, which combines the network server (WebServer) and the database The server (Database Server) is directly integrated into a whole, making the database system and database technology an important and integral part of the Web, breaking through the limitation of the database only playing a backend role in the Web system, realizing the organic and seamless combination of the database and the Web, thereby providing Information management and even e-commerce applications on the Internet/Intranet have opened up a broader field. (6)iBase is fully compatible with various large, medium and small databases, and provides import and link support capabilities for traditional relational databases, such as Oracle, Sybase, SQLServer, DB2, Informix, etc. Through the above analysis, we can predict that with the rapid development of network technology and network application technology, unstructured databases based entirely on Internet applications will become the successor to hierarchical databases, network databases and relational databases. Another key and hot technology. When designing an information system, it will definitely involve data storage. Generally, we will use the system The information is stored in a specified relational database. We will classify the data by business, design corresponding tables, and then save the corresponding information to the corresponding tables. For example, if we build a business system and need to save basic employee information: job number, name, gender, date of birth, etc.; we will create a corresponding staff table. But not all the information in the system can be corresponded to by simply using fields in a table. Just like the example above. This type of data is best handled by simply creating a corresponding table. Like pictures, sounds, videos, etc. We usually cannot directly know the content of this kind of information, and the database can only save it in a BLOB field, which is very troublesome for future retrieval. The general approach is to create a table containing three fields (number, content description varchar(1024), content blob). Citation is by number and search is by content description. There are many tools for processing unstructured data, and the common content manager on the market is one of them. Such data is different from the above two categories. It is structured data, but the structure changes greatly. Because we need to understand the details of the data, we cannot simply organize the data into a file and process it as unstructured data. Since the structure changes greatly, we cannot simply create a table to correspond to it. This article mainly discusses two commonly used methods for semi-structured data storage. 先举一个半结构化的数据的例子,比如存储员工的简历。不像员工基本信息那样一致每个员工的简历大不相同。有的员工的简历很简单,比如只包括教育情况;有的员工的简历却很复杂,比如包括工作情况、婚姻情况、出入境情况、户口迁移情况、党籍情况、技术技能等等。还有可能有一些我们没有预料的信息。通常我们要完整的保存这些信息并不是很容易的,因为我们不会希望系统中的表的结构在系统的运行期间进行变更。 这种方法通常是对现有的简历中的信息进行粗略的统计整理,总结出简历中信息所有的类别同时考虑系统真正关心的信息。对每一类别建立一个子表,比如上例中我们可以建立教育情况子表、工作情况子表、党籍情况子表等等,并在主表中加入一个备注字段,将其它系统不关心的信息和已开始没有考虑到的信息保存在备注中。 优点:查询统计比较方便。 缺点:不能适应数据的扩展,不能对扩展的信息进行检索,对项目设计阶段没有考虑到的同时又是系统关心的信息的存储不能很好的处理。 XML可能是最适合存储半结构化的数据了。将不同类别的信息保存在XML的不同的节点中就可以了。 优点:能够灵活的进行扩展,信息进行扩展式只要更改对应的DTD或者XSD就可以了。 缺点:查询效率比较低,要借助XPATH来完成查询统计,随着数据库对XML的支持的提升性能问题有望能够很好的解决。 <br/> 单链表<br/><br/> 1、链接存储方法<br/> 链接方式存储的线性表简称为链表(Linked List)。<br/> 链表的具体存储表示为:<br/> ① 用一组任意的存储单元来存放线性表的结点(这组存储单元既可以是连续的,也可以是不连续的)<br/> ② 链表中结点的逻辑次序和物理次序不一定相同。为了能正确表示结点间的逻辑关系,在存储每个结点值的同时,还必须存储指示其后继结点的地址(或位置)信息(称为指针(pointer)或链(link))<br/> 注意:<br/> 链式存储是最常用的存储方式之一,它不仅可用来表示线性表,而且可用来表示各种非线性的数据结构。<br/> <br/> 2、链表的结点结构<br/> ┌──┬──┐<br/> │data│next│<br/> └──┴──┘ <br/> data域--存放结点值的数据域<br/> next域--存放结点的直接后继的地址(位置)的指针域(链域)<br/>注意:<br/> ①链表通过每个结点的链域将线性表的n个结点按其逻辑顺序链接在一起的。<br/> ②每个结点只有一个链域的链表称为单链表(Single Linked List)。<br/> 【例】线性表(bat,cat,eat,fat,hat,jat,lat,mat)的单链表示如示意图<br/><br/> 单链表的反转是常见的面试题目。本文总结了2种方法。 单链表node的数据结构定义如下: 把当前链表的下一个节点pCur插入到头结点dummy的下一个节点中,就地反转。 dummy->1->2->3->4->5的就地反转过程: pCur是需要反转的节点。 prev连接下一次需要反转的节点 反转节点pCur 纠正头结点dummy的指向 pCur指向下一次要反转的节点 伪代码 1个头结点,2个指针,4行代码 注意初始状态和结束状态,体会中间的图解过程。 新建一个头结点,遍历原链表,把每个节点用头结点插入到新建链表中。最后,新建的链表就是反转后的链表。 pCur是要插入到新链表的节点。 pNex是临时保存的pCur的next。 pNex保存下一次要插入的节点 把pCur插入到dummy中 纠正头结点dummy的指向 pCur指向下一次要插入的节点 伪代码 <br/> MySQL官方对索引的定义:索引是帮助MySQL高效获取数据的数据结构。索引是在存储引擎中实现的,所以每种存储引擎中的索引都不一样。如MYISAM和InnoDB存储引擎只支持BTree索引;MEMORY和HEAP储存引擎可以支持HASH和BTREE索引。 这里仅针对常用的InnoDB存储引擎所支持的BTree索引进行介绍: 先创建一个新表,用于演示索引类型 这是最基本的索引,没有任何限制。 索引列的值必须唯一,可以有空值 是一种特殊的唯一索引,必须指定为 PRIMARY KEY,如我们常用的AUTO_INCREMENT自增主键 也称为组合索引,就是在多个字段上联合建立一个索引 这里一个组合索引,相当于在有如下三个索引: name; name,age; name,age,phoneNum; 这里或许有这样一个疑惑:为什么age或者age,phoneNum字段上没有索引。这是由于BTree索引因要遵守最左前缀原则,这个原则在后面详细展开。 创建索引简单,但是在哪些列上创建索引则需要好好思考。可以考虑在where字句中出现列或者join字句中出现的列上建索引 联合索引(name,age,phoneNum) ,B+树是按照从左到右的顺序来建立搜索树的。如('张三',18,'18668247652')来检索数据的时候,B+树会优先匹配name来确定搜索方向,name匹配成功再依次匹配age、phoneNum,最后检索到最终的数据。也就是说这种情况下是有三级索引,当name相同,查找age,age也相同时,去比较phoneNum;但是如果拿 (18,'18668247652')来检索时,B+树没有拿到一级索引,根本就无法确定下一步的搜索方向。('张三','18668247652')这种场景也是一样,当name匹配成功后,没有age这个二级索引,只能在name相同的情况下,去遍历所有的phoneNum。 B+树的数据结构决定了在使用索引的时候必须遵守最左前缀原则,在创建联合索引的时候,尽量将经常参与查询的字段放在联合索引的最左边。 一般情况下不建议使用like操作,如果非使用不可的话,需要注意:like '%abd%'不会使用索引,而like ‘aaa%’可以使用索引。这也是前面的最左前缀原则的一个使用场景。 mysql会按照联合索引从左往右进行匹配,直到遇到范围查询,如:>,<,between,like等就停止匹配,a = 1 and b =2 and c > 3 and d = 4,如果建立(a,b,c,d)顺序的索引,d是不会使用索引的。但如果联合索引是(a,b,d,c)的话,则a b d c都可以使用到索引,只是最终c是一个范围值。 order by排序有两种排序方式:using filesort使用算法在内存中排序以及使用mysql的索引进行排序;我们在部分不情况下希望的是使用索引。 如果ID是单列索引,则order by会使用索引 If ID is a single-column index and name is not an index or name is also a single-column index, order by will not use the index. Because a Mysql query will only select one index from many indexes, and the ID column index is used in this query, not the name column index. In this scenario, if you want order by to also use the index, create a joint index (id, name). You need to pay attention to the leftmost prefix principle here. Do not create such a joint index (name, id ). Finally, it should be noted that mysql has a limit on the size of sorted records: max_length_for_sort_data defaults to 1024; which means that if the amount of data to be sorted is greater than 1024, order by will not use the index. Instead use using filesort. <br/> <br/> Large portals are generally news information, which can be optimized using CDN, staticization, etc. . 3 Primary website architecture . At least this is what it looks like below. Peak estimate: 2~3 times the normal amount; Calculate system capacity based on concurrency (concurrency, number of transactions) and storage capacity; Customer demand: The number of users reaches 10 million registered users in 3 to 5 years; Estimated number of concurrencies per second: The daily UV is 2 million (28 principles); Click to browse 30 times a day; PV volume: 200*30=60 million; Concentrated traffic volume: 240.2=4.8 hours, there will be 60 million 0.8=48 million (28 million) ; Concurrency per minute: 4.8*60=288 minutes, 4800/288=167,000 visits per minute (approximately equal to); Concurrency per second: 167,000/60=2780 (approximately equal to); Assuming: the peak period is three times the normal value, then the number of concurrency per second can reach 8340 . 1 millisecond = 1.3 visits; Server estimate: (take tomcat server as an example) According to a web server, it supports 300 concurrent calculations per second. Normally 10 servers are required (approximately equal to); [Default configuration of tomcat is 150] Peak period: 30 servers are required; Capacity Estimation: 70/90 principle The above estimates are for reference only, because server configuration, business logic complexity, etc. all have an impact. Here the CPU, hard disk, network, etc. are no longer evaluated. Based on the above estimation, there are several problems: A large number of servers need to be deployed, and calculations during peak periods may require Deploy 30 web servers. Moreover, these thirty servers are only used during flash sales and events, which is a lot of waste. All applications are deployed on the same server, and the coupling between applications is serious. Vertical and horizontal slicing are required. There are redundant codes in a large number of applications. Server SESSION synchronization consumes a lot of memory and network bandwidth. Data requires frequent access to the database, and the database access pressure is huge. Large websites generally need to do the following architecture optimization (optimization is something that needs to be considered when designing the architecture. It is usually solved from the architecture/code level. Tuning is mainly the adjustment of simple parameters, such as JVM tuning; if the tuning involves a lot of code modification, it is not tuning, but refactoring): Business split Application cluster deployment (distributed deployment, cluster deployment and load balancing) Multi-level cache Single sign-on (distributed Session) Database cluster (read-write separation, sub-database and sub-table) Service-oriented Message Queue Other technologies Architecture diagram after splitting: Reference deployment plan 2: (1) Each application is deployed individually as shown above; (2) Core system and non-core system are deployed in combination; Architecture diagram after cluster deployment: Cache can generally be divided into two types: local cache and distributed cache First-level cache, cache data dictionary, and commonly used hotspot data and other basically immutable/regularly changing information, The second level cache caches all cache Generally, Session synchronization, Cookies, and distributed Session methods can be used high availability and high performance generally use redundancy System design Read and write separation: Generally, to solve the scenario where the read ratio is much greater than the write ratio, one master and one backup, one master and multiple backups, or multiple masters and multiple backups can be used. Extract functions/modules common to multiple subsystems and use them as public services Message queue can solve the coupling between subsystems/modules and achieve asynchronous, high-availability, and high-performance systems 目前使用较多的MQ有Active MQ,Rabbit MQ,Zero MQ,MS MQ等,需要根据具体的业务场景进行选择。 除了以上介绍的业务拆分, 此处不详细介绍,大家可以问度娘/Google,有机会的话也可以分享给大家。 <br/> RESTful是"分布式超媒体应用"的架构风格<br/>1.采用URI标识资源;<br/><br/>2.使用“链接”关联相关的资源;<br/><br/>3.使用统一的接口;<br/><br/>4.使用标准的HTTP方法;<br/><br/>5.支持多种资源表示方式;<br/><br/> 6.无状态性; <br/> <br/> windows 最近要熟悉一下网站优化,包括前端优化,后端优化,涉及到的细节Opcode,Xdebuge等,都会浅浅的了解一下。 像类似于,刷刷CSDN博客的人气啦,完全是得心应手啊。 我测试了博客园,使用ab并不能刷访问量,为什么CSDN可以,因为两者统计的方式不同。 1 2 3 4 5 6 PV与来访者的数量成正比,但是PV并不直接决定页面的真实来访者数量。比如一个网站就你一个人进来,通过不断的刷新页面,也可以制造出非常高的PV。这也就是ab可以刷csdn访问的原因了。 UV是指不同的、通过互联网访问、浏览一个网页的自然人。类似于注册用户,保存session的形式 IP就不用说啦。类似于博客园,使用的统计方式就必须是IP啦 ab是Apache的自带的工具,如果是window安装的,找到Apache的bin目录,在系统全局变量中添加Path,然后就可以使用ab了 1 2 3 4 5 6 1 2 3 1 2 3 本文介绍ab测试,并没有恶意使用它。途中的博客地址,也只是测试过程中借用了一下,没有别的恶意。 原创 2015年10月19日 18:24:31 <br/> 安装ab工具 ubuntu安装ab apt-get install apache2-utils centos安装ab yum install httpd-tools ab 测试命令 ab -kc 1000-n 1000 http://localhost/ab.html(是服务器下的页面) <br/> The logs in ySQL include: error log, binary log, general query log, slow query log etc. Here we mainly introduce two commonly used functions: general query log and slow query log. 1) General query log: Record the established client connection and executed statements. 2) Slow query log: Record all queries whose execution time exceeds long_query_time seconds or queries that do not use indexes (1) General query log When learning general log query, you need to know the common commands in the two databases: 1) showvariables like '%version%'; The effect diagram is as follows : #The above command displays things related to the version number in the current database. 1) showvariables like '%general%'; You can check whether the current general log query is enabled, if the value of general_log is ON means on, OFF means off (is off by default). 1) showvariables like '%log_output%'; View the format of the current slow query log output, which can be FILE (stored in the data hostname.log in the data file of the database), or TABLE (mysql.general_log stored in the database) Question: How to open the MySQL general query log, and how to set the What about the common log output format for output? Enable general log query: set global general_log=on; Turn off general log query: set globalgeneral_log=off; Set general log output to table mode: set globallog_output='TABLE'; Set general log output to file mode: set globallog_output='FILE'; Set general log output to table and file mode: set global log_output='FILE,TABLE'; (Note: The above command only takes effect currently, when MySQLRestart fails, If you want it to take effect permanently, you need to configure my.cnf) The effect of the log output is as follows: Record to the mysql.general_log table The data in is as follows: The format recorded to the local .log is as follows: The configuration of my.cnf file is as follows: general_log=1 #A value of 1 means to enable general log query, and a value of 0 means to turn off general log query log_output =FILE,TABLE#Set the output format of the general log to files and tables (2) Slow query log MySQL’s slow query log is a type provided by MySQL Logging, used to record statements whose response time exceeds the threshold in MySQL, specifically refers to SQL whose running time exceeds the long_query_time value, will be recorded in the slow query log (the log can be written to a file or database table, if the performance requirements are high If so, it is recommended to write a file). By default, the MySQL database does not enable slow query logs. The default value of long_query_time is 10 (that is, 10 seconds, usually set to 1 second), that is, statements that run for more than 10 seconds are slow query statements. Generally speaking, slow queries occur in large tables (for example: a table has millions of data), and the fields of the query conditions are not indexed. At this time, the fields that need to match the query conditions will be Full table scan, long_query_time is time-consuming, is a slow query statement. Question: How to check whether the current slow query log is enabled? Enter the command in MySQL: showvariables like '%quer%'; Mainly master the following parameters: (1) The value of slow_query_log is ON to turn on the slow query log, and OFF is to turn off the slow query log. (2) The value of slow_query_log_file is the slow query log recorded to the file (Note: The default name is hostname.log, whether the slow query log is written In the specified file, you need to specify the output log format of the slow query as a file. The relevant command is: show variables like '%log_output%'; to view the output format). (3) long_query_time specifies the threshold of slow query, that is, if the execution time of the statement exceeds the threshold, it is a slow query statement. The default value is 10 seconds. (4)log_queries_not_using_indexes If the value is set to ON, all queries that do not utilize indexes will be recorded (Note: If you just set log_queries_not_using_indexes to ON, and slow_query_log is set to OFF, this setting will not take effect at this time, that is, the premise for this setting to take effect is that the value of slow_query_log is set to ON), and is generally turned on temporarily during performance tuning. Question: Set the output log format of MySQL slow query to file or table, or both? Use the command: show variables like '%log_output%'; You can view the output format through the value of log_output. The value above is TABLE. Of course, we can also set the output format to text, or record text and database tables at the same time. The setting command is as follows: #Slow query log output to the table (i.e. mysql.slow_log) set globallog_output='TABLE'; #The slow query log is only output to text (ie: the file specified by slow_query_log_file) setglobal log_output='FILE'; #Slow query log is output to text and table at the same time setglobal log_output='FILE,TABLE'; About the data in the table of the slow query log and the data in the text Format analysis: The slow query log record is in the myql.slow_log table, the format is as follows: The slow query log record is in In the hostname.log file, the format is as follows: You can see that whether it is a table or a file, it is specifically recorded: which statement caused the slow query ( sql_text), the query time (query_time), table lock time (Lock_time), and the number of scanned rows (rows_examined) of the slow query statement. Question: How to query the number of current slow query statements? There is a variable in MySQL that records the number of current slow query statements: Enter the command: show global status like '%slow%'; (Note: For all the above commands, if the parameters are set through the MySQL shell, if MySQL is restarted, all the set parameters will be invalid. If If you want it to take effect permanently, you need to write the configuration parameters into the my.cnf file). Additional knowledge points: How to use MySQL's own slow query log analysis tool mysqldumpslow to analyze logs? perlmysqldumpslow –s c –t 10 slow-query.log The specific parameter settings are as follows: -s indicates how to sort, c , t, l, and r are sorted according to the number of records, time, query time, and the number of records returned. ac, at, al, and ar represent the corresponding flashbacks; -t means top. The following data indicates how many previous items are returned; -g can be followed by regular expression matching, which is not case-sensitive. The meaning of the above parameters is as follows: Count:414 The statement appears 414 times; Time=3.51s (1454) The maximum execution time is 3.51s, and the cumulative total time consumed is 1454s; Lock=0.0s (0) The maximum time waiting for the lock is 0s, and the cumulative waiting time for the lock is 0s; Rows=2194.9 (9097604) The maximum number of rows sent to the client is 2194.9, and the cumulative number of functions sent to the client is 90976404 http://blog.csdn.net/a600423444/article/details/6854289 (Note: mysqldumpslow script is written in perl language, the specific usage of mysqldumpslow will be discussed later) Question: actually in the learning process How to know that the set slow query is effective? It’s very simple. We can manually generate a slow query statement. For example, if the value of our slow query log_query_time is set to 1, we can execute the following statement: selectsleep(1); This statement is the slow query statement. After that, you can check whether there is this statement in the corresponding log output file or table. <br/> Reproduced on July 10, 2017 13:36:47 <br/>## ThinkPHP简称TP,TP借鉴了Java思想,基于PHP5,充分利用了PHP5的特性,部署简单只需要一个入口文件,一起搞定,简单高效。中文文档齐全,入门超级简单。自带模板引擎,具有独特的数据验证和自动填充功能,框架更新速度比较速度。 优点:这个框架易使用 易学 安全 对bae sae支持很好提供的工具也很强大 可以支持比较大的项目开发 易扩展 全中文文档 总的来说这款框架适合非常适合国人使用 性能 上比CI还要强一些 缺点:配置对有些人来说有些复杂(其实是因为没有认真的读过其框架源码)文档有些滞后 有些组件未有文档说明。 CodeIgniter简称CI 简单配置,上手很快,全部的配置使用PHP脚本来配置,没有使用很多太复杂的设计模式,(MVC设计模式)执行性能和代码可读性上都不错。执行效率较高,具有基本的MVC功能,快速简洁,代码量少,框架容易上手,自带了很多简单好用的library。 框架适合中小型项目,大型项目也可以,只是扩展能力差。优点:这个框架的入门槛很底 极易学 极易用 框架很小 静态化非常容易 框架易扩展 文档比较详尽 缺点:在极易用的极小下隐藏的缺点即是不安全 功能不是太全 缺少非常多的东西 比如你想使用MongoDB你就得自己实现接口… 对数据的操作亦不是太安全 比如对update和delete操作等不够安全 暂不支持sae bae等(毕竟是欧洲)对大型项目的支持不行 小型项目会非常好。 CI和TP的对比(http://www.jcodecraeer.com/a/phpjiaocheng/2012/0711/309.html) Laravel的设计思想是很先进的,非常适合应用各种开发模式TDD, DDD和BDD(http://blog.csdn.net/bennes/article/details/47973129 TDD DDD BDD解释 ),作为一个框架,它为你准备好了一切,composer是个php的未来,没有composer,PHP肯定要走向没落。laravel最大的特点和处优秀之就是集合了php比较新的特性,以及各种各样的设计模式,Ioc容器,依赖注入等。因此laravel是一个适合学习的框架,他和其他的框架思想有着极大的不同,这也要求你非常熟练php,基础扎实。 优点:http://www.codeceo.com/article/why-laravel-best-php-framework.html Yii是一个基于组件的高性能的PHP的框架,用于开发大规模Web应用。Yii采用严格的OOP编写,并有着完善的库引用以及全面的教程。从MVC,DAO/ActiveRecord,widgets,caching,等级式RBAC,Web服务,到主体化,I18N和L10N,Yii提供了今日Web 2.0应用开发所需要的几乎一切功能。而且这个框架的价格也并不太高。事实上,Yii是最有效率的PHP框架之一。 <br/> 原创 2016年11月09日 17:58:50 <br/> 在PHP中,出现同名函数或是同名类是不被允许的。为防止编程人员在项目中定义的类名或函数名出现重复冲突,在PHP5.3中引入了命名空间这一概念。 1.命名空间,即将代码划分成不同空间,不同空间的类名相互独立,互不冲突。一个php文件中可以存在多个命名空间,第一个命名空间前不能有任何代码。内容空间声明后的代码便属于这个命名空间,例如: 2.调用不同空间内类或方法需写明命名空间。例如: 3.在命名空间内引入其他文件不会属于本命名空间,而属于公共空间或是文件中本身定义的命名空间。例: 首先定义一个1.php和2.php文件: 4.下面我们来看use的使用方法:(use以后引用可简写) 相关推荐: The above is the detailed content of Summary of php interview. For more information, please follow other related articles on the PHP Chinese website!Query-4 explain select * from people where id in (select id from people where zipcode = 100000 union select id from people where zipcode = 200000 );

SELECT ... FROM t1 WHERE t1.a IN (SELECT b FROM t2);
SELECT ... FROM t1 WHERE EXISTS (SELECT 1 FROM t2 WHERE t2.b = t1.a);
Query-5 explain select * from people o where exists  (
select id from people where zipcode = 100000 and id = o.id union select id from people where zipcode = 200000  and id = o.id);

Query-6 explain select * from people where id = (select id from people where zipcode = 100000);

table
Query-7 explain select * from (select * from (select * from people a) b ) c;

<strong><em>N</em></strong>>N就是id值,指该id值对应的那一步操作的结果。type
Query-8 explain select * from people where id=1;

Query-9 explain select * from people where zipcode = 100000;

Query-10 explain select * from people where id >2;

Query-11 explain select * from (select * from people where id = 1 )b;

Query-12 explain select * from people a,people_car b where a.id = b.people_id;


CREATE TABLE people2(
id bigint auto_increment primary key,
zipcode char(32) not null default '',
address varchar(128) not null default '',
lastname char(64) not null default '',
firstname char(64) not null default '',
birthdate char(10) not null default '' )
ENGINE = MyISAM; CREATE TABLE people_car2(
people_id bigint,
plate_number varchar(16) not null default '',
engine_number varchar(16) not null default '',
lasttime timestamp
)ENGINE = MyISAM;

Query-13 explain select * from people2 a,people_car2 b where a.id = b.people_id;

Query-14 explain select * from people2 a,people_car2 b where a.id = b.people_id and b.people_id = 1;

reate index people_id on people2(id); create index people_id on people_car2(people_id);
Query-15 explain select * from people2 a,people_car2 b where a.id = b.people_id and a.id > 2;

Query-16 explain select * from people2 a,people_car2 b where a.id = b.people_id and a.id = 2;

Query-17 explain select * from people2 a,people_car2 b where a.id = b.people_id;

Query-18 explain select * from people2 where id = 1;

Query-19 mysql> explain select * from people2 where id = 2 or id is null;

Query-20 explain select * from people2 where id = 2 or id is not null;

value IN (SELECT primary_key FROM single_table WHERE some_expr)
value IN (SELECT key_column FROM single_table WHERE some_expr)
Query-21 explain select * from people where id = 1 or id = 2;
 <br/>
<br/>explain select * from people where id >1;

explain select * from people where id in (1,2);

Query-22 explain select * from people order by id;

possible_keys
#key
key_len
ref
rows
Extra
##Extra is another very important column in the EXPLAIN output. The columns display some detailed information about MySQL during the query process. It contains a lot of information. I only select a few key points to introduce. 2. author 2.0 Authorization method

1. Application scenarios

2. Definition of nouns
3. The idea of OAuth
4. Operation process
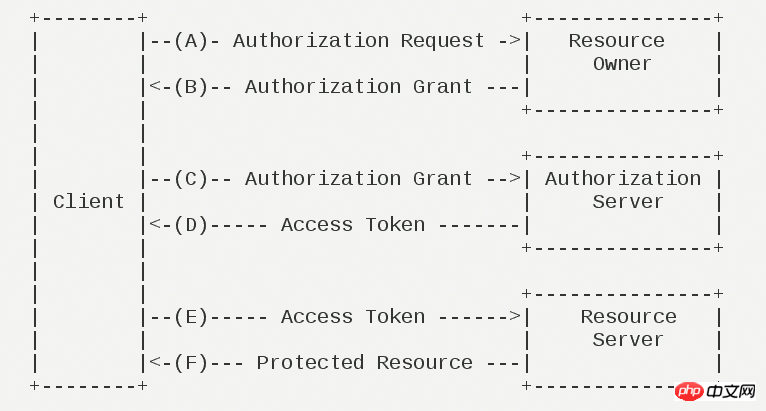
五、客户端的授权模式
六、授权码模式
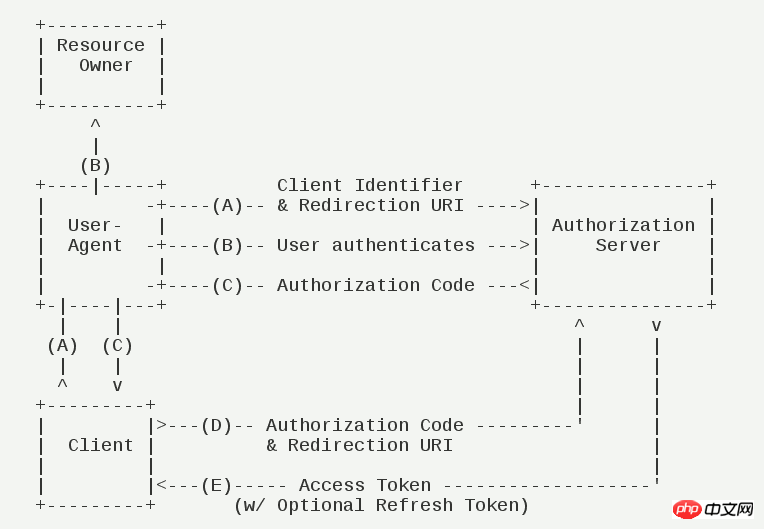
GET /authorize?response_type=code&client_id=s6BhdRkqt3&state=xyz &redirect_uri=https%3A%2F%2Fclient%2Eexample%2Ecom%2Fcb HTTP/1.1 Host: server.example.com
HTTP/1.1 302 Found Location: https://client.example.com/cb?code=SplxlOBeZQQYbYS6WxSbIA &state=xyz
POST /token HTTP/1.1 Host: server.example.com Authorization: Basic czZCaGRSa3F0MzpnWDFmQmF0M2JW Content-Type: application/x-www-form-urlencoded grant_type=authorization_code&code=SplxlOBeZQQYbYS6WxSbIA &redirect_uri=https%3A%2F%2Fclient%2Eexample%2Ecom%2Fcb
HTTP/1.1 200 OK Content-Type: application/json;charset=UTF-8 Cache-Control: no-store Pragma: no-cache { "access_token":"2YotnFZFEjr1zCsicMWpAA", "token_type":"example", "expires_in":3600, "refresh_token":"tGzv3JOkF0XG5Qx2TlKWIA", "example_parameter":"example_value" }七、简化模式
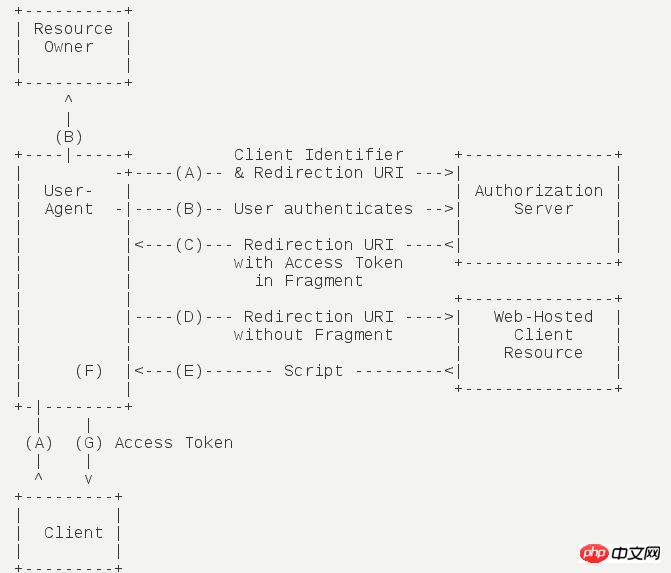
GET /authorize?response_type=token&client_id=s6BhdRkqt3&state=xyz &redirect_uri=https%3A%2F%2Fclient%2Eexample%2Ecom%2Fcb HTTP/1.1 Host: server.example.com
HTTP/1.1 302 Found Location: http://example.com/cb#access_token=2YotnFZFEjr1zCsicMWpAA &state=xyz&token_type=example&expires_in=3600
八、密码模式
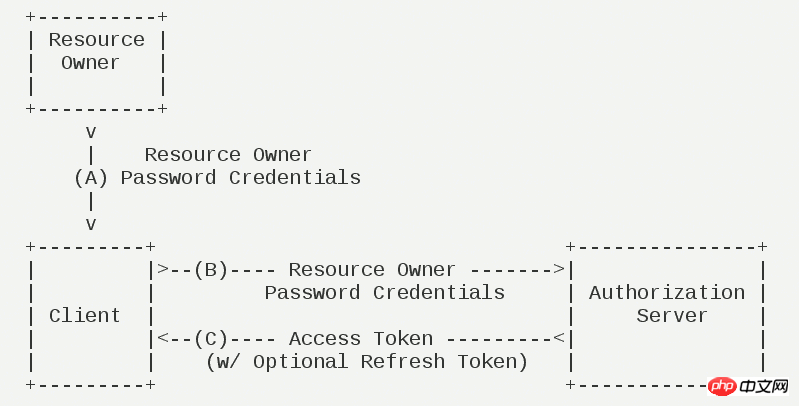
POST /token HTTP/1.1 Host: server.example.com Authorization: Basic czZCaGRSa3F0MzpnWDFmQmF0M2JW Content-Type: application/x-www-form-urlencoded grant_type=password&username=johndoe&password=A3ddj3w
HTTP/1.1 200 OK Content-Type: application/json;charset=UTF-8 Cache-Control: no-store Pragma: no-cache { "access_token":"2YotnFZFEjr1zCsicMWpAA", "token_type":"example", "expires_in":3600, "refresh_token":"tGzv3JOkF0XG5Qx2TlKWIA", "example_parameter":"example_value" }九、客户端模式

POST /token HTTP/1.1 Host: server.example.com Authorization: Basic czZCaGRSa3F0MzpnWDFmQmF0M2JW Content-Type: application/x-www-form-urlencoded grant_type=client_credentials
HTTP/1.1 200 OK Content-Type: application/json;charset=UTF-8 Cache-Control: no-store Pragma: no-cache { "access_token":"2YotnFZFEjr1zCsicMWpAA", "token_type":"example", "expires_in":3600, "example_parameter":"example_value" }十、更新令牌
      POST /token HTTP/1.1
      Host: server.example.com
      Authorization: Basic czZCaGRSa3F0MzpnWDFmQmF0M2JW
      Content-Type: application/x-www-form-urlencoded
grant_type=refresh_token&refresh_token=tGzv3JOkF0XG5Qx2TlKWIA3. yii 配置文件
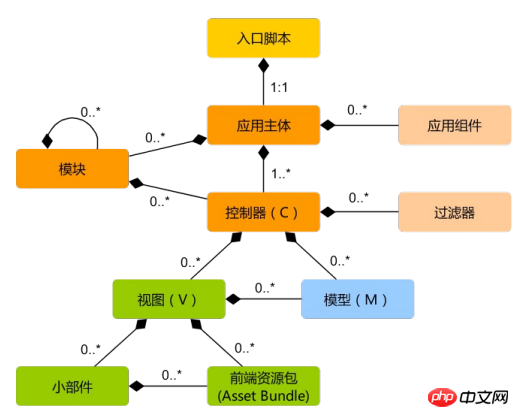 <br/>
<br/>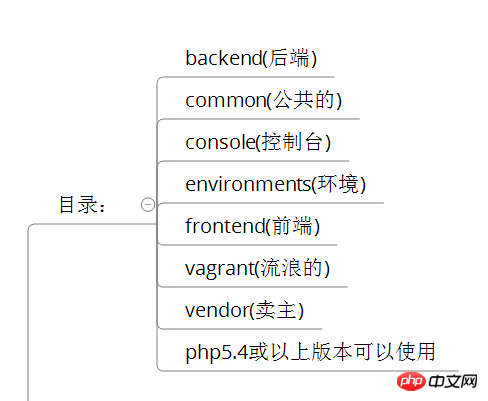
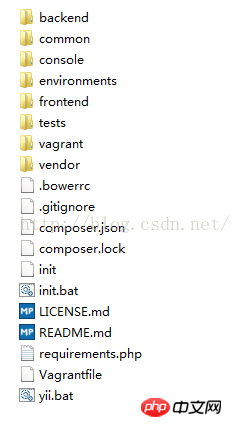 <br/> advance版本的特点是:根目录下预先分配了三个模块,分别是前台、后台、控制台模块。1.backend它主要用于管理后台,网站管理员来管理整个系统。<br/>
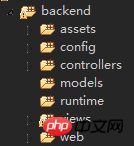 <br/>assets 目录用于存放前端资源包PHP类。 这里不需要了解什么是前端资源包,只要大致知道是用于管理CSS、js等前端资源就可以了。config 用于存放本应用的配置文件,包含主配置文件 main.php 和全局参数配置文件 params.php 。models views controllers 3个目录分别用于存放数据模型类、视图文件、控制器类。这个是我们编码的核心,也是我们工作最多的目录。widgets 目录用于存放一些常用的小挂件的类文件。tests 目录用于存放测试类。web 目录从名字可以看出,这是一个对于Web服务器可以访问的目录。 除了这一目录,其他所有的目录不应对Web用户暴露出来。这是安全的需要。runtime 这个目录是要求权限为 chmod 777 ,即允许Web服务器具有完全的权限, 因为可能会涉及到写入临时文件等。 但是一个目录并未对Web用户可见。也就是说,权限给了,但是并不是Web用户可以访问到的。<br/> <br/>2.frontend
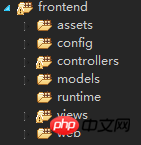 <br/>我们的目标最终用户提供的主要接口的前端应用。其实,前台和后台是一样的,只是我们逻辑上的一个划分.。<br/> 好了,现在问题来了。对于 frontend backend console 等独立的应用而言, 他们的内容放在各自的目录下面,他们的运作必然用到Yii框架等 vendor 中的程序。 他们是如何关联起来的?这个秘密,或者说整个Yii应用的目录结构的秘密, 就包含在一个传说中的称为入口文件的地方。<br/>
<?phpdefined('YII_DEBUG') or define('YII_DEBUG', true);
defined('YII_ENV') or define('YII_ENV', 'dev');
require(__DIR__ . '/../../vendor/autoload.php');
require(__DIR__ . '/../../vendor/yiisoft/yii2/Yii.php');
require(__DIR__ . '/../../common/config/bootstrap.php');
require(__DIR__ . '/../config/bootstrap.php');
$config = yii\helpers\ArrayHelper::merge(
require(__DIR__ . '/../../common/config/main.php'),
require(__DIR__ . '/../../common/config/main-local.php'),
require(__DIR__ . '/../config/main.php'),
require(__DIR__ . '/../config/main-local.php'));
$application = new yii\web\Application($config);$application->run();
 <br/><br/><br/>The following is the global public folder 4.common
 <br/>
<br/>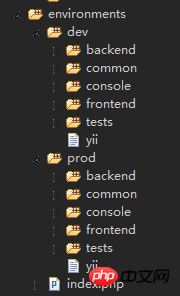 <br/> From the directory structure diagram above, you can see that there are 3 things in the environment directory:
Among them, dev and prod have the same structure, and contain 4 directories and 1 file respectively: Any web directory stores the entry script of the web application, an index.php and a test version of index-test.php
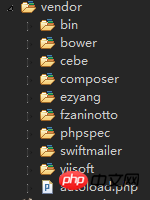 vendor 。 这个目录从字面的意思看,就是各种第三方的程序。 这是Composer安装的其他程序的存放目录,包含Yii框架本身,也放在这个目录下面。 如果你向composer.json 目录增加了新的需要安装的程序,那么下次调用Composer的时候, 就会把新安装的目录也安装在这个 vendor 下面。<br/><br/>下面也是一些不太常用的文件夹7.vagrant
  8.tests
  <br/>
<br/>入口文件篇:
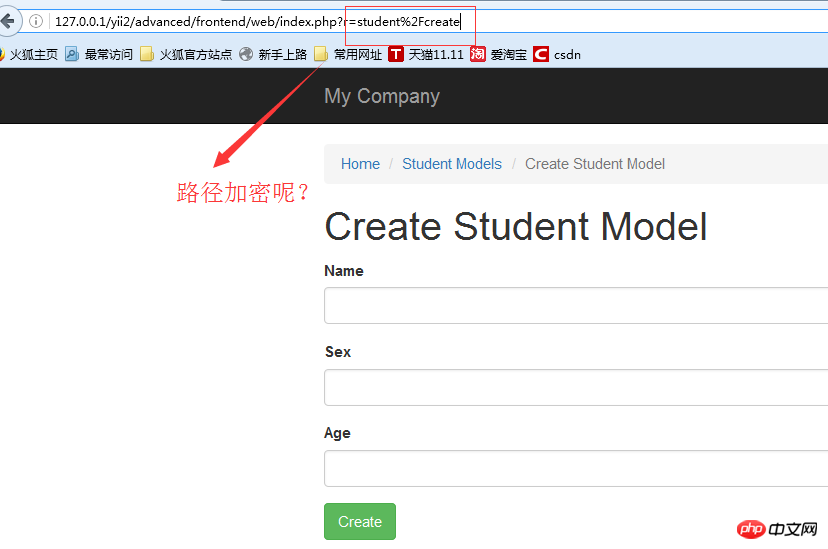 <br/>
<br/> return "$baseUrl/{$route}{$anchor}"; } else { $url = "$baseUrl?{$this->routeParam}=" . urlencode($route); if (!empty($params) && ($query = http_build_query($params)) !== '') { $url .= '&' . $query; } 将urlencode去掉就可以了 3、入口文件内容 入口文件流程如下: <br/>
<br/>public $defaultRoute = 'student/show';
修改前台或者后台控制器: eg :打开 frontend/config/main.php 中
'params' => $params, 'defaultRoute' => 'login/show',
namespace frontend\controllers;
use Yii;
use yii\web\Controller;
vendor/yiisoft/yii2/web/Controller.php
(该控制器继承的是\yii\base\Controller) \web\Controller.php中干了些什么
1、默认开启了 授权防止csrf攻击
2、响应Ajax请求的视图渲染
3、将参数绑定到动作(就是看是不是属于框架自己定义的方法,如果没有定义就走run方法解析)
4、检测方法(beforeAction)beforeAction() 方法会触发一个 beforeAction 事件,在事件中你可以追加事件处理操作;
5、重定向路径 以及一些http Response(响应) 的设置
<br/>
use yii\db\Query; //使用query查询
use yii\data\Pagination;//分页
use yii\data\ActiveDataProvider;//活动记录
use frontend\models\ZsDynasty;//自定义数据模型
class StudentController extends Controller {
  $request = YII::$app->request;//获取请求组件
  $request->get('id');//获取get方法数据
  $request->post('id');//获取post方法数据
  $request->isGet;//判断是不是get请求
  $request->isPost;//判断是不是post请求
  $request->userIp;//获取用户IP地址
  $res = YII::$app->response;//获取响应组件
  $res->statusCode = '404';//设置状态码
  $this->redirect('http://baodu.com');//页面跳转
  $res->sendFile('./b.jpg');//文件下载
  $session = YII::$app->session;
  $session->isActive;//判断session是否开启
  $session->open();//开启session
  //设置session值
  $session->set('user','zhangsan');//第一个参数为键,第二个为值
  $session['user']='zhangsan';
  //获取session值
  $session->get('user');
  $session['user'];
   //删除session值
   $session-remove('user');
   unset($session['user']);
   $cookies = Yii::$app->response->cookies;//获取cookie对象
   $cookie_data = array('name'=>'user','value'=>'zhangsan')//新建cookie数据
   $cookies->add(new Cookie($cookie_data));
   $cookies->remove('id');//删除cookie
$cookies->getValue('user');//获取cookie<?php
namespace frontend\models;
class ListtModel extends \yii\db\ActiveRecord {
public static function tableName()
{
return 'listt';
}
public function one(){
return $this->find()->asArray()->one();
}
}控制器引用
<?php namespace frontend\controllers; use Yii; use yii\web\controller; use frontend\models\ListtModel; class ListtController extends Controller{ public function actionAdd(){ $model=new ListtModel; $list=$model->one(); $data=$model->find()->asArray()->where("id=1")->all(); print_r($data); } } ?> <br/>
<br/>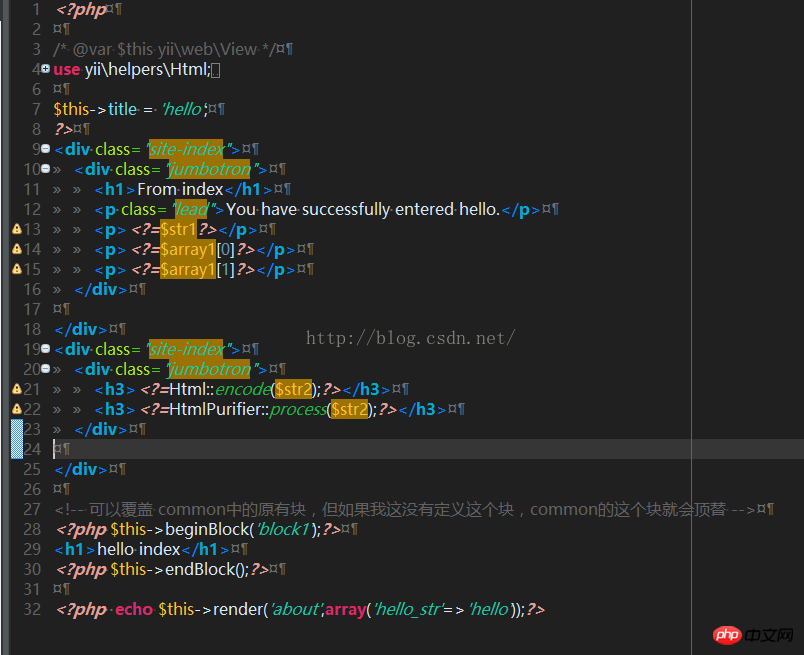 <br/> 而views下面会有一个默认的layouts文件夹,里面存放的就是布局文件,什么意思呢?:在控制器中,会有一个layout字段,如果制定他为一个layout视图文件,比如common.php,那么视图就会以他为主视图,其他的view视图片段都会作为显示片段嵌入到layout文件common.php中.而如果不明确重载layout字段,那么默认layout的值是main,意味着layouts的main.php是视图模板。控制器:
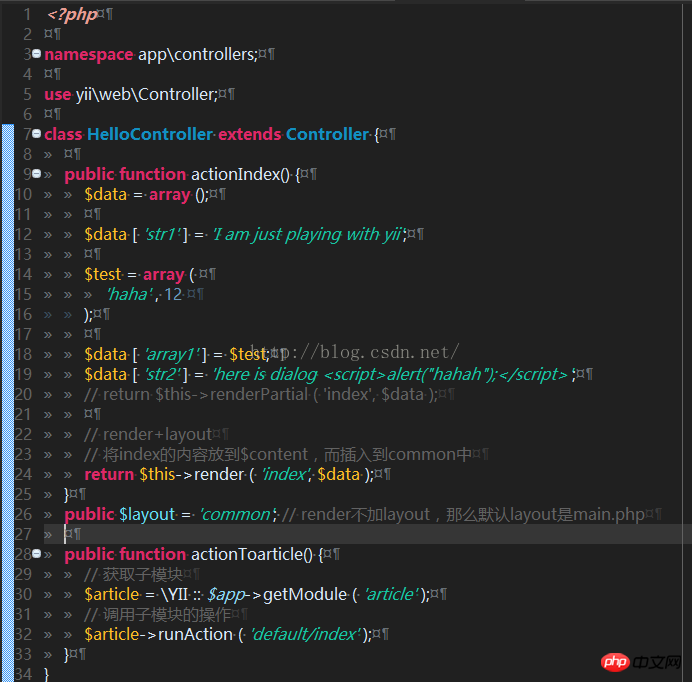 <br/>common.php:
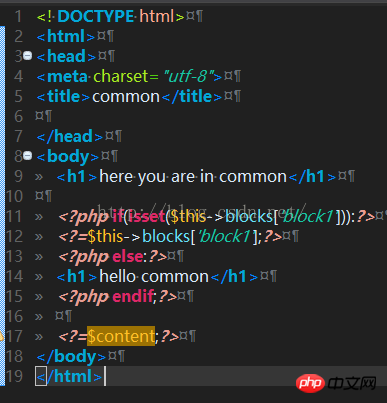 <br/><br/>layouts
  <br/>这样就达到了视图复用的作用。<br/> 控制器中写入$layout <br/>
//$layout="main"  系统默认文件
//$layout=null  会找父类中默认定义的main public $layout="common";
public  function  actionIndex(){
return  $this->render('index');
 }
将以下内容插入 common中 <?=$content;?>
它就是index文件中的内容
'db' => [
    'class' => 'yii\db\Connection',
    'dsn' => 'mysql:host=localhost;dbname=hyii2',   //数据库hyii2
    'username' => 'root',
    'password' => 'pwhyii2',
    'charset' => 'utf8',
],
'db2' => [
    'class' => 'yii\db\Connection',
    'dsn' => 'mysql:host=localhost;dbname=hyii',     //数据库hyii
    'username' => 'root',
    'password' => 'pwhyii',
    'charset' => 'utf8',
],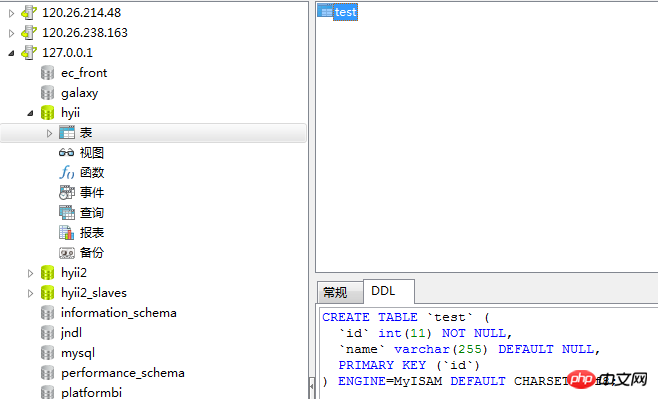
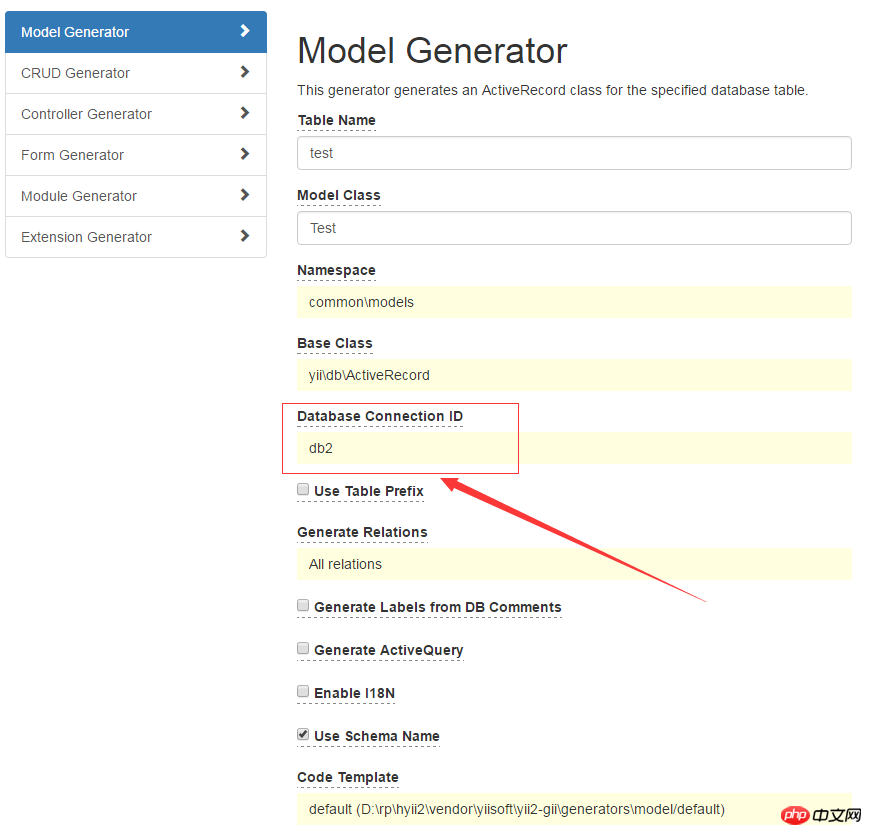
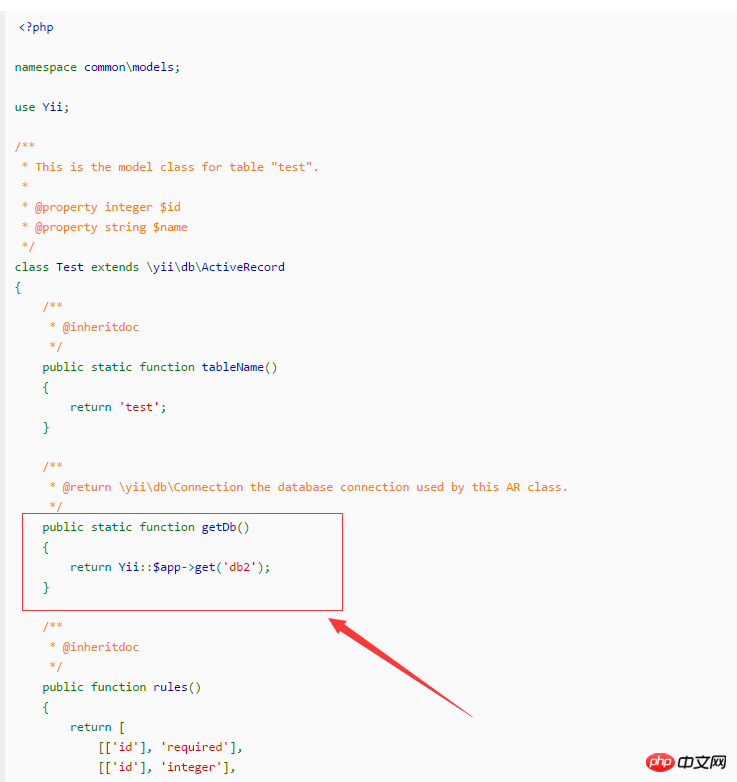
$id=Yii::$app->db->getLastInsertID();
Yii::$app->db->createCommand()->insert('user', [
    'name' => 'test',
    'age' => 30,
])->execute();Yii::$app->db->createCommand()->batchInsert('user', ['name', 'age'], [
['test01', 30],
['test02', 20],
['test03', 25],
])->execute();
删除[php] view plain copy
Yii::$app->db->createCommand()->delete('user', 'age = 30')->execute();Yii::$app->db->createCommand()->update('user', ['age' => 40], 'name = test')->execute();
查询[php] view plain copy
//createCommand(执行原生的SQL语句)
$sql= "SELECT u.account,i.* FROM sys_user as u left join user_info as i on u.id=i.user_id";
$rows=Yii::$app->db->createCommand($sql)->query();
查询返回多行:
$command = Yii::$app->db->createCommand('SELECT * FROM post');
$posts = $command->queryAll();
返回单行
$command = Yii::$app->db->createCommand('SELECT * FROM post WHERE id=1');
$post = $command->queryOne();
查询多行单值:
$command = Yii::$app->db->createCommand('SELECT title FROM post');
$titles = $command->queryColumn();
查询标量值/计算值:
$command = Yii::$app->db->createCommand('SELECT COUNT(*) FROM post');
$postCount = $command->queryScalar();
 //入库一维数组
    public function add($data)
    {
        $this->setAttributes($data);
        $this->isNewRecord = true;
        $this->save();
        return $this->id;
    }
     //入库二维数组
    public function addAll($data){
        $ids=array();
        foreach($data as $attributes)
        {
            $this->isNewRecord = true;
            $this->setAttributes($attributes);
            $this->save()&& array_push($ids,$this->id) && $this->id=0;
        }
        return $ids;
    }

    public function rules()
    {
        return [
            [['title','content'],'required'
       ]];
    }
    控制器:
    $ids=$model->addAll($data);
var_dump($ids);$user = User::find()->where(['name'=>'test'])->one();
$user->delete();
$result = User::deleteAll(['age'=>'30']);
$result = User::deleteByPk(1);
 /**
 * @param $files  字段
 * @param $values  值
 * @return int  影响行数
 */  public function del($field,$values){
 //
 $res = $this->find()->where(['in', "$files", $values])->deleteAll();
 $res=$this->deleteAll(['in', "$field", "$values"]);
 return $res;
}[php] view plain copy
$user = User::find()->where(['name'=>'test'])->one(); //获取name等于test的模型
$user->age = 40; //修改age属性值
$user->save(); //保存
[php] view plain copy
$result = User::model()->updateAll(['age'=>40],['name'=>'test']);
/** * @param $data 修改数据 * @param $where 修改条件 * @return int 影响行数 */ public function upda($data,$where){ $result = $this->updateAll($data,$where); // return $this->id; return $result; }Customer::find()->one();
此方法返回一条数据;
Customer::find()->all();
此方法返回所有数据;
Customer::find()->count();
此方法返回记录的数量;
Customer::find()->average();
此方法返回指定列的平均值;
Customer::find()->min();
此方法返回指定列的最小值 ;
Customer::find()->max();
此方法返回指定列的最大值 ;
Customer::find()->scalar();
此方法返回值的第一行第一列的查询结果;
Customer::find()->column();
此方法返回查询结果中的第一列的值;
Customer::find()->exists();
此方法返回一个值指示是否包含查询结果的数据行;
Customer::find()->batch(10);
每次取10条数据
Customer::find()->each(10);
每次取10条数据,迭代查询
//根据sql语句查询:查询name=test的客户 Customer::model()->findAllBySql("select * from customer where name = test");
//根据主键查询:查询主键值为1的数据 Customer::model()->findByPk(1);
//根据条件查询(该方法是根据条件查询一个集合,可以是多个条件,把条件放到数组里面)
Customer::model()->findAllByAttributes(['username'=>'admin']);
//子查询 $subQuery = (new Query())->select('COUNT(*)')->from('customer');
// SELECT `id`, (SELECT COUNT(*) FROM `customer`) AS `count` FROM `customer` $query = (new Query())->select(['id', 'count' => $subQuery])->from('customer');
//关联查询:查询客户表(customer)关联订单表(orders),条件是status=1,客户id为1,从查询结果的第5条开始,查询10条数据 $data = (new Query())
->select('*')
->from('customer')
->join('LEFT JOIN','orders','customer.id = orders.customer_id')
->where(['status'=>'1','customer.id'=>'1'])
->offset(5) ->limit(10) ->all()[php] view plain copy
/**
*客户表Model:CustomerModel
*订单表Model:OrdersModel
*国家表Model:CountrysModel
*首先要建立表与表之间的关系
*在CustomerModel中添加与订单的关系
*/
Class CustomerModel extends \yii\db\ActiveRecord
{
...
//客户和订单是一对多的关系所以用hasMany
//此处OrdersModel在CustomerModel顶部别忘了加对应的命名空间
//id对应的是OrdersModel的id字段,order_id对应CustomerModel的order_id字段
public function getOrders()
{
return $this->hasMany(OrdersModel::className(), ['id'=>'order_id']);
}
//客户和国家是一对一的关系所以用hasOne
public function getCountry()
{
return $this->hasOne(CountrysModel::className(), ['id'=>'Country_id']);
}
....
}
// 查询客户与他们的订单和国家
CustomerModel::find()->with('orders', 'country')->all();
// 查询客户与他们的订单和订单的发货地址(注:orders 与 address都是关联关系)
CustomerModel::find()->with('orders.address')->all();
// 查询客户与他们的国家和状态为1的订单
CustomerModel::find()->with([
'orders' => function ($query) {
$query->andWhere('status = 1');
},
'country',
])->all();yii2 rbac 详解
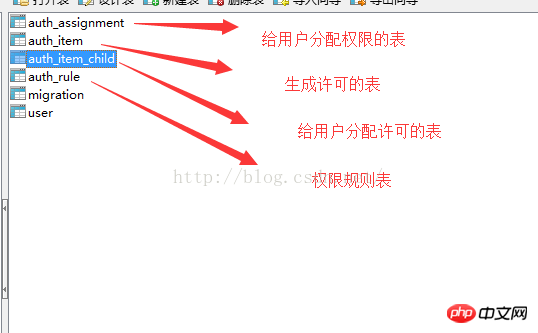 <br/><br/>4. Use yii rbac for operations (every operation you perform will operate data in the four tables of rbac to verify whether relevant permissions have been established. You can directly enter these tables to view) <br/>Register a permission: (data will be generated in the permission table described above) public function createPermission($item) { $auth = Yii::$app->authManager;<br/> $createPost = $auth-> createPermission($item); $createPost->description = 'Created' . $item . 'Permission'; $auth->add($createPost); }<br/>Create a role: <br/>public function createRole($item) { $auth = Yii::$app->authManager;<br/> $role = $auth->createRole($item); $role- >description = 'Created' . $item . 'Role'; $auth->add($role); }<br/>Assign permissions to rolespublic function createEmpowerment($items) { $ auth = Yii::$app->authManager;<br/> $parent = $auth->createRole($items['name']); $child = $auth->createPermission($items['description' ]);<br/> $auth->addChild($parent, $child); }<br/>Add a rule to a permission: The rule is to add roles and permissions Additional constraints. A rule is a class that extends from
 yii\rbac\Rule and must implement the execute() method. <br/> On the hierarchy, the author role we created earlier cannot edit his own articles, let's fix that. <br/>First we need a rule to verify that this user is the author of the article: <br/>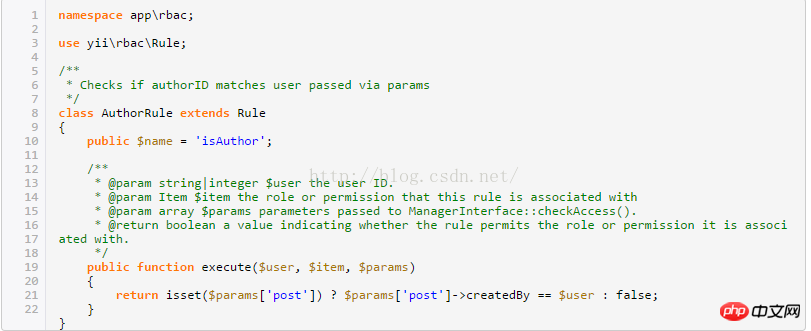 <br/><br/>Note: In the excute in the above method, $user comes from the user_id after the user logs in<br/>
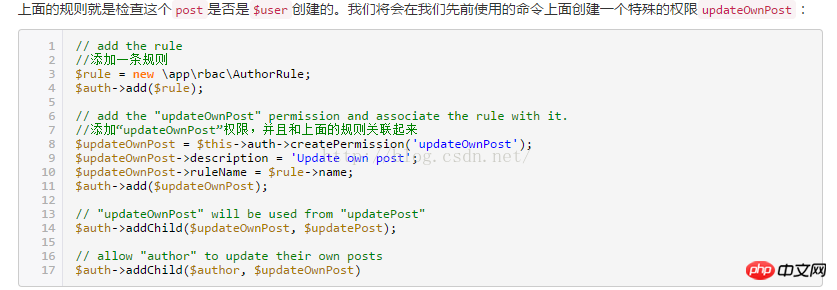 <br/>Determine the user’s permissions after the user logs in
 <br/><br/>## Link to reference the article: http://www.360us. net/article/13.html http://www.open-open.com/lib/view/open1424832085843.html<br/>
4. 在微信里调支付宝
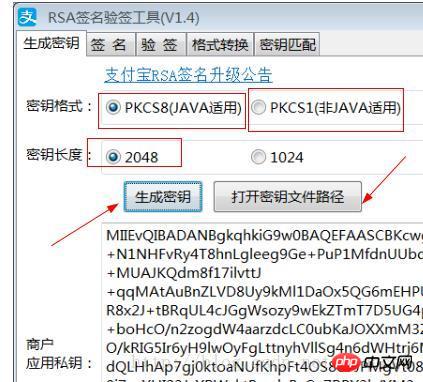 <br/>
<br/>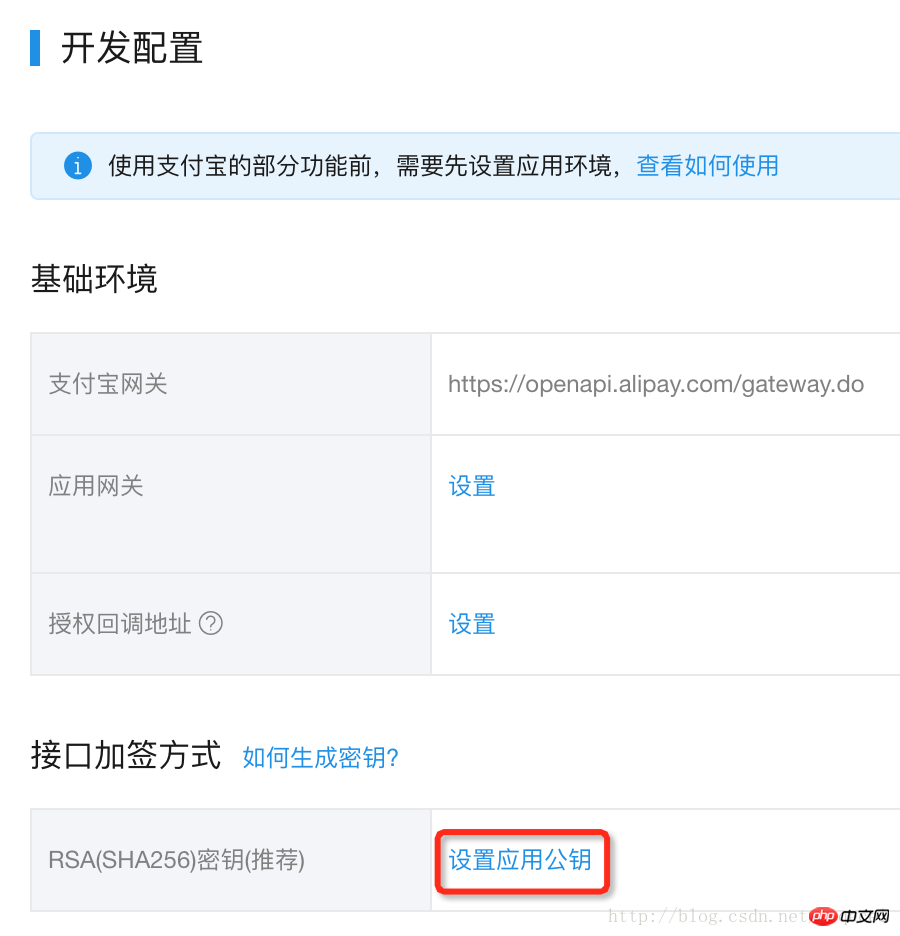
$returnUrl = 'http://域名/user/h5_alipay/return_url.php'; //付款成功后的 同步回调地址,可直接设置为会员中心的地址 $notifyUrl = 'http://域名/notify_url.php'; //付款成功后的异回调地址,如果你的回调地址中包含&符号,最好把回调直接放根目录
$orderName=iconv("GB2312//IGNORE","UTF-8",'支付宝充值');
密钥管理->开放平台密钥,填写添加了电脑网站支付的应用的APPID
$notifyUrl = 'http://域名/user/h5_alipay/notify_url.php';
//付款成功后的异步回调地址支付宝以post的方式回调
$returnUrl = 'http://域名/user/pay_chongzhi.php';
//付款成功后,支付宝以 get同步的方式回调给发起支付方
$sj=date("Y-m-d H:i:s");
$userid=returnuserid($_SESSION["SHOPUSER"]);
$ddbh=$bh="h5_ali_".time()."_".$userid;
//订单编号
$uip=$_SERVER["REMOTE_ADDR"];
//ip地址 $money1=$_POST[t1];
//bz备注,ddzt与alipayzt及ifok表示订单状态,
intotable("yjcode_dingdang","bh,ddbh,userid,sj,uip,money1,ddzt,alipayzt,bz,ifok","'".$bh."','".$ddbh."',".$userid.",'".$sj."','".$uip."',".$money1.",'等待买家付款','','支付宝充值',0");
//订单入库
//die(mysql_error());
//数据库错误
//订单名称
$orderName=iconv("GB2312//IGNORE","UTF-8",'支付宝充值');
//注意编码
$body = $orderName=iconv("GB2312//IGNORE","UTF-8",'支付宝充值');
$outTradeNo = $ddbh;
//你自己的商品订单号
$payAmount = $money1;
//付款金额,单位:元
$signType = 'RSA2';
//签名算法类型,支持RSA2和RSA,推荐使用RSA2
$saPrivateKey='这里填2048位的私钥';
//私钥
$aliPay = new AlipayService($appid,$returnUrl,$notifyUrl,$saPrivateKey);
$payConfigs = $aliPay->doPay($payAmount,$outTradeNo,$orderName,$returnUrl,$notifyUrl);
class AlipayService {
protected $appId;
protected $returnUrl;
protected $notifyUrl;
protected $charset;
//私钥值
protected $rsaPrivateKey;
public function __construct($appid, $returnUrl, $notifyUrl,$saPrivateKey) {
$this->appId = $appid;
$this->returnUrl = $returnUrl;
$this->notifyUrl = $notifyUrl;
$this->charset = 'UTF-8';
$this->rsaPrivateKey=$saPrivateKey;
}
/**
* 发起订单
* @param float $totalFee 收款金额 单位元
* @param string $outTradeNo 订单号
* @param string $orderName 订单名称
* @param string $notifyUrl 支付结果通知url 不要有问号
* @param string $timestamp 订单发起时间
* @return array
*/
public function doPay($totalFee, $outTradeNo, $orderName, $returnUrl,$notifyUrl)
{
//请求参数
$requestConfigs = array( 'out_trade_no'=>$outTradeNo, 'product_code'=>'QUICK_WAP_WAY', 'total_amount'=>$totalFee,
//单位 元 'subject'=>$orderName, //订单标题 );
$commonConfigs = array(
//公共参数
'app_id' => $this->appId, 'method' => 'alipay.trade.wap.pay',
//接口名称 'format' => 'JSON',
'return_url' => $returnUrl, 'charset'=>$this->charset, 'sign_type'=>'RSA2',
'timestamp'=>date('Y-m-d H:i:s'), 'version'=>'1.0', 'notify_url' => $notifyUrl,
'biz_content'=>json_encode($requestConfigs), );
$commonConfigs["sign"] = $this->generateSign($commonConfigs, $commonConfigs['sign_type']);
return $commonConfigs;
}
public function generateSign($params, $signType = "RSA") {
return $this->sign($this->getSignContent($params), $signType);
}
protected function sign($data, $signType = "RSA") {
$priKey=$this->rsaPrivateKey;
$res = "-----BEGIN RSA PRIVATE KEY-----\n" .
wordwrap($priKey, 64, "\n", true) .
"\n-----END RSA PRIVATE KEY-----";
($res) or die('您使用的私钥格式错误,请检查RSA私钥配置');
if ("RSA2" == $signType) {
openssl_sign($data, $sign, $res, version_compare(PHP_VERSION,'5.4.0', '<') ? SHA256 : OPENSSL_ALGO_SHA256);
//OPENSSL_ALGO_SHA256是php5.4.8以上版本才支持
} else {
openssl_sign($data, $sign, $res);
}
$sign = base64_encode($sign);
return $sign;
}
/**
* 校验$value是否非空
* if not set ,return true;
* if is null , return true;
**/
protected function checkEmpty($value) {
if (!isset($value))
return true;
if ($value === null)
return true;
if (trim($value) === "")
return true;
return false;
}
public function getSignContent($params) {
ksort($params);
$stringToBeSigned = "";
$i = 0;
foreach ($params as $k => $v) {
if (false === $this->checkEmpty($v) && "@" != substr($v, 0, 1)) {
// 转换成目标字符集
$v = $this->characet($v, $this->charset);
if ($i == 0) {
$stringToBeSigned .= "$k" . "=" . "$v";
} else {
$stringToBeSigned .= "&" . "$k" . "=" . "$v";
}
$i++;
}
}
unset ($k, $v);
return $stringToBeSigned;
}
/**
* 转换字符集编码
* @param $data
* @param $targetCharset
* @return string
*/
function characet($data, $targetCharset) {
if (!empty($data)) {
$fileType = $this->charset;
if (strcasecmp($fileType, $targetCharset) != 0) {
$data = mb_convert_encoding($data, $targetCharset, $fileType);
}
}
return $data;
} }
function isWeixin(){
if ( strpos($_SERVER['HTTP_USER_AGENT'],'MicroMessenger') !== false ) {
return true;
}
return false;
}
$queryStr = http_build_query($payConfigs); if(isWeixin()):
//注意下面的ap.js ,文件的存在目录,如果不确定.可以写绝对地址.否则可能微信中没法弹出提示窗口,
?>
<script>
var gotoUrl = 'https://openapi.alipaydev.com/gateway.do?<?=$queryStr?>';
//注意上面及下面的alipaydev.com,用的是沙箱接口,去掉dev表示正式上线
_AP.pay(gotoUrl); </script> <?php
header('Content-type:text/html; Charset=GB2312');
//支付宝公钥,账户中心->密钥管理->开放平台密钥,找到添加了支付功能的应用,根据你的加密类型,查看支付宝公钥
$alipayPublicKey=''; $aliPay = new AlipayService($alipayPublicKey);
//验证签名,如果签名失败,注意编码问题.特别是有中文时,可以换成英文,再测试
$result = $aliPay->rsaCheck($_POST,$_POST['sign_type']);
if($result===true){
//处理你的逻辑,例如获取订单号
$_POST['out_trade_no'],订单金额$_POST['total_amount']等
//程序执行完后必须打印输出“success”(不包含引号)。
如果商户反馈给支付宝的字符不是success这7个字符,支付宝服务器会不断重发通知,直到超过24小时22分钟。
一般情况下,25小时以内完成8次通知(通知的间隔频率一般是:4m,10m,10m,1h,2h,6h,15h);
$out_trade_no = $_POST['out_trade_no'];
//支付宝交易号
$trade_no = $_POST['trade_no'];
//交易状态
$trade_status = $_POST['trade_status'];
switch($trade_status){
case "WAIT_BUYER_PAY";
$nddzt="等待买家付款";
break;
case "TRADE_FINISHED": case "TRADE_SUCCESS"; $nddzt="交易成功";
break;
}
if(empty($trade_no)){echo "success";exit;}
//注意,这里的查询不能 强制用户登录,则否支付宝没法进入本页面.没法通知成功
$sql="select ifok,jyh from yjcode_dingdang where ifok=1 and jyh='".$trade_no."'";mysql_query("SET NAMES 'GBK'");$res=mysql_query($sql);
//支付宝生成的流水号
if($row=mysql_fetch_array($res)){echo "success";exit;
}
$sql="select * from yjcode_dingdang where ddbh='".$out_trade_no."' and ifok=0 and ddzt='等待买家付款'";
mysql_query("SET NAMES 'GBK'");
$res=mysql_query($sql);
if($row=mysql_fetch_array($res)){
if(1==$row['ifok']){
echo "success";exit;
}
if($trade_status=="TRADE_SUCCESS" || $trade_status=="TRADE_FINISHED"){
if($row['money1']== $_POST['total_fee'] ){
$sj=time();$uip=$_SERVER["REMOTE_ADDR"];
updatetable("yjcode_dingdang","sj='".$sj."',uip='".$uip."',alipayzt='".$trade_status."',ddzt='".$nddzt."',ifok=1,jyh='".$trade_no."' where id=".$row[id]);
$money1=$row["money1"];
//修改订单状态为成功付款
PointIntoM($userid,"支付宝充值".$money1."元",$money1);
//会员余额增加 echo "success";exit;
}
}
}
//——请根据您的业务逻辑来编写程序(以上代码仅作参考)——
echo 'success';exit();
}
echo 'fail';exit();
class AlipayService {
//支付宝公钥
protected $alipayPublicKey;
protected $charset;
public function __construct($alipayPublicKey) {
$this->charset = 'utf8';
$this->alipayPublicKey=$alipayPublicKey;
}
/** * 验证签名 **/
public function rsaCheck($params) {
$sign = $params['sign'];
$signType = $params['sign_type'];
unset($params['sign_type']);
unset($params['sign']);
return $this->verify($this->getSignContent($params), $sign, $signType);
}
function verify($data, $sign, $signType = 'RSA') {
$pubKey= $this->alipayPublicKey;
$res = "-----BEGIN PUBLIC KEY-----\n" .
wordwrap($pubKey, 64, "\n", true) .
"\n-----END PUBLIC KEY-----";
($res) or die('支付宝RSA公钥错误。请检查公钥文件格式是否正确');
//调用openssl内置方法验签,返回bool值
if ("RSA2" == $signType) {
$result = (bool)openssl_verify($data, base64_decode($sign), $res, version_compare(PHP_VERSION,'5.4.0', '<') ? SHA256 : OPENSSL_ALGO_SHA256);
} else {
$result = (bool)openssl_verify($data, base64_decode($sign), $res);
} // if(!$this->checkEmpty($this->alipayPublicKey)) { //
//释放资源 //
openssl_free_key($res);
// }
return $result;
}
/** * 校验$value是否非空 * if not set ,return true; * if is null , return true; **/
protected function checkEmpty($value) {
if (!isset($value))
return true;
if ($value === null)
return true;
if (trim($value) === "")
return true;
return false;
}
public function getSignContent($params) {
ksort($params);
$stringToBeSigned = "";
$i = 0;
foreach ($params as $k => $v) {
if (false === $this->checkEmpty($v) && "@" != substr($v, 0, 1)) {
// 转换成目标字符集
$v = $this->characet($v, $this->charset);
if ($i == 0) {
$stringToBeSigned .= "$k" . "=" . "$v";
} else {
$stringToBeSigned .= "&" . "$k" . "=" . "$v";
}
$i++;
}
}
unset ($k, $v);
return $stringToBeSigned;
}
/** * 转换字符集编码 * @param $data * @param $targetCharset * @return string */
function characet($data, $targetCharset) {
if (!empty($data)) {
$fileType = $this->charset;
if (strcasecmp($fileType, $targetCharset) != 0) {
$data = mb_convert_encoding($data, $targetCharset, $fileType);
//$data = iconv($fileType, $targetCharset.'//IGNORE', $data);
}
}
return $data;
}
}<?php
define('PHPS_PATH', dirname(__FILE__).DIRECTORY_SEPARATOR);
//$_POST['trade_no']=1; if($_POST['trade_no']){ $alipayPublicKey='MIIBIjANBgkqhkiG9w0BAQEFAAOCAQ8AMIIBCgKCAQEAyg8BC9UffA4ZoMl12zz';
//RSA公钥,与支付时的私钥对应
$aliPay = new AlipayService2($alipayPublicKey);
//验证签名
$result = $aliPay->rsaCheck($_POST,$_POST['sign_type']);
//file_put_contents('333.txt',$_POST);
if($result===true){
//处理你的逻辑,例如获取订单号
$_POST['out_trade_no'],订单金额$_POST['total_amount']等
$out_trade_no = $_POST['out_trade_no'];
//$out_trade_no = '2018022300293843964';
//支付宝交易号
$trade_no = $_POST['trade_no'];
//交易状态
$trade_status = $_POST['trade_status'];
//$trade_status='';
$userinfo = array();
if($trade_status=="TRADE_SUCCESS" || $trade_status=="TRADE_FINISHED"){
//ini_set('display_errors',1);
//错误信息
//ini_set('display_startup_errors',1);
//php启动错误信息
//error_reporting(-1);
//打印出所有的 错误信息
$mysql_user=include(PHPS_PATH.'/caches/configs/database.php');
$username=$mysql_user['default']['username'];
$password=$mysql_user['default']['password'];
$tablepre=$mysql_user['default']['tablepre'];
$database=$mysql_user['default']['database'];
$con = mysqli_connect($mysql_user['default']['hostname'],$username,$password); mysqli_select_db($con,$database);
$sql = ' SELECT * FROM '.$tablepre."pay_account where trade_sn='".$out_trade_no."'";
$result2=mysqli_query($con,$sql);
$orderinfo=mysqli_fetch_array($result2);;
$uid=$orderinfo['userid'];
$sql2 = ' SELECT * FROM '.$tablepre."member where userid=".$uid;
$result1=mysqli_query($con,$sql2); $userinfo=mysqli_fetch_array($result1);;
if($orderinfo){
if($orderinfo['status']=='succ'){
//file_put_contents('31.txt',1);
echo 'success';
mysqli_close($con);
exit();
}else{
// if($orderinfo['money']== $_POST['total_amount'] ){
$money = $orderinfo['money'];
$amount = $userinfo['amount'] + $money;
$sql3 = ' update '.$tablepre."member set amount= ".$amount." where userid=".$uid;
$result3=mysqli_query($con,$sql3);
$sql4 = ' update '.$tablepre."pay_account set status= 'succ' where userid=".$uid ." and trade_sn='".$out_trade_no."'";
$result4=mysqli_query($con,$sql4);
//file_put_contents('1.txt',$result4);
echo 'success';
mysqli_close($con);
exit();
// }
}
} else {
echo 'success';exit();
}
}
echo 'success';exit();
} echo 'fail';exit();
} class AlipayService2 {
//支付宝公钥
protected $alipayPublicKey;
protected $charset;
public function __construct($alipayPublicKey) {
$this->charset = 'utf8';
$this->alipayPublicKey=$alipayPublicKey;
}
/** * 验证签名 **/
public function rsaCheck($params) {
$sign = $params['sign'];
$signType = $params['sign_type'];
unset($params['sign_type']);
unset($params['sign']);
return $this->verify($this->getSignContent($params), $sign, $signType);
}
function verify($data, $sign, $signType = 'RSA') {
$pubKey= $this->alipayPublicKey;
$res = "-----BEGIN PUBLIC KEY-----\n" .
wordwrap($pubKey, 64, "\n", true) .
"\n-----END PUBLIC KEY-----";
($res) or die('支付宝RSA公钥错误。请检查公钥文件格式是否正确');
//调用openssl内置方法验签,返回bool值
if ("RSA2" == $signType) {
$result = (bool)openssl_verify($data, base64_decode($sign), $res, version_compare(PHP_VERSION,'5.4.0', '<') ? SHA256 : OPENSSL_ALGO_SHA256);
} else {
$result = (bool)openssl_verify($data, base64_decode($sign), $res);
}
// if(!$this->checkEmpty($this->alipayPublicKey)) {
//
//释放资源 //
openssl_free_key($res); //
}
return $result;
}
/** * 校验$value是否非空 * if not set ,return true; * if is null , return true; **/
protected function checkEmpty($value) {
if (!isset($value))
return true;
if ($value === null)
return true;
if (trim($value) === "")
return true;
return false;
}
public function getSignContent($params) {
ksort($params);
$stringToBeSigned = "";
$i = 0;
foreach ($params as $k => $v) {
if (false === $this->checkEmpty($v) && "@" != substr($v, 0, 1)) {
// 转换成目标字符集
$v = $this->characet($v, $this->charset);
if ($i == 0) {
$stringToBeSigned .= "$k" . "=" . "$v";
} else {
$stringToBeSigned .= "&" . "$k" . "=" . "$v";
}
$i++;
}
}
unset ($k, $v);
return $stringToBeSigned;
} /** * 转换字符集编码 * @param $data * @param $targetCharset * @return string */
function characet($data, $targetCharset) {
if (!empty($data)) {
$fileType = $this->charset;
if (strcasecmp($fileType, $targetCharset) != 0) {
$data = mb_convert_encoding($data, $targetCharset, $fileType);
//$data = iconv($fileType, $targetCharset.'//IGNORE', $data);
}
}
return $data;
}
}
?>5. 抓包
常用抓包工具
6. https / http
7. like efficiency
8. left, right, join, solve the Cartesian product
sql union, intersect, except statement
9. oop封装、继承、多态
php面向对象之继承、多态、封装简介
作者:PHP中文网2018-03-02 09:49:15
interface InterAnimal{
public function speak();
public function name($name);
}//接口实现 class cat implements InterAnimal{
public function speak(){
echo "speak";
}
public function name($name){
echo "My name is ".$name;
 }
}<br/>class Computer {
private $_name = '联想';
public function __get($_key) {
return $this->$_key;
}
public function run() {
echo '父类run方法';
}}class NoteBookComputer extends Computer {}$notebookcomputer = new NoteBookComputer ();
$notebookcomputer->run ();
//继承父类中的run()方法echo $notebookcomputer->_name;
//通过魔法函数__get()获得私有字段<br/>class Computer {
public $_name = '联想';
protected function run() {
echo '我是父类';
}}//重写其字段、方法class NoteBookComputer extends Computer {
public $_name = 'IBM';
public function run() {
echo '我是子类';
}}<br/>abstract class Computer {
abstract function run();
}
final class NotebookComputer extends Computer {
public function run() {
echo '抽象类的实现';
}
}<br/>interface Computer {
public function version();
public function work();
}class NotebookComputer implements Computer {
public function version() {
echo '联想<br>';
}
public function work() {
echo '笔记本正在随时携带运行!';
}}class desktopComputer implements Computer {
public function version() {
echo 'IBM';
}
public function work() {
echo '台式电脑正在工作站运行!';
}}class Person {
public function run($type) {
$type->version ();
$type->work ();
}}
$person = new Person ();
$desktopcomputer = new desktopComputer ();
$notebookcomputer = new NoteBookComputer ();
$person->run ( $notebookcomputer );<br/>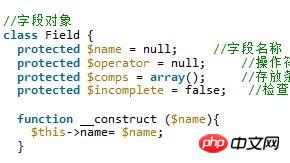 PHP object-oriented identification object
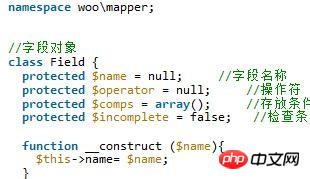 PHP object-oriented identification object instance detailed explanation
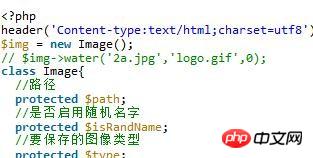 PHP implementation of image watermark class encapsulation code sharing
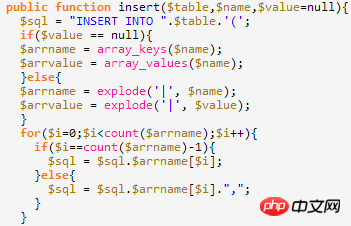 Detailed explanation of PHP encapsulation Mysql operation class
10. mvc
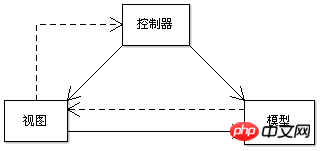
1. Loading resources from multiple domain names
Basic process
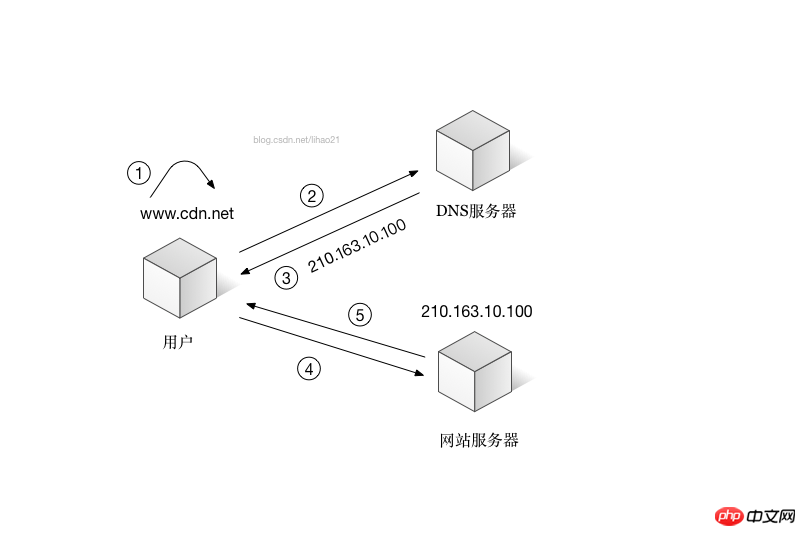 <br/>1. The user enters the domain name to be accessed in the browser. <br/>2. The browser requests the DNS server to resolve the domain name. <br/>3. The DNS server returns the IP address of the domain name to the browser. <br/>4. The browser uses the IP address to request content from the server. <br/>5. The server returns the content requested by the user to the browser.
 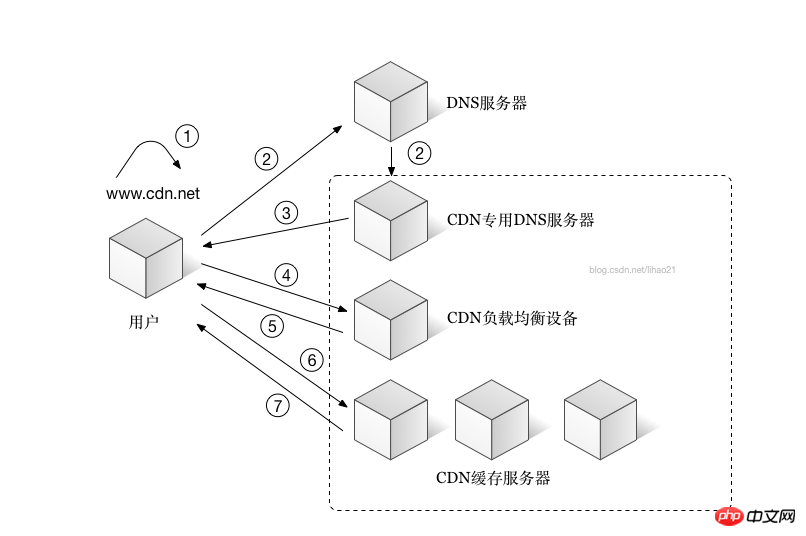 <br/>1. The user enters the domain name to be accessed in the browser. <br/>2. The browser requests the DNS server to resolve the domain name. Since the CDN adjusts domain name resolution, the DNS server will eventually hand over the domain name resolution rights to the CDN dedicated DNS server pointed to by the CNAME. <br/>3. The CDN’s DNS server returns the IP address of the CDN’s load balancing device to the user. <br/>4. The user initiates a content URL access request to the load balancing device of the CDN. <br/>5. The CDN load balancing device will select a suitable cache server to provide services for users. <br/>The basis for selection includes: judging which server is closest to the user based on the user's IP address; judging which server has the content the user needs based on the content name carried in the URL requested by the user; querying the content of each server Load situation, determine which server has the smaller load. <br/>Based on the comprehensive analysis of the above, the load balancing settings will return the IP address of the cache server to the user. <br/>6. The user makes a request to the cache server. <br/>7. The cache server responds to the user's request and delivers the content required by the user to the user. <br/>If this cache server does not have the content that the user wants, and the load balancing device still allocates it to the user, then this server will request the content from its upper-level cache server until it is traced back to the website. The origin server pulls the content locally.
 Summary
##12. nginx load balancing
##13. Cache (seven layers of description)
DirectoryModern Web sites provide more dynamic content, such as dynamic web pages, dynamic pictures, Web services, etc. They are usually calculated on the Web server side, generate HTML and return. In the process of generating HTML pages, a large number of CPU calculations and I/O operations are involved, such as CPU calculations and disk I/O of the database server, as well as network I/O for communication with the database server. These operations will take a lot of time. However, in most cases, the results of dynamic web pages are almost the same when multiple requests are made. Then, you can consider removing this part of the time overhead through caching.
For dynamic web pages, we cache the generated HTML, which is called page cache (Page Cache). For other dynamic content such as dynamic pictures and dynamic XML data, We can also cache their results as a whole using the same strategy.
1.1.1 Storage method
1.1.2 Expiration check
1.1.3 Partial no cache
1.2 Static content
2. Browser cache
2.1 Implementation
2.1.1 缓存协商
header("Last-Modified: " . gmdate("D, d M Y H:i:s") . " GMT");Last-Modified: Fri, 9 Dec 2014 23:23:23 GMT
If-Modified-Since: Fri, 9 Dec 2014 23:23:23 GMT
HTTP/1.1 304 Not Modified
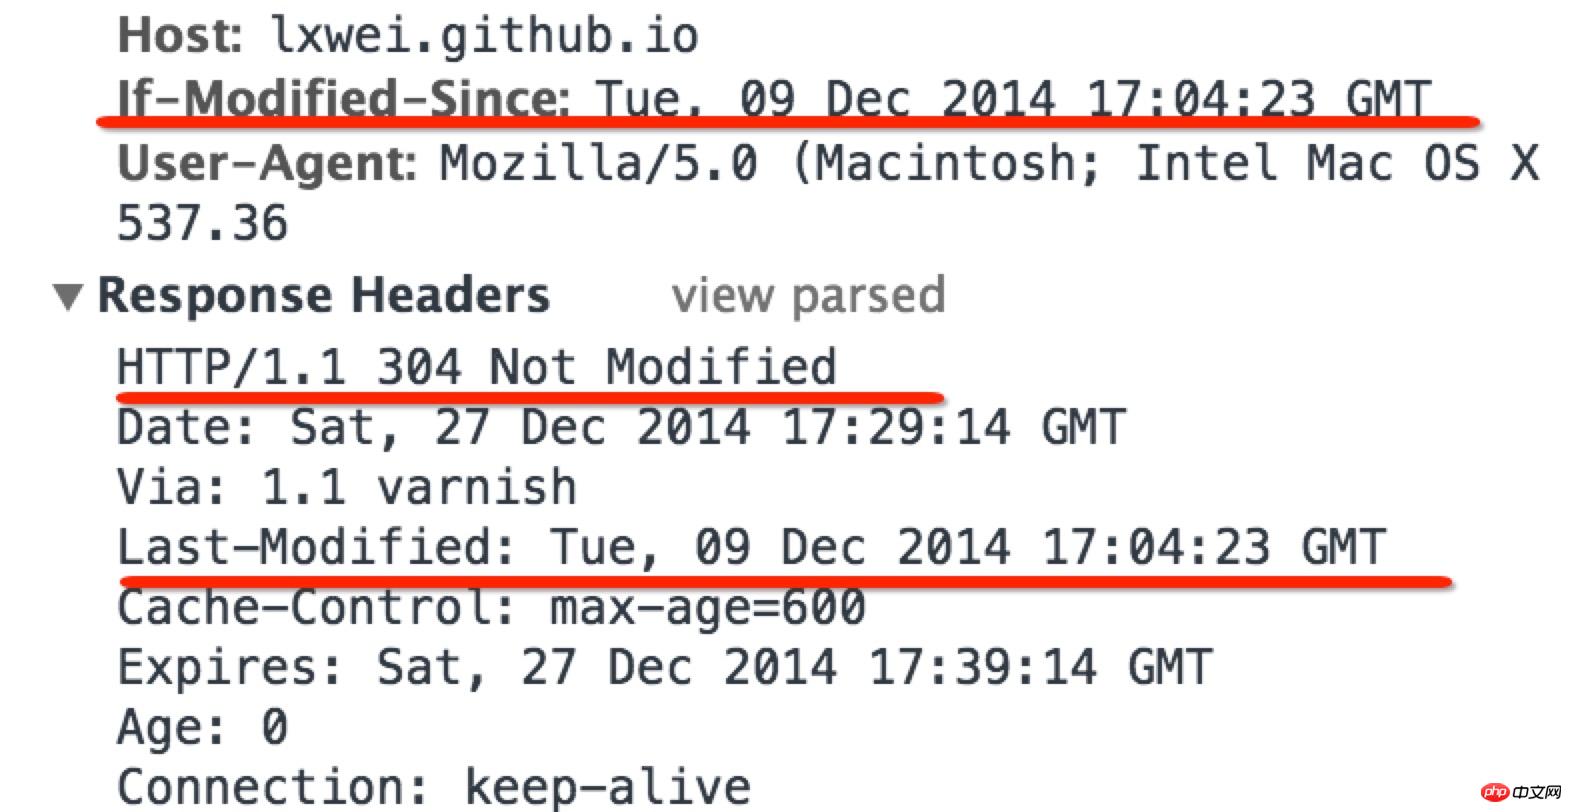
If-None-Match: "87665-c-090f0adfadf"
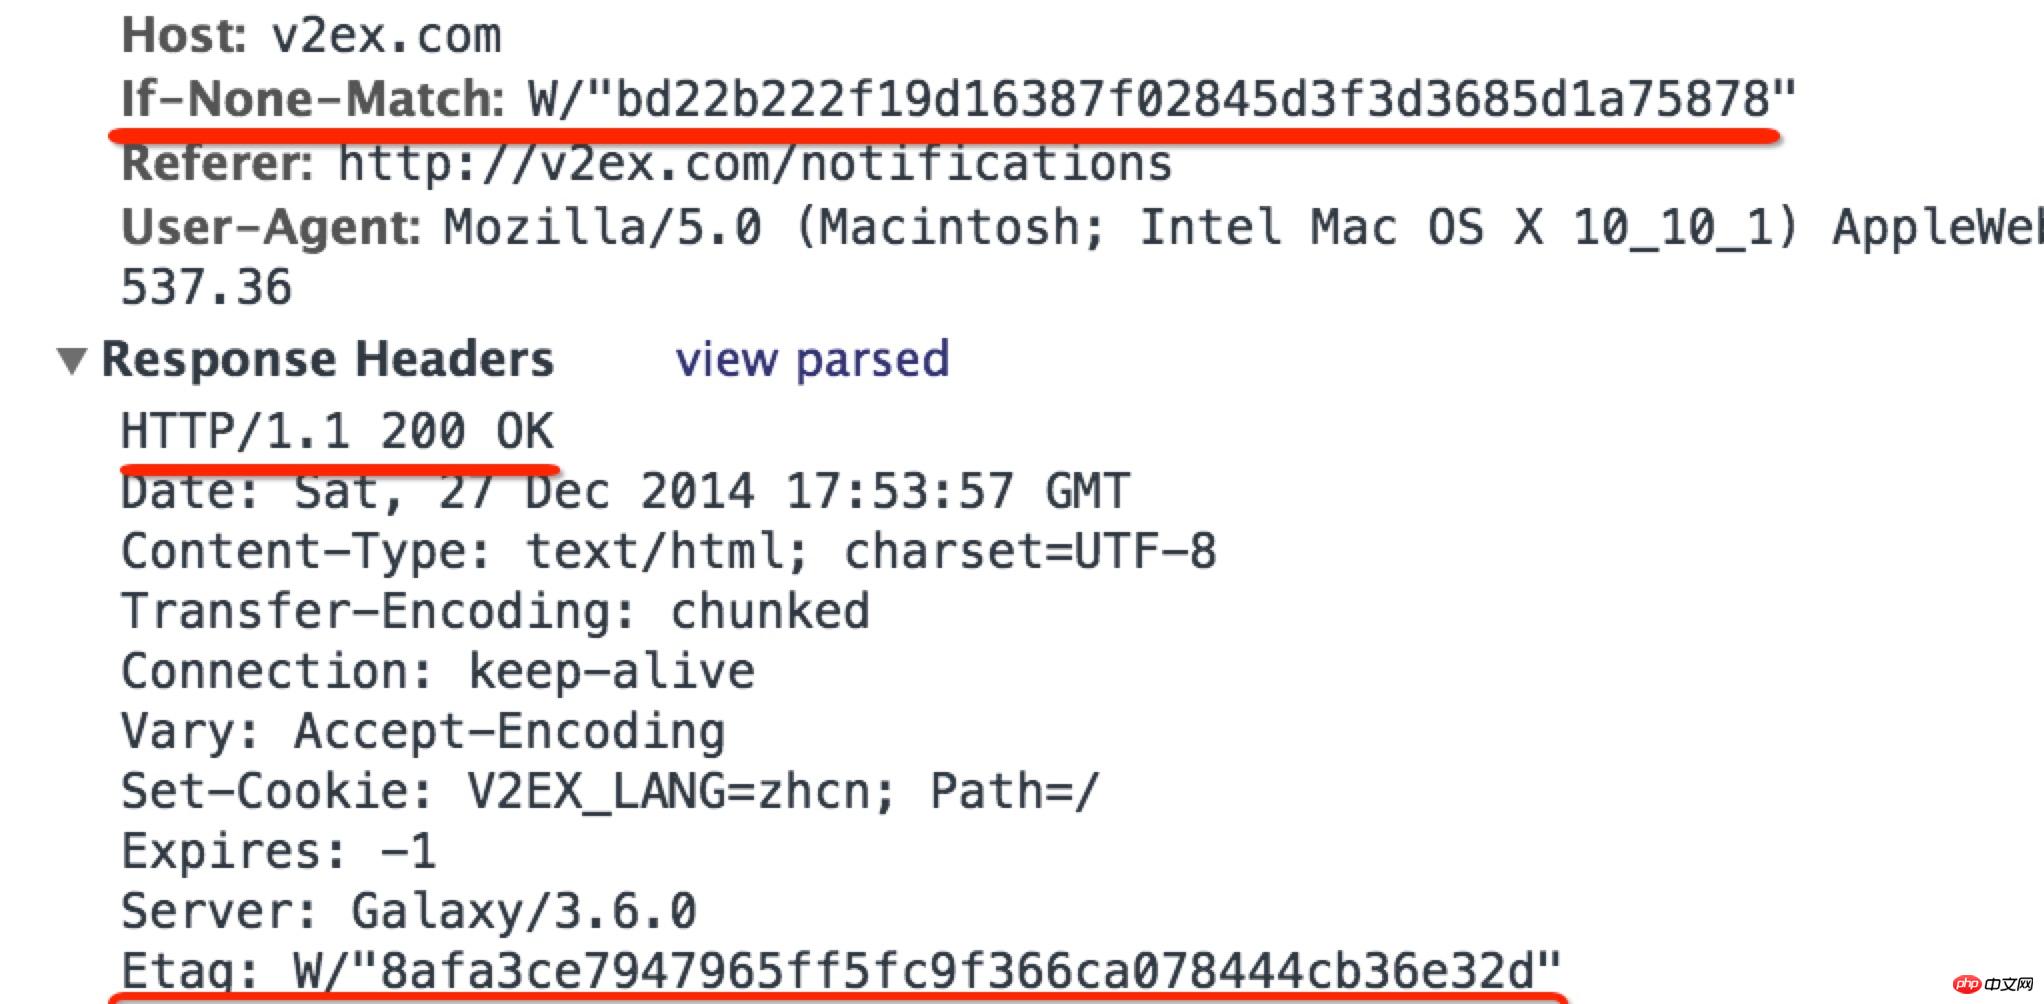
2.1.2 性能
2.2 彻底消灭请求
2.2.1 Expires 标记
Expires标记,告诉浏览器该内容何时过期,在内容过期前不需要再询问服务器,直接使用本地缓存即可。2.2.2 请求页面方式
Last-Modified Expires Ctrl F5 Invalid Invalid F5 Valid Invalid Go to valid valid 2.2.3 适应过期时间
max-age 指定缓存过期的相对时间,单位是秒,相对时间指相对浏览器本地时间。目前,当 HTTP 响应中同时含有 Expires 和 Cache-Control 时,浏览器会优先使用 Cache-Control。2.3 总结
3. Web 服务器缓存
3.1 简介
Expires 标记,如果希望不缓存某个动态内容,那么最简单的办法就是使用:header("Expires: 0");Last-Modified来实现,具体方法不再叙述。3.2 取代动态内容缓存
3.3 缓存文件描述符
4. 反向代理缓存
4.1 反向代理简介
4.2 Reverse proxy cache
4.2.1 Modify caching rules
4.2.2 Clear cache
5. Distributed caching
5.1 memcached
5.2 Read-write cache
5.3 Cache Monitoring
5.4 Cache expansion
6. Summary
14. Content diversion, cms staticization
1. Why static?
2. PHP staticization
Staticization of large-scale dynamic websites
Static solution:
The difference between static pages, dynamic pages and pseudo-static pages
15. spirit css Is the bigger the better?
When to use: Let’s start with the principle. When our request volume is particularly large and the request data is small, we can aggregate multiple small pictures into one large picture and achieve this through positioning; If the graph is relatively large, you need to use graph cutting to reduce resources; in this way, multiple requests are merged into one, consuming less network resources and optimizing front-end access. <br/>

<p>
   <p>
  <b class="N1 n10"></b>
  <em class="First small_up1"></em>
  <span class="A1 up1"></span>
  <span class="A2 up1"></span>
  <span class="A3 down1"></span>
  <span class="A4 down1"></span>
  <span class="B1 up1"></span>
  <span class="B2 down1"></span>
  <span class="C1 up1"></span>
  <span class="C2 up1"></span>
  <span class="C3 down1"></span>
  <span class="C4 down1"></span>
  <em class="Last small_down1"></em>
  <b class="N2 n10_h"></b>
   </p>
</p>
<!DOCTYPE html PUBLIC "-//W3C//DTD XHTML 1.0 Transitional//EN" "http://www.w3.org/TR/xhtml1/DTD/xhtml1-transitional.dtd">
<html xmlns="http://www.w3.org/1999/xhtml">
<head>
<meta http-equiv="Content-Type" content="text/html; charset=utf-8" />
<title>制作一幅扑克牌--黑桃10</title>
<style type="text/css"><!--
.card{width:125px;height:170px; position:absolute;overflow:hidden;border:1px #c0c0c0 solid;}
/*中间图片通用设置*/
span{display:block;width:20px;height:21px; position:absolute;background:url(http://www.blueidea.com//articleimg/2009/02/6382/00.gif) no-repeat;}
/*小图片通用设置*/
b{display:block;width:15px;height:10px; position:absolute;font-size:10pt;text-align:center;font-weight:bold;background:url(http://www.blueidea.com//articleimg/2009/02/6382/00.gif) no-repeat; overflow:hidden;}
/*数字通用设置*/
em{display:block;width:15px;height:10px; position:absolute;font-size:10pt;text-align:center;font-weight:bold;background:url(http://www.blueidea.com//articleimg/2009/02/6382/00.gif) no-repeat;overflow:hidden;}
/*各坐标点位置*/
.N1{left:1px;top:8px;}
.First{left:5px;top:20px;}
.A1{left:20px;top:20px;}
.A2{left:20px;top:57px;}
.A3{left:20px;top:94px;}
.A4{left:20px;top:131px;}
.B1{left:54px;top:38px;}
.B2{left:54px;top:117px;}
.C1{left:86px;top:20px;}
.C2{left:86px;top:57px;}
.C3{left:86px;top:94px;}
.C4{left:86px;top:131px;}
.Last{bottom:20px;right:0px;}
.N2{bottom:8px;right:5px;
}
/*大图标黑红梅方四种图片-上方向*/
.up1{background-position:0 1px;}/*黑桃*/
/*大图标黑红梅方四种图片-下方向*/
.down1{background-position:0 -19px;}/*黑桃*/
/*小图标黑红梅方四种图片-上方向*/
.small_up1{background-position:0 -40px;}/*黑桃*/
/*小图标黑红梅方四种图片-下方向*/
.small_down1{background-position:0 -51px;}/*黑桃*/
/*A~k数字图片-左上角*/
.n10{background-position:-191px 0px;left:-4px;width:21px;}
/*A~k数字图片-右下角*/
.n10_h{background-position:-191px -22px;right:3px;width:21px;}
/*A~k数字图片-左上角红色字*/
.n10_red{background-position:-191px 0px;}
/*A~k数字图片-右下角红色字*/
.n10_h_red{background-position:-191px -33px;}
-->
</style>
</head>
<body>
<!--10字符-->
<p>
 <p>
  <b class="N1 n10"></b>
  <em class="First small_up1"></em>
  <span class="A1 up1"></span>
  <span class="A2 up1"></span>
  <span class="A3 down1"></span>
  <span class="A4 down1"></span>

  <span class="B1 up1"></span>
  <span class="B2 down1"></span>

  <span class="C1 up1"></span>
  <span class="C2 up1"></span>
  <span class="C3 down1"></span>
  <span class="C4 down1"></span>
  <em class="Last small_down1"></em>
  <b class="N2 n10_h"></b>
 </p>
</p>
</body>
</html>16. 反向代理/正向代理
正向代理与反向代理【总结】

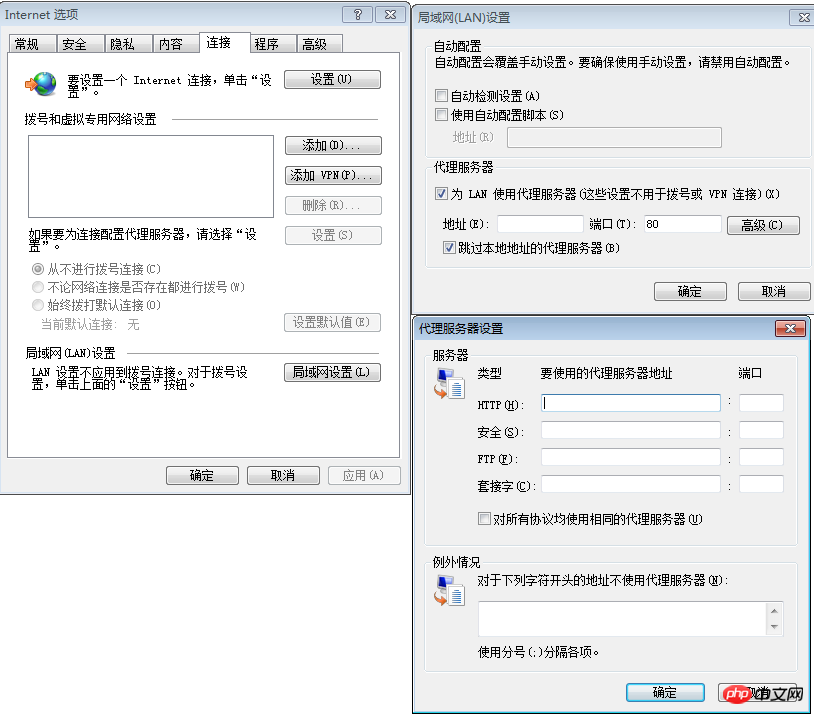


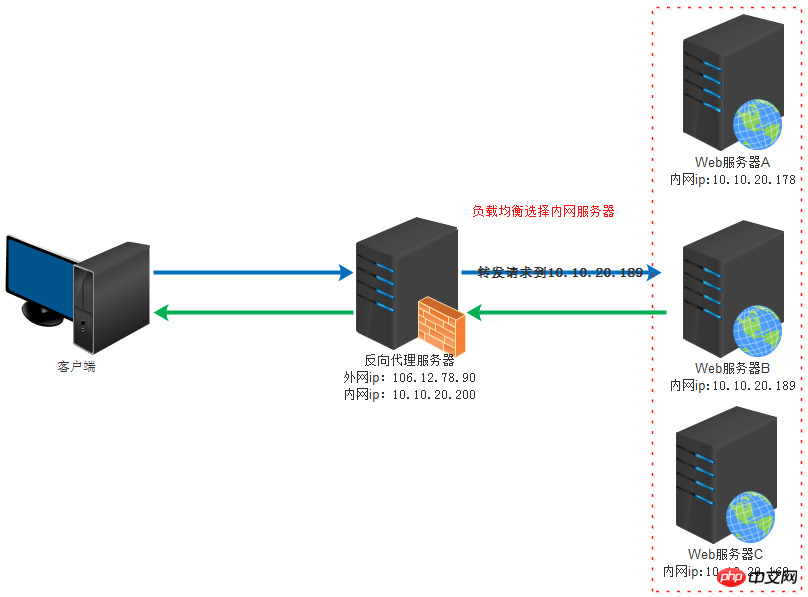
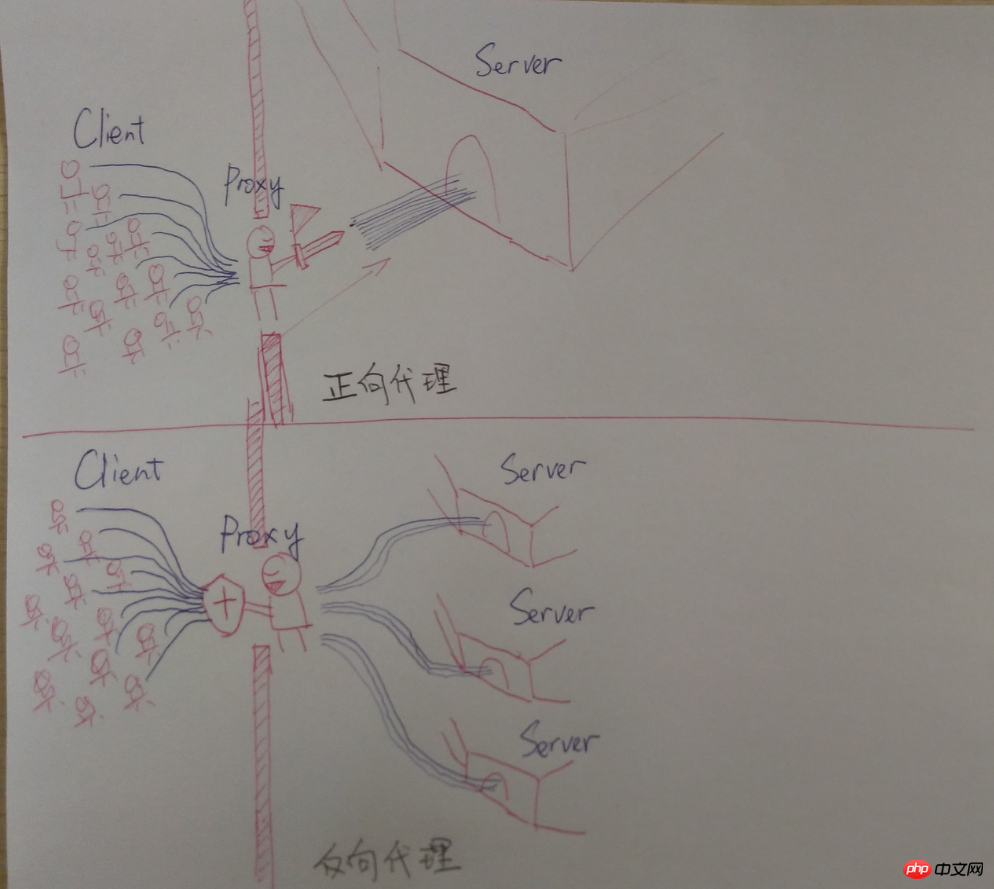
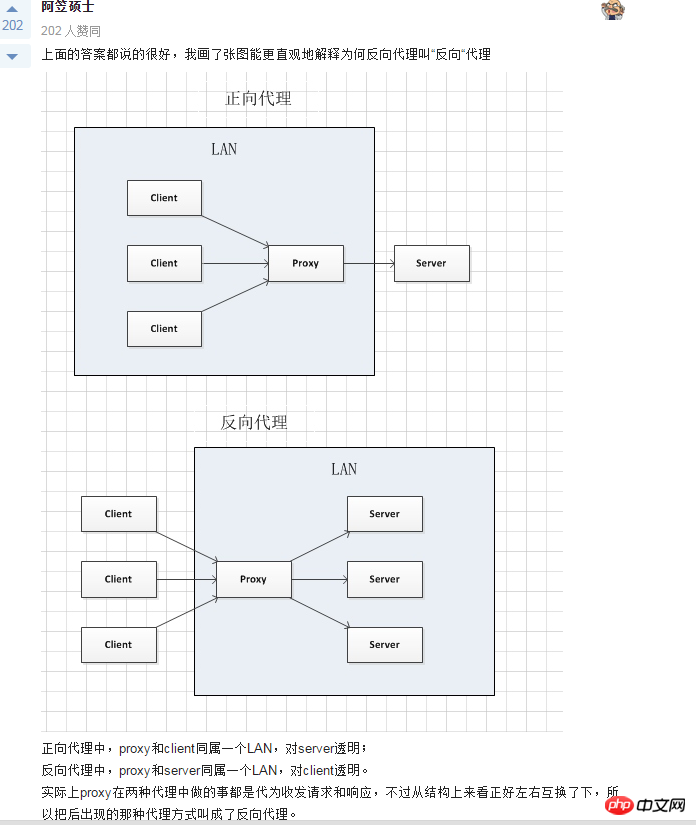
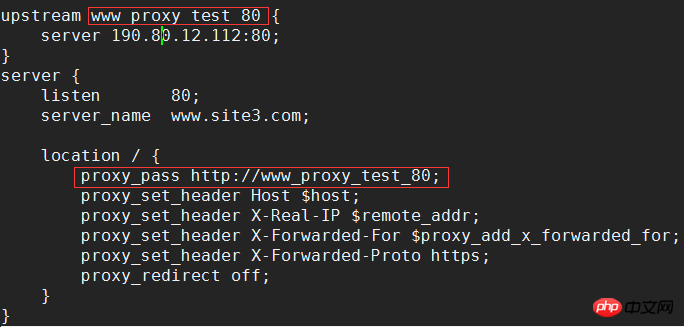
Forward proxy
Function:
Reverse proxy
Function
Transparent proxy
Function
CDN
The difference between forward proxy and reverse proxy
Purpose
Forward proxy
Reverse proxy
Security
Forward proxy
Reverse proxy
The difference between reverse proxy and CDN
17. mysql master-slave, optimization
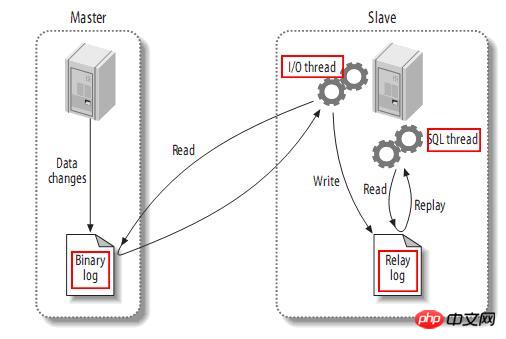
18. web security
 <br/>
<br/>20. The difference between memcached and redis
21. The difference between apache and nginx
1. Definition:
1. Apache
1. Comparison between Apache and Tomcat
Same points:2. Comparison between Nginx and Apache
1) nginx relative to The advantages of apache
2) apache Compared to nginx Advantages
3) Comparison of the advantages and disadvantages of the two
3. Summary
twenty two. Port, process
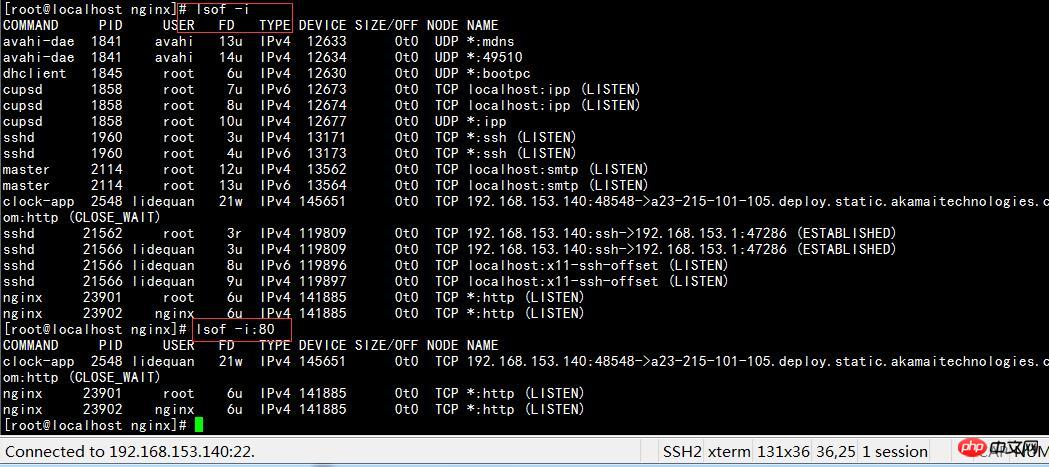 <br/>2.Use netstat <br/>Use netstat -anp|grep 80 <br/>
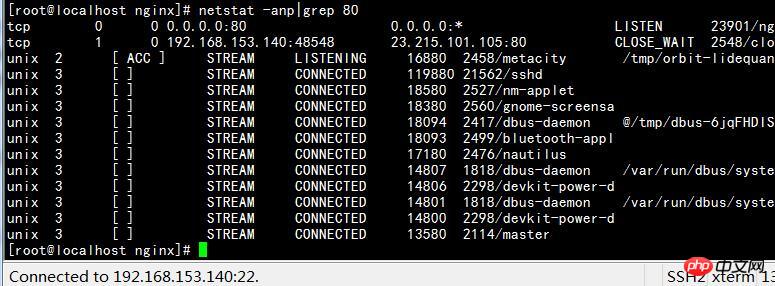
Linux View processes and delete processes
23. 性能优化
分布式缓存
缓存的基本原理
缓存是指将数据存储在相对较高访问速度的存储介质中。
(1)访问速度快,减少数据访问时间;
(2)如果缓存的数据进过计算处理得到的,那么被缓存的数据无需重复计算即可直接使用。
缓存的本质是一个内存Hash表,以一对Key、Value的形式存储在内存Hash表中,读写时间复杂度为O(1)。
合理使用缓存
不合理使用缓存非但不能提高系统的性能,还会成为系统的累赘,甚至风险。
频繁修改的数据
如果缓存中保存的是频繁修改的数据,就会出现数据写入缓存后,应用还来不及读取缓存,数据就已经失效,徒增系统负担。一般来说,数据的读写比在2:1以上,缓存才有意义。
没有热点的访问
如果应用系统访问数据没有热点,不遵循二八定律,那么缓存就没有意义。
数据不一致与脏读
一般会对缓存的数据设置失效时间,一旦超过失效时间,就要从数据库中重新加载。因此要容忍一定时间的数据不一致,如卖家已经编辑了商品属性,但是需要过一段时间才能被买家看到。还有一种策略是数据更新立即更新缓存,不过这也会带来更多系统开销和事务一致性问题。
缓存可用性
缓存会承担大部分数据库访问压力,数据库已经习惯了有缓存的日子,所以当缓存服务崩溃时,数据库会因为完全不能承受如此大压力而宕机,导致网站不可用。
这种情况被称作缓存雪崩,发生这种故障,甚至不能简单地重启缓存服务器和数据库服务器来恢复。
实践中,有的网站通过缓存热备份等手段提高缓存可用性:当某台缓存服务器宕机时,将缓存访问切换到热备服务器上。
但这种设计有违缓存的初衷,**缓存根本就不应该当做一个可靠的数据源来使用**。
通过分布式缓存服务器集群,将缓存数据分布到集群多台服务器上可在一定程度上改善缓存的可用性。
当一台缓存服务器宕机时,只有部分缓存数据丢失,重新从数据库加载这部分数据不会产生很大的影响。
缓存预热
缓存中的热点数据利用LRU(最近最久未用算法)对不断访问的数据筛选淘汰出来,这个过程需要花费较长的时间。
那么最好在缓存系统启动时就把热点数据加载好,这个缓存预加载手段叫缓存预热。
缓存穿透
    如果因为不恰当的业务、或者恶意攻击持续高并发地请求某个不存在的数据,由于缓存没有保存该数据,所有的请求都会落到数据库上,会对数据库造成压力,甚至崩溃。
**一个简单的对策是将不存在的数据也缓存起来(其value为null)** 。分布式缓存架构
分布式缓存指缓存部署在多个服务器组成的集群中,以集群方式提供缓存服务,其架构方式有两种,一种是以JBoss Cache为代表的需要更新同步的分布式缓存,一种是以Memcached为代表的不互相通信的分布式缓存。 JBoss Cache在集群中所有服务器中保存相同的缓存数据,当某台服务器有缓存数据更新,就会通知其他机器更新或清除缓存数据。 它通常将应用程序和缓存部署在同一台服务器上,但受限于单一服务器的内存空间;当集群规模较大的时候,缓存更新需要同步到所有机器,代价惊人。因此这种方案多见于企业应用系统中。 Memcached采用一种集中式的缓存集群管理(互不通信的分布式架构方式)。缓存与应用分离部署,缓存系统部署在一组专门的服务器上,应用程序通过一致性Hash等路由算法选择缓存服务器远程访问数据,缓存服务器之间不通信,集群规模可以很容易地实现扩容,具有良好的伸缩性。 (1)简单的通信协议。Memcached使用TCP协议(UDP也支持)通信; (2)丰富的客户端程序。 (3)高性能的网络通信。Memcached服务端通信模块基于Libevent,一个支持事件触发的网络通信程序库,具有稳定的长连接。 (4)高效的内存管理。 (5)互不通信的服务器集群架构。
异步操作
使用消息队列将调用异步化(生产者--消费者模式),可改善网站的扩展性,还可以改善系统的性能。
在不使用消息队列的情况下,用户的请求数据直接写入数据库,在高并发的情况下,会对数据库造成巨大压力,使得响应延迟加剧。
在使用消息队列后,用户请求的数据发送给消息队列后立即返回,再由消息队列的消费者进程(通常情况下,该进程独立部署在专门的服务器集群上)从消息队列中获取数据,
  异步写入数据库。由于消息队列服务器处理速度远快于服务器(消息队列服务器也比数据库具有更好的伸缩性)。
消息队列具有很好的削峰作用--通过异步处理,将短时间高并发产生的事务消息存储在消息队列中,从而削平高峰期的并发事务。
需要注意的是,由于数据写入消息队列后立即返回给用户,数据在后续的业务校验、写数据库等操作可能失败,因此在使用消息队列进行业务异步处理后,
  需要适当修改业务流程进行配合,如订单提交后,订单数据写入消息队列,不能立即返回用户订单提交成功,需要在消息队列的订单消费者进程真正处理完后,
  甚至商品出库后,再通过电子邮件或SMS消息通知用户订单成功,以免交易纠纷。
使用集群
在网站高并发访问的场景下,使用负载均衡技术为一个应用构建一个由多台服务器组成的服务器集群,将并发访问请求分发到多台服务器上处理。
代码优化
多线程
从资源利用的角度看,使用多线程的原因主要有两个:IO阻塞与多CPU。
当前线程进行IO处理的时候,会被阻塞释放CPU以等待IO操作完成,由于IO操作(不管是磁盘IO还是网络IO)通常都需要较长的时间,这时CPU可以调度其他的线程进行处理。
理想的系统Load是既没有进程(线程)等待也没有CPU空闲,利用多线程IO阻塞与执行交替进行,可最大限度利用CPU资源。
使用多线程的另一个原因是服务器有多个CPU。
简化启动线程估算公式:
 启动线程数 = [任务执行时间 / (任务执行时间 - IO等待时间)]*CPU内核数 多线程编程一个需要注意的问题是线程安全问题,即多线程并发对某个资源进行修改,导致数据混乱。
所有的资源---对象、内存、文件、数据库,乃至另一个线程都可能被多线程并发访问。
编程上,解决线程安全的主要手段有:
 (1)将对象设计为无状态对象。
 所谓无状态对象是指对象本身不存储状态信息(对象无成员变量,或者成员变量也是无状态对象),不过从面向对象设计的角度看,无状态对象是一种不良设计。
 (2)使用局部对象。
 即在方法内部创建对象,这些对象会被每个进入该方法的线程创建,除非程序有意识地将这些对象传递给其他线程,否则不会出现对象被多线程并发访问的情形。
 (3)并发访问资源时使用锁。
 即多线程访问资源的时候,通过锁的方式使多线程并发操作转化为顺序操作,从而避免资源被并发修改。
资源复用
1系统运行时,要尽量减少那些开销很大的系统资源的创建和销毁,比如数据库连接、网络通信连接、线程、复杂对象等。
2从编程角度,资源复用主要有两种模式:单例(Singleton)和对象池(Object Pool)。
3单例虽然是GoF经典设计模式中较多被诟病的一个模式,但由于目前Web开发中主要使用贫血模式,从Service到Dao都是些无状态对象,无需重复创建,使用单例模式也就自然而然了。
4对象池模式通过复用对象实例,减少对象创建和资源消耗。
5对于数据库连接对象,每次创建连接,数据库服务端都需要创建专门的资源以应对,因此频繁创建关闭数据库连接,对数据库服务器是灾难性的,
同时频繁创建关闭连接也需要花费较长的时间。
6因此实践中,应用程序的数据库连接基本都使用连接池(Connection Pool)的方式,数据库连接对象创建好以后,
将连接对象放入对象池容器中,应用程序要连接的时候,就从对象池中获取一个空闲的连接使用,使用完毕再将该对象归还到对象池中即可,不需要创建新的连接。
数据结构
早期关于程序的一个定义是,程序就是数据结构+算法,数据结构对于编程的重要性不言而喻。
在不同场景中合理使用数据结构,灵活组合各种数据结构改善数据读写和计算特性可极大优化程序的性能。
垃圾回收
理解垃圾回收机制有助于程序优化和参数调优,以及编写内存安全的代码。
24. 支付
手机网站支付接口
产品简介
申请条件
配置
查看PID

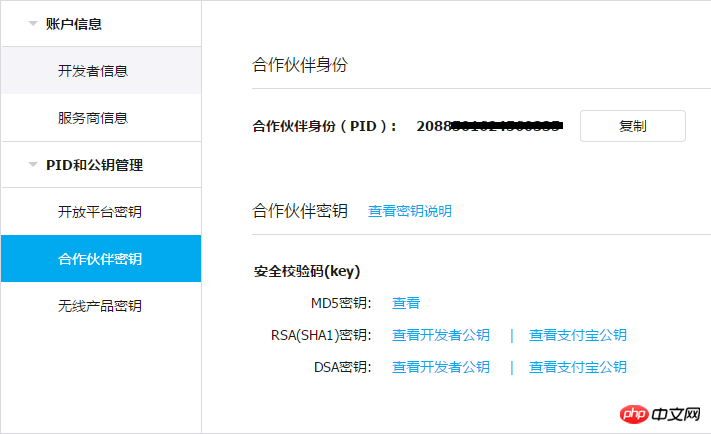
配置密钥
应用环境
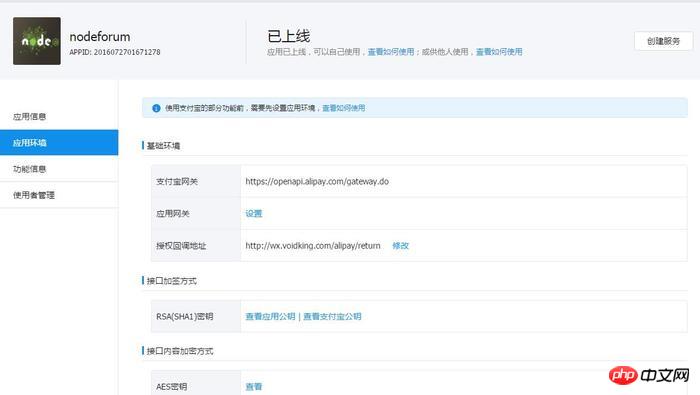 <br/>
<br/>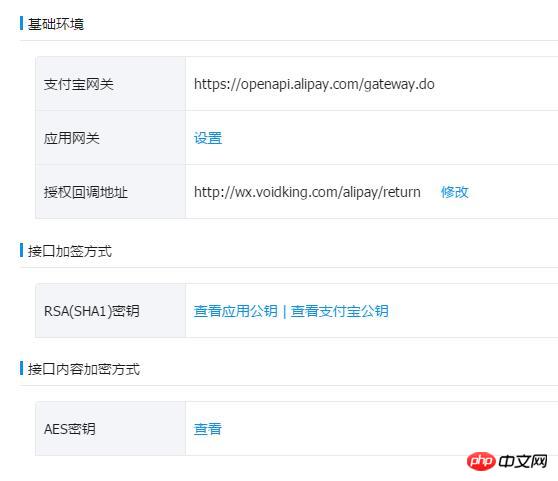 <br/>上图是我的应用配置选项,公司账号也许会有所不同。具体哪些参数需要配置?请参照接口参数说明,需要什么就配置什么。
交互
Node端发起支付请求
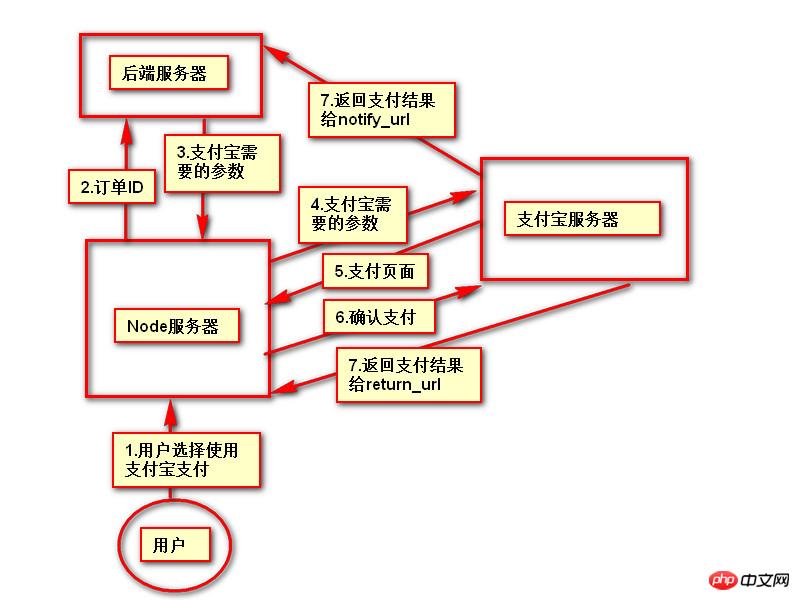 <br/>我们公司采用的,就是这种方式,步骤3中Node端获取到的支付宝参数,包括sign。其实,sign的计算工作也可以放在Node端,只不过支付宝没有给出Node的demo,实现起来需要耗费多一点时间。
后端发起支付请求
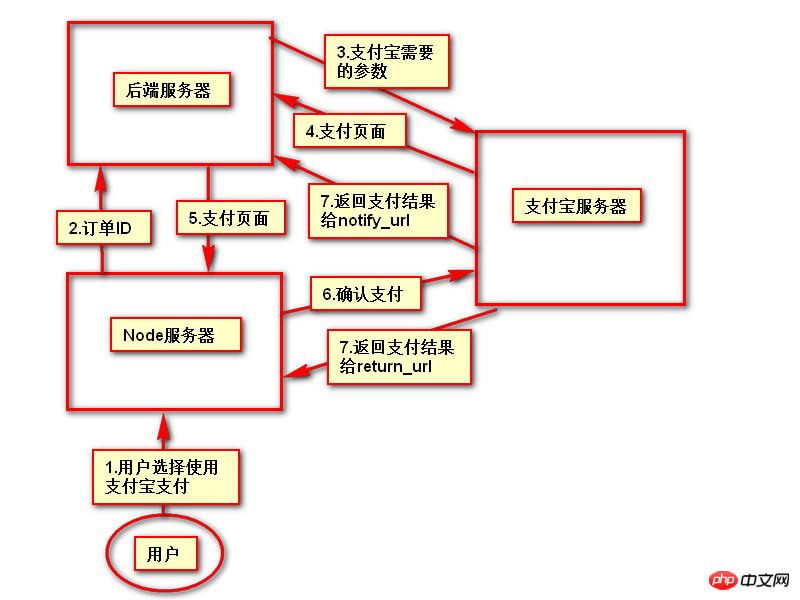 <br/>这种方式也很好,而且,步骤4中后端获取到支付页面,也可以不传给Node端,自己显示出来。这样,整个流程就更加简单。
return_url和notify_url
Node端详解
request发起请求
// 通过orderId向后端请求获取支付宝支付参数alidata var alipayUrl = 'https://mapi.alipay.com/gateway.do?'+ alidata; request.get({url: alipayUrl},function(error, response, body){ res.send(response.body); });
request.get({url: alipayUrl},function(error, response, body){
var str = response2.body;
str = str.replace(/gb2312/, "utf-8");
res.setHeader('content-type', 'text/html;charset=utf-8');
 res.send(str);
});表单提交请求
Node端
// node端 // 通过orderId向后端请求获取支付宝支付参数alidata function getArg(str,arg) { var reg = new RegExp('(^|&)' + arg + '=([^&]*)(&|$)', 'i'); var r = str.match(reg); if (r != null) { return unescape(r[2]); } return null; } var alipayParam = { _input_charset: getArg(alidata,'_input_charset'), body: getArg(alidata,'body'), it_b_pay: getArg(alidata, 'it_b_pay'), notify_url: getArg(alidata, 'notify_url'), out_trade_no: getArg(alidata, 'out_trade_no'), partner: getArg(alidata, 'partner'), payment_type: getArg(alidata, 'payment_type'), return_url: getArg(alidata, 'return_url'), seller_id: getArg(alidata, 'seller_id'), service: getArg(alidata, 'service'), show_url: getArg(alidata, 'show_url'), subject: getArg(alidata, 'subject'), total_fee: getArg(alidata, 'total_fee'), sign_type: getArg(alidata, 'sign_type'), sign: getArg(alidata, 'sign'), app_pay: getArg(alidata, 'app_pay') }; res.render('artist/alipay',{ // 其他参数 alipayParam: alipayParam });html
<!--alipay.html-->
<!DOCTYPE html>
<html lang="en">
<head>
<meta charset="UTF-8">
<title>支付宝支付</title> </head> <body>
<form id="ali-form" action="https://mapi.alipay.com/gateway.do" method="get">
<input type="hidden" name="_input_charset" value="<%= alipayParam._input_charset%>">
<input type="hidden" name="body" value="<%= alipayParam.body%>">
<input type="hidden" name="it_b_pay" value="<%= alipayParam.it_b_pay%>">
<input type="hidden" name="notify_url" value="<%= alipayParam.notify_url%>">
<input type="hidden" name="out_trade_no" value="<%= alipayParam.out_trade_no%>">
<input type="hidden" name="partner" value="<%= alipayParam.partner%>">
<input type="hidden" name="payment_type" value="<%= alipayParam.payment_type%>">
<input type="hidden" name="return_url" value="<%= alipayParam.return_url%>">
<input type="hidden" name="seller_id" value="<%= alipayParam.seller_id%>">
<input type="hidden" name="service" value="<%= alipayParam.service%>">
<input type="hidden" name="show_url" value="<%= alipayParam.show_url%>">
<input type="hidden" name="subject" value="<%= alipayParam.subject%>">
<input type="hidden" name="total_fee" value="<%= alipayParam.total_fee%>">
<input type="hidden" name="sign_type" value="<%= alipayParam.sign_type%>">
<input type="hidden" name="sign" value="<%= alipayParam.sign%>">
<input type="hidden" name="app_pay" value="<%= alipayParam.app_pay%>">
</form> <% include ../bootstrap.html %> <script type="text/javascript" src="<%= dist %>/js/business-modules/artist/alipay.js?v=2016052401"></script>
</body>
</html>
js
// alipay.js seajs.use(['zepto'],function($){
var index = {
 init:function(){
  var self = this;
   this.bindEvent();
    },
    bindEvent:function(){
     var self = this;
      $('#ali-form').submit();
       }
        }
         index.init();
});小结
 <br/>选择支付宝支付后,成功跳转到了支付宝支付页面,nice!看来这种方案很靠谱。
错误排查
 <br/>值得点赞的是,支付宝给的错误代码很明确,一看就懂。上面这个错误,签名不对。因为我给alipayParam私自加了个app_pay属性,没有经过签名。
微信屏蔽支付宝
问题描述

完美解决办法
Node端
res.render('artist/alipay',{ alipayParam: alipayParam, param: urlencode(alidata) });html
<input type="hidden" id="param" value="<%= param%>"> <iframe id="payFrame" name="mainIframe" src="" frameborder="0" scrolling="auto" ></iframe>
js
var iframe = document.getElementById('payFrame'); var param = $('#param').val(); iframe.src='https://mapi.alipay.com/gateway.do?'+param;
报错
官方解决办法
html
<!--alipay.html--> <!DOCTYPE html> <html lang="en"> <head> <meta charset="UTF-8"> <title>支付宝支付</title> </head> <body> <form id="ali-form" action="https://mapi.alipay.com/gateway.do" method="get"> <input type="hidden" name="_input_charset" value="<%= alipayParam._input_charset%>"> <input type="hidden" name="body" value="<%= alipayParam.body%>"> <input type="hidden" name="it_b_pay" value="<%= alipayParam.it_b_pay%>"> <input type="hidden" name="notify_url" value="<%= alipayParam.notify_url%>"> <input type="hidden" name="out_trade_no" value="<%= alipayParam.out_trade_no%>"> <input type="hidden" name="partner" value="<%= alipayParam.partner%>"> <input type="hidden" name="payment_type" value="<%= alipayParam.payment_type%>"> <input type="hidden" name="return_url" value="<%= alipayParam.return_url%>"> <input type="hidden" name="seller_id" value="<%= alipayParam.seller_id%>"> <input type="hidden" name="service" value="<%= alipayParam.service%>"> <input type="hidden" name="show_url" value="<%= alipayParam.show_url%>"> <input type="hidden" name="subject" value="<%= alipayParam.subject%>"> <input type="hidden" name="total_fee" value="<%= alipayParam.total_fee%>"> <input type="hidden" name="sign_type" value="<%= alipayParam.sign_type%>"> <input type="hidden" name="sign" value="<%= alipayParam.sign%>"> <p class="wrapper buy-wrapper" style="max-width:90%"> <a href="javascript:void(0);" class="J-btn-submit btn mj-submit btn-strong btn-larger btn-block">确认支付</a> </p> </form> <input type="hidden" id="param" value="<%= param%>"> <% include ../bootstrap.html %> <script type="text/javascript" src="<%= dist %>/js/business-modules/artist/ap.js"></script> <script> var btn = document.querySelector(".J-btn-submit"); btn.addEventListener("click", function (e) { e.preventDefault(); e.stopPropagation(); e.stopImmediatePropagation(); var queryParam = ''; Array.prototype.slice.call(document.querySelectorAll("input[type=hidden]")).forEach(function (ele) { queryParam += ele.name + "=" + encodeURIComponent(ele.value) + '&'; }); var gotoUrl = document.querySelector("#ali-form").getAttribute('action') + '?' + queryParam; _AP.pay(gotoUrl); return false; }, false); btn.click(); </script> </body> </html>
后记
Bookmark
25. High concurrency, large traffic
<br/>
##26. The difference between mysql and nosql
NoSQL or Relational Database
27. Backend structure servitization
Overview
Data model:
Data classification
Semi-structured data
Structured data
Unstructured data
Semi-structured data
储存方式
化解为结构化数据
用XML格式来组织并保存到CLOB字段中
28. 单链表翻转
单链表反转总结篇
1 定义

class ListNode {
int val;
ListNode next;
ListNode(int x) {
val = x;
 next = null;
 }
 }
2 方法1:就地反转法
2.1 思路
2.2 解释
1初始状态
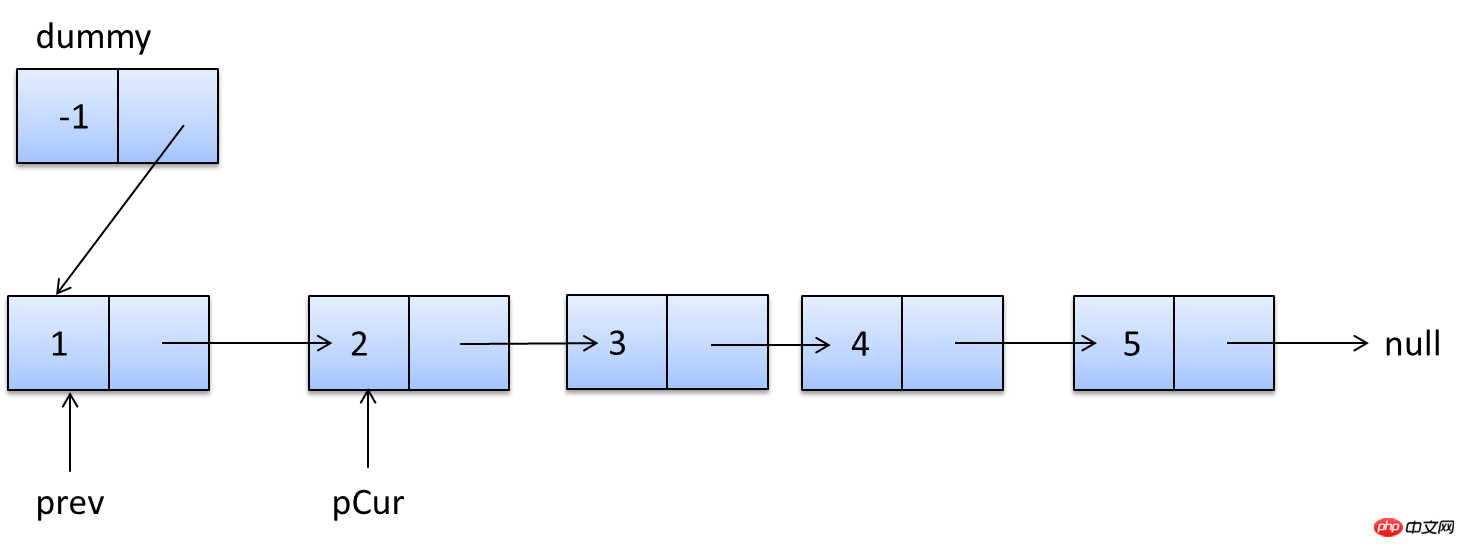
2 过程
1 prev.next = pCur.next;
2 pCur.next = dummy.next;
3 dummy.next = pCur;
4 pCur = prev.next;
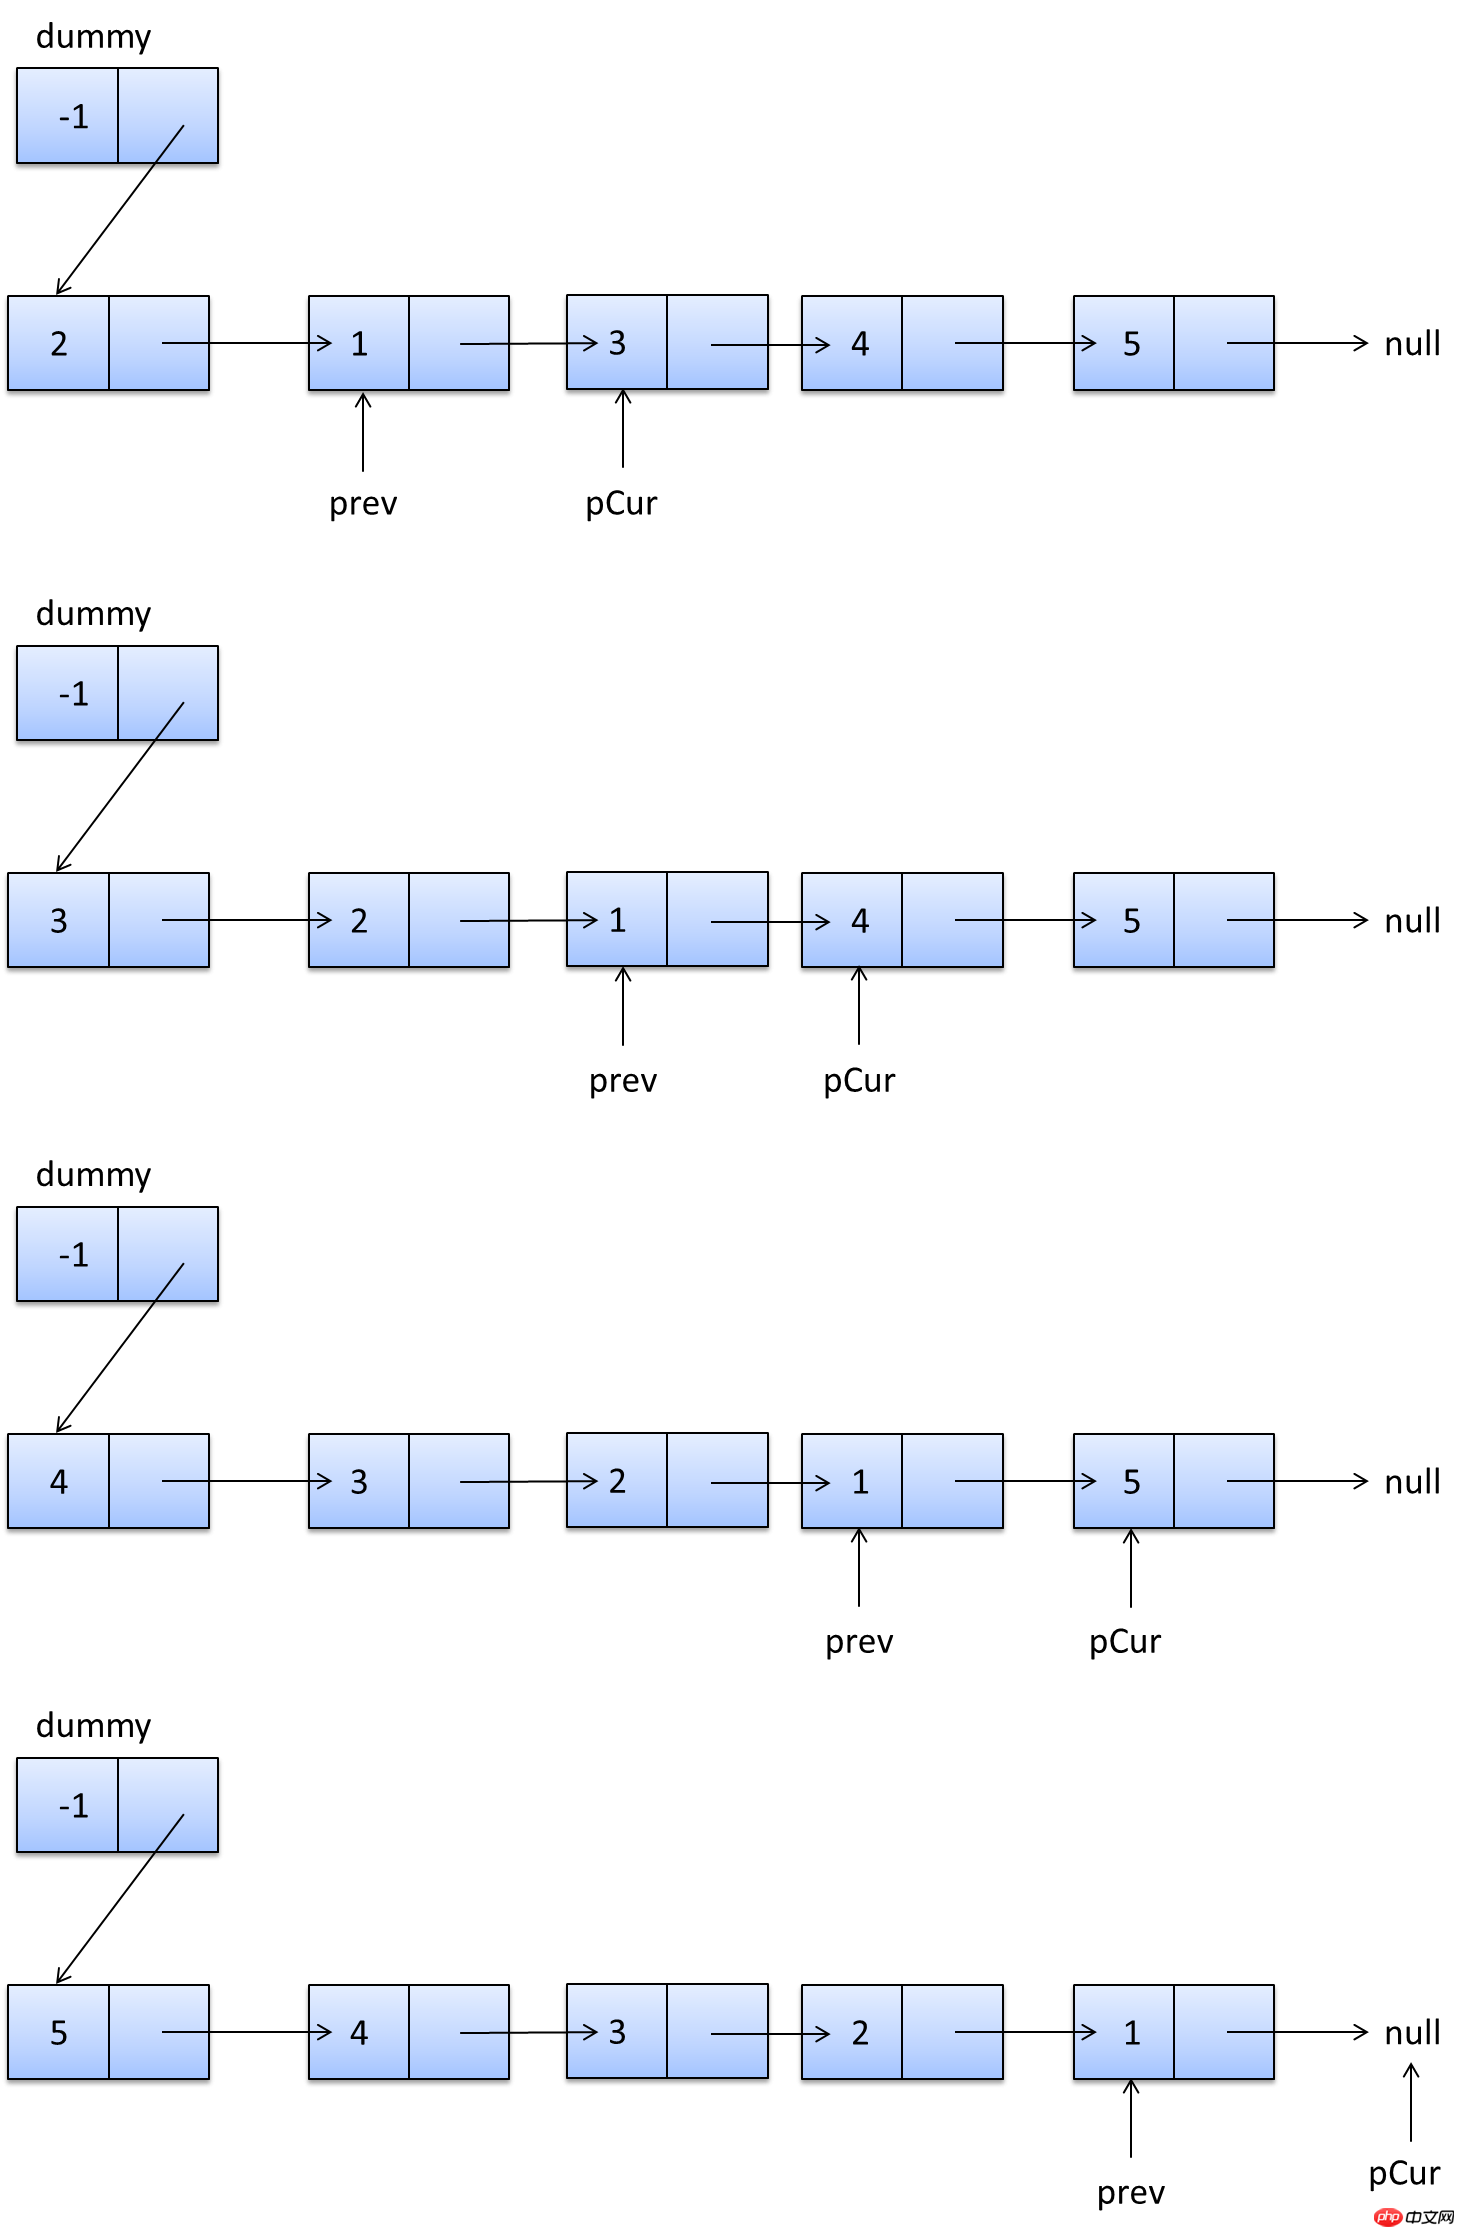
3 循环条件
pCur is not null
2.3 代码

 1     // 1.就地反转法
 2     public ListNode reverseList1(ListNode head) {
 3         if (head == null)
 4             return head;
 5         ListNode dummy = new ListNode(-1);
 6         dummy.next = head;
 7         ListNode prev = dummy.next;
 8         ListNode pCur = prev.next;
 9         while (pCur != null) {
 10             prev.next = pCur.next;
 11             pCur.next = dummy.next;
 12             dummy.next = pCur;
 13             pCur = prev.next;
 14         }
 15         return dummy.next;
 16     }
2.4 总结
3 方法2:新建链表,头节点插入法
3.1 思路
3.2 解释
1 初始状态
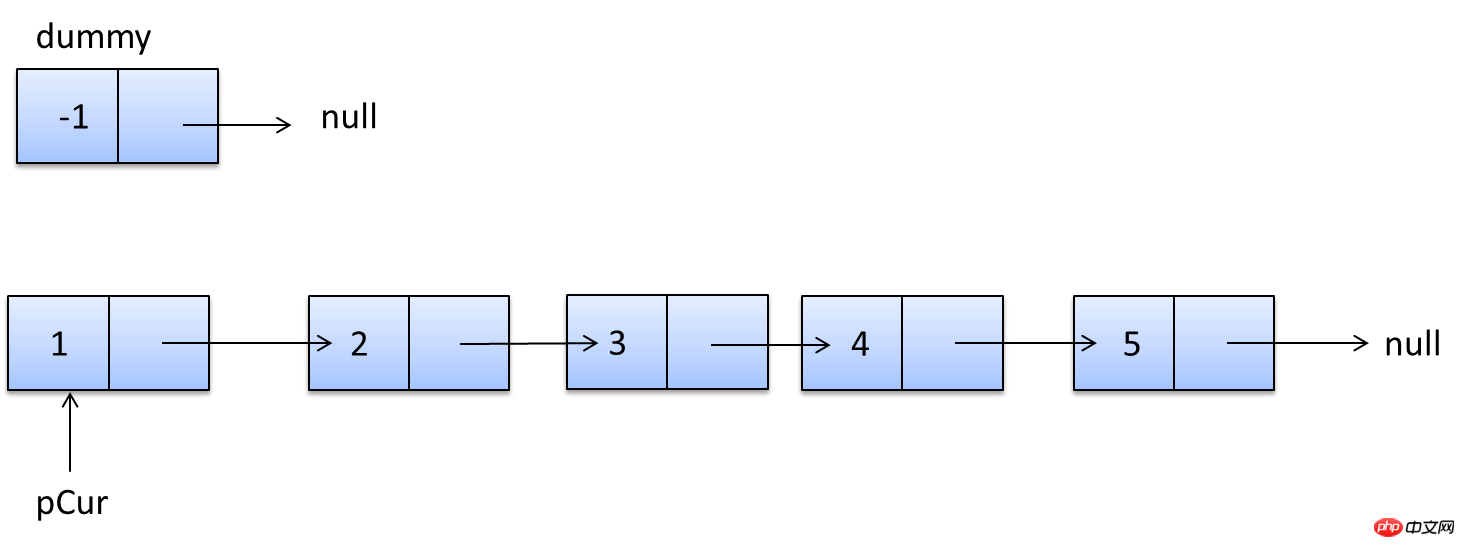
2 过程
1 pNex = pCur.next
2 pCur.next = dummy.next
3 dummy.next = pCur
4 pCur = pNex
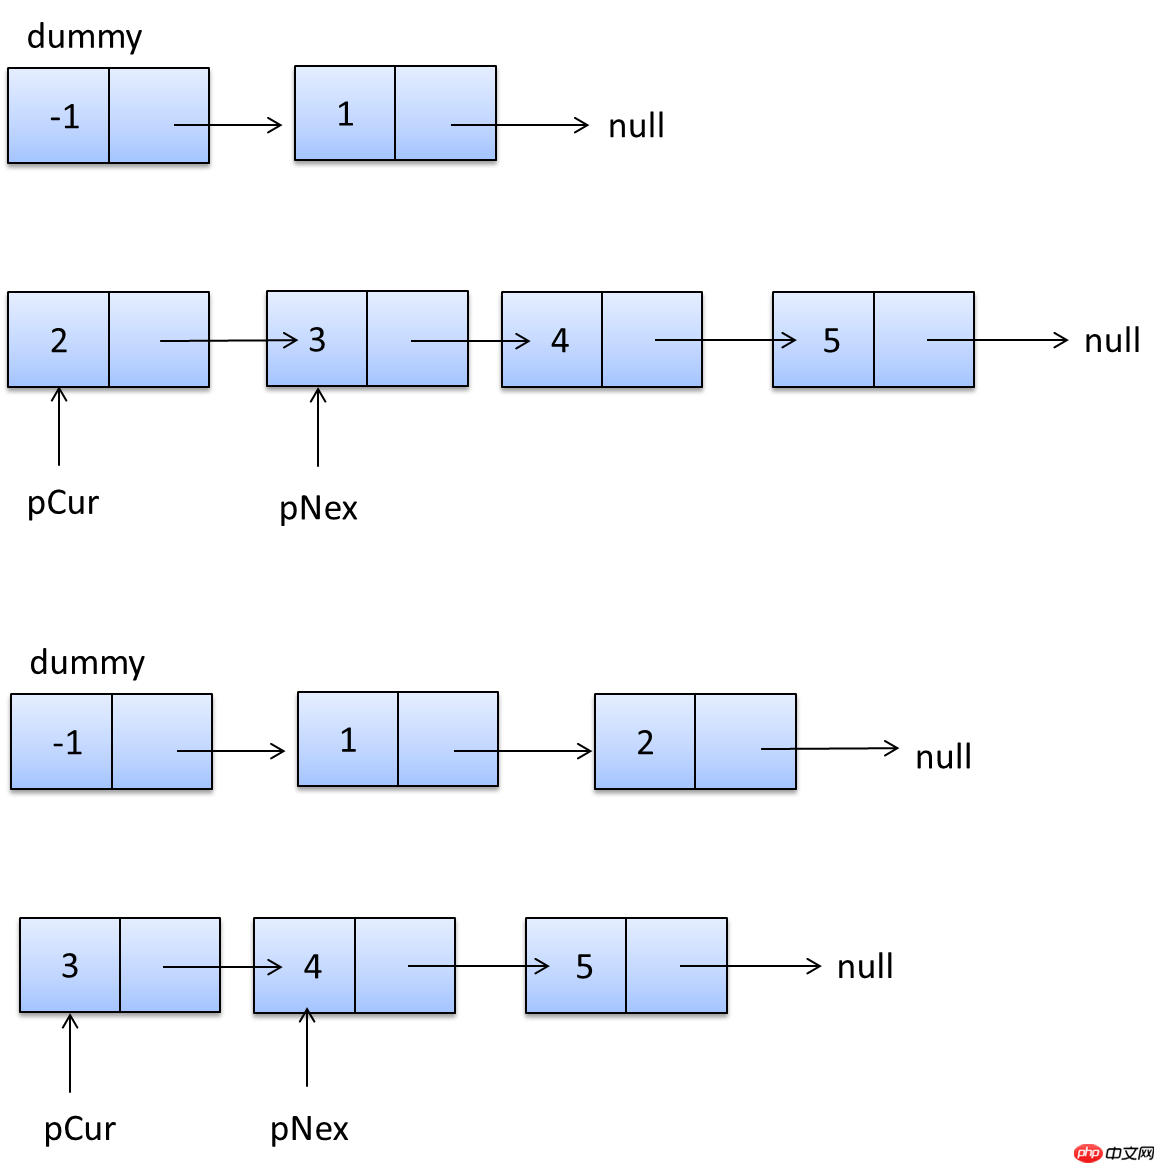
3 循环条件
pCur is not null
3.3 代码

 1     // 2.新建链表,头节点插入法
 2     public ListNode reverseList2(ListNode head) {
 3         ListNode dummy = new ListNode(-1);
 4         ListNode pCur = head;
 5         while (pCur != null) {
 6             ListNode pNex = pCur.next;
 7             pCur.next = dummy.next;
 8             dummy.next = pCur;
 9             pCur = pNex;
 10         }
 11         return dummy.next;
12 } <br/>
<br/>29. 最擅长的php
30. 索引
MySQL索引优化
一、索引类型

CREATE TABLE index_table (
 id BIGINT NOT NULL auto_increment COMMENT '主键',
 NAME VARCHAR (10) COMMENT '姓名',
 age INT COMMENT '年龄',
 phoneNum CHAR (11) COMMENT '手机号',
 PRIMARY KEY (id) ) ENGINE = INNODB AUTO_INCREMENT = 1 DEFAULT CHARSET = utf8;

下图是Col2为索引列,记录与B树结构的对应图,仅供参考:
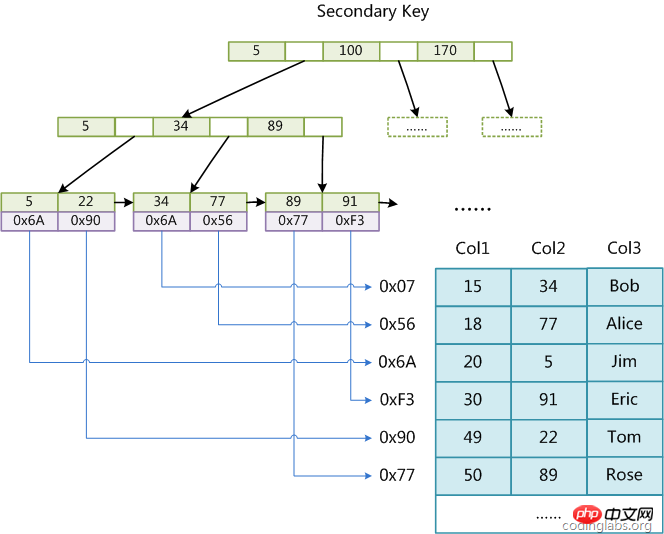
1、普通索引
------直接创建索引 create index index_name on index_table(name);
2、唯一索引
---------直接创建唯一索引 create UNIQUE index index_phoneNum on index_table(phoneNum);
3、主键
4、多列索引
-------直接创建组合索引 create index index_union on index_table(name,age,phoneNum);
二、索引优化
1、选择索引列

SELECT age----不使用索引 FROM index_union WHERE NAME = 'xiaoming'---考虑使用索引 AND phoneNum = '18668247687';---考虑使用索引

2、最左前缀原则
3、like的使用
4、不能使用索引说明
5、order by
1 select test_index where id = 3 order by id desc;1 select test_index where id = 3 order by name desc;##31. Mall Architecture
1 Reasons for e-commerce cases There are currently several types of distributed large-scale websites: 1. Large portals, such as NetEase, Sina, etc.; 2. SNS websites, such as Xiaonei, Kaixin.com, etc.; 3. E-commerce websites: For example, Alibaba, JD.com, Gome Online, Autohome, etc. , Kaixin.com, etc. are more interactive and may introduce more NOSQL, distributed caching, and use high performance Communication framework, etc.. E-commerce websites have the characteristics of the above two categories. For example, product details can be made static using CDN, while those with high interactivity need to use technologies such as NOSQL. Therefore, we use e-commerce websites as a case for analysis. 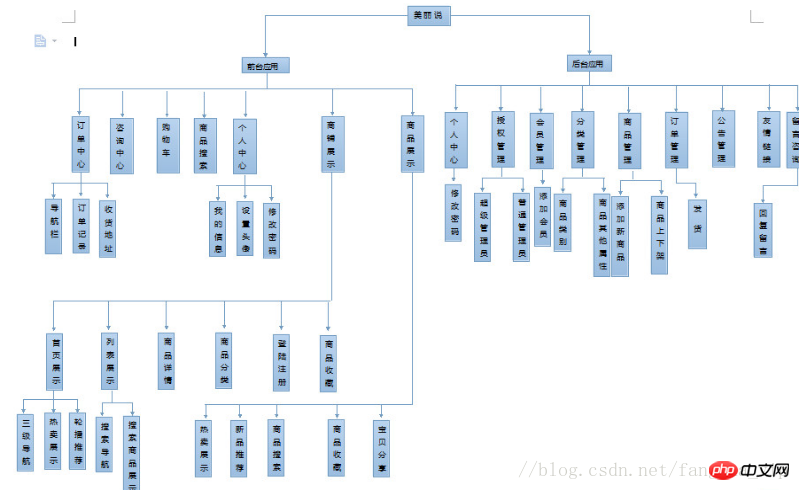
Customers are customers. They will not tell you what they want specifically, they will only tell you what they want. We often need to guide and explore customer needs. Fortunately, a clear reference website is provided. Therefore, the next step is to conduct a lot of analysis, combine the industry, and reference websites to provide customers with solutions. The traditional approach to requirements management is to use use case diagrams or module diagrams (requirements lists) to describe requirements. Doing so often ignores a very important requirement (non-functional requirement), so it is recommended that you use the requirements function matrix to describe requirementsThe demand matrix of this e-commerce website is as follows: 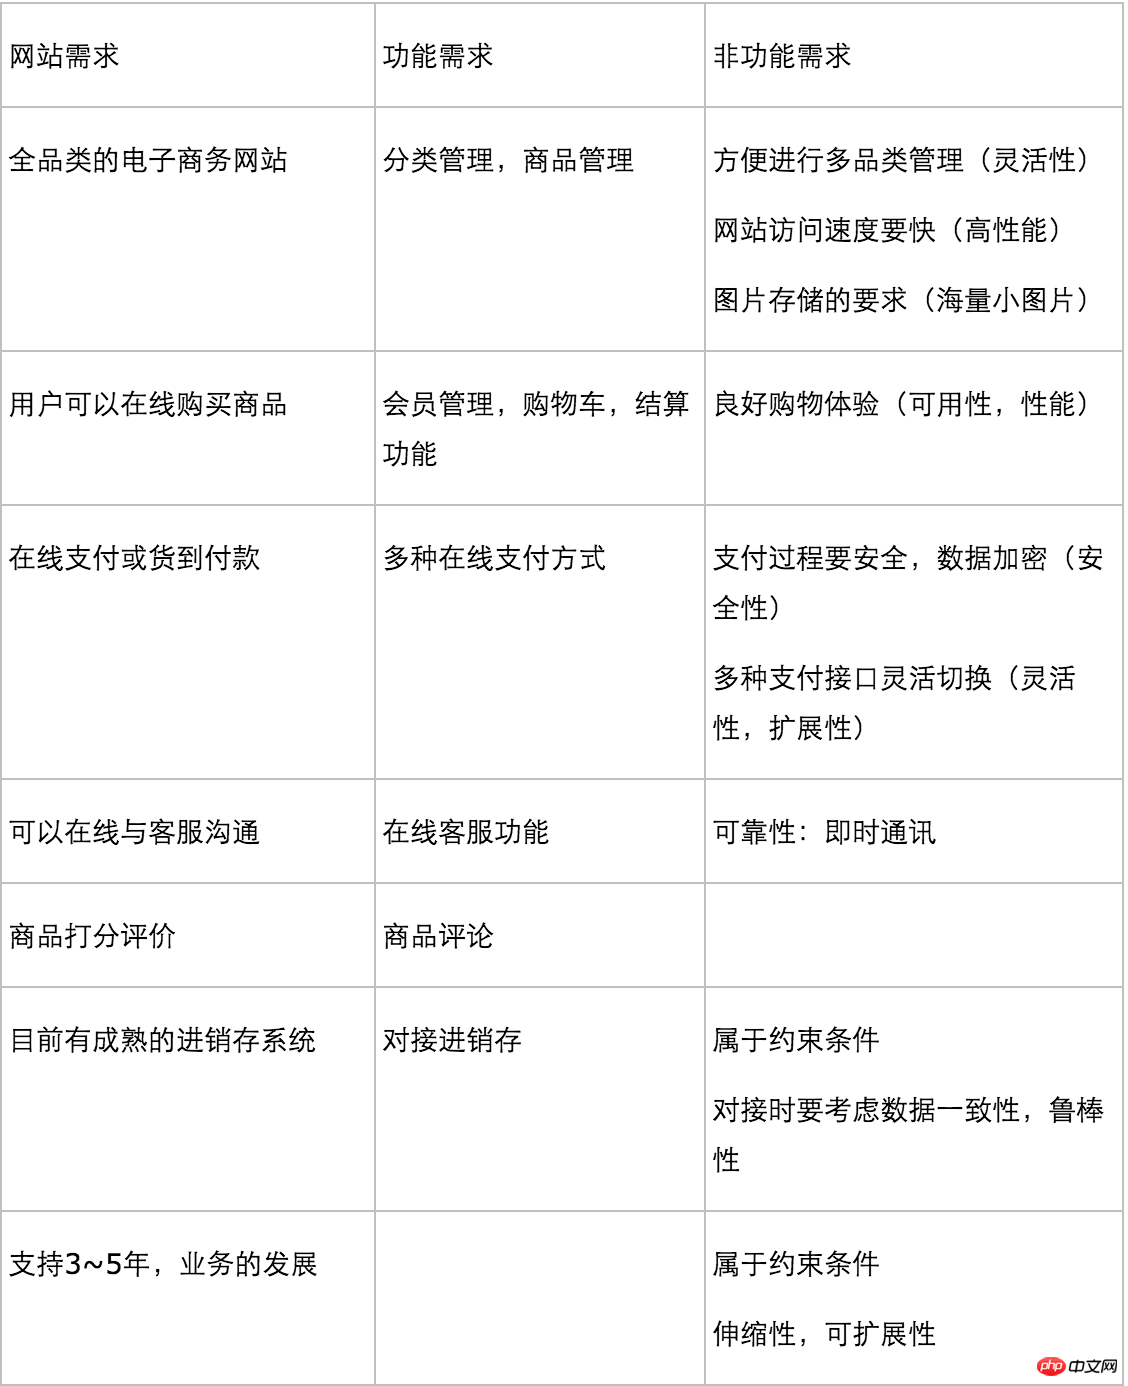
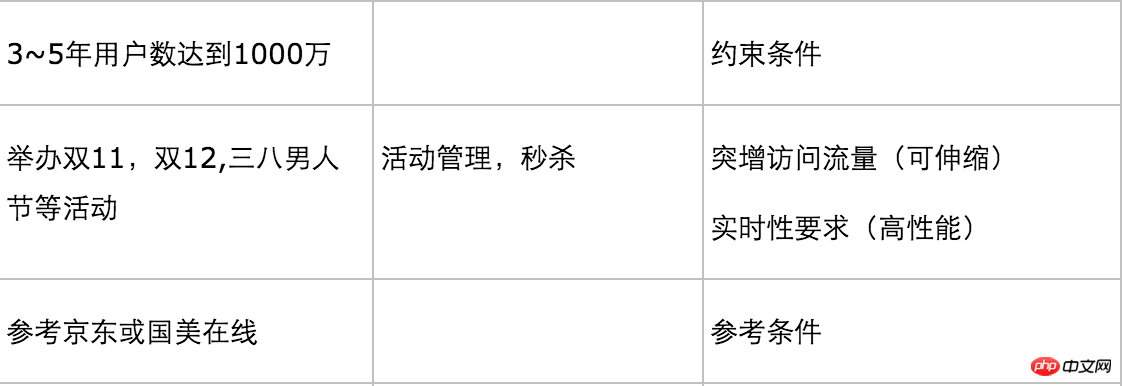 The above is a simple example of the demand for e-commerce websites. The purpose is to explain that (1) when analyzing requirements, it must be comprehensive, focusing on non-functional requirements for large distributed systems; (2) describing a simple e-commerce demand scenario so that everyone has a basis for the next step of analysis and design.
 General websites, the initial approach is to use three servers, one to deploy applications, one to deploy databases, and one to deploy NFS file systems. This is a relatively traditional approach in the past few years. I have seen a website with more than 100,000 members, a vertical clothing design portal, and numerous pictures. A server is used to deploy applications, databases and image storage. There were a lot of performance issues. As shown below:
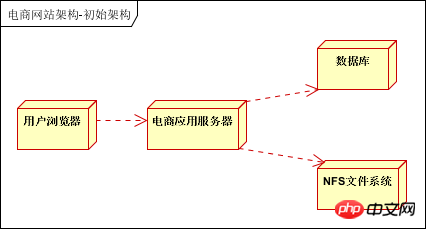 # However, the current mainstream website architecture has undergone earth-shaking changes.
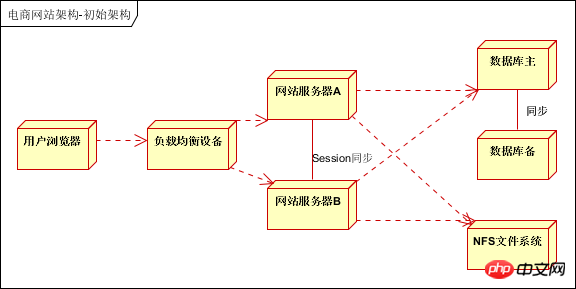
(1) Use clusters to redundant application servers to achieve high availability; (Load balancing equipment can be deployed together with the application)
Estimation steps:
Number of registered users-average daily UV volume-daily PV volume-daily concurrent volume;
The system CPU is generally maintained at about 70% level, and reaches 90% level during the peak period. It does not waste resources and is relatively stable. . Memory and IO are similar. 5 Website Architecture Analysis
6 Website architecture optimization
6.1 Business split
Vertically segmented based on business attributes, divided into product subsystem, shopping subsystem, payment subsystem, review subsystem, customer service subsystem, and interface subsystem (interconnecting with external systems such as purchase, sale, inventory, SMS, etc.). Level definition is based on business subsystems, which can be divided into core systems and non-core systems. Core system: product subsystem, shopping subsystem, payment subsystem; non-core: review subsystem, customer service subsystem, interface subsystem. The role of business splitting: Upgrading to subsystems can be handled by specialized teams and departments. Professional people do professional things to solve coupling and scalability issues between modules; each subsystem Deploy separately to avoid the problem of centralized deployment causing one application to hang and all applications to be unavailable. Level definition function: Used to protect key applications during traffic bursts and achieve graceful degradation; protect key applications from being affected. 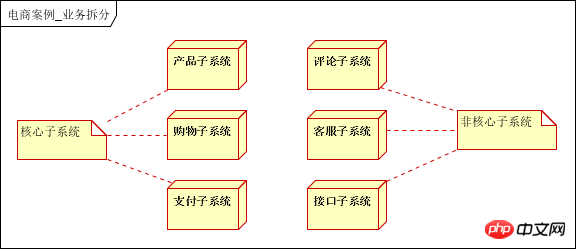
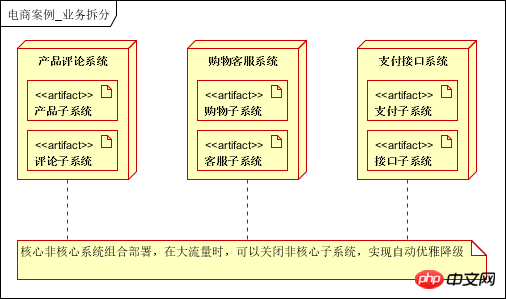
6.2 Application cluster deployment (distributed, clustered, load Balanced)
Distributed deployment: Deploy the applications after business splitting separately, and the applications communicate directly through RPC remotely; Cluster deployment: High availability requirements for e-commerce websites. Each application must deploy at least two servers for cluster deployment; Load balancing: is necessary for high availability systems. Generally, applications achieve high availability through load balancing. Available, distributed services achieve high availability through built-in load balancing, and relational databases achieve high availability through active and backup methods. 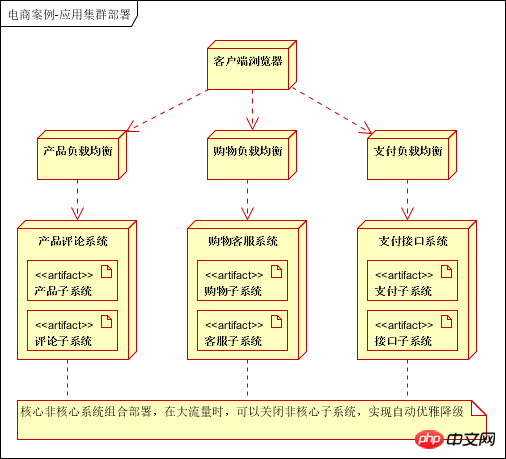
6.3 Multi-level cache
according to the storage location. This case uses the second-level cache method to design the cache. The first-level cache is a local cache, and the second-level cache is a distributed cache. (There are also page cache, fragment cache, etc., which are more fine-grained divisions) needed. When the first-level cache expires or is unavailable, the data in the second-level cache is accessed. If there is no second-level cache, the database is accessed. 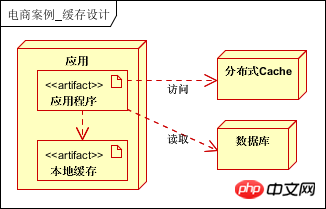
(1) Automatic cache expiration; (2) Cache trigger expiration;
6.4 Single sign-on (distributed Session)The system is divided into multiple subsystems. After independent deployment, session management problems will inevitably be encountered. . E-commerce websites are generally implemented using distributed Sessions. 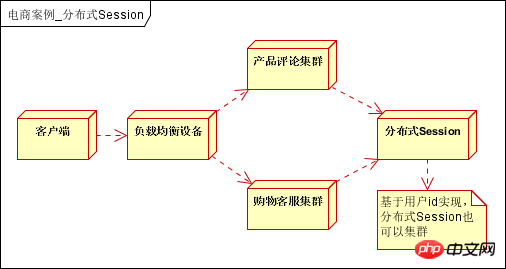
(1) When the user logs in for the first time, the session information (user ID and user information), such as The user ID is Key and is written to the distributed Session; (2) When the user logs in again, obtain the distributed Session and see if there is session information. If not, transfer to the login page; ( 3) Generally implemented using Cache middleware, it is recommended to use Redis, so it has a persistence function, which facilitates the loading of session information from the persistent storage after the distributed Session goes down; (4) Save the session , you can set the session retention time, such as 15 minutes, and it will automatically time out after it exceeds;
Combined with Cache middleware, the distributed Session implemented can simulate the Session session very well. 6.5 Database cluster (separation of reading and writing, sub-database and sub-table)Large websites need to store massive amounts of data. In order to achieve massive data storage, . Generally there are two ways to separate reading and writing and sub-database and table . 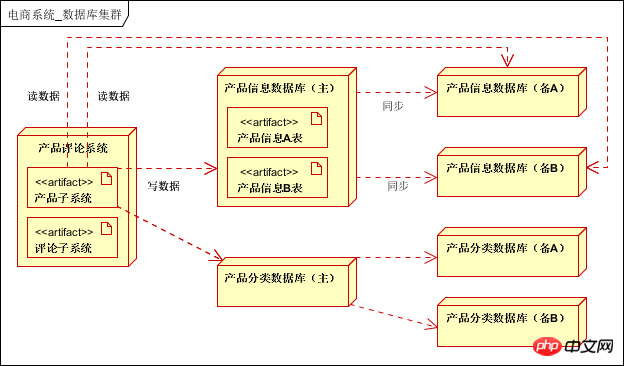
(1) After business splitting: each subsystem requires a separate library; (2) If a separate library If it is too large, you can divide the database again according to the business characteristics, such as commodity classification database and product database; (3) After dividing the database, if there is a large amount of data in the table, the table will be divided. Generally, Tables can be divided according to ID, time, etc.; (Advanced usage is consistent Hash) (4) On the basis of database and table partitioning, read and write separation is performed;
Related middleware can refer to Cobar (Alibaba, currently no longer maintained), TDDL (Alibaba), Atlas (Qihoo 360), MyCat (based on Cobar, there are many talented people in China, and it is known as the first open source project in China). Issues with sequences, JOIN, and transactions after sharding databases and tables will be introduced in the theme sharing of sharding databases and tables. 6.6 Servitization. For example, the membership subsystem in this case can be extracted as a public service. 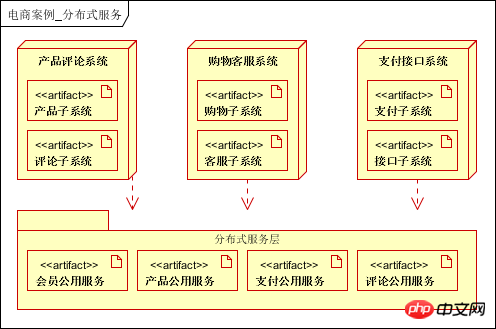
. It is the standard configuration of distributed systems. In this case, message queue is mainly used in shopping and delivery links. (1) After the user places an order, it is written to the message queue and then returned directly to the client; (2) Inventory subsystem: reads the message queue information and completes inventory reduction ; (3) Distribution subsystem: read message queue information and deliver;
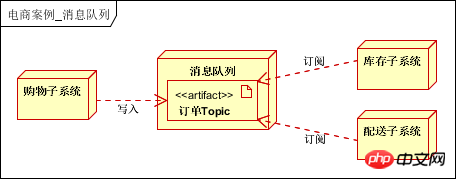
建议可以研究下Rabbit MQ。6.8 其他架构(技术)
应用集群,多级缓存,单点登录,数据库集群,服务化,消息队列外。还有CDN,反向代理,分布式文件系统,大数据处理等系统。7 架构总结
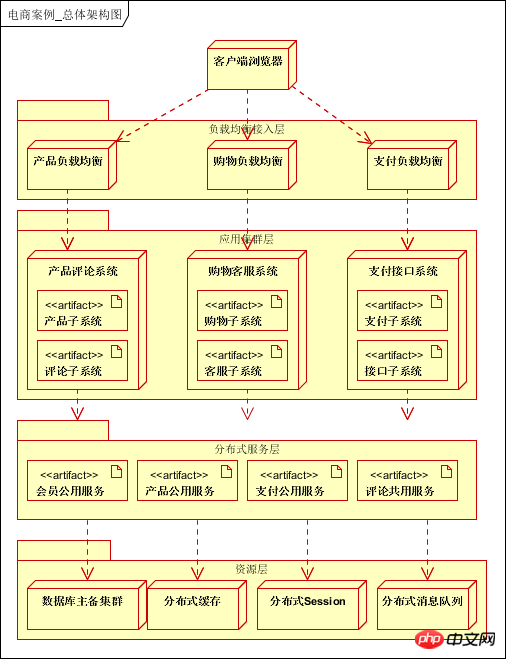
32. app
34. AB
前沿
--PV(访问量):Page View, 即页面浏览量或点击量,用户每次刷新即被计算一次。 --UV(独立访客):Unique Visitor,访问您网站的一台电脑客户端为一个访客。00:00-24:00内相同的客户端只会被计算一次。 --IP(独立IP):指独立IP数。00:00-24:00内相同IP地址之被计算一次。
安装
ab的基本参数
-c 并发的请求数 -n 要执行的请求总数 -k 启用keep-alive功能(开启的话,请求会快一些) -H 一个使用冒号分隔的head报文头的附加信息 -t 执行这次测试所用的时间
ab基本语法
ab -c 5 -n 60 -H "Referer: http://baidu.com" -H "Connection: close" http://blog.csdn.net /XXXXXX/article/details/XXXXXXX
ab -c 100 -n 100 -H "User-Agent: Mozilla/5.0 (Windows NT 6.1; rv:3 8.0) Gecko/20100101 Firefox/38.0" -e "E:\ab.csv" http://blog.csdn.net/uxxxxx/artic le/details/xxxx
ab执行结果分析
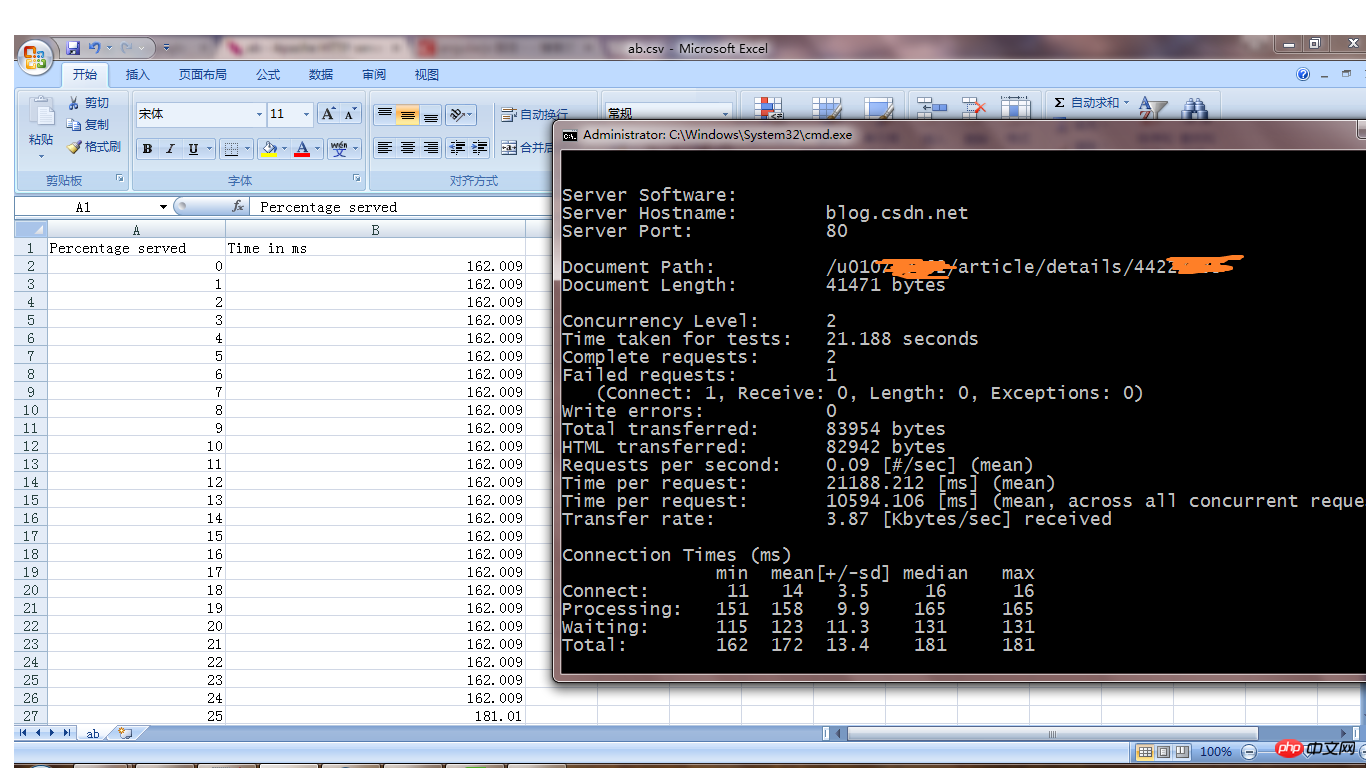
总结
linux 下ab压力测试
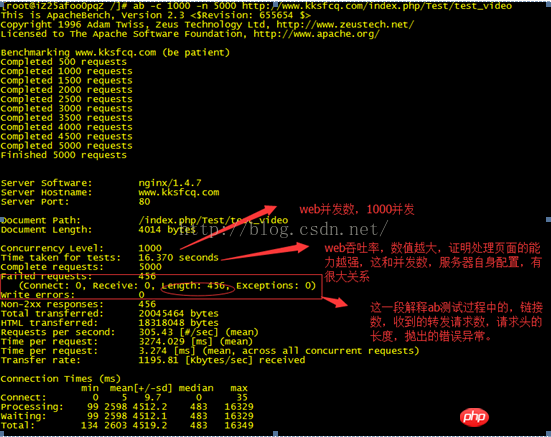
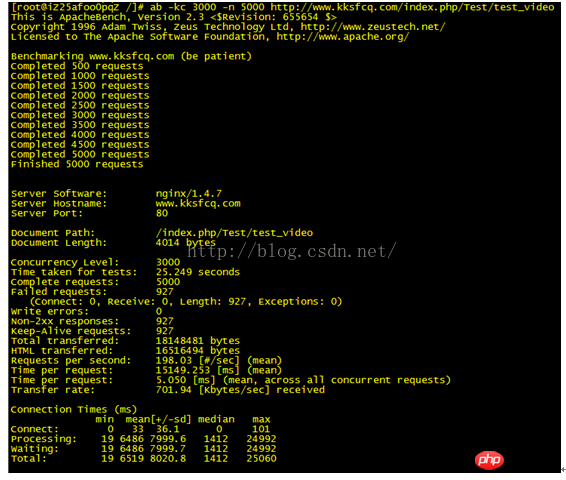 <br/>
<br/>35. Slow query
 <br/>
<br/> <br/>
<br/> <br/>
<br/> <br/>
<br/> <br/>
<br/>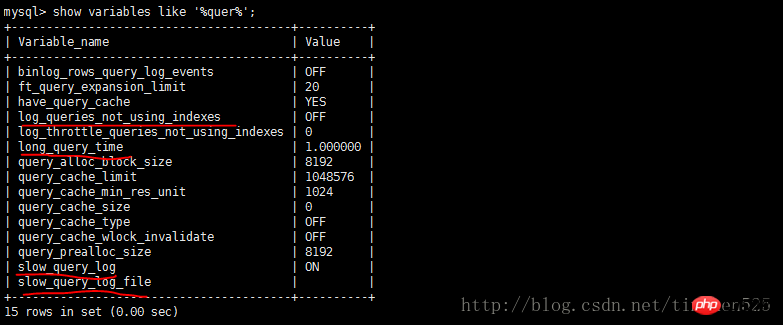 <br/>
<br/> <br/>
<br/> <br/>
<br/> <br/>
<br/> <br/>
<br/> <br/>
<br/>36. Framework
Open source framework (TP, CI, Laravel, Yii)
37. 命名空间
PHP命名空间 namespace 及导入 use 的用法
<?php
echo 111;
//由于namespace前有代码而报错
namespace Teacher;
class Person{
function __construct(){
echo 'Please study!';
}
}<?php
namespace Newer;
require_once './1.php';
new Person();
//报错,找不到Person;
new \Person();
//输出 I am tow!;
<?php
namespace New;
require_once './2.php';
new Person();
//报错,(当前空间)找不到
Person; new \Person();
//报错,(公共空间)找不到
Person; new \Two\Person();
//输出 I am tow!;
    namespace School\Parents;
    class Man{
      function __construct(){
       echo 'Listen to teachers!<br/>';
       }
       }
       namespace School\Teacher;
       class Person{
       function __construct(){
       echo 'Please study!<br/>';
        }
        }
        namespace School\Student;
        class Person{
             function __construct(){
             echo 'I want to play!<br/>';
             }
              }
               new Person();
                //输出I want to play!
                new \School\Teacher\Person();
                //输出Please study!
                new Teacher\Person();
                 //报错     ----------
                 use School\Teacher;
                 new Teacher\Person();
                 //输出Please study!         ----------
                  use School\Teacher as Tc;
                   new Tc\Person();
                    //输出Please study!       ----------
                    use \School\Teacher\Person;
                    new Person();
                    //报错     ----------
                     use \School\Parent\Man;
                     new Man();
                     //报错


