

jQuery creates editable tables (with code)
This time I will bring you jQuery to create editable tables (with code). What are the precautions for jQuery to create editable tables? Here are practical cases, let’s take a look.
1 2 3 4 5 6 7 8 9 10 11 12 13 14 15 16 17 18 19 20 21 22 23 24 25 26 27 28 29 30 31 32 33 34 35 36 37 38 39 40 41 42 43 44 45 46 47 |
|
css code:
1 2 3 4 5 6 7 8 9 10 11 12 13 14 15 16 17 18 |
|
jquery code
1 2 3 4 5 6 7 8 9 10 11 12 13 14 15 16 17 18 19 20 21 22 23 24 25 26 27 28 29 30 31 32 33 34 35 36 37 38 39 40 41 42 43 44 45 46 47 48 49 50 51 |
|
Summary: Knowledge points that can be obtained through the study of this example:
1. HTML aspect
1. The table can contain thead and tbody
2. The content of the table header can be placed in th
3.table{} This writing method is called tag selector , which can select the entire table Make an impact.
4.table td{} represents all tds contained in the table.
2. In terms of jquery
$() can put 4 different parameters in the brackets
1. Put the parameter directly into function, which means that the page is loaded: For example, line 1 in the jquery code in the above example$ (function(){})
2. The parameter can be a css class selector and is packaged into a jquery object. For example: Line 4 of the jquery code in the above example $("tbody tr:even")
3. If the parameter is HTML text, you can create a dom node and package it into a jquery object. For example: Line 27 of the jquery code in the above example $("")
4. The parameter can be a dom object. This method is equivalent to replacing the dom object with a jquery object. . Line 11 of the jquery code in the above example var tdObj = $(this)
jquery object in this example
1. Add css attributes after the jquery object to set the css attributes of the node. For example, line 4 in the jquery code in the above example $("tbody tr:even").css("background-color", "#ece9d8");
2. The jquery object content contains the selector corresponding DOM node, saved as an array.
3. Adding the html method after the jquery object can set or get the html content of the node. For example, line 17 of the jquery code in the above example var text = tdObj.html()
4. Add the val method after the jquery object to get or set the value of the node. For example, in the above example, line 41 of the jquery code var inputtext = $(this).val()
5. Adding the width method after the jquery object can set or get the width of a node. For example, line 27 tdObj.width() in the jquery code in the above example
6. Adding the appendTo method after the jquery object can append a node to all the child nodes of another node. For example, in the above example, line 27 appendTo(tdObj) in the jquery code
7. Adding the trigger method after the jquery object can trigger a js event to occur. For example, in the above example, line 29 of the jquery code inputObj.trigger("focus").trigger("select")
8. Adding the children method after the jquery object can obtain the child nodes of a node, and parameters can be set to limit The content of the child node. For example, line 13 of the jquery code in the above example tdObj.children("input").length
9. If the jquery object returned by the selector contains multiple dom nodes, register a similar click event on this object, all dom Nodes will be used for this event. For example, in the above example, line 9 numId.click in the jquery code;
I believe you have mastered the method after reading the case in this article. For more exciting information, please pay attention to other related articles on the PHP Chinese website!
Recommended reading:
Detailed explanation of the difference between JSON.parse() and JSON.stringify() and how to use it
JS implements JSON .stringify steps detailed explanation
The above is the detailed content of jQuery creates editable tables (with code). For more information, please follow other related articles on the PHP Chinese website!

Hot AI Tools

Undresser.AI Undress
AI-powered app for creating realistic nude photos

AI Clothes Remover
Online AI tool for removing clothes from photos.

Undress AI Tool
Undress images for free

Clothoff.io
AI clothes remover

Video Face Swap
Swap faces in any video effortlessly with our completely free AI face swap tool!
Hot Article
Hot Tools

Notepad++7.3.1
Easy-to-use and free code editor

SublimeText3 Chinese version
Chinese version, very easy to use

Zend Studio 13.0.1
Powerful PHP integrated development environment

Dreamweaver CS6
Visual web development tools

SublimeText3 Mac version
God-level code editing software (SublimeText3)
Hot Topics
 1390
1390
 52
52

 Steps to adjust the format of pictures inserted in PPT tables
Mar 26, 2024 pm 04:16 PM
Steps to adjust the format of pictures inserted in PPT tables
Mar 26, 2024 pm 04:16 PM
1. Create a new PPT file and name it [PPT Tips] as an example. 2. Double-click [PPT Tips] to open the PPT file. 3. Insert a table with two rows and two columns as an example. 4. Double-click on the border of the table, and the [Design] option will appear on the upper toolbar. 5. Click the [Shading] option and click [Picture]. 6. Click [Picture] to pop up the fill options dialog box with the picture as the background. 7. Find the tray you want to insert in the directory and click OK to insert the picture. 8. Right-click on the table box to bring up the settings dialog box. 9. Click [Format Cells] and check [Tile images as shading]. 10. Set [Center], [Mirror] and other functions you need, and click OK. Note: The default is for pictures to be filled in the table
 How to make a table for sales forecast
Mar 20, 2024 pm 03:06 PM
How to make a table for sales forecast
Mar 20, 2024 pm 03:06 PM
Being able to skillfully make forms is not only a necessary skill for accounting, human resources, and finance. For many sales staff, learning to make forms is also very important. Because the data related to sales is very large and complex, and it cannot be simply recorded in a document to explain the problem. In order to enable more sales staff to be proficient in using Excel to make tables, the editor will introduce the table making issues about sales forecasting. Friends in need should not miss it! 1. Open [Sales Forecast and Target Setting], xlsm, to analyze the data stored in each table. 2. Create a new [Blank Worksheet], select [Cell], and enter [Label Information]. [Drag] downward and [Fill] the month. Enter [Other] data and click [
 How to set WPS value to automatically change color according to conditions_Steps to set WPS table value to automatically change color according to condition
Mar 27, 2024 pm 07:30 PM
How to set WPS value to automatically change color according to conditions_Steps to set WPS table value to automatically change color according to condition
Mar 27, 2024 pm 07:30 PM
1. Open the worksheet and find the [Start]-[Conditional Formatting] button. 2. Click Column Selection and select the column to which conditional formatting will be added. 3. Click the [Conditional Formatting] button to bring up the option menu. 4. Select [Highlight conditional rules]-[Between]. 5. Fill in the rules: 20, 24, dark green text with dark fill color. 6. After confirmation, the data in the selected column will be colored with corresponding numbers, text, and cell boxes according to the settings. 7. Conditional rules without conflicts can be added repeatedly, but for conflicting rules WPS will replace the previously established conditional rules with the last added rule. 8. Repeatedly add the cell columns after [Between] rules 20-24 and [Less than] 20. 9. If you need to change the rules, you can just clear the rules and then reset the rules.
 Do you know how to sum a Word table?
Mar 21, 2024 pm 01:10 PM
Do you know how to sum a Word table?
Mar 21, 2024 pm 01:10 PM
Sometimes, we often encounter counting problems in Word tables. Generally, when encountering such problems, most students will copy the Word table to Excel for calculation; some students will silently pick up the calculator. Calculate. Is there a quick way to calculate it? Of course there is, in fact the sum can also be calculated in Word. So, do you know how to do it? Today, let’s take a look together! Without further ado, friends in need should quickly collect it! Step details: 1. First, we open the Word software on the computer and open the document that needs to be processed. (As shown in the picture) 2. Next, we position the cursor on the cell where the summed value is located (as shown in the picture); then, we click [Menu Bar
 GE universal remote codes program on any device
Mar 02, 2024 pm 01:58 PM
GE universal remote codes program on any device
Mar 02, 2024 pm 01:58 PM
If you need to program any device remotely, this article will help you. We will share the top GE universal remote codes for programming any device. What is a GE remote control? GEUniversalRemote is a remote control that can be used to control multiple devices such as smart TVs, LG, Vizio, Sony, Blu-ray, DVD, DVR, Roku, AppleTV, streaming media players and more. GEUniversal remote controls come in various models with different features and functions. GEUniversalRemote can control up to four devices. Top Universal Remote Codes to Program on Any Device GE remotes come with a set of codes that allow them to work with different devices. you may
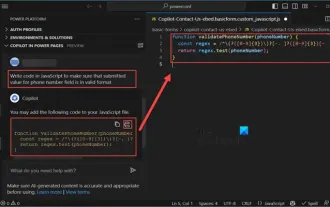 How to use Copilot to generate code
Mar 23, 2024 am 10:41 AM
How to use Copilot to generate code
Mar 23, 2024 am 10:41 AM
As a programmer, I get excited about tools that simplify the coding experience. With the help of artificial intelligence tools, we can generate demo code and make necessary modifications as per the requirement. The newly introduced Copilot tool in Visual Studio Code allows us to create AI-generated code with natural language chat interactions. By explaining functionality, we can better understand the meaning of existing code. How to use Copilot to generate code? To get started, we first need to get the latest PowerPlatformTools extension. To achieve this, you need to go to the extension page, search for "PowerPlatformTool" and click the Install button
 How to switch tables horizontally and vertically in word
Mar 20, 2024 am 09:31 AM
How to switch tables horizontally and vertically in word
Mar 20, 2024 am 09:31 AM
Word software is indispensable to us and needs to be used frequently. I have learned how to edit tables using Word software before. However, if I accidentally edit the table in the horizontal and vertical directions, and I don’t want to waste time re-creating it, is it possible to change the horizontal and vertical directions of the table? Woolen cloth? The answer is of course yes. Next, the editor will introduce to you in detail how to swap tables horizontally and vertically in Word. Let us learn together. First, we need to swap the rows and columns of the Word table below. To do this, we need to first select the table entirely, then right-click and select the copy function. Step 2: After selecting copy, we minimize word, then open an Excel table, right-click, select paste, and paste it into Exc
 What are the tips for novices to create forms?
Mar 21, 2024 am 09:11 AM
What are the tips for novices to create forms?
Mar 21, 2024 am 09:11 AM
We often create and edit tables in excel, but as a novice who has just come into contact with the software, how to use excel to create tables is not as easy as it is for us. Below, we will conduct some drills on some steps of table creation that novices, that is, beginners, need to master. We hope it will be helpful to those in need. A sample form for beginners is shown below: Let’s see how to complete it! 1. There are two methods to create a new excel document. You can right-click the mouse on a blank location on the [Desktop] - [New] - [xls] file. You can also [Start]-[All Programs]-[Microsoft Office]-[Microsoft Excel 20**] 2. Double-click our new ex
