
At the end of September 2015, DeviceOne Release was released. At this point, DeviceOne has basically completed support for multiple terminals. Based on DeviceOne you can:
HTML5, Android, iOS, Windows multi-terminal code is written once and reused everywhere;
Simple deployment in real time.
Localized UI
In the next time, I will introduce DeviceOne through a series of articles. This article introduces environment configuration and how to set up a simple project. (Note: This article is applicable to iOS, Android and Windows development.)
Currently, development using DeviceOne can be carried out on Windows or Mac systems.
The following is an introduction to setting up the DeviceOne environment. Whether it is application development or component development, you need to set up a development environment. It only takes 3 minutes to complete.
1. Hardware environment
One PC or MAC computer for development
A mobile device is used for debugging and testing, either a mobile phone or a pad (android, ios, and windowsphone are all acceptable). You can also try an emulator for Android.
2. Software environment
Operating system (supported by MAC or Windows)
Windows: 7 or above operating system.
MAC: 10.9 or above
Mobile:
Android: 4.0 or above operating system
IOS: 7.0 or above operating system
WinPhone: 8.1 or above operating system
JDK: version 1.7 and above
3. Network environment
External network environment: Many functions require an external network to operate, and App development and debugging can be performed offline.
4. Register a DeviceOne developer account
To use DeviceOne to develop applications, you first need to register a developer account on www.deviceone.net. The registered address is Register
5. Download the designer (IDE)
Users need to download and use the designer (IDE) provided by DeviceOne to develop mobile applications. The designer provides a WYSIWYG approach to build UI, and a code editor to write standard javascript or lua logic script code. Use the real-time debugging function provided by the designer to interact with real mobile devices to debug the application, and finally publish the final application through the packaging function provided by the designer.
The designer currently contains 2 major versions, one is based on Eclipse RCP, and the other is a self-developed version that only supports Windows. We recommend everyone to use the Eclipse-based version.
The download address is http://docs.deviceone.net/ Platform—>Download Center
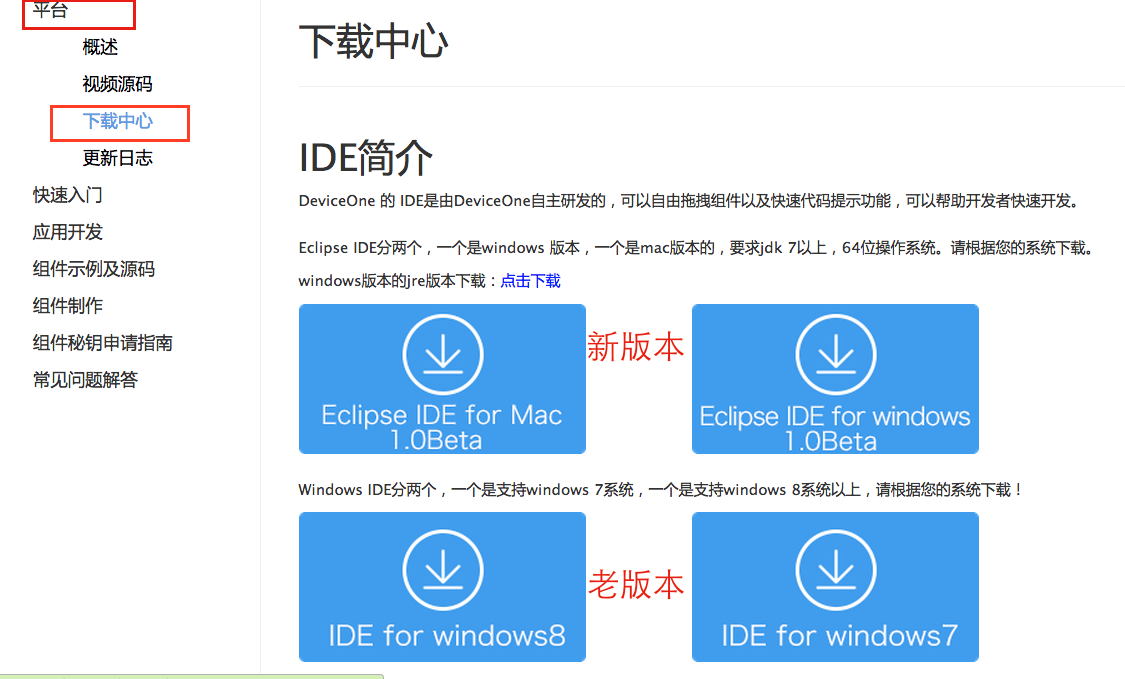
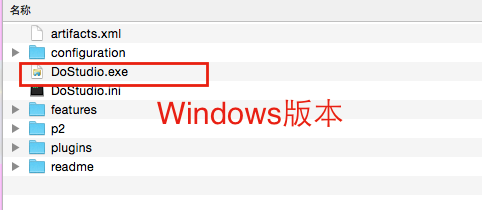
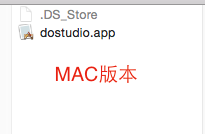
Install the designer and directly find the zip file you just downloaded. Unzip it to your appropriate location. This designer is an installation-free green version. For the Windows version, go directly to the decompressed file path to find DoStudio.exe and double-click to open it. After decompressing the Mac version, double-click dostuio.app to start it. You may encounter some problems during the startup process. You can refer to the new version design for installation and startup problems
After the development environment was set up, we began to try to develop the first DeviceOne mobile application. The following is a step-by-step introduction to the construction method of the Hello DeviceOne application
1. Create a new application
First open the designer and click New Project. To create a new project, you need to be connected to the Internet. Enter the user password verification code and log in. But after creation, it supports offline development and debugging.

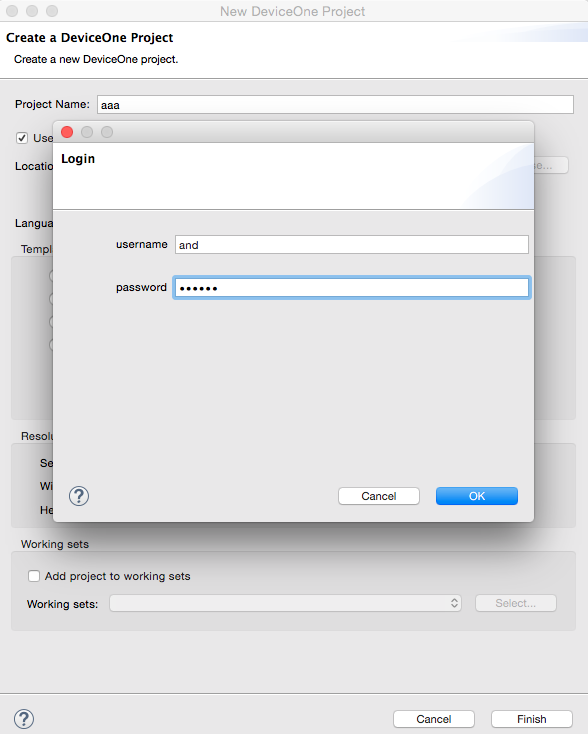
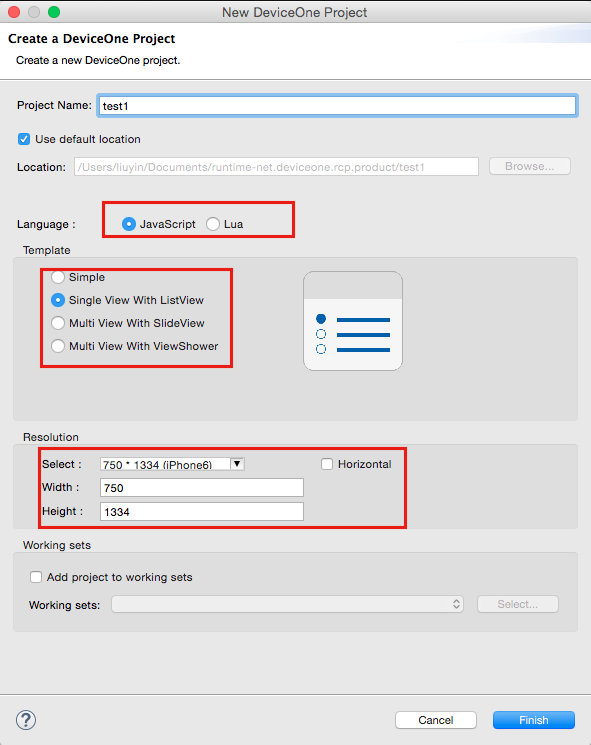
Fill in the name of the new project in the pop-up dialog box and select the front-end scripting language you want to use to write the program. Currently, you can choose JavaScript and Lua. You can also configure a basic project template, including an empty page template and a listview. Templates, etc., you can also configure the screen resolution. After configuring everything, click the OK button and a project will be automatically generated
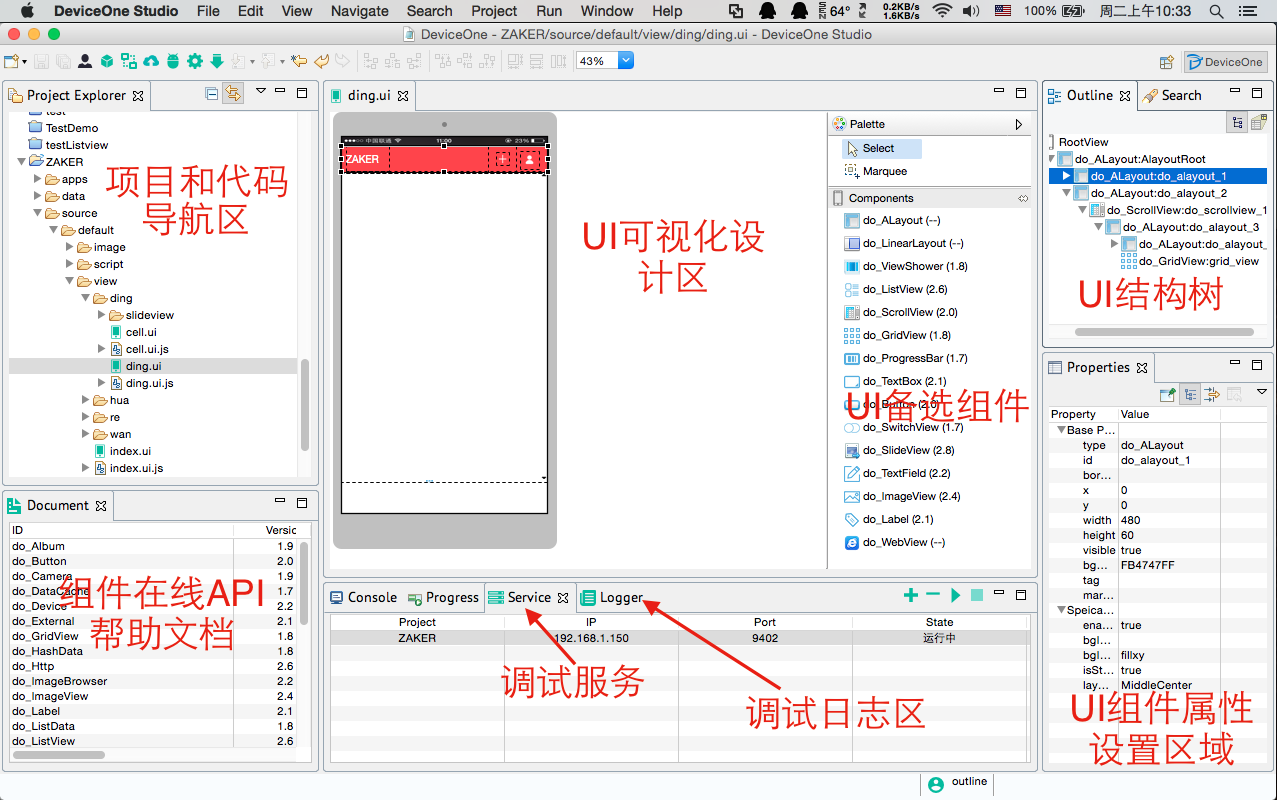
We can see the main page of the designer as shown below. We can see all the codes in the tree of the project navigation area on the left side of the designer. app.js is the entrance to the entire program, similar to the main function of other development languages. . For more file structure introduction, please refer to the "DeviceOne Application Structure" document. For detailed instructions on the designer, please refer to the "Designer Usage Guide" document.
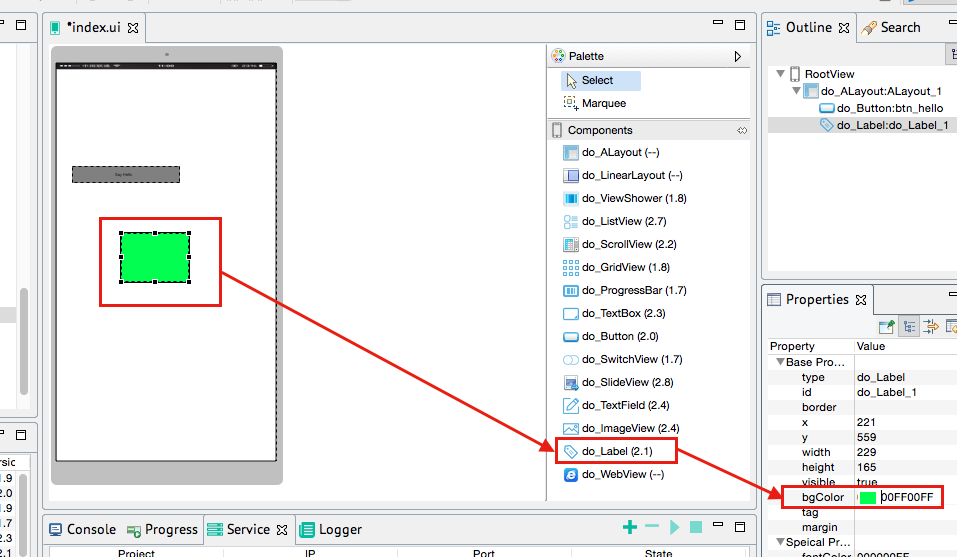
We can try dragging a Label component in the "Control List" to the "View Design" corresponding to the index.ui file, and set the background color of the Label to green. View design allows WYSIWYG dragging and setting of basic and proprietary properties of an interface element.
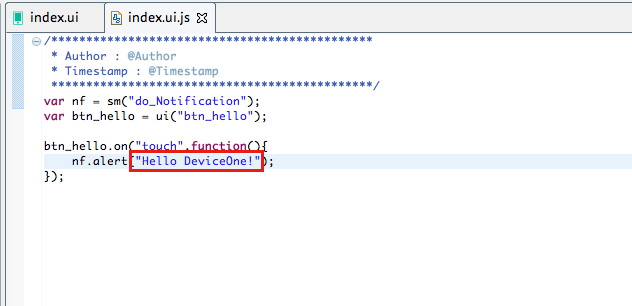
Let’s modify the index.ui.js source code again and change Hello World to Hello DeviceOne. The logic of application running can be modified in the js file.
The above is the entire content of the actual development of JavaScript using DeviceOne (1) configuration and start introduced in this article. I hope you like it. The next article will introduce to you JavaScript development using DeviceOne (2) Generating debugging installation package , please continue to pay attention, friends who like it can click directly to learn more.
 The difference between anchoring and aiming
 Check out the top ten cryptocurrencies worth investing in
 Introduction to parametric modeling software
 How to solve parsererror error
 What to do if notepad.exe is not responding
 What does formatting a mobile phone mean?
 How to open dmp file
 How to use sort function


