This time I will bring you a detailed explanation of the steps to implement data interaction with axios. What are the precautions for implementing data interaction with axios? The following is a practical case, let’s take a look.
The network communication library officially recommended by Vue is no longer vue-resource. It is recommended to use axios. So I studied it and summarized it as follows.
1. Functional features
1. Send XMLHttpRequests requests in the browser2. Send http requests in node.js
3. Support Promise API
4. Intercept requests and responses
5. Convert request and response data
6. Automatically convert JSON data
7. Client supports protecting security from XSRF attacks
2. Axios installation method (officially gives 3 methods)
1. npm installation$ npm install axios
$ bower install axios
<script src="https://unpkg.com/axios/dist/axios.min.js"></script>
3. Installation steps
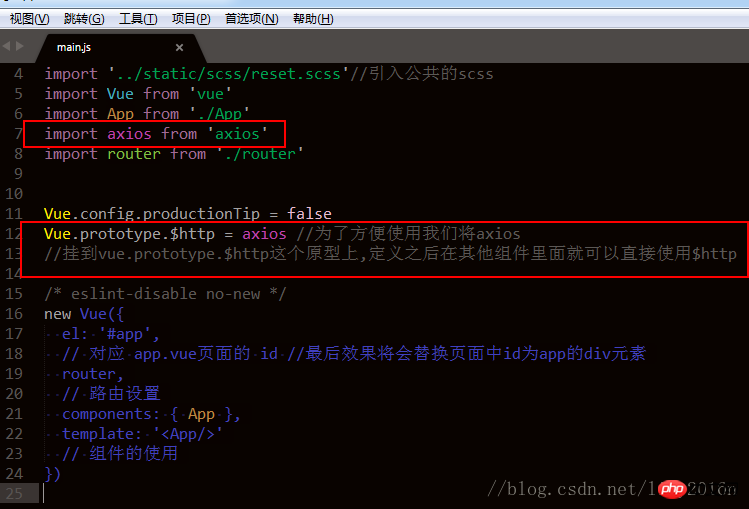
Here I use npm method steps: ①First enternpm install axios in npm
import axios from ‘axios'
Vue.prototype.$http = axios

##4. Request ExampleClick to get the data to get the data you want
<template>
<p class="tabbar">
<p>首页</p>
<button v-on:click = 'goback'>获取数据</button>
<p class="new_wrap" v-for="items in item">
<p class="newcard">
<p>
<p>{{items.issuer_nickname}}.</p>
</p>
<p>
{{items.title}}
</p>
<p class="pic">
<img :src="items.cover">
</p>
</p>
<br>
</p>
</p>
</template>
<script>
export default {
name: 'tabbar',
data () {
return {
msg: 'Welcome to Your Vue.js App',
item: []
}
},
methods:{
goback:function(){
console.log('hah');
this.$http.get('url') //把url地址换成你的接口地址即可
.then(res => {
//this.request.response = res.data
this.item = res.data.data.item; //把取item的数据赋给 item: []中
console.log(res.data.data.item);
if (res.data.code == '0') {
console.log('haha');
}else{
alert('数据不存在');
}
})
.catch(err => {
alert('请求失败');
})
}
}
}
</script>
<!-- Add "scoped" attribute to limit CSS to this component only -->
<style scoped lang="scss">
*{margin: 0;padding: 0;}
@function torem($px){//$px为需要转换的字号
@return $px / 100px * 1rem; //100px为根字体大小
}
ul{
width: 100%;
position: absolute;
bottom: 0;
li{
width: torem(187.5px);
float:left;
height: torem(98px);
text-align:center;
background: #ccc;
}
}
img{
width: torem(200px);
height: torem(200px);
}
</style>Rendering:
 I believe you have read this article You have mastered the case method. For more exciting information, please pay attention to other related articles on the PHP Chinese website!
Recommended reading:
Detailed explanation of Angular Component use casesWhat are the storage methods of JS original values and reference valuesThe above is the detailed content of Detailed explanation of the steps to implement data interaction with axios. For more information, please follow other related articles on the PHP Chinese website!


