

The method of parent-child communication in VueJs components

This article mainly introduces the method of father-son communication in VueJs components. It is very good and has certain reference value. Friends in need can refer to
Component (Father-Child Communication)
1. Summary
Define another component within a component, called a parent-child component.
But it should be noted that: 1. Child components can only be used inside the parent component (written in the parent component template); The data on, the scope of each component instance is independent;
How to complete the communication between father and son, in a simple sentence: props down, events up: the parent component passes data downward to the child component through props , the child component sends to the parent component through events
Pass from parent to child: Props
Pass from child to parent: Child: $emit(eventName) Parent $on(eventName) Parent accesses child: ref
Let’s explain the three cases below:
2. Pass from father to son: Props The scope of the component instance is isolated. This means that you cannot (and should not) reference the parent component's data directly within the child component's template. To allow the child component to use the data of the parent component, you need to use the props option of the child component
Using Prop to transfer data includes static and dynamic forms. Let’s first introduce static props
1, static props
<script src="https://unpkg.com/vue"></script>
<p id="example">
<parent></parent>
</p>
<script>
//要想子组件能够获取父组件的,那么在子组件必须申明:props
var childNode = {
template: '<p>{{message}}</p>',
props: ['message']
}
//这里的message要和上面props中值一致
var parentNode = {
template: `
<p class="parent">
<child message="我是"></child>
<child message="徐小小"></child>
</p>`,
components: {
'child': childNode
}
};
// 创建根实例
new Vue({
el: '#example',
components: {
'parent': parentNode
}
})
</script>Effect:
## Naming convention: 
<script>
//这里需要注意的是props可以写成['my-message']或者['myMessage']都是可以的
//但是template里的属性名,只能是驼峰式{{myMessage}},如果也写成{{my-message}}那么是无效的
var childNode = {
template: '<p>{{myMessage}}</p>',
props: ['myMessage']
}
//这里的属性名为my-message
var parentNode = {
template: `
<p class="parent">
<child my-message="我是"></child>
<child my-message="徐小小"></child>
</p>`,
components: {
'child': childNode
}
};
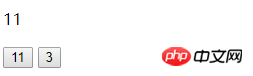
</script>2. Dynamic props
var childNode = {
template: '<p>{{myMessage}}</p>',
props: ['my-message']
}
var parentNode = {
template: `
<p class="parent">
<child :my-message="data1"></child>
<child :my-message="data2"></child>
</p>`,
components: {
'child': childNode
},
data() {
return {
'data1': '111',
'data2': '222'
}
}
};<script src="https://unpkg.com/vue"></script>
<p id="example">
<parent></parent>
</p>
<script>
var childNode = {
template: '<p>{{myMessage}}的类型是{{type}}</p>',
props: ['myMessage'],
computed: {
type() {
return typeof this.myMessage
}
}
}
var parentNode = {
template: `
<p class="parent">
<my-child my-message="1"></my-child>
</p>`,
components: {
'myChild': childNode
}
};
// 创建根实例
new Vue({
el: '#example',
components: {
'parent': parentNode
}
})
</script> How to convert String to number? In fact, you only need to change one place.
 var parentNode = {
  template: `
 <p class="parent">
 //只要把父组件my-message="1"改成:my-message="1"结果就变成number类型
 <my-child :my-message="1"></my-child>
 </p>`,
};Of course, if you want to pass a string type through v-bind, what should you do?
We can use dynamic props to set the corresponding number in the data attribute 1
var parentNode = {
template: `
<p class="parent">
<my-child :my-message="data"></my-child>
</p>`,
components: {
'myChild': childNode
},
//这里'data': 1代表就是number类型,'data': "1"那就代表String类型
data(){
return {
'data': 1
}
}
};3. Sub-turn Parent: $emit
About the usage of $emit 1. The parent component can use props to pass data to the child component.
2. Subcomponents can use $emit to trigger custom events of parent components. Child primary key<template>
<p class="train-city">
<span @click='select(`大连`)'>大连</span>
</p>
</template>
<script>
export default {
name:'trainCity',
methods:{
select(val) {
let data = {
cityname: val
};
this.$emit('showCityName',data);//select事件触发后,自动触发showCityName事件
}
}
}
</script>Parent component
<template>
<trainCity @showCityName="updateCity" :index="goOrtoCity"></trainCity> //监听子组件的showCityName事件。
<template>
<script>
export default {
name:'index',
data () {
return {
toCity:"北京"
}
}
methods:{
updateCity(data){//触发子组件城市选择-选择城市的事件
this.toCity = data.cityname;//改变了父组件的值
console.log('toCity:'+this.toCity)
}
}
}
</script>The result is :toCity: Dalian
The second case
<script src="https://unpkg.com/vue"></script>
<p id="counter-event-example">
<p>{{ total }}</p>
<button-counter v-on:increment1="incrementTotal"></button-counter>
<button-counter v-on:increment2="incrementTotal"></button-counter>
</p>
<script>
Vue.component('button-counter', {
template: '<button v-on:click="increment">{{ counter }}</button>',
//组件数据就是需要函数式,这样的目的就是让每个button-counter不共享一个counter
data: function() {
return {
counter: 0
}
},
methods: {
increment: function() {
//这里+1只对button的值加1,如果要父组件加一,那么就需要$emit事件
this.counter += 1;
this.$emit('increment1', [12, 'kkk']);
}
}
});
new Vue({
el: '#counter-event-example',
data: {
total: 0
},
methods: {
incrementTotal: function(e) {
this.total += 1;
console.log(e);
}
}
});
</script>Detailed explanation:
1: button-counter as the parent primary key , there is a button button in the parent primary key.
2: Both buttons are bound to click events. In the method: this.$emit('increment1', [12, 'kkk']);, then the parent class v-on will be called. The increment1 event being monitored.
3: When the increment1 event is monitored, then incrementTotal is executed. At this time, the value is passed to the parent component and the method of the parent class is called.
4: Pay attention here to v-on:'increment2 corresponding to the second button-counter, and the button inside it corresponds to this.$emit('increment1', [12, 'kkk' ]); So the second button button cannot pass the value to its parent primary key.
Example: If a button is clicked once, both itself and the above will increase by 1, while the second button will only increment itself and will not affect the above.
还有就是第一个按钮每点击一次,后台就会打印一次如下:

四、ref ($refs)用法
ref 有三种用法
1.ref 加在普通的元素上,用this.ref.name 获取到的是dom元素
2.ref 加在子组件上,用this.ref.name 获取到的是组件实例,可以使用组件的所有方法。
3.如何利用v-for 和ref 获取一组数组或者dom 节点
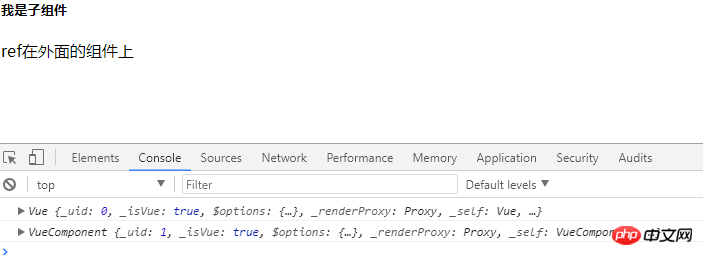
1.ref 加在普通的元素上,用this.ref.name 获取到的是dom元素
<script src="https://unpkg.com/vue"></script>
<p id="ref-outside-component" v-on:click="consoleRef">
<component-father ref="outsideComponentRef">
</component-father>
<p>ref在外面的组件上</p>
</p>
<script>
var refoutsidecomponentTem = {
template: "<p class='childComp'><h5>我是子组件</h5></p>"
};
var refoutsidecomponent = new Vue({
el: "#ref-outside-component",
components: {
"component-father": refoutsidecomponentTem
},
methods: {
consoleRef: function() {
console.log(this.); // #ref-outside-component vue实例
console.log(this.$refs.outsideComponentRef); // p.childComp vue实例
}
}
});
</script>效果:当在p访问内点击一次:
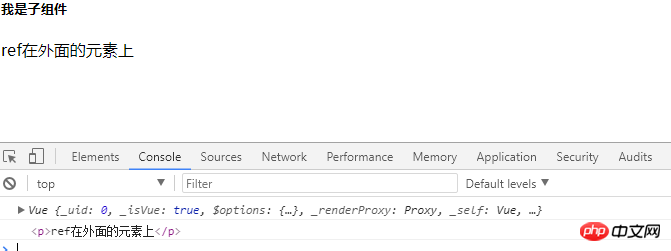
2.ref使用在外面的元素上
<script src="https://unpkg.com/vue"></script>
<!--ref在外面的元素上-->
<p id="ref-outside-dom" v-on:click="consoleRef">
<component-father>
</component-father>
<p ref="outsideDomRef">ref在外面的元素上</p>
</p>
<script>
var refoutsidedomTem = {
template: "<p class='childComp'><h5>我是子组件</h5></p>"
};
var refoutsidedom = new Vue({
el: "#ref-outside-dom",
components: {
"component-father": refoutsidedomTem
},
methods: {
consoleRef: function() {
console.log(this); // #ref-outside-dom vue实例
console.log(this.$refs.outsideDomRef); // <p> ref在外面的元素上</p>
}
}
});
</script>效果:当在p访问内点击一次:
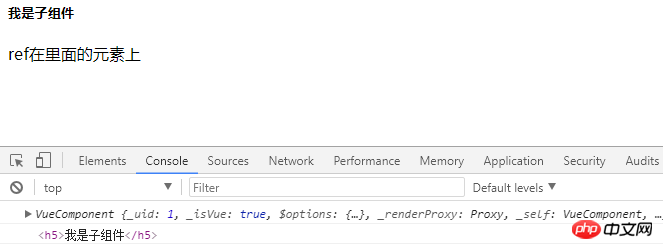
3.ref使用在里面的元素上---局部注册组件
<script src="https://unpkg.com/vue"></script>
<!--ref在里面的元素上-->
<p id="ref-inside-dom">
<component-father>
</component-father>
<p>ref在里面的元素上</p>
</p>
<script>
var refinsidedomTem = {
template: "<p class='childComp' v-on:click='consoleRef'>" +
"<h5 ref='insideDomRef'>我是子组件</h5>" +
"</p>",
methods: {
consoleRef: function() {
console.log(this); // p.childComp vue实例
console.log(this.$refs.insideDomRef); // <h5 >我是子组件</h5>
}
}
};
var refinsidedom = new Vue({
el: "#ref-inside-dom",
components: {
"component-father": refinsidedomTem
}
});
</script>效果:当在click范围内点击一次:
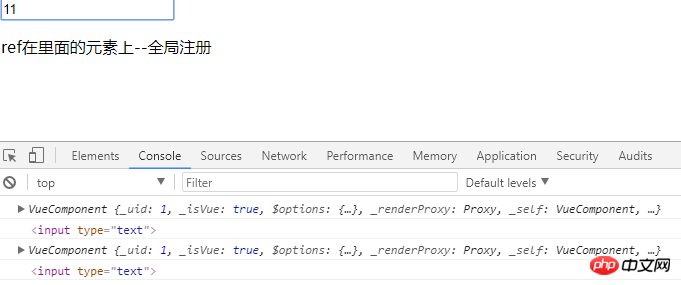
4.ref使用在里面的元素上---全局注册组件
<script src="https://unpkg.com/vue"></script>
<!--ref在里面的元素上--全局注册-->
<p id="ref-inside-dom-all">
<ref-inside-dom-quanjv></ref-inside-dom-quanjv>
</p>
<script>
//v-on:input指当input里值发生改变触发showinsideDomRef事件
Vue.component("ref-inside-dom-quanjv", {
template: "<p class='insideFather'> " +
"<input type='text' ref='insideDomRefAll' v-on:input='showinsideDomRef'>" +
" <p>ref在里面的元素上--全局注册 </p> " +
"</p>",
methods: {
showinsideDomRef: function() {
console.log(this); //这里的this其实还是p.insideFather
console.log(this.$refs.insideDomRefAll); // <input type="text">
}
}
});
var refinsidedomall = new Vue({
el: "#ref-inside-dom-all"
});
</script>效果:当我第一次输入1时,值已改变出发事件,当我第二次在输入时在触发一次事件,所以后台应该打印两次
相关推荐:
The above is the detailed content of The method of parent-child communication in VueJs components. For more information, please follow other related articles on the PHP Chinese website!

Hot AI Tools

Undresser.AI Undress
AI-powered app for creating realistic nude photos

AI Clothes Remover
Online AI tool for removing clothes from photos.

Undress AI Tool
Undress images for free

Clothoff.io
AI clothes remover

AI Hentai Generator
Generate AI Hentai for free.

Hot Article
Hot Tools

Notepad++7.3.1
Easy-to-use and free code editor

SublimeText3 Chinese version
Chinese version, very easy to use

Zend Studio 13.0.1
Powerful PHP integrated development environment

Dreamweaver CS6
Visual web development tools

SublimeText3 Mac version
God-level code editing software (SublimeText3)
Hot Topics
 1384
1384
 52
52

 How to implement an online speech recognition system using WebSocket and JavaScript
Dec 17, 2023 pm 02:54 PM
How to implement an online speech recognition system using WebSocket and JavaScript
Dec 17, 2023 pm 02:54 PM
How to use WebSocket and JavaScript to implement an online speech recognition system Introduction: With the continuous development of technology, speech recognition technology has become an important part of the field of artificial intelligence. The online speech recognition system based on WebSocket and JavaScript has the characteristics of low latency, real-time and cross-platform, and has become a widely used solution. This article will introduce how to use WebSocket and JavaScript to implement an online speech recognition system.
 WebSocket and JavaScript: key technologies for implementing real-time monitoring systems
Dec 17, 2023 pm 05:30 PM
WebSocket and JavaScript: key technologies for implementing real-time monitoring systems
Dec 17, 2023 pm 05:30 PM
WebSocket and JavaScript: Key technologies for realizing real-time monitoring systems Introduction: With the rapid development of Internet technology, real-time monitoring systems have been widely used in various fields. One of the key technologies to achieve real-time monitoring is the combination of WebSocket and JavaScript. This article will introduce the application of WebSocket and JavaScript in real-time monitoring systems, give code examples, and explain their implementation principles in detail. 1. WebSocket technology
 How to use JavaScript and WebSocket to implement a real-time online ordering system
Dec 17, 2023 pm 12:09 PM
How to use JavaScript and WebSocket to implement a real-time online ordering system
Dec 17, 2023 pm 12:09 PM
Introduction to how to use JavaScript and WebSocket to implement a real-time online ordering system: With the popularity of the Internet and the advancement of technology, more and more restaurants have begun to provide online ordering services. In order to implement a real-time online ordering system, we can use JavaScript and WebSocket technology. WebSocket is a full-duplex communication protocol based on the TCP protocol, which can realize real-time two-way communication between the client and the server. In the real-time online ordering system, when the user selects dishes and places an order
 How to implement an online reservation system using WebSocket and JavaScript
Dec 17, 2023 am 09:39 AM
How to implement an online reservation system using WebSocket and JavaScript
Dec 17, 2023 am 09:39 AM
How to use WebSocket and JavaScript to implement an online reservation system. In today's digital era, more and more businesses and services need to provide online reservation functions. It is crucial to implement an efficient and real-time online reservation system. This article will introduce how to use WebSocket and JavaScript to implement an online reservation system, and provide specific code examples. 1. What is WebSocket? WebSocket is a full-duplex method on a single TCP connection.
 JavaScript and WebSocket: Building an efficient real-time weather forecasting system
Dec 17, 2023 pm 05:13 PM
JavaScript and WebSocket: Building an efficient real-time weather forecasting system
Dec 17, 2023 pm 05:13 PM
JavaScript and WebSocket: Building an efficient real-time weather forecast system Introduction: Today, the accuracy of weather forecasts is of great significance to daily life and decision-making. As technology develops, we can provide more accurate and reliable weather forecasts by obtaining weather data in real time. In this article, we will learn how to use JavaScript and WebSocket technology to build an efficient real-time weather forecast system. This article will demonstrate the implementation process through specific code examples. We
 Simple JavaScript Tutorial: How to Get HTTP Status Code
Jan 05, 2024 pm 06:08 PM
Simple JavaScript Tutorial: How to Get HTTP Status Code
Jan 05, 2024 pm 06:08 PM
JavaScript tutorial: How to get HTTP status code, specific code examples are required. Preface: In web development, data interaction with the server is often involved. When communicating with the server, we often need to obtain the returned HTTP status code to determine whether the operation is successful, and perform corresponding processing based on different status codes. This article will teach you how to use JavaScript to obtain HTTP status codes and provide some practical code examples. Using XMLHttpRequest
 How to use insertBefore in javascript
Nov 24, 2023 am 11:56 AM
How to use insertBefore in javascript
Nov 24, 2023 am 11:56 AM
Usage: In JavaScript, the insertBefore() method is used to insert a new node in the DOM tree. This method requires two parameters: the new node to be inserted and the reference node (that is, the node where the new node will be inserted).
 JavaScript and WebSocket: Building an efficient real-time image processing system
Dec 17, 2023 am 08:41 AM
JavaScript and WebSocket: Building an efficient real-time image processing system
Dec 17, 2023 am 08:41 AM
JavaScript is a programming language widely used in web development, while WebSocket is a network protocol used for real-time communication. Combining the powerful functions of the two, we can create an efficient real-time image processing system. This article will introduce how to implement this system using JavaScript and WebSocket, and provide specific code examples. First, we need to clarify the requirements and goals of the real-time image processing system. Suppose we have a camera device that can collect real-time image data
