
This time I will bring you a detailed explanation of the steps for submitting formdata using the axios post method. What are the precautions for submitting formdata using the axios post method? The following is a practical case, let’s take a look.
The vue framework recommends using axios to send ajax requests. I also wrote ablog before to explain how to use axios in vue components. But before, I only used get requests for fun. Now I use the post method when setting up my blog. It turns out that the background (node.js) cannot get the parameters passed by the front desk at all. After some exploration, I finally found the problem.
Four coding methods for post submission data
1.application/x-www-form-urlencoded
This should be the most common post encoding method. Generally, form submissions are submitted in this way by default. Most server languages have good support for this method. In PHP, you can use $_POST["key"] to get the value of key. In node, we can use querystringmiddleware to separate parameters
app.post("/server",function(req,res){
 req.on("data",function(data){
 let key=querystring.parse(decodeURIComponent(data)).key;
 console.log("querystring:"+key)
 });
});2.multipart/form-data
This is also a relatively common post data format. When we use a form to upload files, we must use the enctype attribute of the form form or ajax. The contentType parameter is equal to multipart/form-data. The data sent to the background when using this encoding format looks like this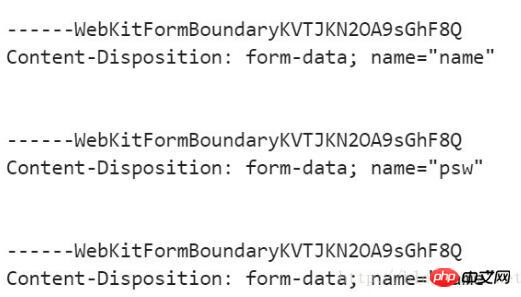
also include the file name and file type information
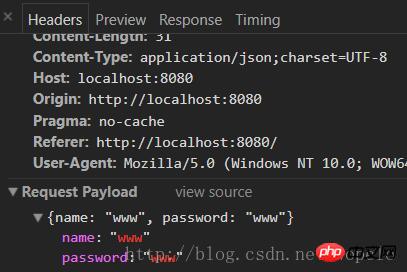
3.application/json
axios The default submission uses this format. If this encoding method is used, what is passed to the background will be the serialized jsonstring. We can compare application/json with the data sent by application/x-www-form-urlencoded
First application/json:


4.text/xml
The remaining encoding format is text/xml, which I have not used much.Solution
Now that we know that the axios post method uses the application/json format to encode data by default, there are two solutions. One is to change the method of receiving parameters in the background, and the other is to modify the encoding format of the axios post method to application/x-www-form-urlencoded, so no background modification is required.Let’s look at the first solution first
In the vue component, the code for axios to send apost request is as follows
this.$axios({
 method:"post",
 url:"/api/haveUser",
 data:{
 name:this.name,
 password:this.password
 }
}).then((res)=>{
 console.log(res.data);
})
后台接收数据需要依赖body-parser中间件,我们事先装好,接着在后台代码中引用body-parser
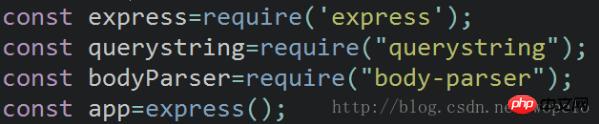
这张截图中,发挥作用的代码仅仅是const bodyParser=require("body-parser");
接下来在路由中使用body-parser
app.post("/api/haveUser",bodyParser.json(),function(req,res){
 console.log(req.body);
 let haveUser=require("../api/server/user.js");
 haveUser(req.body.name,req.body.password,res);
});这时,当前台发送post请求之后,后台控制台中就会打印出req.body

这时,通过req.body.name或者req.body.password就能拿到对应的值。
这种方法比较简单,也不需要前台做过多修改,推荐使用这种方法。
第二种解决方法,具体操作如下
前端
this.$axios({
 method:"post",
 url:"/api/haveUser",
 headers:{
 'Content-type': 'application/x-www-form-urlencoded'
 },
 data:{
 name:this.name,
 password:this.password
 },
 transformRequest: [function (data) {
 let ret = ''
 for (let it in data) {
  ret += encodeURIComponent(it) + '=' + encodeURIComponent(data[it]) + '&'
 }
 return ret
 }],
}).then((res)=>{
 console.log(res.data);
})其中发挥关键作用的是headers与transformRequest。其中 headers 是设置即将被发送的自定义请求头。 transformRequest 允许在向服务器发送前,修改请求数据。这样操作之后,后台querystring.parse(decodeURIComponent(data))获取到的就是类似于{ name: 'w', password: 'w' }的对象。
后台代码如下
app.post("/api/haveUser",function(req,res){
 let haveUser=require("../api/server/user.js");
 req.on("data",function(data){
  let name=querystring.parse(decodeURIComponent(data)).name;
  let password=querystring.parse(decodeURIComponent(data)).password;
  console.log(name,password)
  haveUser(name,password,res);
 });
});这种方法明显就要比第一种麻烦一点,但不需要后台做过多处理。所以具体操作还是得根据实际情况决定。
相信看了本文案例你已经掌握了方法,更多精彩请关注php中文网其它相关文章!
推荐阅读:
The above is the detailed content of Detailed explanation of the steps to submit formdata using axios+post method. For more information, please follow other related articles on the PHP Chinese website!


![[Web front-end] Node.js quick start](https://img.php.cn/upload/course/000/000/067/662b5d34ba7c0227.png)


