

Tips for using router in Angular4
This time I will bring you tips on using the router in Angular4. What are the notes when using the router in Angular4? The following is a practical case, let’s take a look.
router, that is, routing, is a relatively important concept in the front-end. The specific address and the corresponding page are associated and separated through the router to achieve the purpose of decoupling. Create a new detail folder in the src/app directory and create a file named gundam-detail.component.
import { Component } from '@angular/core';
import { Gundam } from '../../model/gundam';
@Component({
template: `
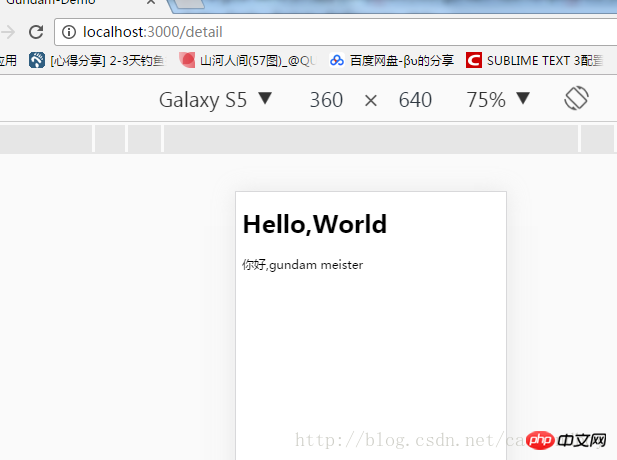
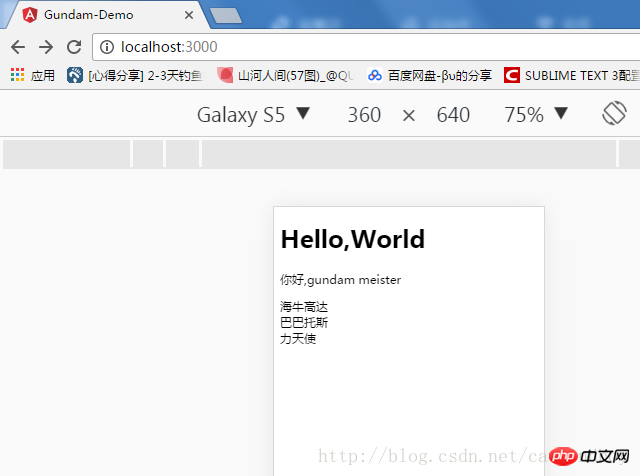
<p *ngIf="selectedGundam">
<span>{{selectedGundam.name}}</span>
<span>{{selectedGundam.type}}</span>
</p>
`
})
export class GundamDetailComponent {
selectedGundam: Gundam;
}ps: Regarding naming, basically the naming method of xxx "-" "business type" "component type" is used, at least this is recommended in the official documentation. Of course, you can also name the component Zhutou San, but standard naming can increase the readability of the component. Even if you don't mind naming random maintainers, no one can be sure that they won't refactor the same piece of code again in a long time. Therefore, you still have to be kind. It’s okay if you don’t write comments. It’s better to be more standardized in naming.
ps2: Regarding the subcontracting method, some people like to put the views together and the controllers together, and then further subdivide them according to the logic; some people do it the other way around, dividing the logic first and then the views and controllers. There seems to be no unified conclusion on this. I personally prefer the latter method, so this project adopts the latter method.
There is nothing in the file at present, it is just a simple move of the temple in app.component.ts.
First clarify the requirements, and then start writing the router.
Requirements: Click on any item in the gundam list page to jump to the gundam details page.
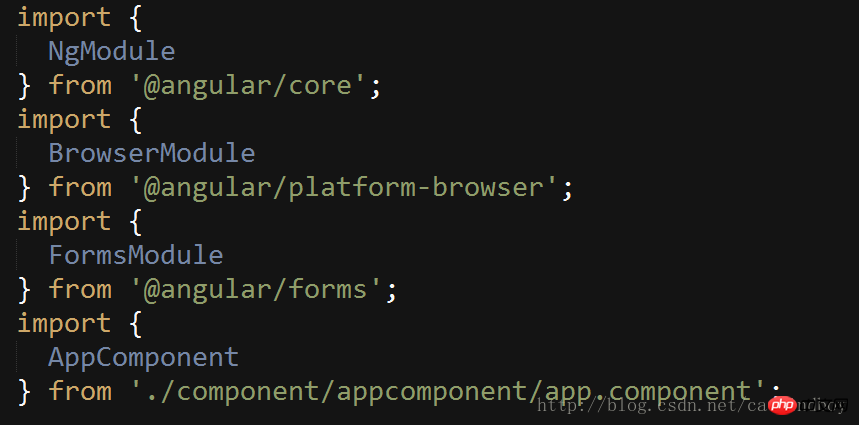
As an angular component, if you want to use router in the page, you must first declare it in app.module.ts.
ps: The previous business has nothing to do with app.module.ts, but this does not mean that it is not important. app.module.ts is equivalent to the mainifist file of android, which coordinates and manages the entire project.
Open app.module.ts:

- ##imports: used in the component page to the base class.
- declarations: Existing custom component declarations.
import { RouterModule } from '@angular/router';imports: [ BrowserModule, FormsModule, RouterModule.forRoot() ],
RouterModule.forRoot([
  {
    path: '',
    component: AppComponent
  },
  {
    path: '',
    component: GundamDetailComponent
  }
])import {
NgModule
} from '@angular/core';
import {
BrowserModule
} from '@angular/platform-browser';
import {
FormsModule
} from '@angular/forms';
import { RouterModule } from '@angular/router';
import {
AppComponent
} from './component/appcomponent/app.component';
import { GundamDetailComponent } from './component/detail/gundam-detail.component';
@NgModule({
imports: [
BrowserModule,
FormsModule,
RouterModule.forRoot([
{
path: '',
component: AppComponent
},
{
path: '',
component: GundamDetailComponent
}
])
],
declarations: [
AppComponent,
GundamDetailComponent
],
bootstrap: [AppComponent],
})
export class AppModule {}
<router-outlet></router-outlet>
to the template in 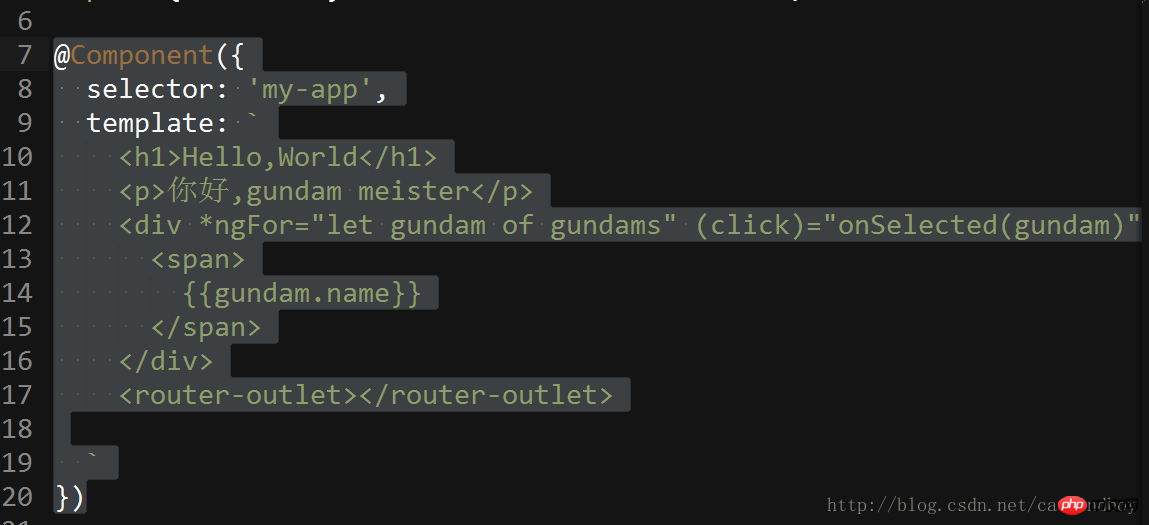 app.component.ts
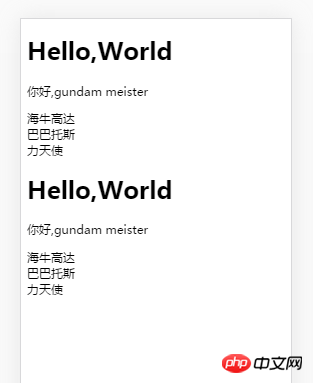
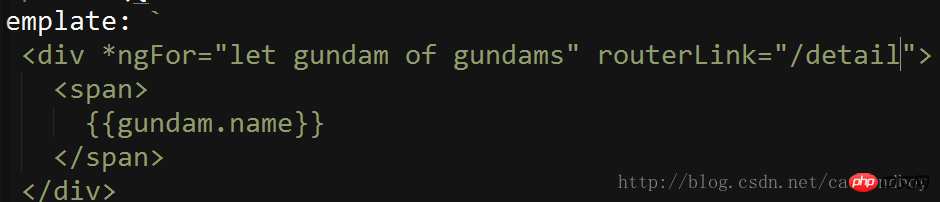
app.component.ts is a component and a page. Angular first entered app.component.ts# from bootstrap. ##The interface is rendered (that is, the part above the router-outlet). I went to find the router again and found that the corresponding router also had components, so I loaded it again. 所以为了正常显示,也要把主页也单独抽出来。所有组件通过app.component.ts里的来进行加载。而app.component.ts作为整个demo的最外层容器可以进行一些公共的操作(典型:后退动作)。 在src下新建host包,新建gundam-host.component.ts文件。 app.component.ts只保留标签,其他一概去掉。 修改app.module.ts文件,导入gundam-host.component.ts并把GundamHostComponent 增加到组件声明declarations里。 修改route里的path所指向的component,默认进入后显示主页组件: before after path的值为”(空字符串)的表示不需要增加子路径。 修改详情页的路径: 在主页里增加跳转连接: 点击跳转(路径已改变) 现在点击主页的高达列表的item后,可以跳转到一个空白的详情页。之所以是空白,是因为详情页的值是需要由主页进行传递的。现在主页详情页分家以后,需要通过路由来进行值传递。 传值的方法有很多种,甚至可以传的值也有很多种。 在app.component.ts文件的class里添加函数: 修改app.component.ts文件的template,访问gundam路径时转化传递转化过的gundam字符串 修改详情页的path /:gundam 是一个占位符,又是参数说明。表示传递过来的参数属性是gundam。 这样在detail文件中,就可以从url的连接中拿到传递过来的高达字符串。 获得这个字符串的时机,应该是在在detail页面初始化的时候。Angular提供了所谓的的“钩子”(hook),用来标示component的活动周期—其实也就是是类似于Android里onStart或者onCreate一样的方法。 在gundam-detail.component.ts的中添加OnInit钩子,或者说接口: 在class后面加implements关键词和OnInit来实现该接口: 剩下的事情,就是读取连接上传来的参数就可以了。 读取连接上传递的参数还是要用到router里的几个类,所以需要在detail里导入。 导入完成后,通过在构造器里注入的方式进行调用: (有关注入,现在暂时没有说到) angular会自动创建ActivatedRoute的实例。 先在ngOnInit里输出看看params是什么 ps:switchMap是angular官方给的拿取url参数的方法,也是需要预先导入才可以使用: ps2: 有关箭头函数 是一个箭头函数,等同于 其中params是switchMap的返回值,返回的即是通过路由连接传递过来的参数所在的类。 ps3: 箭头函数真的是整个ES6里最恶心的东西,之一。 控制台中 输出: 传递过来的参数,是一个gundam类格式化输出的字符串,所以还要在detail里补充一个反格式化字符串到gundam类的函数。 最终,获得detail的初始化是这个样子的 移动web页面间传值确实没有什么太好的方法,angular和react都是如此。以前我们的做法是短的参数直接挂连接传走,长的大的或者object的参数就先保存本地,然后第二个页面再从本地读取。 但是像android那样扔一个intent里直接就过去了的方式,确实没有。 回首页: 点击一个列表: 包结构: 总的来说,业务被分开了,结构干净多了。虽然现在还体现不出来,但是写到后来就觉得心花怒放,磨刀不误砍柴工功啊。 作为router,也可以分离的。 目前我的项目里只有2个页面,如果多起来-比如20来个,那么app.module.ts又会变的乱七八糟。 所以要把router也给扔出去。 新建一个文件app-routing.module.ts,然后把footRoot平移过来(带上引用)。 在app-routing.module.ts文件里,也需要ngModul。个人理解ngModul就相当于一个基类指示器,导出class后以便被其他类引用。 然后既然已经有了这个类,可以导入到app.module.ts里使用使得整个文件看起来清爽一些。 当然,官方文档又进行了进一步简化。 既然forRoot是一个Route数组,那么数组也可以单独抽出来,当然进一步抽取也可以放到另一个文件里。 相信看了本文案例你已经掌握了方法,更多精彩请关注php中文网其它相关文章! 推荐阅读:
基本上可以把整个app挪过来,删除掉out标签,删掉selector(暂时用不到)。import {
Component
} from '@angular/core';
import { Gundam } from '../../model/gundam';
import { GUNDAMS } from './../../service/data';
@Component({
template: `
<p *ngFor="let gundam of gundams" (click)="onSelected(gundam)">
<span>
{{gundam.name}}
</span>
</p>
`
})
export class GundamHostComponent {
gundam: Gundam = {
name: '海牛',
type: 'NewType'
};
gundams = GUNDAMS;
selectedGundam: Gundam; // 定义一个selectedGudam作为展示详情的变量
onSelected (gundam: Gundam): void {
this.selectedGundam = gundam; // 通过参数赋值
}
}

{
  path: 'detail',
  component: GundamDetailComponent
}
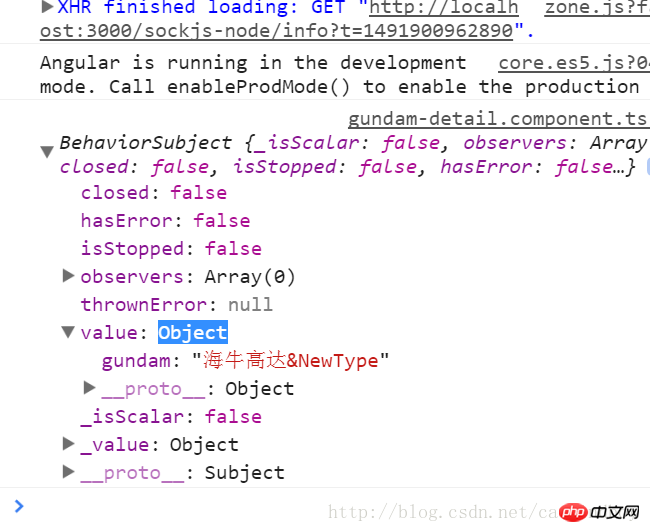
目前我先用最笨的方法:将gundam类转化为一个字符串,将字符串传递到详情页面后再转化为gundam类。parseGundamToString(gundam: Gundam): string {
return gundam.name + '&' + gundam.type;
} // 将gundam类转化为固定格式的字符串<p *ngFor="let gundam of gundams" routerLink="/detail/name=parseGundamToString(gundam)">
<span>
{{gundam.name}}
</span>
</p>{
path: 'detail/:gundam',
component: GundamDetailComponent
}import { Component, OnInit } from '@angular/core';export class GundamDetailComponent implements OnInit {
selectedGundam: Gundam ;
ngOnInit(): void {
}
}import { ActivatedRoute, Params } from '@angular/router';constructor(
private route: ActivatedRoute){}this.route.params.switchMap((params: Params) => console.log(params))
import 'rxjs/add/operator/switchMap';
(params: Params) => this.gundamStr = params['gundam']
function(params){
this.gundamStr = params['gundam']
}
parseStringToGundam(str: string): Gundam {
const temp = str.split('&');
const tempGundam: Gundam = {
name: temp[0],
type: temp[1]
};
return tempGundam;
}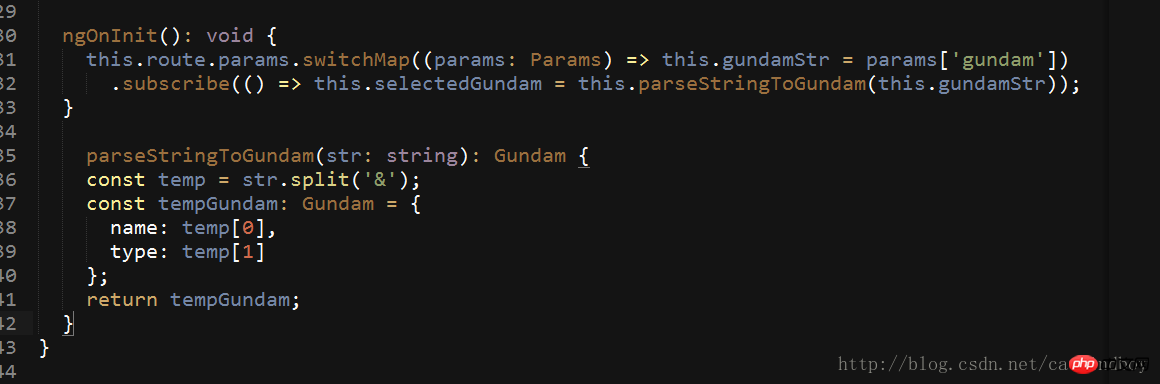
ngOnInit(): void {
this.route.params // 通过注入的方式拿到route里的参数params
.switchMap((params: Params) => this.gundamStr = params['gundam']) // 通过参数拿到gundam字符串并付给detail里的一个临时变量
.subscribe(() => this.selectedGundam = this.parseStringToGundam(this.gundamStr)); // 通过反格式化函数解析临时变量并返回给作为显示的model
}


import {
NgModule
} from '@angular/core';
import { RouterModule } from '@angular/router';
import { GundamDetailComponent } from './component/detail/gundam-detail.component';
import { GundamHostComponent } from './component/host/gundam-host.component';
@NgModule({
imports: [
RouterModule.forRoot([
{
path: '',
component: GundamHostComponent
},
{
path: 'detail/:id',
component: GundamDetailComponent
}
])
],
exports: [RouterModule]
})
export class AppRoutingModule {
}import {
NgModule
} from '@angular/core';
import {
BrowserModule
} from '@angular/platform-browser';
import {
FormsModule
} from '@angular/forms';
import {
AppComponent
} from './component/appcomponent/app.component';
import { GundamDetailComponent } from './component/detail/gundam-detail.component';
import { GundamHostComponent } from './component/host/gundam-host.component';
import { AppRoutingModule } from './app-routing.module';
@NgModule({
imports: [
BrowserModule,
FormsModule,
AppRoutingModule // 调用路由
],
declarations: [
AppComponent,
GundamDetailComponent,
GundamHostComponent
],
bootstrap: [AppComponent],
})
export class AppModule {}import {
NgModule
} from '@angular/core';
import { RouterModule, Route } from '@angular/router';
import { GundamDetailComponent } from './component/detail/gundam-detail.component';
import { GundamHostComponent } from './component/host/gundam-host.component';
const routes: Route[] = [
{
path: '',
component: GundamHostComponent
},
{
  path: 'detail/:gundam',
  component: GundamDetailComponent
}
];
@NgModule({
imports: [
RouterModule.forRoot(routes)
],
exports: [RouterModule]
})
export class AppRoutingModule {
}
The above is the detailed content of Tips for using router in Angular4. For more information, please follow other related articles on the PHP Chinese website!

Hot AI Tools

Undresser.AI Undress
AI-powered app for creating realistic nude photos

AI Clothes Remover
Online AI tool for removing clothes from photos.

Undress AI Tool
Undress images for free

Clothoff.io
AI clothes remover

Video Face Swap
Swap faces in any video effortlessly with our completely free AI face swap tool!

Hot Article
Hot Tools

Notepad++7.3.1
Easy-to-use and free code editor

SublimeText3 Chinese version
Chinese version, very easy to use

Zend Studio 13.0.1
Powerful PHP integrated development environment

Dreamweaver CS6
Visual web development tools

SublimeText3 Mac version
God-level code editing software (SublimeText3)
Hot Topics
 1386
1386
 52
52

 React Router User Guide: How to implement front-end routing control
Sep 29, 2023 pm 05:45 PM
React Router User Guide: How to implement front-end routing control
Sep 29, 2023 pm 05:45 PM
ReactRouter User Guide: How to Implement Front-End Routing Control With the popularity of single-page applications, front-end routing has become an important part that cannot be ignored. As the most popular routing library in the React ecosystem, ReactRouter provides rich functions and easy-to-use APIs, making the implementation of front-end routing very simple and flexible. This article will introduce how to use ReactRouter and provide some specific code examples. To install ReactRouter first, we need
 How to use Go language for quantitative financial analysis?
Jun 11, 2023 am 08:51 AM
How to use Go language for quantitative financial analysis?
Jun 11, 2023 am 08:51 AM
In the field of modern finance, with the rise of data science and artificial intelligence technology, quantitative finance has gradually become an increasingly important direction. As a statically typed programming language that can efficiently process data and deploy distributed systems, Go language has gradually attracted attention in the field of quantitative finance. This article will introduce how to use the Go language to perform quantitative financial analysis. The specific content is as follows: Obtaining financial data First, we need to obtain financial data. The network programming capabilities of Go language are very powerful and can be used to obtain various financial data. Compare
 How to use Go language for data mining?
Jun 10, 2023 am 08:39 AM
How to use Go language for data mining?
Jun 10, 2023 am 08:39 AM
With the rise of big data and data mining, more and more programming languages have begun to support data mining functions. As a fast, safe and efficient programming language, Go language can also be used for data mining. So, how to use Go language for data mining? Here are some important steps and techniques. Data Acquisition First, you need to obtain the data. This can be achieved through various means, such as crawling information on web pages, using APIs to obtain data, reading data from databases, etc. Go language comes with rich HTTP
 How to use PHP to develop simple SEO optimization functions
Sep 20, 2023 pm 04:18 PM
How to use PHP to develop simple SEO optimization functions
Sep 20, 2023 pm 04:18 PM
How to use PHP to develop simple SEO optimization functions SEO (SearchEngineOptimization), or search engine optimization, refers to improving the website's ranking in search engines by improving the structure and content of the website, thereby obtaining more organic traffic. In website development, how to use PHP to implement simple SEO optimization functions? This article will introduce some commonly used SEO optimization techniques and specific code examples to help developers implement SEO optimization in PHP projects. 1. Friendly to use
 How to write the minimum spanning tree algorithm using C#
Sep 19, 2023 pm 01:55 PM
How to write the minimum spanning tree algorithm using C#
Sep 19, 2023 pm 01:55 PM
How to use C# to write the minimum spanning tree algorithm. The minimum spanning tree algorithm is an important graph theory algorithm, which is used to solve the connectivity problem of graphs. In computer science, a minimum spanning tree refers to a spanning tree of a connected graph in which the sum of the weights of all edges of the spanning tree is the smallest. This article will introduce how to use C# to write the minimum spanning tree algorithm and provide specific code examples. First, we need to define a graph data structure to represent the problem. In C#, you can use an adjacency matrix to represent a graph. An adjacency matrix is a two-dimensional array in which each element represents
 How to use nginx to prevent hotlinking
Jun 11, 2023 pm 01:25 PM
How to use nginx to prevent hotlinking
Jun 11, 2023 pm 01:25 PM
With the popularity of the Internet, more and more websites provide external link functions for pictures, videos and other resources. However, this external link function is easy to be stolen. Hotlinking means that other websites use pictures, videos and other resources on your website to directly display these resources on their own website through the reference address instead of downloading them to their own server. In this way, hotlink websites can use your website's traffic and bandwidth resources for free, which wastes resources and affects website speed. To address this problem, Nginx can be used to prevent hotlinking. Nginx is
 Easy solution: A complete guide to pip mirror source usage techniques
Jan 16, 2024 am 10:31 AM
Easy solution: A complete guide to pip mirror source usage techniques
Jan 16, 2024 am 10:31 AM
One-click solution: Quickly master the usage skills of pip mirror source Introduction: pip is the most commonly used package management tool for Python, which can easily install, upgrade and manage Python packages. However, due to well-known reasons, using the default mirror source to download the installation package is slower. In order to solve this problem, we need to use a domestic mirror source. This article will introduce how to quickly master the usage skills of pip mirror source and provide specific code examples. Before you start, understand the concept of pip mirror source.
 How to use the divide and conquer algorithm in C++
Sep 20, 2023 pm 03:19 PM
How to use the divide and conquer algorithm in C++
Sep 20, 2023 pm 03:19 PM
How to use the divide-and-conquer algorithm in C++ The divide-and-conquer algorithm is a method that decomposes a problem into several sub-problems and then combines the solutions to the sub-problems to obtain a solution to the original problem. It has a wide range of applications and can be used to solve various types of problems, including mathematical problems, sorting problems, graph problems, etc. This article will introduce how to use the divide and conquer algorithm in C++ and provide specific code examples. 1. Basic idea The basic idea of the divide-and-conquer algorithm is to decompose a large problem into several smaller sub-problems, solve each sub-problem recursively, and finally merge the sub-problems.
