

How to use ueditor custom upload button in vue
This time I will show you how to use the ueditor custom upload button in vue. What are the precautions for using the ueditor custom upload button in vue. The following is a practical case, let's take a look.
Due to the upload address problem, it is necessary to customize the upload button. The effect is as shown in the figure
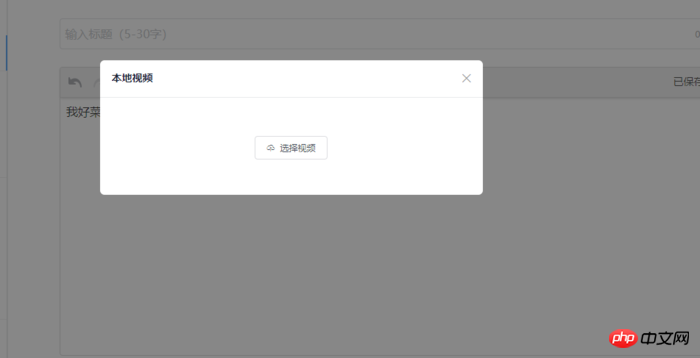
Since there is no dom operation in the page, I thought of using vue to customize it. Define event binding $emit and $on to pass the click event to ueditor.
The first step is to add a custom button to ueditor:
1. Open ueditor.all.js and find btnCmds, which is probably at line 27854, as shown below. Add a custom button name to the array. , what I wrote is "love"

ueditor.all.js
2, add events to the button
still in ueditor. Find the commands directive in the all.js file to extend the event for the button just defined, as follows:
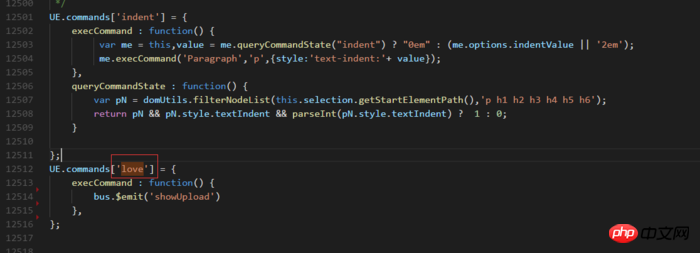
Add events to the button
The event I bound here is It has been defined in vue. Use $emit to bind it, and then monitor it on the page. bus is a custom vue instance, because the entire project is used in combination with vue.
3. Add an icon to the button
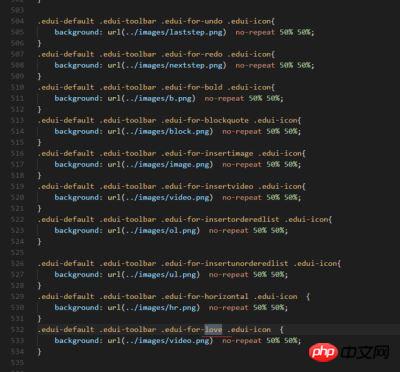
Open themes/default/css/ueditor.css. Just add it below the file, as follows:
1 2 3 |
|
Here.edui The love after -for-love is the name of the button I just defined. Since all my buttons have rewritten styles, they are all covered;
Add icons to buttons
4. The page listens for click events
The content here is the basis of vue. You can read the document yourself. It is simply as follows

First give The page defines an element to add a binding event
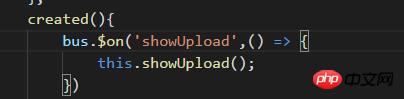
and then listens to the click event passed by ueditor showUpload

in methods Define the showUpload event (it doesn’t matter if the name is repeated here)
In this way, the custom upload button has been completed.
The following is an example of using ueditor in a vue project
Take the project generated by vue-cli as an example
1. First put the ueditor file in the static folder
2.index.html and add the following code
1 2 |
|
3.webpack.base.conf.js add the following configuration
1 2 3 |
|
4.index.html Add
1 2 3 |
|
5.editor component
1 2 3 4 5 6 7 8 9 10 11 12 13 14 15 16 17 18 19 20 21 22 23 24 25 26 27 28 29 30 |
|
I believe you have mastered the method after reading the case in this article. For more exciting information, please pay attention to other related articles on the PHP Chinese website!
Recommended reading:
Vue implementation of PopupWindow component usage steps analysis
vue jquery lodash top suspension fixed function implementation when sliding Detailed explanation
The above is the detailed content of How to use ueditor custom upload button in vue. For more information, please follow other related articles on the PHP Chinese website!

Hot AI Tools

Undresser.AI Undress
AI-powered app for creating realistic nude photos

AI Clothes Remover
Online AI tool for removing clothes from photos.

Undress AI Tool
Undress images for free

Clothoff.io
AI clothes remover

AI Hentai Generator
Generate AI Hentai for free.
Hot Article
Hot Tools

Notepad++7.3.1
Easy-to-use and free code editor

SublimeText3 Chinese version
Chinese version, very easy to use

Zend Studio 13.0.1
Powerful PHP integrated development environment

Dreamweaver CS6
Visual web development tools

SublimeText3 Mac version
God-level code editing software (SublimeText3)
Hot Topics
 1376
1376
 52
52

 How to quickly set up a custom avatar in Netflix
Feb 19, 2024 pm 06:33 PM
How to quickly set up a custom avatar in Netflix
Feb 19, 2024 pm 06:33 PM
An avatar on Netflix is a visual representation of your streaming identity. Users can go beyond the default avatar to express their personality. Continue reading this article to learn how to set a custom profile picture in the Netflix app. How to quickly set a custom avatar in Netflix In Netflix, there is no built-in feature to set a profile picture. However, you can do this by installing the Netflix extension on your browser. First, install a custom profile picture for the Netflix extension on your browser. You can buy it in the Chrome store. After installing the extension, open Netflix on your browser and log into your account. Navigate to your profile in the upper right corner and click
 How to customize background image in Win11
Jun 30, 2023 pm 08:45 PM
How to customize background image in Win11
Jun 30, 2023 pm 08:45 PM
How to customize background image in Win11? In the newly released win11 system, there are many custom functions, but many friends do not know how to use these functions. Some friends think that the background image is relatively monotonous and want to customize the background image, but don’t know how to customize the background image. If you don’t know how to define the background image, the editor has compiled the steps to customize the background image in Win11 below. If you are interested If so, take a look below! Steps for customizing background images in Win11: 1. Click the win button on the desktop and click Settings in the pop-up menu, as shown in the figure. 2. Enter the settings menu and click Personalization, as shown in the figure. 3. Enter Personalization and click on Background, as shown in the picture. 4. Enter background settings and click to browse pictures
 How to create and customize Venn diagrams in Python?
Sep 14, 2023 pm 02:37 PM
How to create and customize Venn diagrams in Python?
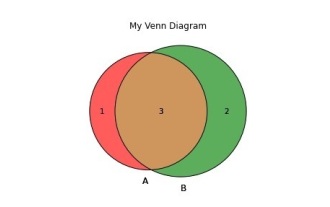
Sep 14, 2023 pm 02:37 PM
A Venn diagram is a diagram used to represent relationships between sets. To create a Venn diagram we will use matplotlib. Matplotlib is a commonly used data visualization library in Python for creating interactive charts and graphs. It is also used to create interactive images and charts. Matplotlib provides many functions to customize charts and graphs. In this tutorial, we will illustrate three examples to customize Venn diagrams. The Chinese translation of Example is: Example This is a simple example of creating the intersection of two Venn diagrams; first, we imported the necessary libraries and imported venns. Then we create the dataset as a Python set, after that we use the "venn2()" function to create
 render function in Vue3: custom rendering function
Jun 18, 2023 pm 06:43 PM
render function in Vue3: custom rendering function
Jun 18, 2023 pm 06:43 PM
Vue is a popular JavaScript framework that provides many convenient functions and APIs to help developers build interactive front-end applications. With the release of Vue3, the render function has become an important update. This article will introduce the concept and purpose of the render function in Vue3 and how to use it to customize the rendering function. What is the render function? In Vue, template is the most commonly used rendering method, but in Vue3, you can use another method: r
 How to enable and customize crossfades in Apple Music on iPhone with iOS 17
Jun 28, 2023 pm 12:14 PM
How to enable and customize crossfades in Apple Music on iPhone with iOS 17
Jun 28, 2023 pm 12:14 PM
The iOS 17 update for iPhone brings some big changes to Apple Music. This includes collaborating with other users on playlists, initiating music playback from different devices when using CarPlay, and more. One of these new features is the ability to use crossfades in Apple Music. This will allow you to transition seamlessly between tracks, which is a great feature when listening to multiple tracks. Crossfading helps improve the overall listening experience, ensuring you don't get startled or dropped out of the experience when the track changes. So if you want to make the most of this new feature, here's how to use it on your iPhone. How to Enable and Customize Crossfade for Apple Music You Need the Latest
 How to create custom pagination in CakePHP?
Jun 04, 2023 am 08:32 AM
How to create custom pagination in CakePHP?
Jun 04, 2023 am 08:32 AM
CakePHP is a powerful PHP framework that provides developers with many useful tools and features. One of them is pagination, which helps us divide large amounts of data into several pages, making browsing and manipulation easier. By default, CakePHP provides some basic pagination methods, but sometimes you may need to create some custom pagination methods. This article will show you how to create custom pagination in CakePHP. Step 1: Create a custom pagination class First, we need to create a custom pagination class. this
 How to customize shortcut key settings in Eclipse
Jan 28, 2024 am 10:01 AM
How to customize shortcut key settings in Eclipse
Jan 28, 2024 am 10:01 AM
How to customize shortcut key settings in Eclipse? As a developer, mastering shortcut keys is one of the keys to improving efficiency when coding in Eclipse. As a powerful integrated development environment, Eclipse not only provides many default shortcut keys, but also allows users to customize them according to their own preferences. This article will introduce how to customize shortcut key settings in Eclipse and give specific code examples. Open Eclipse First, open Eclipse and enter
 How to implement custom middleware in CodeIgniter
Jul 29, 2023 am 10:53 AM
How to implement custom middleware in CodeIgniter
Jul 29, 2023 am 10:53 AM
How to implement custom middleware in CodeIgniter Introduction: In modern web development, middleware plays a vital role in applications. They can be used to perform some shared processing logic before or after the request reaches the controller. CodeIgniter, as a popular PHP framework, also supports the use of middleware. This article will introduce how to implement custom middleware in CodeIgniter and provide a simple code example. Middleware overview: Middleware is a kind of request
