
 Web Front-end
JS Tutorial
Detailed explanation of the steps to implement dynamic permission routing menu with vue addRoutes
Web Front-end
JS Tutorial
Detailed explanation of the steps to implement dynamic permission routing menu with vue addRoutes
Detailed explanation of the steps to implement dynamic permission routing menu with vue addRoutes
This time I will bring you a detailed explanation of the steps to implement dynamic permission routing menu with vue addRoutes. What are the precautions for vue addRoutes to implement dynamic permission routing menu. Here is a practical case, let’s take a look.
Requirements
Recently took over a backend management system, and it is necessary to realize the effect of pulling the navigation menu from the backend; according to the different permissions of the logged in user, The pulled-out navigation menu is also different, and the operable interface is also different.
Question
Because the background management system is prepared to use vue vue-router element-ui vuex, but the single-page application The vue-router has been instantiated and injected into the vue instance before entering the page, so there is no way to re-customize the route when entering the login page. After a lot of searching, I found that vue-router provided the addRoutes method to add routes in version 2.0, and a glimmer of hope appeared.
After a lot of hard work, the function was finally realized. I recorded it for easy review. I also hope it can help comrades who have the same needs.
Ideas
1. First configure a fixed routing address locally, such as login and 404 pages, as follows:
import Vue from 'vue'
import Router from 'vue-router'
import store from '@/vuex/store'
Vue.use(Router)
let router = new Router({
 routes: [
  {
   path: '/login',
   name: 'login',
   meta: {requireAuth: false},
   // 模块使用异步加载
   component: (resolve) => require(['../components/login/login.vue'], resolve)
  }]
})
// 拦截登录,token验证
router.beforeEach((to, from, next) => {
 if (to.meta.requireAuth === undefined) {
  if (store.state.token) {
   next()
  } else {
   next({
    path: '/login'
   })
  }
 } else {
  next()
 }
})
export default routerOnly after configuring these fixed routes can we get to the login page, otherwise we will not be able to continue.
2. Then the important step is to agree with the back-end veteran on the permission menu list information that needs to be returned; first, let’s analyze the routing structure we need. Here I take my own routing as an example. . If I define the route directly myself, it will have the following structure:
let router = new Router({
 routes: [
  {
   path: '/login',
   name: 'login',
   meta: {requireAuth: false},
   component: (resolve) => require(['../components/login/login.vue'], resolve)
  },
  {
    path: '/',
    redirect: '/layout'
  },
  {
    path: '/layout',
    component: (resolve) => require(['../layout.vue'], resolve),
    children: [
      {
        path: 'index',
        meta: {
          type: '1',    //控制是否显示隐藏 1显示,2隐藏
          code: 00010001, // 后面需要控制路由高亮
          title: '首页',  // 菜单名称
          permissonList: [] // 权限列表
        }
        component: (resolve) => require(['@/components/index/index.vue'], resolve)
      },
      {
      ...
      }
    ]
  }]
})According to the above structural analysis, in fact, the route that really requires dynamic configuration is actually under /layout The children part, so the backend needs to return to us an array containing all routes.

In the returned data, the rootList is a list of first-level navigation. Navigation actually does not have routing function. It is only used as a trigger to switch secondary menu. SubList is the routing information we really need.
3. After getting the permission routing information, we need to process the data locally and assemble it into the data we need:
// 登录
login () {
let params = {
account: this.loginForm.username,
password: encrypt(this.loginForm.password)
}
this.loading = true
this.$http.post(this.$bumng + '/login', this.$HP(params))
.then((res) => {
this.loging = false
console.info('菜单列表:', res)
if (res.resultCode === this.$state_ok) {
// 合并一级菜单和二级菜单,便于显示
let menus = handleMenu.mergeSubInRoot(res.rootList, res.subList)
// 本地化处理好的菜单列表
this.saveRes({label: 'menuList', value: menus})
// 根据subList处理路由
let routes = handleMenu.mergeRoutes(res.subList)
// 本地化subList,便于在刷新页面的时候重新配置路由
this.saveRes({label: 'subList', value: res.subList})
// 防止重复配置相同路由
if (this.$router.options.routes.length <= 1) {
this.$router.addRoutes(routes)
// this.$router不是响应式的,所以手动将路由元注入路由对象
this.$router.options.routes.push(routes)
}
this.$router.replace('/layout/index')
}
})
.catch((err) => {
this.loging = false
console.error('错误:', err)
})
},Methods for processing menu lists and subLists: mergeSubInRoot and mergeRoutes
const routes = [
 {
  path: '/',
  redirect: '/layout'
 },
 {
  path: '/layout',
  component: (resolve) => require(['../layout.vue'], resolve),
  children: []
 }
]
export default {
 /**
  * 合并主菜单和子菜单
  * @param: rootList [Array] 主菜单列表
  * @param: subList [Array] 子菜单
  * */
 mergeSubInRoot (roots, subs) {
  if (roots && subs) {
   for (let i = 0; i < roots.length; i++) {
    let rootCode = roots[i].code
    roots[i].children = []
    for (let j = 0; j < subs.length; j++) {
     if (rootCode === subs[j].code.substring(0, 4)) {
      roots[i].children.push(subs[j])
     }
    }
   }
  }
  return roots
 },
 /**
  * 合并远程路由到本地路由
  * @param: subList [Array] 远程路由列表
  * @param: routes [Array] 本地路由列表
  * */
 mergeRoutes (subs) {
  if (subs) {
   for (let i = 0; i < subs.length; i++) {
    let temp = {
     path: subs[i].actUrl,
     name: subs[i].actUrl,
     component: (resolve) => require([`@/components/${subs[i].component}.vue`], resolve),
     meta: {
      type: subs[i].type,
      code: subs[i].code,
      title: subs[i].name,
      permissionList: subs[i].permissionList
     }
    }
    routes[1].children.push(temp)
   }
  }
  return routes
 }
}So far we have successfully configured permission routing into local routing. My system login is as follows

Follow-up optimization
1. Menu list display and secondary navigation switching:
<template>
<p class="mainMenu">
<el-menu
class="menubar"
mode="horizontal"
:default-active="activeCode"
background-color="#545c64"
text-color="#fff"
active-text-color="#ffd04b">
<el-menu-item :index="item.code | splitCode" v-for="item in menuList" :key="item.code" @click="switchSubMenu(item)" v-if="item.code !== '0008'">
<i :class="`iconfont icon-${item.imgUrl}`"></i>
<span slot="title">{{item.name}}</span>
</el-menu-item>
</el-menu>
</p>
</template>
<script type="text/ecmascript-6">
import {mapState, mapMutations} from 'vuex'
export default {
name: 'menu',
data () {
return {
msg: 'Welcome to Your Vue.js App'
}
},
computed: {
...mapState(['menuList']),
activeCode () {
// 通过code保证在切换字路由的情况下一级路由也是高亮显示
return this.$route.meta.code.substring(0, 4)
}
},
methods: {
...mapMutations(['saveRes']),
// 切换二级路由
switchSubMenu (route) {
console.info('路由:', route)
if (route.actUrl !== 'index') {
// 用currentSubMenu控制二级路由数据
this.saveRes({label: 'currentSubMenu', value: route.children})
this.$router.push(`/layout/${route.children[0].actUrl}`)
} else {
// 不存在二级路由隐藏二级
this.saveRes({label: 'currentSubMenu', value: ''})
this.$router.push(`/layout/${route.actUrl}`)
}
}
},
filters: {
splitCode (code) {
return code.substring(0, 4)
}
}
}
</script>2. Prevent refresh routing from being lost; since the single-page application will be re-initialized during refresh, all All configured routes will be lost. Once you return to before liberation, only locally configured routes can be jumped. At this time, we can execute the following code in app.vue (ps: no matter where the refresh is performed, app.vue will be executed):
<script>
 import {decrypt} from '@/libs/AES'
 import handleMenu from '@/router/handleMenu'
 export default {
  name: 'app',
  created () {
   // 当this.$router.options.routes的长度为1,且本地缓存存在菜单列表的时候才重新配置路由
   if (this.$router.options.routes.length <= 1 && sessionStorage.getItem('subList')) {
    let subList = JSON.parse(decrypt(sessionStorage.getItem('subList')))
    let routes = handleMenu.mergeRoutes(subList)
    this.$router.addRoutes(routes)
    // this.$router不是响应式的,所以手动将路由元注入路由对象
    this.$router.options.routes.push(routes)
   }
  }
 }
</script>In this way, even if refreshed, the routing will be reconfigured.
3. Regarding page button level control, you can customize a command to do this. Because we have put the permission list into the meta object of the corresponding route, we can easily go back to the permissions that the current user has on the current page on each page

Refer to the official document custom instructions
Conclusion
After finishing the work, thanks to the addRoutes method added to vue-router2, otherwise
I believe you have mastered the method after reading the case in this article. For more exciting information, please pay attention to other related articles on the php Chinese website!
Recommended reading:
Detailed explanation of the steps for php to generate a random string of custom length
php image cropping and thumbnail usage examples
The above is the detailed content of Detailed explanation of the steps to implement dynamic permission routing menu with vue addRoutes. For more information, please follow other related articles on the PHP Chinese website!

Hot AI Tools

Undresser.AI Undress
AI-powered app for creating realistic nude photos

AI Clothes Remover
Online AI tool for removing clothes from photos.

Undress AI Tool
Undress images for free

Clothoff.io
AI clothes remover

Video Face Swap
Swap faces in any video effortlessly with our completely free AI face swap tool!

Hot Article
Hot Tools

Notepad++7.3.1
Easy-to-use and free code editor

SublimeText3 Chinese version
Chinese version, very easy to use

Zend Studio 13.0.1
Powerful PHP integrated development environment

Dreamweaver CS6
Visual web development tools

SublimeText3 Mac version
God-level code editing software (SublimeText3)
Hot Topics
 1387
1387
 52
52

 Enable root permissions with one click (quickly obtain root permissions)
Jun 02, 2024 pm 05:32 PM
Enable root permissions with one click (quickly obtain root permissions)
Jun 02, 2024 pm 05:32 PM
It allows users to perform more in-depth operations and customization of the system. Root permission is an administrator permission in the Android system. Obtaining root privileges usually requires a series of tedious steps, which may not be very friendly to ordinary users, however. By enabling root permissions with one click, this article will introduce a simple and effective method to help users easily obtain system permissions. Understand the importance and risks of root permissions and have greater freedom. Root permissions allow users to fully control the mobile phone system. Strengthen security controls, customize themes, and users can delete pre-installed applications. For example, accidentally deleting system files causing system crashes, excessive use of root privileges, and inadvertent installation of malware are also risky, however. Before using root privileges
 How to set permission access in QQ space
Feb 23, 2024 pm 02:22 PM
How to set permission access in QQ space
Feb 23, 2024 pm 02:22 PM
How to set permission access in QQ space? You can set permission access in QQ space, but most friends don’t know how to set permission access in QQ space. Next is the diagram of how to set permission access in QQ space brought by the editor for users. Text tutorial, interested users come and take a look! QQ usage tutorial QQ space how to set permission access 1. First open the QQ application, click [Avatar] in the upper left corner of the main page; 2. Then expand the personal information area on the left and click the [Settings] function in the lower left corner; 3. Enter the settings page Swipe to find the [Privacy] option; 4. Next in the privacy interface, select the [Permission Settings] service; 5. Then challenge to the latest page and select [Space Dynamics]; 6. Set up in QQ Space again
 Java Apache Camel: Building a flexible and efficient service-oriented architecture
Feb 19, 2024 pm 04:12 PM
Java Apache Camel: Building a flexible and efficient service-oriented architecture
Feb 19, 2024 pm 04:12 PM
Apache Camel is an Enterprise Service Bus (ESB)-based integration framework that can easily integrate disparate applications, services, and data sources to automate complex business processes. ApacheCamel uses route-based configuration to easily define and manage integration processes. Key features of ApacheCamel include: Flexibility: ApacheCamel can be easily integrated with a variety of applications, services, and data sources. It supports multiple protocols, including HTTP, JMS, SOAP, FTP, etc. Efficiency: ApacheCamel is very efficient, it can handle a large number of messages. It uses an asynchronous messaging mechanism, which improves performance. Expandable
 Discuz Forum Permission Management: Read Permission Setting Guide
Mar 10, 2024 pm 05:33 PM
Discuz Forum Permission Management: Read Permission Setting Guide
Mar 10, 2024 pm 05:33 PM
Discuz forum permission management: Read the permission setting guide In Discuz forum management, permission setting is a crucial part. Among them, the setting of reading permissions is particularly important, as it determines the scope of content that different users can see in the forum. This article will introduce in detail the reading permission settings of the Discuz forum and how to flexibly configure it for different needs. 1. Basic concepts of reading permissions In the Discuz forum, reading permissions mainly include the following concepts that need to be understood: Default reading permissions: Default after new user registration
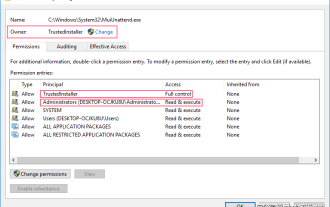 How to obtain trustedinstaller permission 'Recommended steps to obtain TrustedInstaller permission'
Feb 06, 2024 pm 05:48 PM
How to obtain trustedinstaller permission 'Recommended steps to obtain TrustedInstaller permission'
Feb 06, 2024 pm 05:48 PM
This article will take you to understand the essence of TI and further explore how to obtain TI permissions with the help of powershell and NtObjectManager modules to complete any operation you want in the operating system. If you have ever administered a Windows system, you should be familiar with the concept of the trustedInstaller (TI) group. The TI group has important permissions in the operation of system files and registry. For example, you can view the properties of files under the System32 folder. In the security options, the TI group and the file owner have permission to delete and modify files. Even administrators cannot directly modify the security options. Therefore, for the operation of system files and registry, it is necessary to
 Where to set the permissions of shared folders? Tips for setting the permissions of shared folders in Win10 to be read-only and cannot be modified
Feb 29, 2024 pm 03:43 PM
Where to set the permissions of shared folders? Tips for setting the permissions of shared folders in Win10 to be read-only and cannot be modified
Feb 29, 2024 pm 03:43 PM
How to set shared folder read-only permissions in Win10? After the host shares the folder, some users only want others to access, read and view the files, but do not want others to modify the files on the host. This article is a tutorial on how to set the permissions of a shared folder to be read-only and cannot be modified. 1. First, share the folder according to the normal process. On the host side, right-click the folder that needs to be shared, and select: Properties-Sharing-Advanced Sharing-check Share this folder; 2. Then, click the permission option below. By default Everyone account, if there is not one, add an Everyone account; 3. Only check the read permission below, and then click OK; 4. Find the folder properties-security, and add an Ever
 Introduction to how to set everyone permissions on win7 computer
Mar 26, 2024 pm 04:11 PM
Introduction to how to set everyone permissions on win7 computer
Mar 26, 2024 pm 04:11 PM
1. Take e-disk as an example. Open [Computer], and click [eDisk], right-click [Properties]. As shown in the figure: 2. In the [Window] page, switch the interface to the [Security] option, and click the [Edit] option below. As shown in the figure: 3. In the [Permissions] option, click the [Add] option. As shown in the figure: 4. The users and groups window pops up and click the [Advanced] option. As shown in the figure: 5. Click to expand the [Find Now] - [Everyone] options in order. When completed, click OK. As shown in the figure: 6. When you see that the user [everyone] has been added to [Group or User] on the [E Disk Permissions] page, select [everyone] and check the box in front of [Full Control]. After the setting is completed, Just press [OK]
 Use JavaScript functions to implement web page navigation and routing
Nov 04, 2023 am 09:46 AM
Use JavaScript functions to implement web page navigation and routing
Nov 04, 2023 am 09:46 AM
In modern web applications, implementing web page navigation and routing is a very important part. Using JavaScript functions to implement this function can make our web applications more flexible, scalable and user-friendly. This article will introduce how to use JavaScript functions to implement web page navigation and routing, and provide specific code examples. Implementing web page navigation For a web application, web page navigation is the most frequently operated part by users. When a user clicks on the page
