

Cascading operations for drop-down menus
This article mainly introduces the cascade operation of the drop-down menu in detail, and shares the tool class for interactive transmission of data between ajax and the background. Interested friends can refer to
often used in development You will encounter cascading menu operations, such as: selection of countries, cities, towns, etc. When a country is selected, the following menu will list the cities in that country. When a city is selected, the following menu will list the corresponding towns.
There are two ways I understand to solve the cascading operation of this kind of menu:
① Use js to implement it, and put the cascading data used on the page into js Within, when the page is loaded, it is displayed in the corresponding select through js. There are many solutions to this method. The most intuitive one is to put it into a multi-dimensional array. Everyone has different thinking, so I won’t go into details here. Commentary.
② Use ajax to load asynchronously and dynamically, and then display it in the corresponding select. This method is very convenient and is recommended for use in development.
Let’s look at a small example in development:
JSP short page:
1 2 3 4 5 6 7 8 9 10 11 12 13 14 |
|
This page involves two options: device classification and device subcategory. The device classification is the first-level menu, and the device subcategory is the second-level menu. The display content of the device subcategory is determined by the device classification.
Let’s look at the ajax code snippet:
1 2 3 4 5 6 7 8 9 10 11 12 13 14 15 16 17 18 19 20 21 22 23 24 25 26 27 28 29 30 31 32 33 34 35 36 37 38 39 |
|
It is not difficult to see that when the content in the device category selector After the change occurs, the showCodeSubCate function is triggered to request the background to obtain data, and then the requested data is added to the select corresponding to the device subclass. The implementation of the background code is as follows (only the controller methods are posted):
1 2 3 4 5 6 7 8 9 10 11 12 13 14 15 16 17 18 19 20 21 22 |
|
These two methods respectively correspond to the two ajax requests above, which is worth What is introduced is the data returned by the background. The return value type is Result
Ajax tool class for interacting with the background to transmit data
1 2 3 4 5 6 7 8 9 10 11 12 13 14 15 16 17 18 19 20 21 22 23 24 25 26 27 28 29 30 31 32 33 34 35 36 37 38 39 40 41 42 43 44 45 46 47 48 49 50 51 52 |
|
This class provides a very large platform for front-end and back-end interaction Convenience:
The following is the ajax interaction between the front and backend:
The front-end ajax code:
1 2 3 4 5 6 7 8 9 10 11 12 13 |
|
The following is the background java code:
1 2 3 4 5 6 7 8 9 |
|
The above is what I compiled for everyone. I hope it will be helpful to everyone in the future.
Related articles:
AJAX display loading and pop-up layer occlusion page implementation example
Ajax submit Form form The page will still be refreshed. A quick solution to the problem
The above is the detailed content of Cascading operations for drop-down menus. For more information, please follow other related articles on the PHP Chinese website!

Hot AI Tools

Undresser.AI Undress
AI-powered app for creating realistic nude photos

AI Clothes Remover
Online AI tool for removing clothes from photos.

Undress AI Tool
Undress images for free

Clothoff.io
AI clothes remover

Video Face Swap
Swap faces in any video effortlessly with our completely free AI face swap tool!
Hot Article
Hot Tools

Notepad++7.3.1
Easy-to-use and free code editor

SublimeText3 Chinese version
Chinese version, very easy to use

Zend Studio 13.0.1
Powerful PHP integrated development environment

Dreamweaver CS6
Visual web development tools

SublimeText3 Mac version
God-level code editing software (SublimeText3)
Hot Topics


 How to make drop-down menu in WPS table
Mar 21, 2024 pm 01:31 PM
How to make drop-down menu in WPS table
Mar 21, 2024 pm 01:31 PM
How to make the WPS table drop-down menu: After selecting the cell where you want to set the drop-down menu, click "Data", "Validity" in sequence, and then make the corresponding settings in the pop-up dialog box to pull down our menu. As a powerful office software, WPS has the ability to edit documents, statistical data tables, etc., which provides a lot of convenience for many people who need to deal with text, data, etc. In order to skillfully use WPS software to provide us with a lot of convenience, we need to be able to master various very basic operations of WPS software. In this article, the editor will share with you how to use WPS software. Perform drop-down menu operations in the WPS table that appears. After opening the WPS form, first select the
 PyCharm usage tutorial: guide you in detail to run the operation
Feb 26, 2024 pm 05:51 PM
PyCharm usage tutorial: guide you in detail to run the operation
Feb 26, 2024 pm 05:51 PM
PyCharm is a very popular Python integrated development environment (IDE). It provides a wealth of functions and tools to make Python development more efficient and convenient. This article will introduce you to the basic operation methods of PyCharm and provide specific code examples to help readers quickly get started and become proficient in operating the tool. 1. Download and install PyCharm First, we need to go to the PyCharm official website (https://www.jetbrains.com/pyc
 What is sudo and why is it important?
Feb 21, 2024 pm 07:01 PM
What is sudo and why is it important?
Feb 21, 2024 pm 07:01 PM
sudo (superuser execution) is a key command in Linux and Unix systems that allows ordinary users to run specific commands with root privileges. The function of sudo is mainly reflected in the following aspects: Providing permission control: sudo achieves strict control over system resources and sensitive operations by authorizing users to temporarily obtain superuser permissions. Ordinary users can only obtain temporary privileges through sudo when needed, and do not need to log in as superuser all the time. Improved security: By using sudo, you can avoid using the root account during routine operations. Using the root account for all operations may lead to unexpected system damage, as any mistaken or careless operation will have full permissions. and
 Linux Deploy operation steps and precautions
Mar 14, 2024 pm 03:03 PM
Linux Deploy operation steps and precautions
Mar 14, 2024 pm 03:03 PM
LinuxDeploy operating steps and precautions LinuxDeploy is a powerful tool that can help users quickly deploy various Linux distributions on Android devices, allowing users to experience a complete Linux system on their mobile devices. This article will introduce the operating steps and precautions of LinuxDeploy in detail, and provide specific code examples to help readers better use this tool. Operation steps: Install LinuxDeploy: First, install
 What to do if you forget to press F2 for win10 boot password
Feb 28, 2024 am 08:31 AM
What to do if you forget to press F2 for win10 boot password
Feb 28, 2024 am 08:31 AM
Presumably many users have several unused computers at home, and they have completely forgotten the power-on password because they have not been used for a long time, so they would like to know what to do if they forget the password? Then let’s take a look together. What to do if you forget to press F2 for win10 boot password? 1. Press the power button of the computer, and then press F2 when turning on the computer (different computer brands have different buttons to enter the BIOS). 2. In the bios interface, find the security option (the location may be different for different brands of computers). Usually in the settings menu at the top. 3. Then find the SupervisorPassword option and click it. 4. At this time, the user can see his password, and at the same time find the Enabled next to it and switch it to Dis.
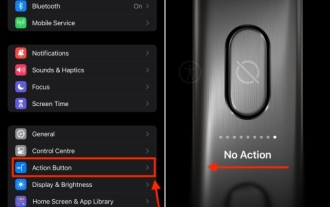 How to disable the action button on iPhone 15 Pro and 15 Pro Max
Nov 07, 2023 am 11:17 AM
How to disable the action button on iPhone 15 Pro and 15 Pro Max
Nov 07, 2023 am 11:17 AM
Apple brought some Pro-exclusive hardware features to iPhone 15 Pro and 15 Pro Max, which attracted everyone’s attention. We're talking titanium frames, sleek designs, the new A17 Pro chipset, an exciting 5x telephoto lens, and more. Of all the bells and whistles added to the iPhone 15 Pro models, the action button remains a prominent and prominent feature. Needless to say, it is a useful addition to launching actions on your iPhone. That said, you could accidentally hold down the Action button and trigger the feature inadvertently. Frankly, it's annoying. To avoid this, you should disable the action button on iPhone 15 Pro and 15 Pro Max. let
 Huawei Mate60 Pro screenshot operation steps sharing
Mar 23, 2024 am 11:15 AM
Huawei Mate60 Pro screenshot operation steps sharing
Mar 23, 2024 am 11:15 AM
With the popularity of smartphones, the screenshot function has become one of the essential skills for daily use of mobile phones. As one of Huawei's flagship mobile phones, Huawei Mate60Pro's screenshot function has naturally attracted much attention from users. Today, we will share the screenshot operation steps of Huawei Mate60Pro mobile phone, so that everyone can take screenshots more conveniently. First of all, Huawei Mate60Pro mobile phone provides a variety of screenshot methods, and you can choose the method that suits you according to your personal habits. The following is a detailed introduction to several commonly used interceptions:
 CSS web page scroll monitoring: monitor web page scroll events and perform corresponding operations
Nov 18, 2023 am 10:35 AM
CSS web page scroll monitoring: monitor web page scroll events and perform corresponding operations
Nov 18, 2023 am 10:35 AM
CSS web page scroll monitoring: monitor web page scroll events and perform corresponding operations. With the continuous development of front-end technology, the effects and interactions of web pages are becoming more and more rich and diverse. Among them, scroll monitoring is a common technology that can perform some special effects or operations based on the scroll position when the user scrolls the web page. Generally speaking, scroll monitoring can be implemented through JavaScript. However, in some cases, we can also achieve the effect of scroll monitoring through pure CSS. This article will introduce how to implement scrolling of web pages through CSS
