
 Web Front-end
JS Tutorial
SSH online mall uses ajax to complete user name asynchronous verification
Web Front-end
JS Tutorial
SSH online mall uses ajax to complete user name asynchronous verification
SSH online mall uses ajax to complete user name asynchronous verification
This article mainly introduces the relevant information on using ajax to complete the asynchronous verification of user names in the SSH online mall. Friends who need it can refer to it
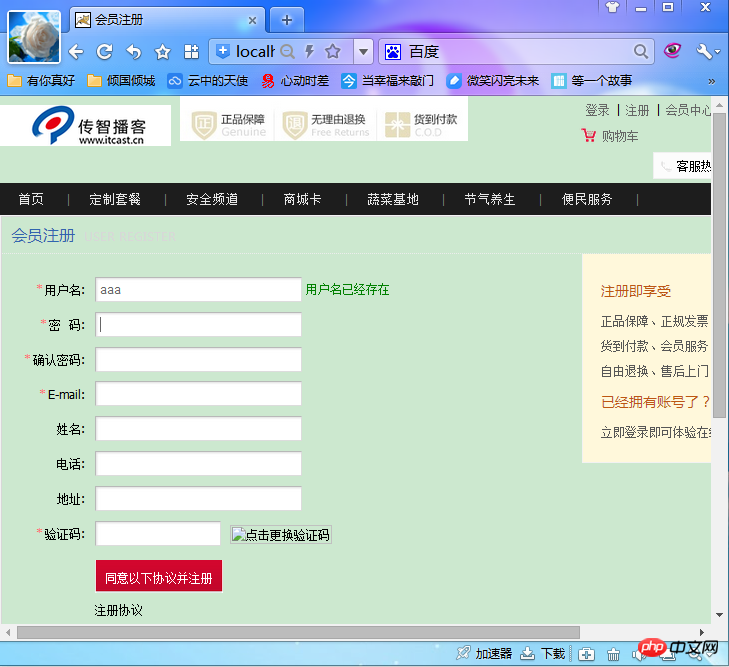
When friends are surfing the Internet, they need to download or watch it For some video materials, or when browsing Taobao, we all need to register a user. When we fill in various information and click OK, it prompts that the user name already exists. The editor wonders why when we fill in the When entering the username, she will automatically prompt that the username already exists. We don’t need to waste so much emotion until the prompt is prompted after filling in so much information. In the editor’s recent project, we encountered this problem. We can Use ajax to check whether the username exists. In today's blog, the editor will briefly summarize how to use ajax to complete the verification. Please give me your advice `(*∩_∩*)′!
First, ajax completes the asynchronous verification of the user name, so how should we do it? Here, we need to be triggered by an event. That is to say, when we enter the user name and the mouse moves away, this event is called onblur, which means losing focus. On the contrary, when the mouse is placed inside and gains focus, we call it onblur. For onfocus, what should we do if we lose focus? First find the registration page, find the code for the user name on the registration page, add onblur=checkUsername() at the end to verify the user name, then we write the method checkUsername, the specific code is as follows:
<span style="font-size:18px;">function checkUsername() {
    //获取文本框值:
    var username = document.getElementById("username").value;
    //1、创建异步交互对象
    var xhr = createXmlHttp();
    //2、设置监听
    xhr.onreadystatechange = function() {
      if (xhr.readyState == 4) {
        if (xhr.status == 200) {
          document.getElementById("span1").innerHTML = xhr.responseText;
        }
      }
    }
    //3、打开连接
    xhr.open("GET",
        "${pageContext.request.contextPath}/user_findByName.action?time="
            + new Date().getTime() + "&username=", true)
    //4、发送
    xhr.send(null);
  }
  function createXmlHttp() {
    var xmlHttp;
    try {
      xmlHttp = new XMLHttpRequest();
    }
    catch (e) {
      try {
        xmlHttp = new ActiveXObject("Msxml2.XMLHTTP");
      }
       catch (e) {
        try {
          xmlHttp = new ActiveXObject("Microsoft.XMLHTTP");
        } catch (e) {}
      }
    }
    return xmlHttp;
  }
</span>Next, we create the entity Vo, implement model driving, and automatically implement encapsulation. The specific code is as follows:
<span style="font-size:18px;">package cn.itcast.shop.user.vo;
public class User {
  private Integer uid;
  private String username;
  private String password;
  private String name;
  private String email;
  private String phone;
  private String addr;
  private Integer state;
  private String code;
  public Integer getUid() {
    return uid;
  }
  public void setUid(Integer uid) {
    this.uid = uid;
  }
  public String getUsername() {
    return username;
  }
  public void setUsername(String username) {
    this.username = username;
  }
  public String getPassword() {
    return password;
  }
  public void setPassword(String password) {
    this.password = password;
  }
  public String getName() {
    return name;
  }
  public void setName(String name) {
    this.name = name;
  }
  public String getEmail() {
    return email;
  }
  public void setEmail(String email) {
    this.email = email;
  }
  public String getPhone() {
    return phone;
  }
  public void setPhone(String phone) {
    this.phone = phone;
  }
  public String getAddr() {
    return addr;
  }
  public void setAddr(String addr) {
    this.addr = addr;
  }
  public Integer getState() {
    return state;
  }
  public void setState(Integer state) {
    this.state = state;
  }
  public String getCode() {
    return code;
  }
  public void setCode(String code) {
    this.code = code;
  }
}</span>
We need to receive parameters and implement model driver. ActionSupport can directly implement modelDriven. Then we will write our ajax code, which needs to be submitted to the action. Let's write the code in UserAction. The specific code is as follows :
<span style="font-size:18px;">package cn.itcast.shop.user.action;
import java.io.IOException;
import javax.servlet.http.HttpServletResponse;
import org.apache.struts2.ServletActionContext;
import cn.itcast.shop.user.service.UserService;
import cn.itcast.shop.user.vo.User;
import com.opensymphony.xwork2.ActionSupport;
import com.opensymphony.xwork2.ModelDriven;
/**
* 用户模块Action的类
* @author Flower
*
*/
public class UserAction extends ActionSupport implements ModelDriven<User> {
//模型驱动使用的对象
private User user = new User();
public User getModel(){
return user;
}
//注入UserService
private UserService userService;
public void setUserService(UserService userService){
this.userService=userService;
}
/**
* 跳转到注册页面的执行方法
*/
public String registPage(){
return "registPage";
}
/**
* ajax进行异步校验用户名的执行方法
* @throws IOException
*/
public String findByName() throws IOException{
//调用Service进行查询
User existUser = userService.findByUsername(user.getUsername());
//获得response对象,向页面输出
HttpServletResponse response = ServletActionContext.getResponse();
response.setContentType("text/html;charset=UTF-8");
//判断
if(existUser != null){
//查询到该用户:用户名已经存在
response.getWriter().println("<font color='red'>用户名已经存在</font>");
}else{
//没查询到该用户:用户名可以使用
response.getWriter().println("<font color='green'>用户名已经存在</font>");
}
return NONE;
}
/**
* 用戶注册的方法:
*/
public String regist(){
return NONE;
}
}
</span>Next, what we need to do is to configure the service and Dao into the applicationContext. The code is as follows:
<span style="font-size:18px;"><!-- Service的配置 =========================== -->
  <bean id="userService" class="cn.itcast.shop.user.service.UserService">
    <property name="userDao" ref="userDao"/>
  </bean>
  <!-- UserDao的配置 =========================== -->
   <bean id="userDao" class="cn.itcast.shop.user.dao.UserDao">
    <property name="sessionFactory" ref="sessionFactory"></property>
</bean> </span>After configuring it, we need to complete the query in UserDao. The specific code is as follows:
<span style="font-size:18px;">package cn.itcast.shop.user.dao;
import org.springframework.orm.hibernate3.support.HibernateDaoSupport;
import java.util.List;
import cn.itcast.shop.user.vo.User;
/**
 * 用户模块持久层代码
 * @author Flower
 *
 */
public class UserDao extends HibernateDaoSupport {
  //按名次查询是否有该用户
  public User findByUsername (String username){
    String hql ="from User where username= ?";
    List <User> list=this.getHibernateTemplate().find(hql,username);
    if(list !=null && list.size() > 0){
      return list.get(0);
    }
     return null;
    }
}
</span>Then, We need to complete the call to Dao in the service. The specific code is as follows:
<span style="font-size:18px;">package cn.itcast.shop.user.service;
import org.springframework.transaction.annotation.Transactional;
import cn.itcast.shop.user.dao.UserDao;
import cn.itcast.shop.user.vo.User;
/**
 * 用户模块业务层代码
 * @author Flower
 *
 */
@Transactional
public class UserService {
  //注入UserDao
  private UserDao userDao;
  public void setUserDao(UserDao userDao){
    this.userDao =userDao;
  }
  //按用户名查询用户的方法
  public User findByUsername (String username){
    return userDao.findByUsername(username);
  }
}
</span>Then we need to call it in UserAction. The specific code is as follows :
<span style="font-size:18px;">package cn.itcast.shop.user.action;
import java.io.IOException;
import javax.servlet.http.HttpServletResponse;
import org.apache.struts2.ServletActionContext;
import cn.itcast.shop.user.service.UserService;
import cn.itcast.shop.user.vo.User;
import com.opensymphony.xwork2.ActionSupport;
import com.opensymphony.xwork2.ModelDriven;
/**
* 用户模块Action的类
* @author Flower
*
*/
public class UserAction extends ActionSupport implements ModelDriven<User> {
//模型驱动使用的对象
private User user = new User();
public User getModel(){
return user;
}
//注入UserService
private UserService userService;
public void setUserService(UserService userService){
this.userService=userService;
}
/**
* 跳转到注册页面的执行方法
*/
public String registPage(){
return "registPage";
}
/**
* ajax进行异步校验用户名的执行方法
* @throws IOException
*/
public String findByName() throws IOException{
//调用Service进行查询
User existUser = userService.findByUsername(user.getUsername());
//获得response对象,向页面输出
HttpServletResponse response = ServletActionContext.getResponse();
response.setContentType("text/html;charset=UTF-8");
//判断
if(existUser != null){
//查询到该用户:用户名已经存在
response.getWriter().println("<font color='red'>用户名已经存在</font>");
}else{
//没查询到该用户:用户名可以使用
response.getWriter().println("<font color='green'>用户名已经存在</font>");
}
return NONE;
}
/**
* 用戶注册的方法:
*/
public String regist(){
return NONE;
}
}
</span>Finally, we write the contents of the mapping file. The specific code is as follows:
<span style="font-size:18px;"><?xml version="1.0" encoding="UTF-8"?>
<!DOCTYPE hibernate-mapping PUBLIC
  "-//Hibernate/Hibernate Mapping DTD 3.0//EN"
  "http://www.hibernate.org/dtd/hibernate-mapping-3.0.dtd">
  <hibernate-mapping>
    <class name="cn.itcast.shop.user.vo.User" table="user">
      <id name="uid">
        <generator class="native"/>
      </id>
      <property name="username"/>
      <property name="password"/>
      <property name="name"/>
      <property name="email"/>
      <property name="phone"/>
      <property name="addr"/>
      <property name="state"/>
      <property name="code"/>
    </class>
  </hibernate-mapping></span>
Don’t forget to accompany her to the applicationContext. The specific code is as follows:
<span style="font-size:18px;"><!-- 配置Hibernate的其他的属性 -->
    <property name="hibernateProperties">
      <props>
        <prop key="hibernate.dialect">org.hibernate.dialect.MySQLDialect</prop>
        <prop key="hibernate.show_sql">true</prop>
        <prop key="hibernate.format_sql">true</prop>
        <prop key="hibernate.connection.autocommit">false</prop>
        <prop key="hibernate.hbm2ddl.auto">update</prop>
      </props>
    </property>
    <!-- 配置Hibernate的映射文件 -->
    <property name="mappingResources">
      <list>
        <value>cn/itcast/shop/user/vo/User.hbm.xml</value>
      </list>
    </property>
</span>The code ends here, here is the code Let me show you the renderings:
The above is what I compiled for you. I hope it will be helpful to you in the future.
Related articles:
Analysis on the order of returned data in ajax requests
Solution to prevent repeated sending of Ajax requests
How to solve the problem that error always pops up when ajax returns verification
##
The above is the detailed content of SSH online mall uses ajax to complete user name asynchronous verification. For more information, please follow other related articles on the PHP Chinese website!

Hot AI Tools

Undresser.AI Undress
AI-powered app for creating realistic nude photos

AI Clothes Remover
Online AI tool for removing clothes from photos.

Undress AI Tool
Undress images for free

Clothoff.io
AI clothes remover

AI Hentai Generator
Generate AI Hentai for free.

Hot Article
Hot Tools

Notepad++7.3.1
Easy-to-use and free code editor

SublimeText3 Chinese version
Chinese version, very easy to use

Zend Studio 13.0.1
Powerful PHP integrated development environment

Dreamweaver CS6
Visual web development tools

SublimeText3 Mac version
God-level code editing software (SublimeText3)
Hot Topics
 1386
1386
 52
52

 How to solve the 403 error encountered by jQuery AJAX request
Feb 20, 2024 am 10:07 AM
How to solve the 403 error encountered by jQuery AJAX request
Feb 20, 2024 am 10:07 AM
Title: Methods and code examples to resolve 403 errors in jQuery AJAX requests. The 403 error refers to a request that the server prohibits access to a resource. This error usually occurs because the request lacks permissions or is rejected by the server. When making jQueryAJAX requests, you sometimes encounter this situation. This article will introduce how to solve this problem and provide code examples. Solution: Check permissions: First ensure that the requested URL address is correct and verify that you have sufficient permissions to access the resource.
 How to solve jQuery AJAX request 403 error
Feb 19, 2024 pm 05:55 PM
How to solve jQuery AJAX request 403 error
Feb 19, 2024 pm 05:55 PM
jQuery is a popular JavaScript library used to simplify client-side development. AJAX is a technology that sends asynchronous requests and interacts with the server without reloading the entire web page. However, when using jQuery to make AJAX requests, you sometimes encounter 403 errors. 403 errors are usually server-denied access errors, possibly due to security policy or permission issues. In this article, we will discuss how to resolve jQueryAJAX request encountering 403 error
 PHP and Ajax: Building an autocomplete suggestion engine
Jun 02, 2024 pm 08:39 PM
PHP and Ajax: Building an autocomplete suggestion engine
Jun 02, 2024 pm 08:39 PM
Build an autocomplete suggestion engine using PHP and Ajax: Server-side script: handles Ajax requests and returns suggestions (autocomplete.php). Client script: Send Ajax request and display suggestions (autocomplete.js). Practical case: Include script in HTML page and specify search-input element identifier.
 How to solve the problem of jQuery AJAX error 403?
Feb 23, 2024 pm 04:27 PM
How to solve the problem of jQuery AJAX error 403?
Feb 23, 2024 pm 04:27 PM
How to solve the problem of jQueryAJAX error 403? When developing web applications, jQuery is often used to send asynchronous requests. However, sometimes you may encounter error code 403 when using jQueryAJAX, indicating that access is forbidden by the server. This is usually caused by server-side security settings, but there are ways to work around it. This article will introduce how to solve the problem of jQueryAJAX error 403 and provide specific code examples. 1. to make
 How to get variables from PHP method using Ajax?
Mar 09, 2024 pm 05:36 PM
How to get variables from PHP method using Ajax?
Mar 09, 2024 pm 05:36 PM
Using Ajax to obtain variables from PHP methods is a common scenario in web development. Through Ajax, the page can be dynamically obtained without refreshing the data. In this article, we will introduce how to use Ajax to get variables from PHP methods, and provide specific code examples. First, we need to write a PHP file to handle the Ajax request and return the required variables. Here is sample code for a simple PHP file getData.php:
 PHP vs. Ajax: Solutions for creating dynamically loaded content
Jun 06, 2024 pm 01:12 PM
PHP vs. Ajax: Solutions for creating dynamically loaded content
Jun 06, 2024 pm 01:12 PM
Ajax (Asynchronous JavaScript and XML) allows adding dynamic content without reloading the page. Using PHP and Ajax, you can dynamically load a product list: HTML creates a page with a container element, and the Ajax request adds the data to that element after loading it. JavaScript uses Ajax to send a request to the server through XMLHttpRequest to obtain product data in JSON format from the server. PHP uses MySQL to query product data from the database and encode it into JSON format. JavaScript parses the JSON data and displays it in the page container. Clicking the button triggers an Ajax request to load the product list.
 PHP and Ajax: Ways to Improve Ajax Security
Jun 01, 2024 am 09:34 AM
PHP and Ajax: Ways to Improve Ajax Security
Jun 01, 2024 am 09:34 AM
In order to improve Ajax security, there are several methods: CSRF protection: generate a token and send it to the client, add it to the server side in the request for verification. XSS protection: Use htmlspecialchars() to filter input to prevent malicious script injection. Content-Security-Policy header: Restrict the loading of malicious resources and specify the sources from which scripts and style sheets are allowed to be loaded. Validate server-side input: Validate input received from Ajax requests to prevent attackers from exploiting input vulnerabilities. Use secure Ajax libraries: Take advantage of automatic CSRF protection modules provided by libraries such as jQuery.
 What are the ajax versions?
Nov 22, 2023 pm 02:00 PM
What are the ajax versions?
Nov 22, 2023 pm 02:00 PM
Ajax is not a specific version, but a technology that uses a collection of technologies to asynchronously load and update web page content. Ajax does not have a specific version number, but there are some variations or extensions of ajax: 1. jQuery AJAX; 2. Axios; 3. Fetch API; 4. JSONP; 5. XMLHttpRequest Level 2; 6. WebSockets; 7. Server-Sent Events; 8, GraphQL, etc.
