

Example of using Vue.js and Flask to build a single-page App
This article mainly introduces an example of using Vue.js and Flask to build a single-page App. I think it is quite good. I will share it with you now and give it as a reference. Let’s take a look together
In this tutorial, we will explain how to connect a vue.js single-page application with the Flask backend.
Generally speaking, if you just want to use the vue.js library through Flask templates, there is no problem. However, there is actually an obvious problem that Jinja (template engine) also uses double braces for rendering like Vue.js, but it is only a passable solution.
I would like a different example. If I need to build a single-page application (the application is composed of a single page, vue-router in HTML5's History-mode and other more useful features) using vue.js, provided by Flask Web Serve? Simply put it should be like this, like this:
Flask serves index.html which contains my vue.js App. For front-end development I use Webpack, which provides all the cool features.
Flask has an API side that I can access from my SPA.
I have access to the API side, even when I'm running Node.js for front-end development.
Sounds interesting? So let's do it like this.
ClientI will use Vue CLI to generate a basic vue.js App. If you haven't installed it yet, run:
$ npm install -g vue-cli
The client and backend code will be split into different folders. Initialize the front-end part to run the trace:
$ mkdir flaskvue
$ cd flaskvue
$ vue init webpack frontend
Through the installation wizard. My setup is:
Vue only builds at runtime.
Install Vue-router.
Use ESLint to check the code.
Select an ESLint standard preset.
Do not try out Karma Mocha for unit testing.
Do not use Nightwatch to build end-to-end tests.
ok, next:
$ cd frontend
$ npm install
# after installation
$ npm run dev
Now you can start installing the
vue.jsapplication. Let's start by adding some pages. Add
home.vueand about.vue to the frontend/src/components folder. They are very simple, like this:
// Home.vue
<template>
<p>
<p>Home page</p>
</p>
</template>
and
// About.vue
<template>
<p>
<p>About</p>
</p>
</template>
We will use them Correctly identifies our current location (according to the address bar). Now we need to change the
frontend/src/router/index.jsfile to use our new component:
import Vue from 'vue'
import Router from 'vue-router'
const routerOptions = [
{ path: '/', component: 'Home' },
{ path: '/about', component: 'About' }
]

const routes = routerOptions.map(route => {
return {
...route,
component: () => import(`@/components/${route.component}.vue`)
}

})

Vue.use(Router)
export default new Router({
routes,
mode: 'history'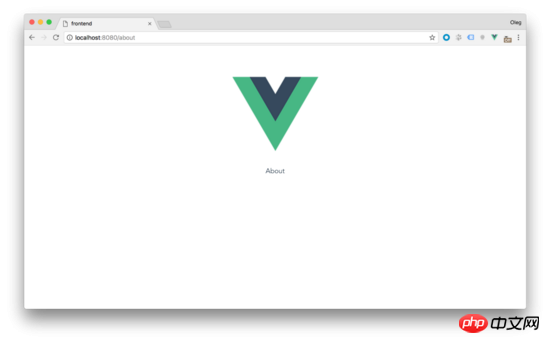
})If you try Enter
localhost:8080and localhost:8080/about and you should see the corresponding pages.
 We are almost ready to build a project and are able to create a static resource file bundle. Before that, let's redefine the output directories for them. Find the next settings in
:
index: path.resolve(__dirname, '../dist/index.html'),
assetsRoot: path.resolve(__dirname, '../dist'),
Change them to
index: path.resolve(__dirname, '../../dist/index.html'),
assetsRoot: path.resolve(__dirname, '../../dist'),
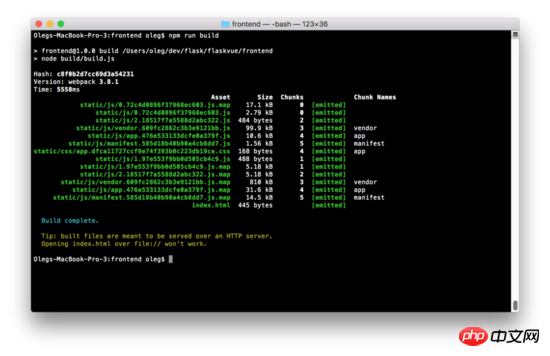
So the HTML, CSS, and JS of the /dist folder will be in the same level directory /frontend. Now you can run
$ npm run buildto create a package.
For the Flask server, I will be using Python version 3.6. Create a new subfolder in
/flaskvueto store the backend code and initialize the virtual environment:
$ mkdir backend
$ cd backend
$ virtualenv -p python3 venv
In order to run in the virtual environment ( MacOS):
$ source venv/bin/activate
This document needs to be activated in Windows (http://pymote.readthedocs.io/en/latest/install/windows_virtualenv.html) .
Installation in a virtual environment:
(venv) pip install Flask
Now let’s write the code for the Flask server. Create the root directory file run.py:
(venv) cd ..
(venv) touch run.py
Add the next code to this file:
from flask import Flask, render_template
app = Flask(__name__,
static_folder = "./dist/static",
template_folder = "./dist")

@app.route('/')
def index():
return render_template("index.html")This code is slightly different from Flask's **"Hello World"** code. The main difference is that we specify the location to store static files and templates in the folder
/distto distinguish them from our front-end folder. Run the Flask server in the root folder:
(venv) FLASK_APP=run.py FLASK_DEBUG=1 flask run
This will start the web server on localhost:
localhost:5000 FLASK_APP Server-side startup file, flask_debug = 1 will run in debug mode. If everything is correct, you will see the familiar home page and you have completed setting up Vue. 同时,如果您尝试输入/about页面,您将面临一个错误。Flask抛出一个错误,说找不到请求的URL。事实上,因为我们使用了HTML5的History-Mode在Vue-router需要配置Web服务器的重定向,将所有路径指向index.html。用Flask做起来很容易。将现有路由修改为以下: 现在输入网址localhost:5000/about 将重新定向到index.html和vue-router将处理路由。 添加404页 因为我们有一个包罗万象的路径,我们的Web服务器在现在已经很难赶上404错误,Flask将所有请求指向index.html(甚至不存在的页面)。所以我们需要处理未知的路径在vue.js应用。当然,所有的工作都可以在我们的路由文件中完成。 在frontend/src/router/index.js添加下一行: 这里的路径'*'是一个通配符, Vue-router 就知道除了我们上面定义的所有其他任何路径。现在我们需要更多的创造 NotFound.vue 文件在**/components**目录。试一下很简单: 现在运行的前端服务器再次 npm run dev ,尝试进入一些毫无意义的地址例如: localhost:8080/gljhewrgoh 。您应该看到我们的“未找到”消息。 添加API端 我们的 vue.js/flask 教程的最后一个例子将是服务器端API创建和调度客户端。我们将创建一个简单的Api,它将从1到100返回一个随机数。 打开run.py并添加: 首先我导入random库和jsonify函数从Flask库中。然后我添加了新的路由 /api/random 来返回像这样的JSON: 你可以通过本地浏览测试这个路径: localhost:5000/api/random。 此时服务器端工作已经完成。是时候在客户端显示了。我们来改变home.vue组件显示随机数: 在这个阶段,我们只是模仿客户端的随机数生成过程。所以,这个组件就是这样工作的: 在初始化变量 randomNumber 等于0。 在methods部分我们通过 getRandomInt(min, max) 功能来从指定的范围内返回一个随机数, getrandom 函数将生成随机数并将赋值给 randomNumber 组件方法 getrandom 创建后将会被调用来初始化随机数 在按钮的单击事件我们将用 getrandom 方法得到新的随机数 现在在主页上,你应该看到前端显示我们产生的随机数。让我们把它连接到后端。 为此目的,我将用 axios 库。它允许我们用响应HTTP请求并用 Json 返回 JavaScript Promise 。我们安装下它: 打开 home.vue 再在
AI-powered app for creating realistic nude photos Online AI tool for removing clothes from photos. Undress images for free AI clothes remover Generate AI Hentai for free. Easy-to-use and free code editor Chinese version, very easy to use Powerful PHP integrated development environment Visual web development tools God-level code editing software (SublimeText3)@app.route('/', defaults={'path': ''})
@app.route('/<path:path>')
def catch_all(path):
return render_template("index.html")const routerOptions = [
{ path: '/', component: 'Home' },
{ path: '/about', component: 'About' },
{ path: '*', component: 'NotFound' }
]// NotFound.vue
<template>
<p>
<p>404 - Not Found</p>
</p>
</template>
from flask import Flask, render_template, jsonify
from random import *
app = Flask(__name__,
static_folder = "./dist/static",
template_folder = "./dist")
@app.route('/api/random')
def random_number():
response = {
'randomNumber': randint(1, 100)
}
return jsonify(response)
@app.route('/', defaults={'path': ''})
@app.route('/<path:path>')
def catch_all(path):
return render_template("index.html"){
"randomNumber": 36
}<template>
<p>
<p>Home page</p>
<p>Random number from backend: {{ randomNumber }}</p>
<button @click="getRandom">New random number</button>
</p>
</template>
<script>
export default {
data () {
return {
randomNumber: 0
}
},
methods: {
getRandomInt (min, max) {
min = Math.ceil(min)
max = Math.floor(max)
return Math.floor(Math.random() * (max - min + 1)) + min
},
getRandom () {
this.randomNumber = this.getRandomInt(1, 100)
}
},
created () {
this.getRandom()
}
}
</script>(venv) cd frontend
(venv) npm install --save axios

Hot AI Tools

Undresser.AI Undress

AI Clothes Remover

Undress AI Tool

Clothoff.io

AI Hentai Generator

Hot Article
Hot Tools

Notepad++7.3.1

SublimeText3 Chinese version

Zend Studio 13.0.1

Dreamweaver CS6

SublimeText3 Mac version
Hot Topics
 1379
1379
 52
52

 Django vs. Flask: A comparative analysis of Python web frameworks
Jan 19, 2024 am 08:36 AM
Django vs. Flask: A comparative analysis of Python web frameworks
Jan 19, 2024 am 08:36 AM
Django and Flask are both leaders in Python Web frameworks, and they both have their own advantages and applicable scenarios. This article will conduct a comparative analysis of these two frameworks and provide specific code examples. Development Introduction Django is a full-featured Web framework, its main purpose is to quickly develop complex Web applications. Django provides many built-in functions, such as ORM (Object Relational Mapping), forms, authentication, management backend, etc. These features allow Django to handle large
 Start from scratch and guide you step by step to install Flask and quickly establish a personal blog
Feb 19, 2024 pm 04:01 PM
Start from scratch and guide you step by step to install Flask and quickly establish a personal blog
Feb 19, 2024 pm 04:01 PM
Starting from scratch, I will teach you step by step how to install Flask and quickly build a personal blog. As a person who likes writing, it is very important to have a personal blog. As a lightweight Python Web framework, Flask can help us quickly build a simple and fully functional personal blog. In this article, I will start from scratch and teach you step by step how to install Flask and quickly build a personal blog. Step 1: Install Python and pip Before starting, we need to install Python and pi first
 Guide to installing the Flask framework: Detailed steps to help you install Flask correctly
Feb 18, 2024 pm 10:51 PM
Guide to installing the Flask framework: Detailed steps to help you install Flask correctly
Feb 18, 2024 pm 10:51 PM
Flask framework installation tutorial: Teach you step by step how to correctly install the Flask framework. Specific code examples are required. Introduction: Flask is a simple and flexible Python Web development framework. It's easy to learn, easy to use, and packed with powerful features. This article will lead you step by step to correctly install the Flask framework and provide detailed code examples for reference. Step 1: Install Python Before installing the Flask framework, you first need to make sure that Python is installed on your computer. You can start from P
 WebSocket and JavaScript: key technologies for implementing real-time monitoring systems
Dec 17, 2023 pm 05:30 PM
WebSocket and JavaScript: key technologies for implementing real-time monitoring systems
Dec 17, 2023 pm 05:30 PM
WebSocket and JavaScript: Key technologies for realizing real-time monitoring systems Introduction: With the rapid development of Internet technology, real-time monitoring systems have been widely used in various fields. One of the key technologies to achieve real-time monitoring is the combination of WebSocket and JavaScript. This article will introduce the application of WebSocket and JavaScript in real-time monitoring systems, give code examples, and explain their implementation principles in detail. 1. WebSocket technology
 Comparing the performance of Gunicorn and uWSGI for Flask application deployment
Jan 17, 2024 am 08:52 AM
Comparing the performance of Gunicorn and uWSGI for Flask application deployment
Jan 17, 2024 am 08:52 AM
Flask application deployment: Comparison of Gunicorn vs suWSGI Introduction: Flask, as a lightweight Python Web framework, is loved by many developers. When deploying a Flask application to a production environment, choosing the appropriate Server Gateway Interface (SGI) is a crucial decision. Gunicorn and uWSGI are two common SGI servers. This article will describe them in detail.
 Flask installation and configuration tutorial: a tool to easily build Python web applications
Feb 20, 2024 pm 11:12 PM
Flask installation and configuration tutorial: a tool to easily build Python web applications
Feb 20, 2024 pm 11:12 PM
Flask installation and configuration tutorial: A tool to easily build Python Web applications, specific code examples are required. Introduction: With the increasing popularity of Python, Web development has become one of the necessary skills for Python programmers. To carry out web development in Python, we need to choose a suitable web framework. Among the many Python Web frameworks, Flask is a simple, easy-to-use and flexible framework that is favored by developers. This article will introduce the installation of Flask framework,
 Gunicorn Deployment Guide for Flask Applications
Jan 17, 2024 am 08:13 AM
Gunicorn Deployment Guide for Flask Applications
Jan 17, 2024 am 08:13 AM
How to deploy Flask application using Gunicorn? Flask is a lightweight Python Web framework that is widely used to develop various types of Web applications. Gunicorn (GreenUnicorn) is a Python-based HTTP server used to run WSGI (WebServerGatewayInterface) applications. This article will introduce how to use Gunicorn to deploy Flask applications, with
 JavaScript and WebSocket: Building an efficient real-time weather forecasting system
Dec 17, 2023 pm 05:13 PM
JavaScript and WebSocket: Building an efficient real-time weather forecasting system
Dec 17, 2023 pm 05:13 PM
JavaScript and WebSocket: Building an efficient real-time weather forecast system Introduction: Today, the accuracy of weather forecasts is of great significance to daily life and decision-making. As technology develops, we can provide more accurate and reliable weather forecasts by obtaining weather data in real time. In this article, we will learn how to use JavaScript and WebSocket technology to build an efficient real-time weather forecast system. This article will demonstrate the implementation process through specific code examples. We
