How to use Vue to integrate AdminLTE template
This time I will show you how to use Vue to integrate the AdminLTE template, and what are the precautions for using Vue to integrate the AdminLTE template. The following is a practical case, let's take a look.
The login verification and jump issues were solved last time, but there was a bug. In Vue's main.js, Vue-router's routing hook is used to determine whether protected resources can be accessed. The problem lies here. Fix the last bug first./*
全局路由钩子
访问资源时需要验证localStorage中是否存在token
以及token是否过期
验证成功可以继续跳转
失败返回登录页重新登录
*/
router.beforeEach((to, from, next) => {
if(localStorage.token && new Date().getTime() < localStorage.tokenExpired){
next()
}
else{
next('/login')
}
})/*
全局路由钩子
访问资源时需要验证localStorage中是否存在token
以及token是否过期
验证成功可以继续跳转
失败返回登录页重新登录
*/
router.beforeEach((to, from, next) => {
if(to.path == '/login'){
next()
}
if(localStorage.token && new Date().getTime() < localStorage.tokenExpired){
next()
}
else{
next('/login')
}
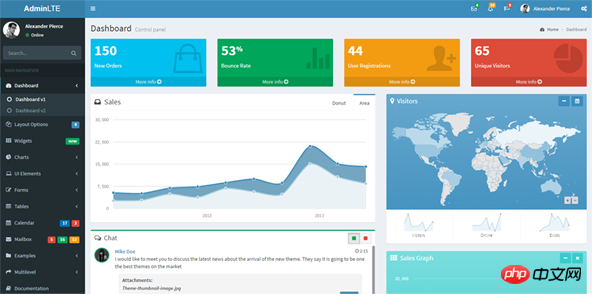
})
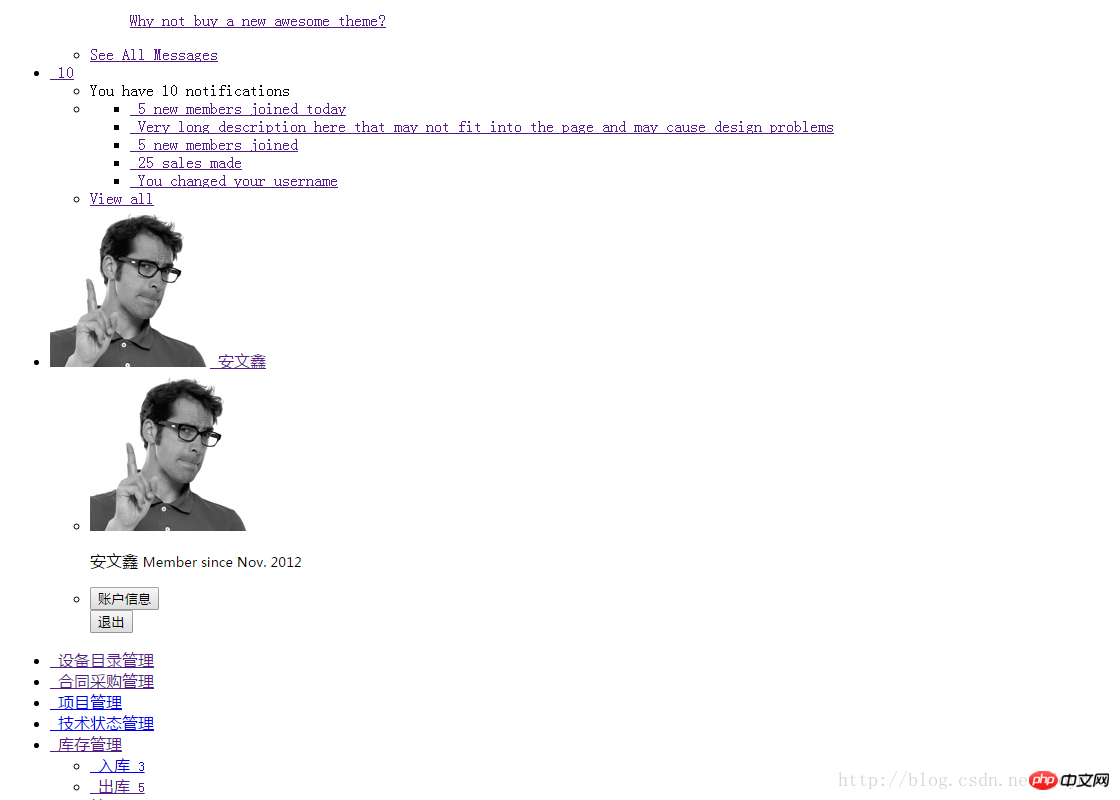
import Vue from 'vue'
import VueRouter from 'vue-router'
import VueResource from 'vue-resource'
import store from './store/store'
import 'bootstrap/dist/css/bootstrap.css'
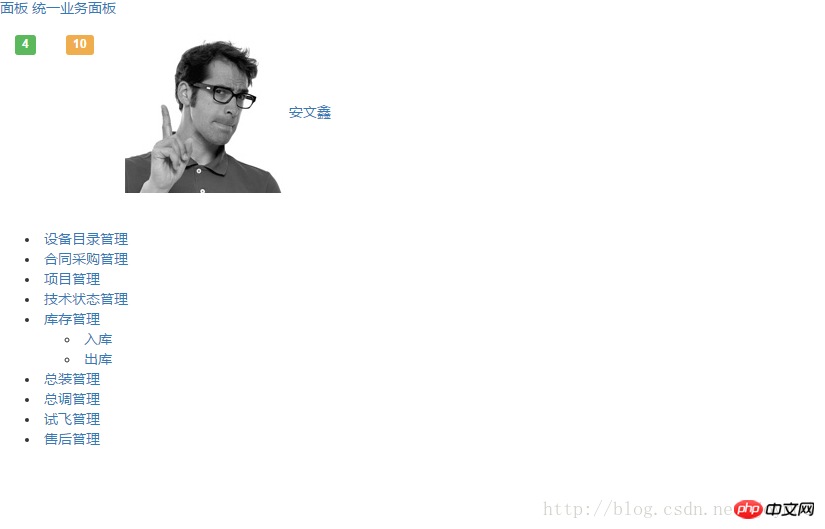
import Vue from 'vue'
import VueRouter from 'vue-router'
import VueResource from 'vue-resource'
import store from './store/store'
import 'bootstrap/dist/css/bootstrap.css'
//AdminLTE
import './assets/css/skins/_all-skins.min.css'
import './assets/css/AdminLTE.min.css'
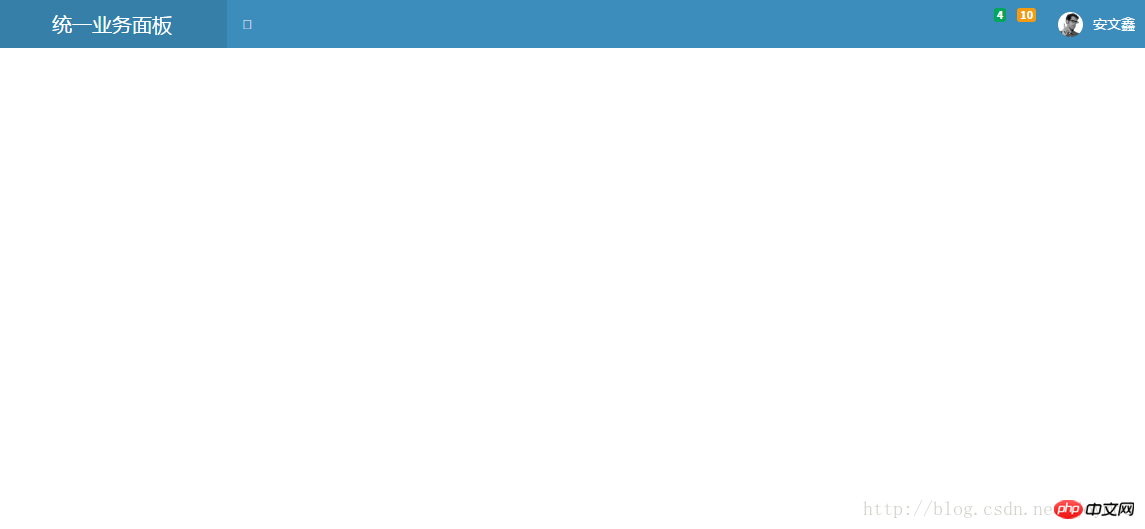

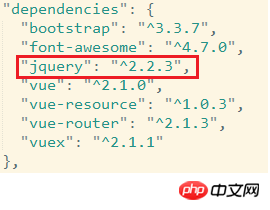
configuration file. The file is located in the build folder of the project, and the file name is webpack.base.conf.js. Two new configurations need to be added to this file.
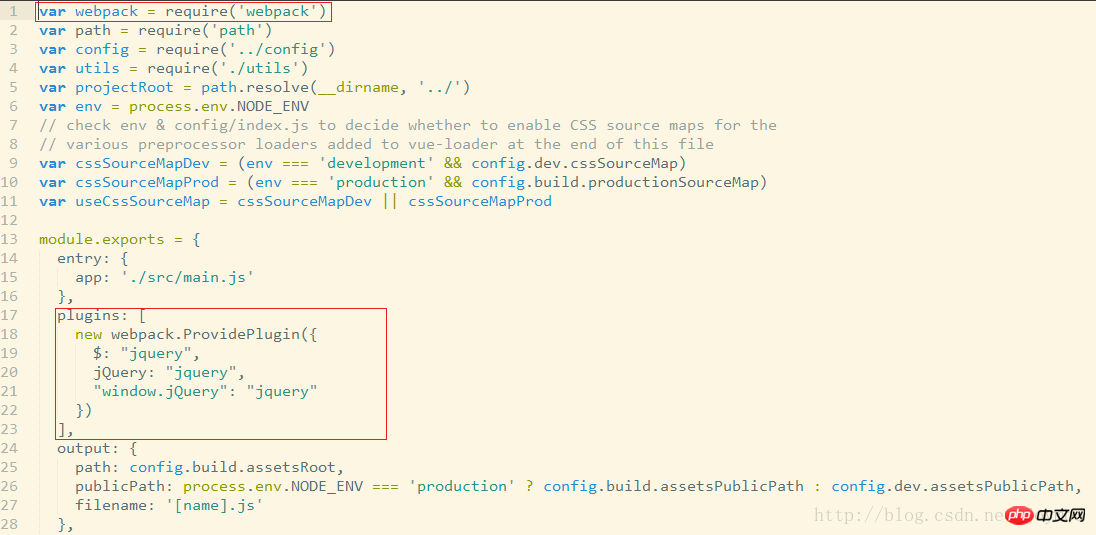
import Vue from 'vue'
import VueRouter from 'vue-router'
import VueResource from 'vue-resource'
import store from './store/store'
//bootstrap
import 'bootstrap/dist/css/bootstrap.css'
import 'bootstrap/dist/js/bootstrap.min.js'
//AdminLTE
import './assets/css/skins/_all-skins.min.css'
import './assets/css/AdminLTE.min.css'
import './assets/js/app.min.js'
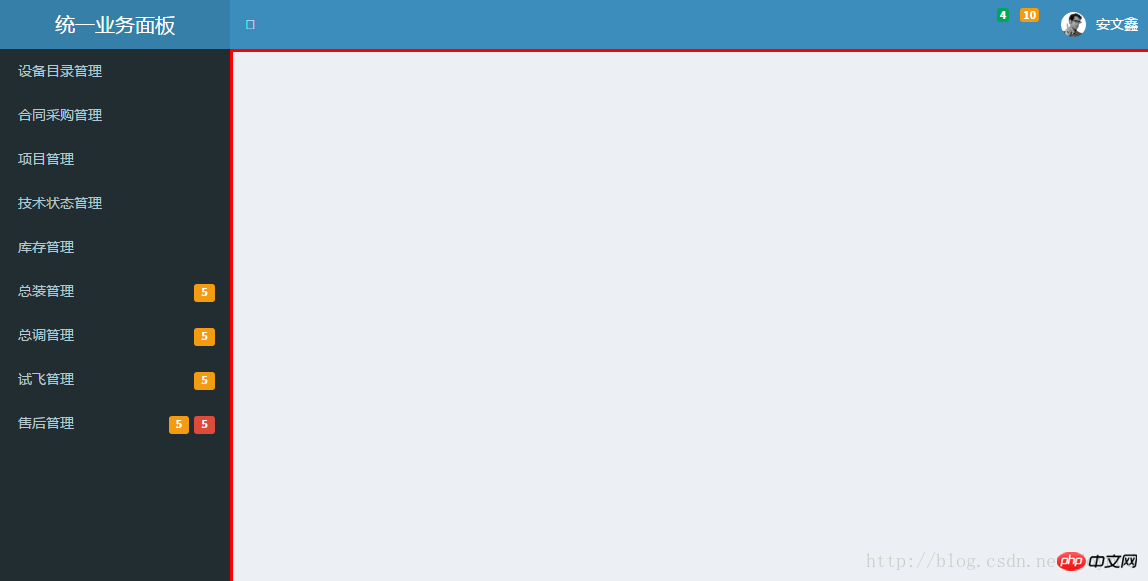

//bootstrap
import 'bootstrap/dist/css/bootstrap.css'
import 'bootstrap/dist/js/bootstrap.min.js'
//AdminLTE
import './assets/css/skins/_all-skins.min.css'
import './assets/css/AdminLTE.min.css'
import './assets/js/app.min.js'
//font-awesome
import 'font-awesome/css/font-awesome.min.css'
导入后效果
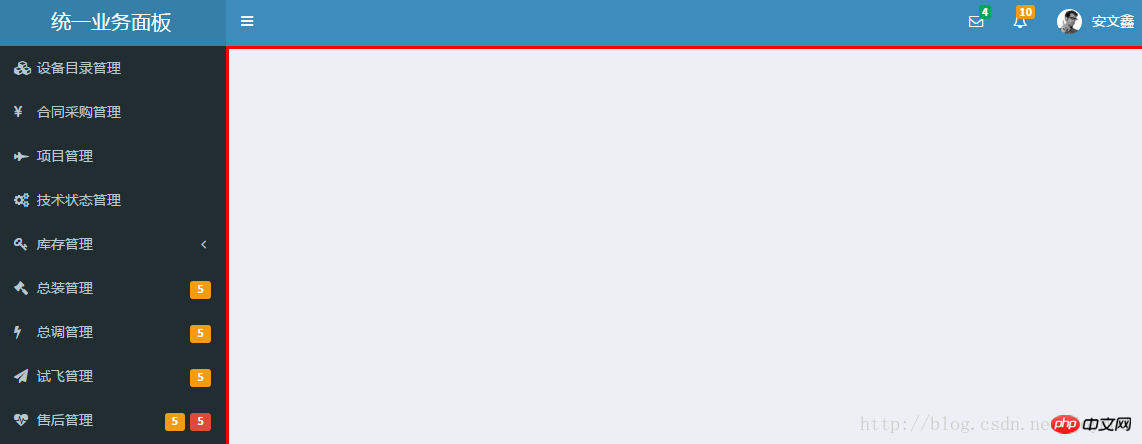
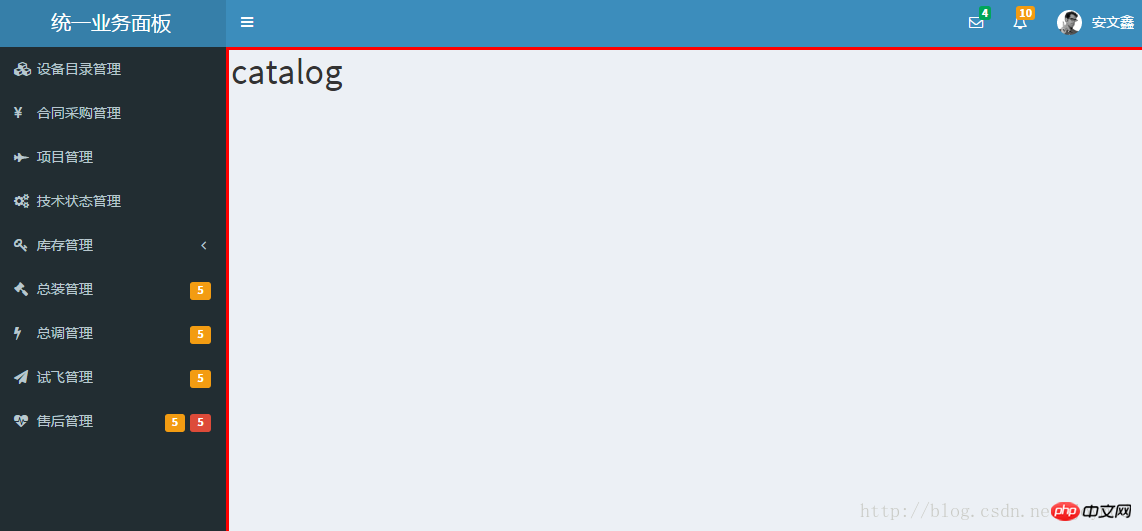
还差一点完成了,我们还要处理一下Vue路由,使得我们在点击左侧导航时,需要显示的内容会出现在图中红框区域内。对应设备目录管理我们新建一个catalog.vue文件,先简单的包含一行内容即可。
<template>
  <h1>catalog</h1>
</template>
在main.js中引入catalog并新增一条路由规则。注意这里我们使用了vue-router的嵌套路由,因为我们需要catalog.vue的内容嵌套在index.vue中显示。
//compinents
import App from './App'
import Login from './components/login'
import Index from './components/index'
import DeviceCatalog from './components/deviceCatalog'
Vue.use(VueRouter)
Vue.use(VueResource)
Vue.http.options.emulateJSON = true;
const routes = [
 {
  path: '/login',
  component : Login
 },{
  path: '/index',
  component: Index,
  children: [
   {
    path: '/deviceCatalog',
    component: DeviceCatalog
   }
  ]
 },
]在index.vue中创建导航和路由出口(即catalog.vue要被放置的红色区域)
<!-- 路由导航 -->
<router-link to="/deviceCatalog">
 <i class="fa fa-cubes"></i>
 <span class="ch">设备目录管理</span>
</router-link>
<!-- 路由出口 -->
<p class="content-wrapper" style="border-style:solid; border-color:red">
 <!-- Main content -->
 <router-view style="margin-top:0px; padding:2px"></router-view>
 <!-- /.content -->
</p>
点击设备目录管理,catalog.vue的内容就会出现在红色框区域内了
最后一步,我们需要一个退出功能,上一篇中我们把认证凭证放在了localStorage中,那么在退出时我们就需要删除localStorage中的信息,并且返回到登录页。我们在退出按钮上绑定一个logout方法实现这个功能。
<!-- 绑定方法 -->
<p class="pull-right">
 <button v-on:click="logOut" class="btn btn-primary btn-flat ch">退出</button>
</p>
<!-- logout方法 -->
<script>
 export default {
 // name: 'app',
  data() {
   return {
    displayName: localStorage.userDisplayName,
   }
  },
  methods: {
    logOut: function(){
     localStorage.clear();
     this.$router.push('login')
    }
   }
 }
</script>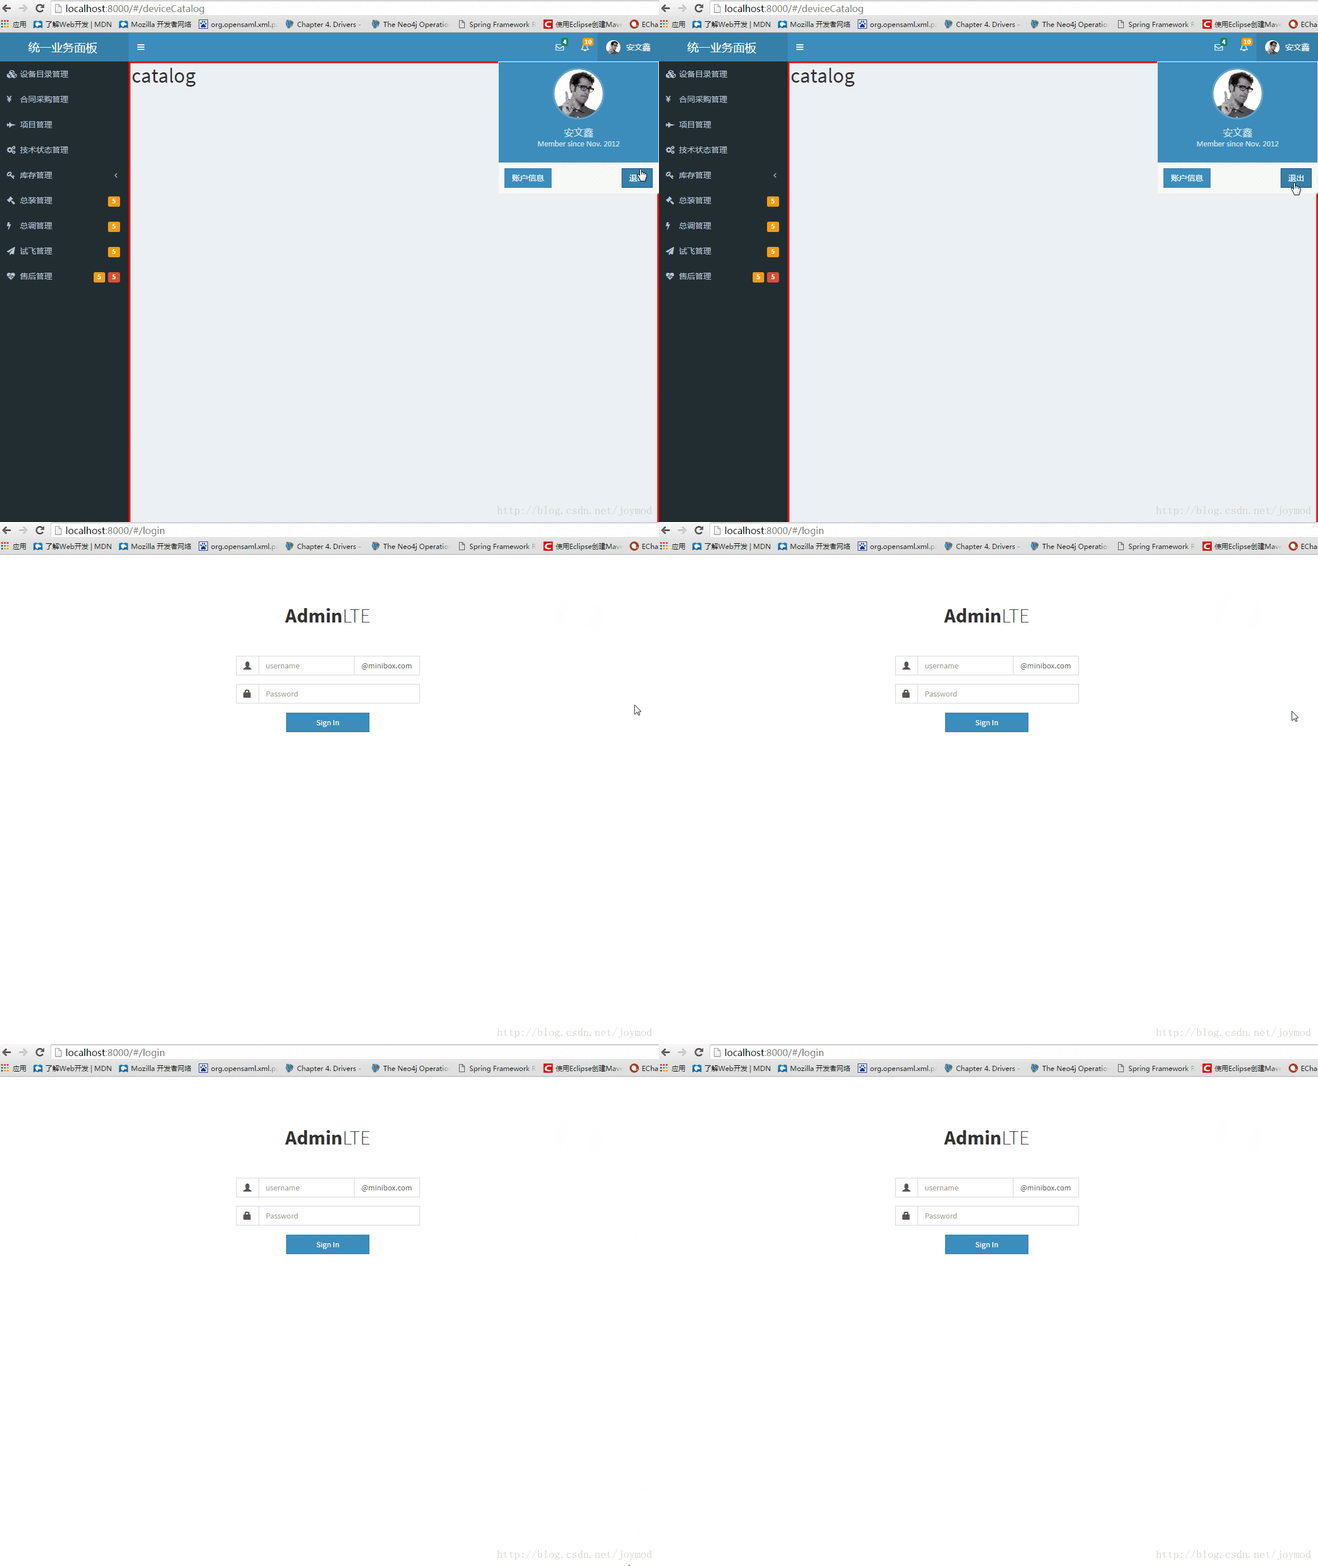
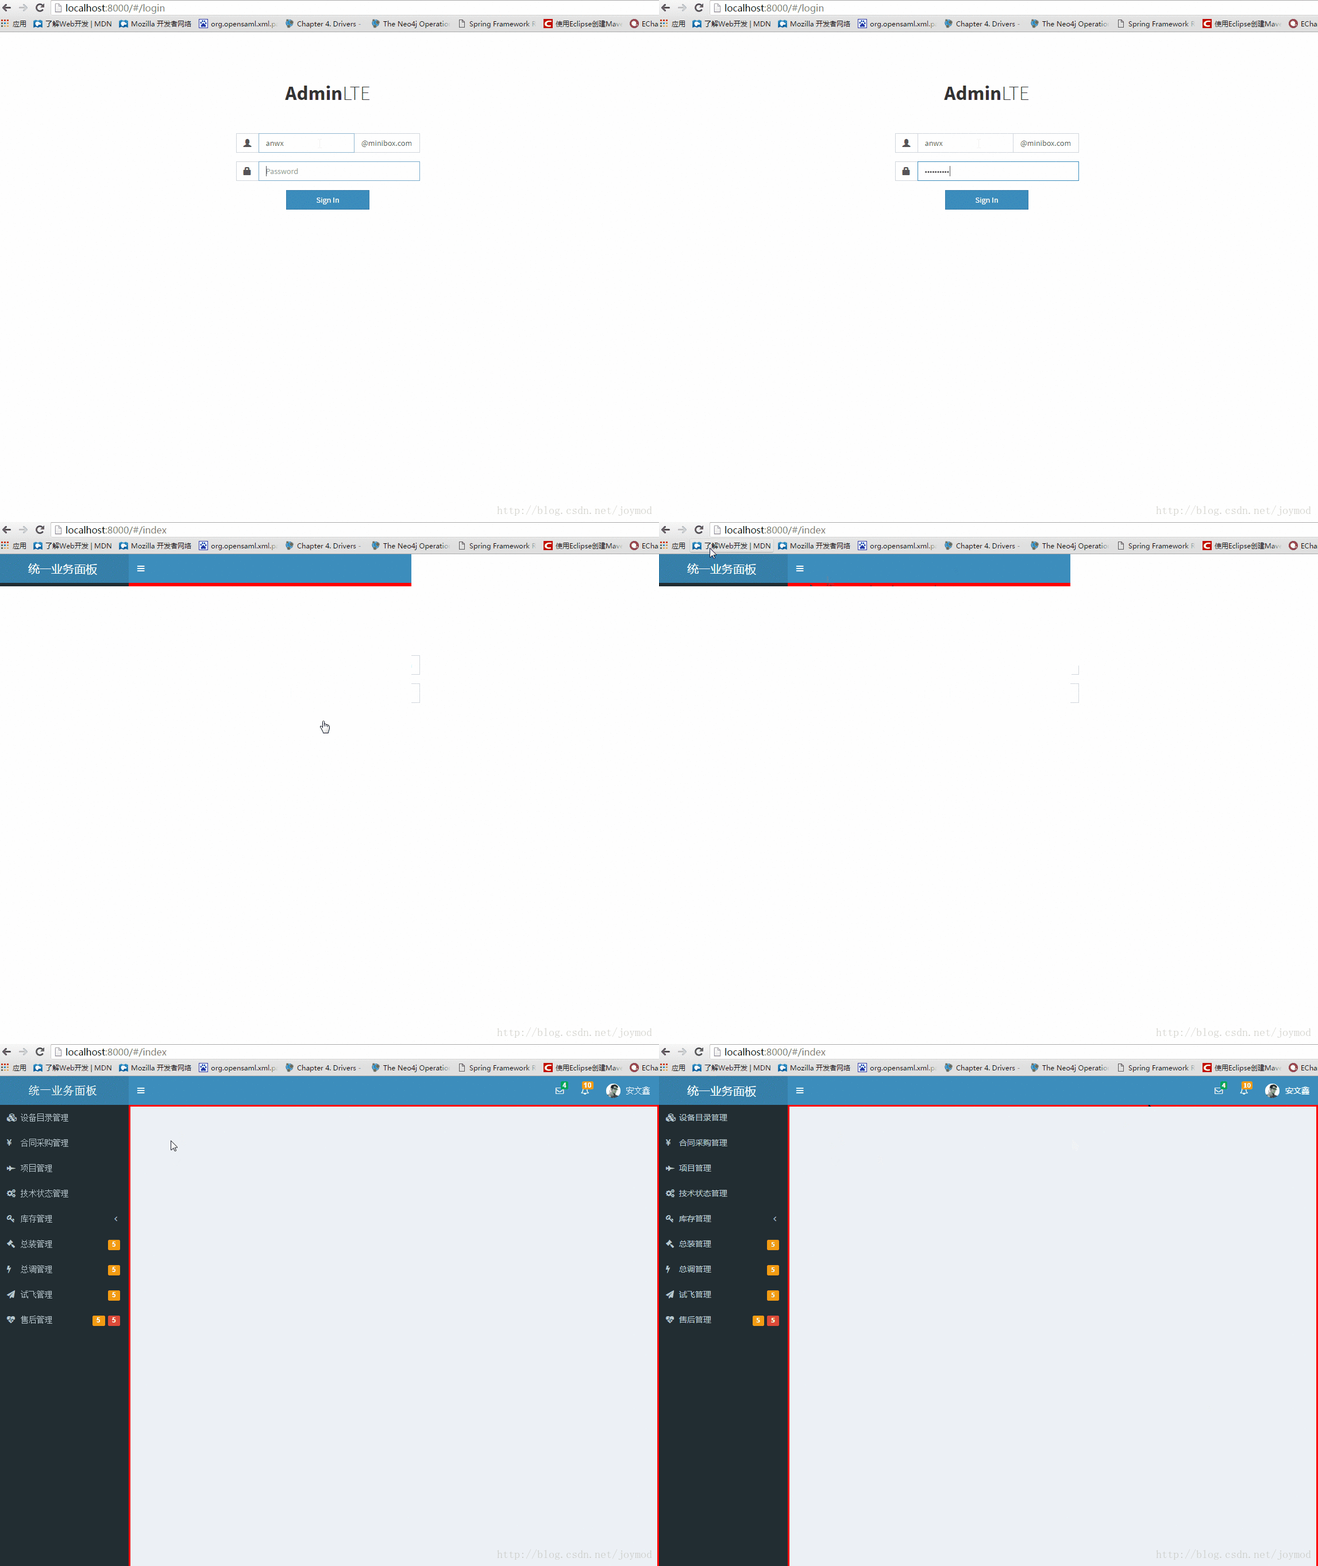
全部搞定,最后还有一个奇怪的问题。在第一次登录后页面不能完整显示,需要刷新一次。不过如果手动制定红色区域的高度则不会出现,我搞了半天也不知问题出在哪里,如果有哪位老师知道的话请指点我一下,谢谢。
相信看了本文案例你已经掌握了方法,更多精彩请关注php中文网其它相关文章!
推荐阅读:
The above is the detailed content of How to use Vue to integrate AdminLTE template. For more information, please follow other related articles on the PHP Chinese website!

Hot AI Tools

Undresser.AI Undress
AI-powered app for creating realistic nude photos

AI Clothes Remover
Online AI tool for removing clothes from photos.

Undress AI Tool
Undress images for free

Clothoff.io
AI clothes remover

AI Hentai Generator
Generate AI Hentai for free.

Hot Article

Hot Tools

Notepad++7.3.1
Easy-to-use and free code editor

SublimeText3 Chinese version
Chinese version, very easy to use

Zend Studio 13.0.1
Powerful PHP integrated development environment

Dreamweaver CS6
Visual web development tools

SublimeText3 Mac version
God-level code editing software (SublimeText3)

Hot Topics
 1377
1377
 52
52
 Integration and use of Spring Boot and NoSQL database
Jun 22, 2023 pm 10:34 PM
With the development of the Internet, big data analysis and real-time information processing have become an important need for enterprises. In order to meet such needs, traditional relational databases no longer meet the needs of business and technology development. Instead, using NoSQL databases has become an important option. In this article, we will discuss the use of SpringBoot integrated with NoSQL databases to enable the development and deployment of modern applications. What is a NoSQL database? NoSQL is notonlySQL
 PHP email templates: customize and personalize your email content.
Sep 19, 2023 pm 01:21 PM
PHP email templates: Customize and personalize your email content With the popularity and widespread use of email, traditional email templates can no longer meet people's needs for personalized and customized email content. Now we can create customized and personalized email templates by using PHP programming language. This article will show you how to use PHP to achieve this goal, and provide some specific code examples. 1. Create an email template First, we need to create a basic email template. This template can be an HTM
 How to add PPT mask
Mar 20, 2024 pm 12:28 PM
Regarding PPT masking, many people must be unfamiliar with it. Most people do not understand it thoroughly when making PPT, but just make it up to make what they like. Therefore, many people do not know what PPT masking means, nor do they understand it. I know what this mask does, and I don’t even know that it can make the picture less monotonous. Friends who want to learn, come and learn, and add some PPT masks to your PPT pictures. Make it less monotonous. So, how to add a PPT mask? Please read below. 1. First we open PPT, select a blank picture, then right-click [Set Background Format] and select a solid color. 2. Click [Insert], word art, enter the word 3. Click [Insert], click [Shape]
 Effects of C++ template specialization on function overloading and overriding
Apr 20, 2024 am 09:09 AM
C++ template specializations affect function overloading and rewriting: Function overloading: Specialized versions can provide different implementations of a specific type, thus affecting the functions the compiler chooses to call. Function overriding: The specialized version in the derived class will override the template function in the base class, affecting the behavior of the derived class object when calling the function.
 UniApp realizes perfect integration of Vue.js framework
Jul 04, 2023 pm 08:49 PM
UniApp realizes the perfect integration of the Vue.js framework Introduction: UniApp is a cross-platform development tool based on the Vue.js framework. It can compile a Vue.js project into applications for multiple different platforms, such as iOS, Android, small Programs etc. The advantage of UniApp is that it allows developers to write only one set of code and adapt to multiple platforms at the same time, speeding up development efficiency and reducing development costs. The following will introduce how to use UniApp to achieve perfect integration of the Vue.js framework
 Template Metaprogramming in C++ FAQ Interview Questions
Aug 22, 2023 pm 03:33 PM
C++ is a programming language widely used in various fields. Its template metaprogramming is an advanced programming technique that allows programmers to transform types and values at compile time. Template metaprogramming is a widely discussed topic in C++, so questions related to it are quite common in interviews. Here are some common template metaprogramming interview questions in C++ that you may be asked. What is template metaprogramming? Template metaprogramming is a technique for manipulating types and values at compile time. It uses templates and metafunctions to generate based on types and values
 How to implement image template and mask processing in Vue?
Aug 17, 2023 am 08:49 AM
How to implement image template and mask processing in Vue? In Vue, we often need to perform some special processing on images, such as adding template effects or masks. This article will introduce how to use Vue to achieve these two image processing effects. 1. Image template processing When using Vue to process images, we can use the filter attribute of CSS to achieve template effects. The filter attribute adds graphic effects to the element, and the brightness filter can change the brightness of the picture. we can change
 Flask-Bootstrap: Add templates to Flask applications
Jun 17, 2023 pm 01:38 PM
Flask-Bootstrap: Adding templates to Flask applications Flask is a lightweight Python web framework that provides a simple and flexible way to build web applications. It is a very popular framework, but its default templates have limited functionality. To create attractive user interfaces, use additional frameworks or libraries. This is where Flask-Bootstrap comes in. Flask-Bootstrap is a Twitter-based


