Detailed explanation of Build and Serve using Angular CLI
This article mainly introduces the detailed explanation of Build and Serve using Angular CLI. Now I share it with you and give it as a reference.
Build.
Build will mainly do the following actions:
Compile the project file and output it Go to a certain directory
Build targets determine the output result
bundling packaging
Production The build of the environment will also perform uglify and tree-shaking (removing useless code)
ng build.
You can read the help first :
ng build --help
For the development environment, use the command ng build.
By default, its output directory is in .angular-cli. The ourDir attribute in the json file is configured, and the default is the /dist directory.
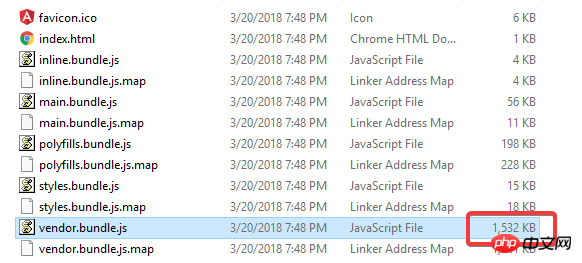
After building, you will see these files in dist:
inline.bundle.js This is webpack runtime.
main.bundle.js is the program code.
pollyfills.bundle.js is the browser’s Pollyfills.
styles.bundle.js Styles
vendor.bundle.js is angular and third-party library
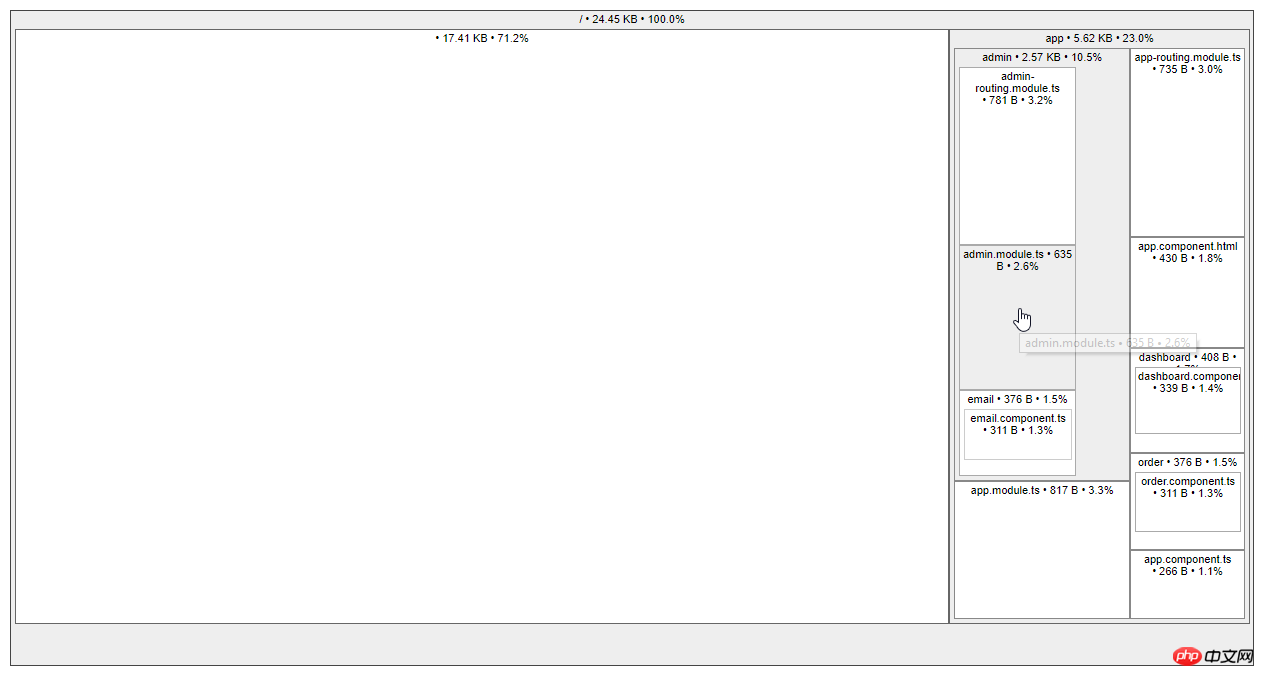
You can use source-map-explorer to analyze dependencies and check which modules and classes are in the bundle.
First modify the code in the previous example:
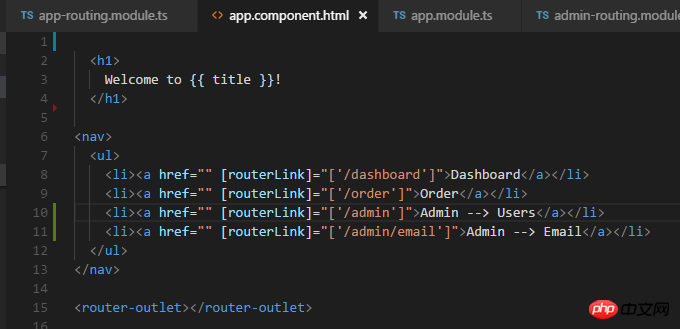
Execute ng build:
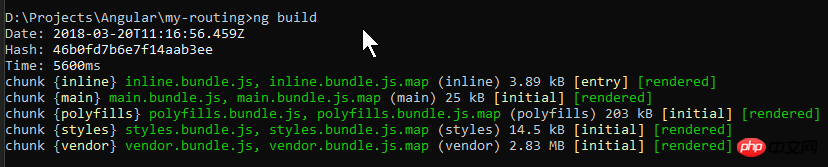
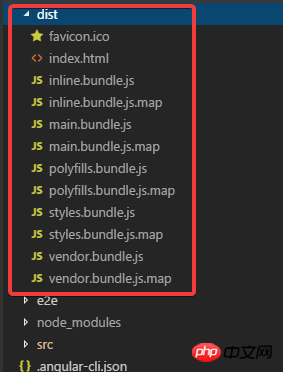
You can see that these files are generated.
Change the index in dist. Format the html and take a look:
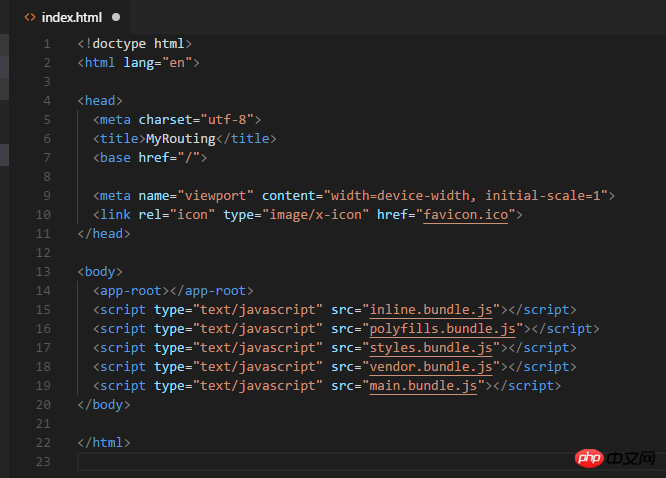
You can see that it refers to the 5 generated js files.
Open main.bundle.js and you can see The code I wrote:

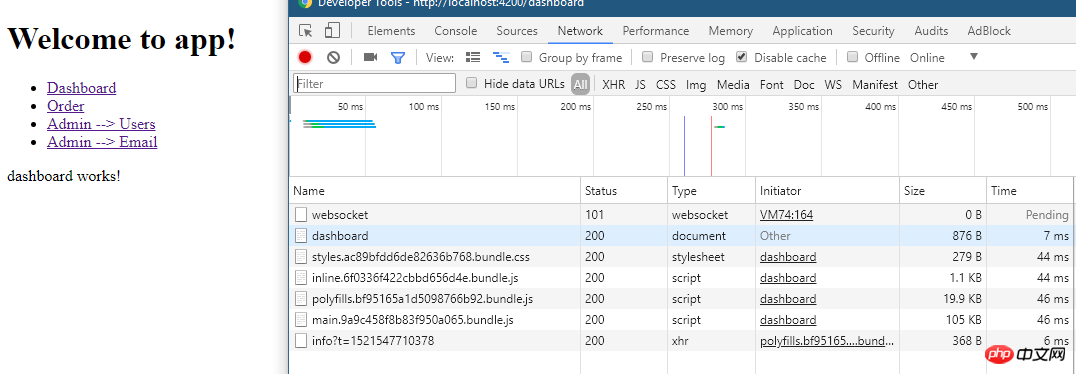
Run the program below: ng serve -o:
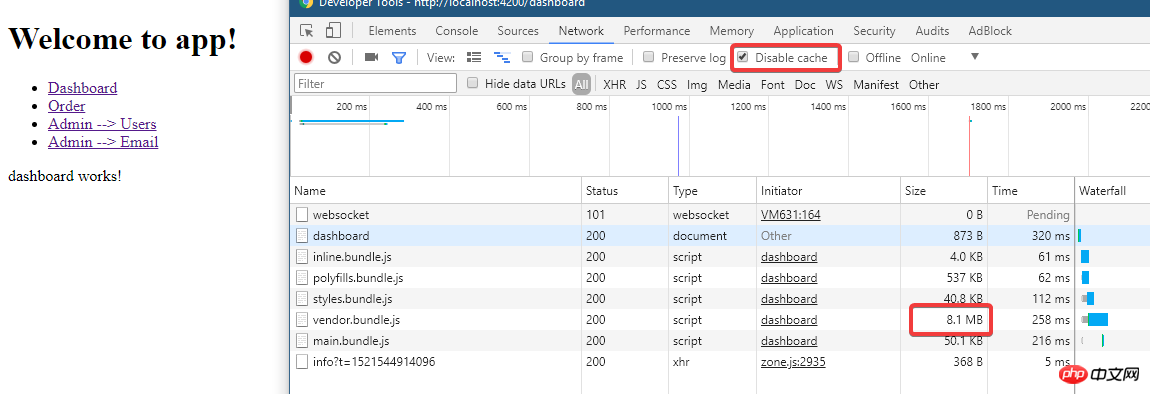
You can see it in ng serve When, the above file was loaded.
Because ng build is a development build, no optimization has been done, and the file is quite large.
Looking at the file directory at this time, there is no dist directory:
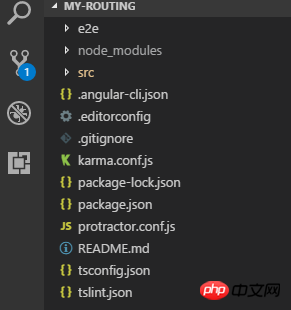
So how are these files served?
This is because webpack is served in memory at this time.
Use source-map-explorer for analysis below. First install it:
npm install --save-dev source-map-explorer
Then execute ng build, and then execute:
.\node_modules\.bin\source-map-explorer dist\main.bundle.js
The result will generate this graph:
Look at the situation of vendor.bundle:
.\node_modules\.bin\source-map-explorer dist\vendor.bundle.js
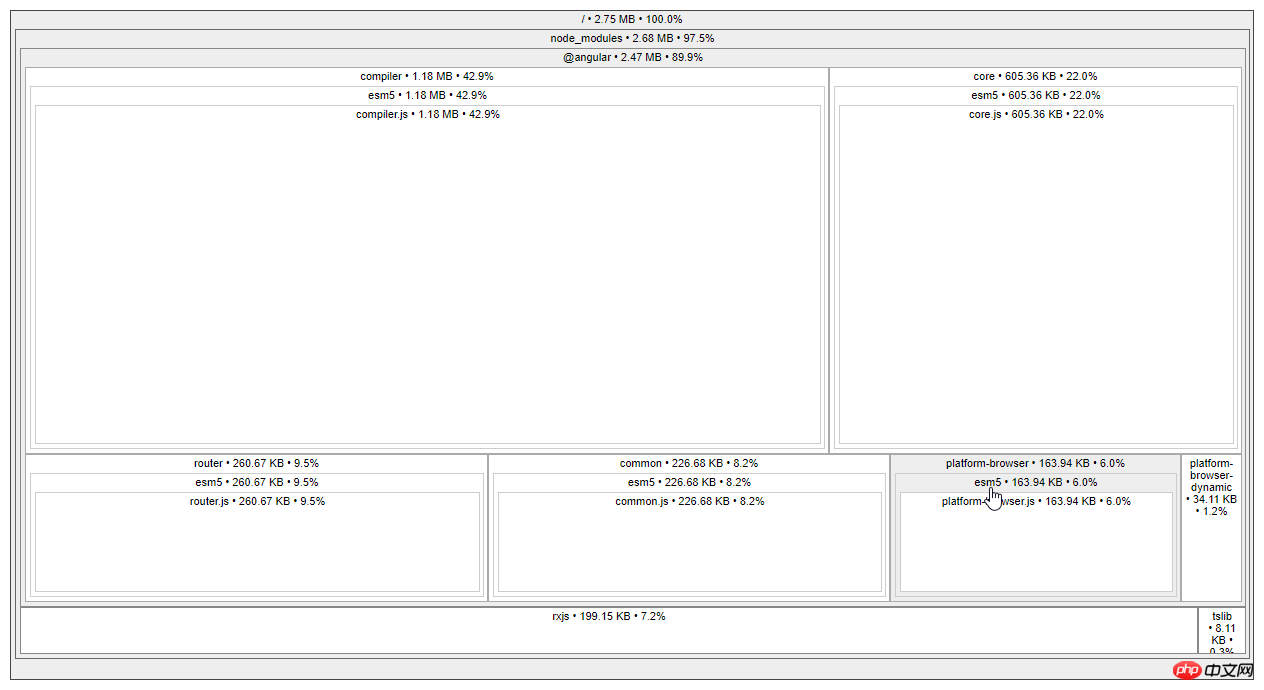
There are more things here.
Build Targets and Environment.
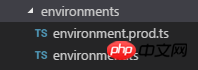
Environment refers to which environment file is used:
And Targets is used to determine how the project file is optimized.
See Let’s compare development and production builds.
ng build | ##ng build --prod | |
| Environment | environment.ts | ##environment..prod.ts|
| Only cache images referenced in css | All build files | |
| Generate | Do not generate | |
| Global css output to js file | The generated is css file | |
| not | is | |
| Do not remove useless code | Remove useless code | |
| No | is | |
| is | is | |
| No | ##Yes (with AOT and Angular5) | --named-chunks |
Yes | No | --output-hashing |
media | all | 下面命令都是针对开发时的build, 它们的作用是一样的: ng build ng build --dev ng build --dev -e=dev ng build --target=development --environment=dev Copy after login 下面则是生产build: ng build --prod ng build --prod -e=prod ng build --target=production --environment=prod Copy after login 其它常用的参数还有:
Production Build. 先使用--aot: ng build --aot Copy after login
使用aot之后可以看到 vendor.bundle的大小降了很多, 只有1.5m左右了. 执行aot会去掉一些程序执行不需要的代码, 例如angular的compiler这时就不在build输出的文件里了(可以使用source-map-explorer查看). 试试生产环境: ng build --prod Copy after login
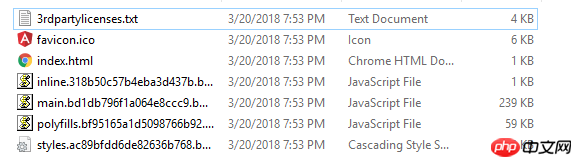
可以看到所有的文件都非常小了, 并且没有vendor了(因为prod下--build-optimizer起作用所以vendor没有了, 但可以使用--vendor-chunk true给弄出来). Serve. ng serve. 已经一直在用了, 下面看看它常用的参数:
试试 --prod: ng serve --prod Copy after login
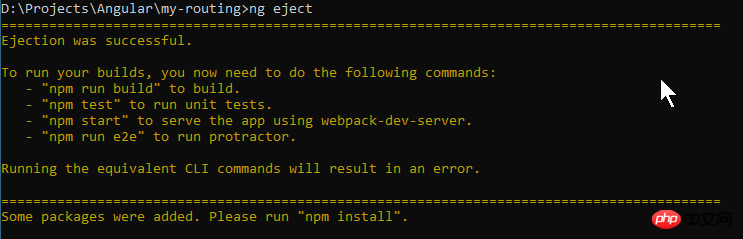
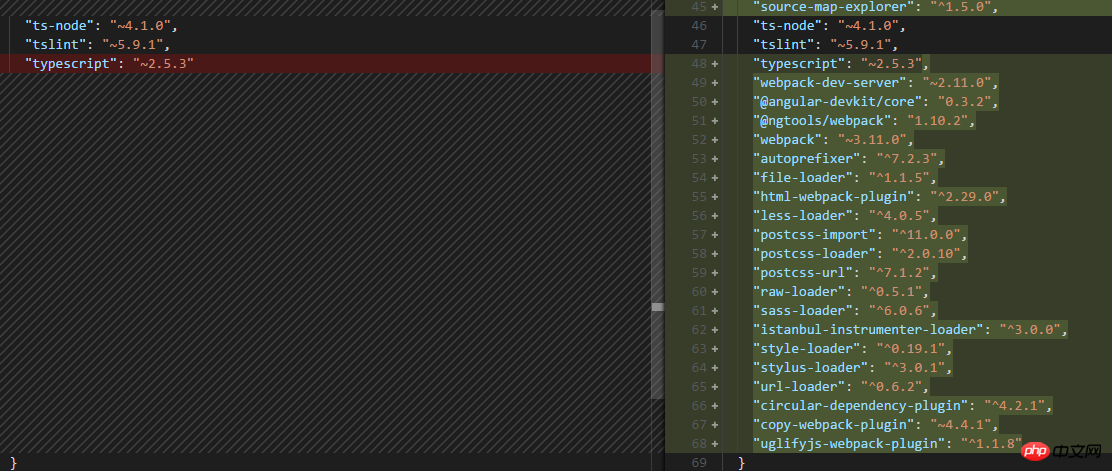
通过文件大小可以看出确实是prod build的. ng eject. 为项目生成webpack配置和脚本. 执行该命令试试:
看看有哪些变化: .angular-cli.json:
package.json:
命令脚本都变了
还多出来一个webpack.config.js文件:
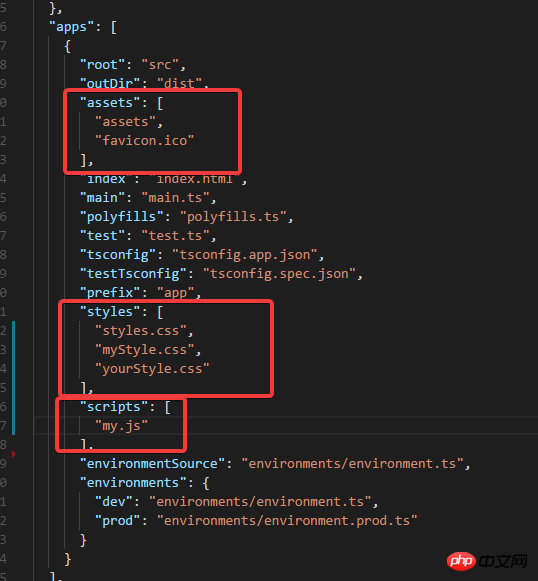
为什么要这么做呢? 可以对项目更深入的配置.... 这时运行程序就是 npm start了. 我还是把reject恢复回去吧, 使用git来恢复吧. 如果需要Serve 其他js/css/assets文件:
放在.angular-cli.json就行, 例如jquery就应该放在scripts里面. 上面是我整理给大家的,希望今后会对大家有帮助。 相关文章: The above is the detailed content of Detailed explanation of Build and Serve using Angular CLI. For more information, please follow other related articles on the PHP Chinese website! Statement of this Website
The content of this article is voluntarily contributed by netizens, and the copyright belongs to the original author. This site does not assume corresponding legal responsibility. If you find any content suspected of plagiarism or infringement, please contact admin@php.cn

Hot AI Tools
Undresser.AI UndressAI-powered app for creating realistic nude photos 
AI Clothes RemoverOnline AI tool for removing clothes from photos. 
Undress AI ToolUndress images for free 
Clothoff.ioAI clothes remover 
Video Face SwapSwap faces in any video effortlessly with our completely free AI face swap tool! 
Hot Article
Assassin's Creed Shadows: Seashell Riddle Solution
3 weeks ago
By DDD
What's New in Windows 11 KB5054979 & How to Fix Update Issues
2 weeks ago
By DDD
Where to find the Crane Control Keycard in Atomfall
3 weeks ago
By DDD
Assassin's Creed Shadows - How To Find The Blacksmith And Unlock Weapon And Armour Customisation
1 months ago
By DDD
Roblox: Dead Rails - How To Complete Every Challenge
3 weeks ago
By DDD
Hot Tools
Notepad++7.3.1Easy-to-use and free code editor 
SublimeText3 Chinese versionChinese version, very easy to use 
Zend Studio 13.0.1Powerful PHP integrated development environment 
Dreamweaver CS6Visual web development tools 
SublimeText3 Mac versionGod-level code editing software (SublimeText3)
Hot Topics
CakePHP Tutorial
 1387
1387
 52
52
 How to install Angular on Ubuntu 24.04
Mar 23, 2024 pm 12:20 PM
How to install Angular on Ubuntu 24.04
Mar 23, 2024 pm 12:20 PM
Angular.js is a freely accessible JavaScript platform for creating dynamic applications. It allows you to express various aspects of your application quickly and clearly by extending the syntax of HTML as a template language. Angular.js provides a range of tools to help you write, update and test your code. Additionally, it provides many features such as routing and form management. This guide will discuss how to install Angular on Ubuntu24. First, you need to install Node.js. Node.js is a JavaScript running environment based on the ChromeV8 engine that allows you to run JavaScript code on the server side. To be in Ub  Building a Custom WordPress User Flow, Part Three: Password Reset
Sep 03, 2023 pm 11:05 PM
Building a Custom WordPress User Flow, Part Three: Password Reset
Sep 03, 2023 pm 11:05 PM
In the first two tutorials in this series, we built custom pages for logging in and registering new users. Now, there's only one part of the login flow left to explore and replace: What happens if a user forgets their password and wants to reset their WordPress password? In this tutorial, we'll tackle the last step and complete the personalized login plugin we've built throughout the series. The password reset feature in WordPress more or less follows the standard method on websites today: the user initiates a reset by entering their username or email address and requesting WordPress to reset their password. Create a temporary password reset token and store it in user data. A link containing this token will be sent to the user's email address. User clicks on the link. In the heavy  Microsoft Win11 24H2 Build 26100 has found multiple bugs and installation is not recommended
Apr 07, 2024 pm 09:22 PM
Microsoft Win11 24H2 Build 26100 has found multiple bugs and installation is not recommended
Apr 07, 2024 pm 09:22 PM
The latest news from this site on April 7 is that multiple bugs have been discovered in Microsoft Win1124H2Build26100, and it is temporarily not recommended to install it on commonly used devices. Windows 1124H2 is still in a very unstable stage. Although Microsoft will gradually fix the problem through monthly cumulative updates, it may take some time before this version is officially released and brings a stable experience to everyone. If any user has installed the 24H2 version image and encountered problems, it is recommended that the user reinstall it. It is now relatively stable. ZacBowden, encountered a Blue Screen of Death when trying to reset Windows 1124H2Build26100 version, and the "Reset this PC" function was supposed to fix system problems, but instead  Angular components and their display properties: understanding non-block default values
Mar 15, 2024 pm 04:51 PM
Angular components and their display properties: understanding non-block default values
Mar 15, 2024 pm 04:51 PM
The default display behavior for components in the Angular framework is not for block-level elements. This design choice promotes encapsulation of component styles and encourages developers to consciously define how each component is displayed. By explicitly setting the CSS property display, the display of Angular components can be fully controlled to achieve the desired layout and responsiveness.  Token-based authentication with Angular and Node
Sep 01, 2023 pm 02:01 PM
Token-based authentication with Angular and Node
Sep 01, 2023 pm 02:01 PM
Authentication is one of the most important parts of any web application. This tutorial discusses token-based authentication systems and how they differ from traditional login systems. By the end of this tutorial, you will see a fully working demo written in Angular and Node.js. Traditional Authentication Systems Before moving on to token-based authentication systems, let’s take a look at traditional authentication systems. The user provides their username and password in the login form and clicks Login. After making the request, authenticate the user on the backend by querying the database. If the request is valid, a session is created using the user information obtained from the database, and the session information is returned in the response header so that the session ID is stored in the browser. Provides access to applications subject to  ChatGPT Java: How to build an intelligent music recommendation system
Oct 27, 2023 pm 01:55 PM
ChatGPT Java: How to build an intelligent music recommendation system
Oct 27, 2023 pm 01:55 PM
ChatGPTJava: How to build an intelligent music recommendation system, specific code examples are needed. Introduction: With the rapid development of the Internet, music has become an indispensable part of people's daily lives. As music platforms continue to emerge, users often face a common problem: how to find music that suits their tastes? In order to solve this problem, the intelligent music recommendation system came into being. This article will introduce how to use ChatGPTJava to build an intelligent music recommendation system and provide specific code examples. No.  Smooth build: How to correctly configure the Maven image address
Feb 20, 2024 pm 08:48 PM
Smooth build: How to correctly configure the Maven image address
Feb 20, 2024 pm 08:48 PM
Smooth build: How to correctly configure the Maven image address When using Maven to build a project, it is very important to configure the correct image address. Properly configuring the mirror address can speed up project construction and avoid problems such as network delays. This article will introduce how to correctly configure the Maven mirror address and give specific code examples. Why do you need to configure the Maven image address? Maven is a project management tool that can automatically build projects, manage dependencies, generate reports, etc. When building a project in Maven, usually  Optimize the Maven project packaging process and improve development efficiency
Feb 24, 2024 pm 02:15 PM
Optimize the Maven project packaging process and improve development efficiency
Feb 24, 2024 pm 02:15 PM
Maven project packaging step guide: Optimize the build process and improve development efficiency. As software development projects become more and more complex, the efficiency and speed of project construction have become important links in the development process that cannot be ignored. As a popular project management tool, Maven plays a key role in project construction. This guide will explore how to improve development efficiency by optimizing the packaging steps of Maven projects and provide specific code examples. 1. Confirm the project structure. Before starting to optimize the Maven project packaging step, you first need to confirm 
|