
This article mainly introduces the detailed explanation of using Angular CLI to generate code from a blueprint. Now I share it with you and give it as a reference.
The first article is: "Using angular cli to generate angular5 projects": http://www.jb51.net/article/136621.htm
This article mainly talks about generating Components , Directive, Service, class, interface, enum, etc.
ng generate
The format of this command is ng generate < Blueprint name>
You can also use the --dry-run parameter to list the files to be generated instead of actually generating them.
For example:
ng generate component person, a person.component.ts will be generated.
ng generate service sales-data will generate a sales-data.service.ts.
ng generate class user-model will generate a user-model.ts which contains the UserModel class.
#Components.
ng The command to generate xxx xxx is still a bit long, here angular cli has built-in aliases for commands, for example:
ng generate component person In this command, the generate in
can be replaced by the letter g, and the component in
can be replaced by the letter c Replace.
So these two commands are equal:
ng generate component person
ng g c person
You can go here to view component-related commands and aliases:
https://github.com/angular/angular-cli/wiki/generate-component
Possibly commonly used command parameters are:
ng generate component person
ng generate component person --inline-template --inline-style

ng g c person
ng g c person -it -is
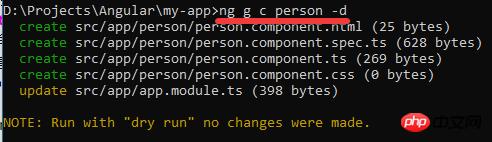
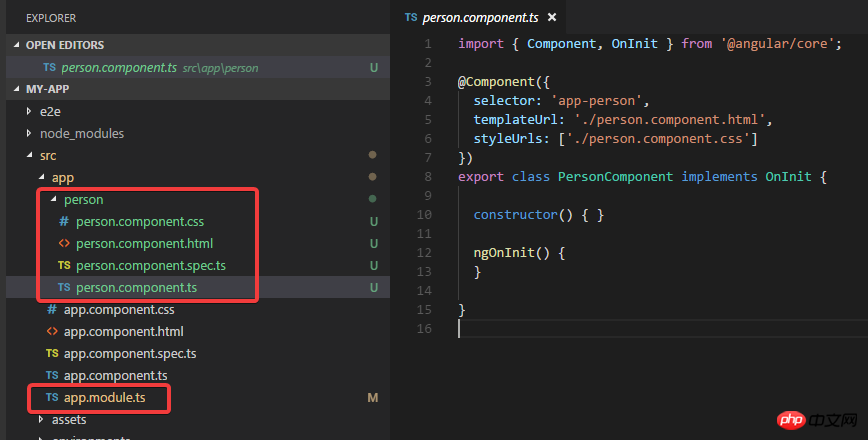
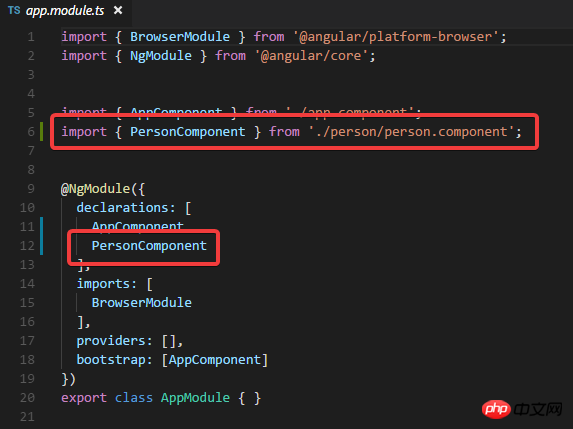
ng g c person -d
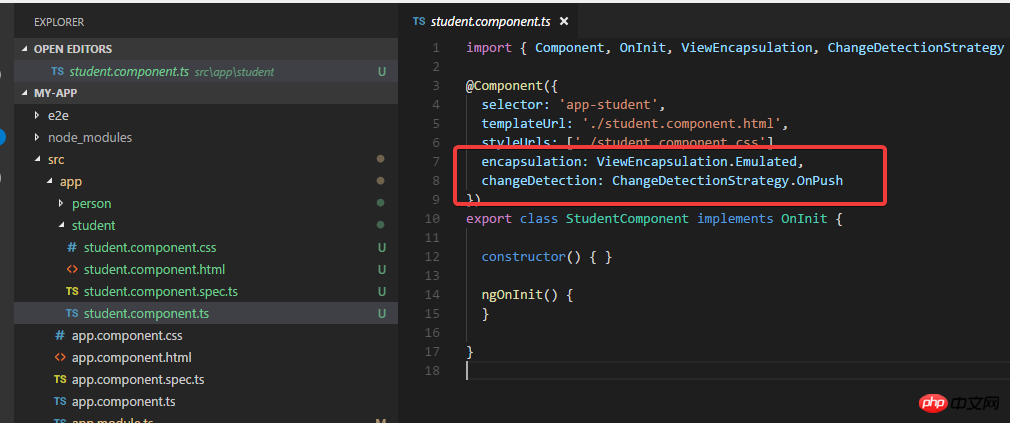
ng g c student -ve Emulated -cd OnPush
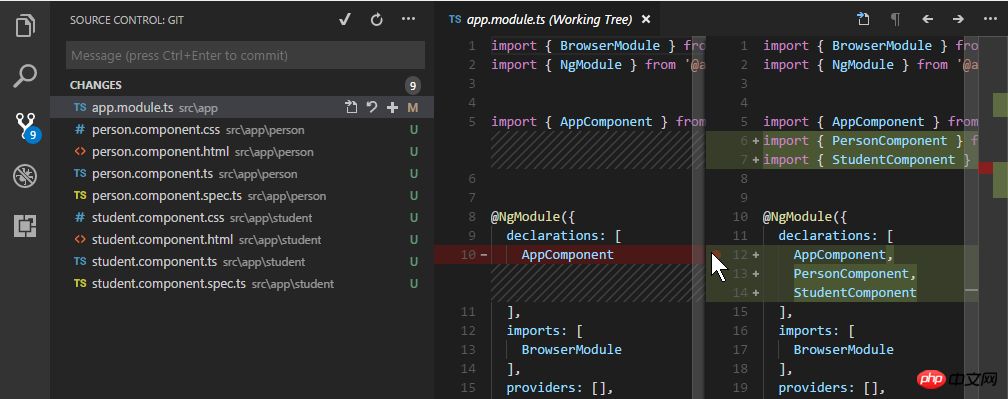
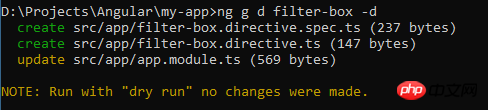
ng g d filter-box -d
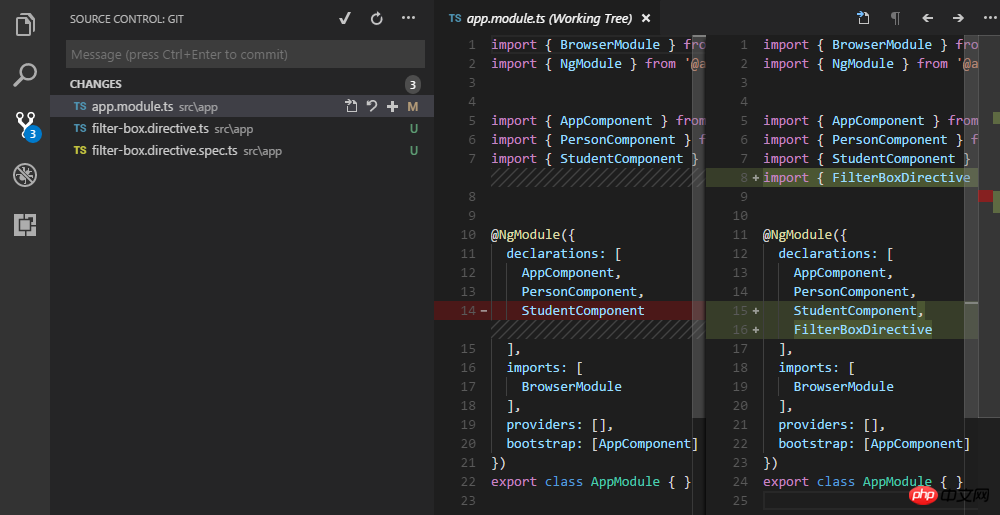
ng g d filter-box
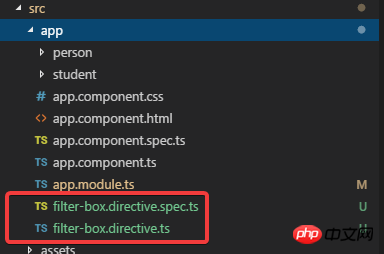
Look at the directory structure:
ng g d filter-box2 --flat false

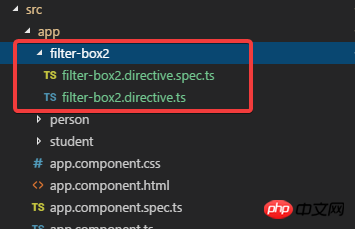 ##Now you have your own folder.
Commit it.
Service.ng g s order-data -d

可以看到 这个命令会生成flat结构的service.
然后把-d去掉, 真实生成文件:
ng g s order-data
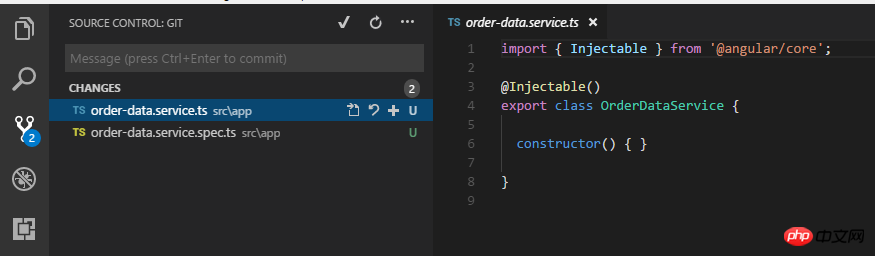
可以从源码管理看到, 只生成了两个文件, 并没有在app.module里面注册:
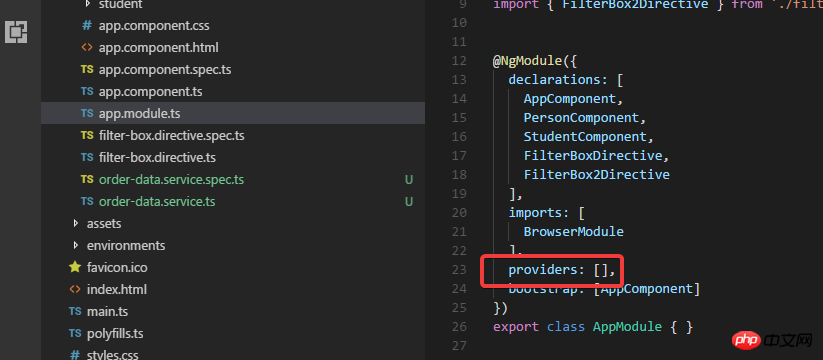
当然可以在这里写代码把刚才生成的service注册进去.
但是正确的做法是使用 -m 参数来指定需要注册的module:
ng g s order-data2 -m app

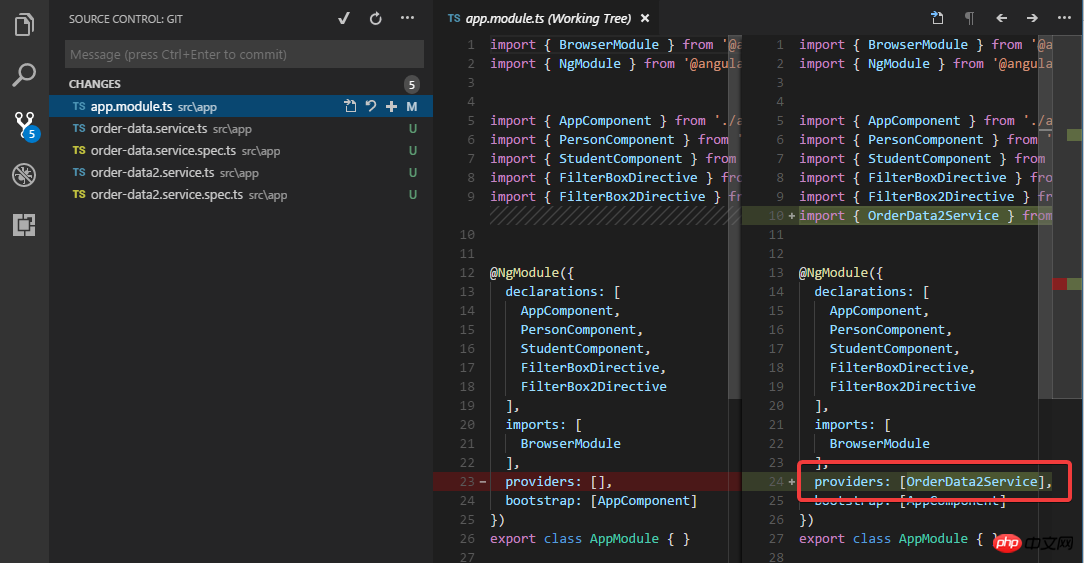
这次生成的order-data2 service就会在app.module.ts里面进行注册了.
然后再commit一下.
Model/Interface/Enum/Pipe.
model:
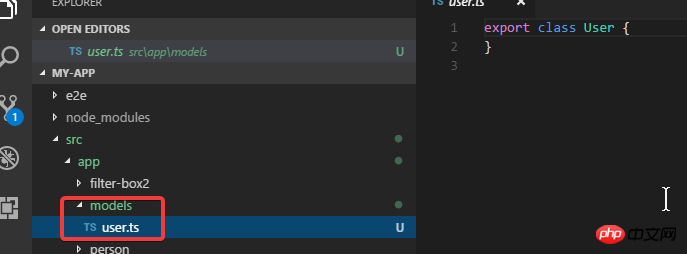
ng g cl models/user
这个命令会创建models文件夹, 然后在里面创建user这个model:

interface:
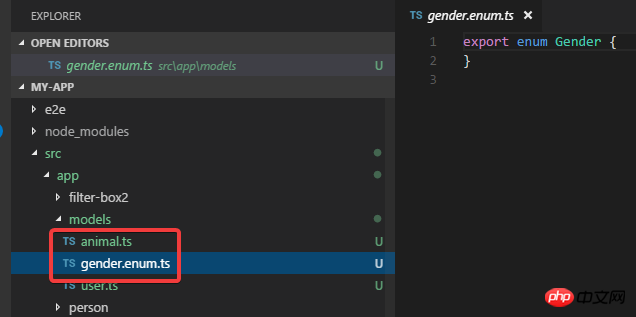
ng g i models/animal
enum:
ng g e models/gender
commit一下.
Pipe.
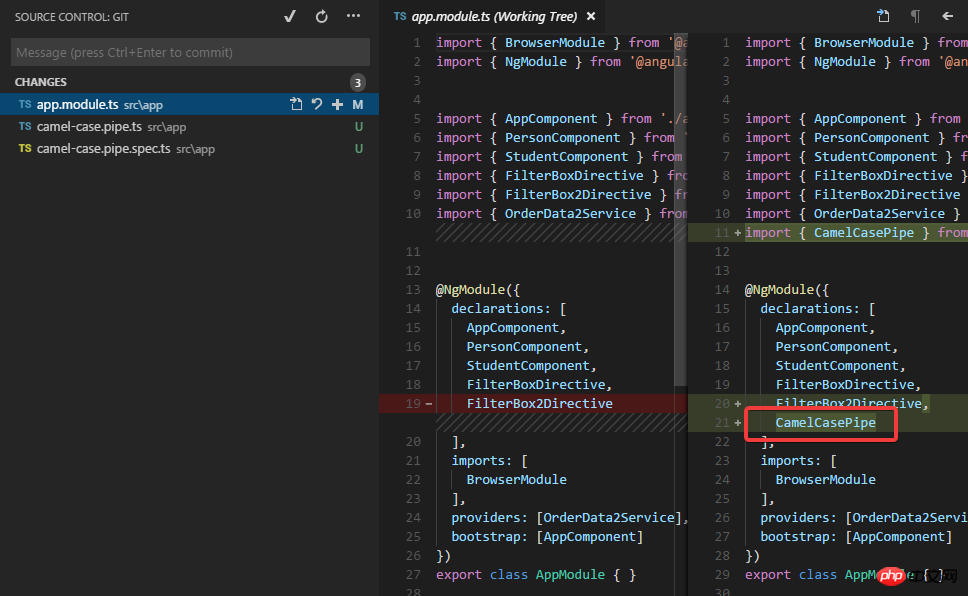
ng g p camel-case

除了生成两个文件之外, 这个命令默认也会更新app.module.
Module.
ng g m login

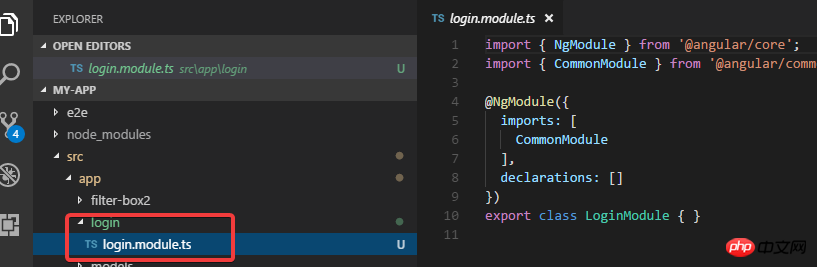
可以看到module默认是自带文件夹的.
然后我试试添加一个component, 目的是要在login module进行声明:
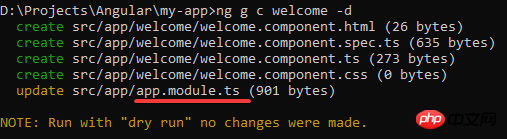
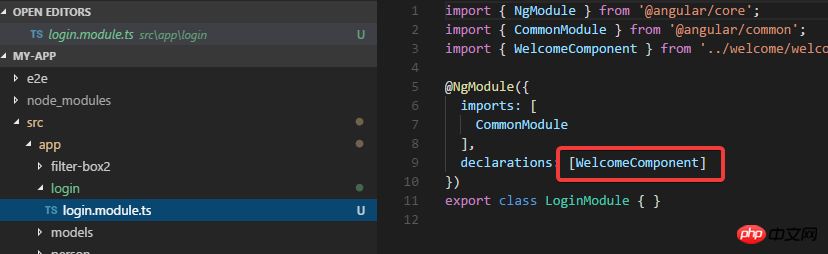
可以看到我要创建的welcome component默认是在app.module里面进行声明的, 这时候如果想要在login module进行声明, 就要使用 -m 参数:
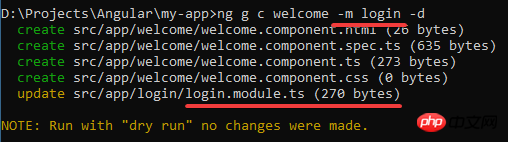
去掉-d执行生成命令后:
上面是我整理给大家的,希望今后会对大家有帮助。
相关文章:
使用Angular CLI进行Build(构建)和Serve详解
The above is the detailed content of Detailed explanation of using Angular CLI to generate code from blueprints. For more information, please follow other related articles on the PHP Chinese website!


![[Web front-end] Node.js quick start](https://img.php.cn/upload/course/000/000/067/662b5d34ba7c0227.png)


