This time I will show you how to use vue addRoutes to implement a dynamic permission routing menu, and what are the precautions for how to use vue addRoutes to implement a dynamic permission routing menu. The following is a practical case, let's take a look.
Requirements
Recently took over a backend management system, and it is necessary to realize the effect of pulling the navigation menu from the backend; according to the different permissions of the logged in user, The pulled-out navigation menu is also different, and the operable interface is also different.
Question
Because the background management system is prepared to use vue vue-router element-ui vuex, but the single-page application The vue-router has been instantiated and injected into the vue instance before entering the page, so there is no way to re-customize the route when entering the login page. After a lot of searching, I found that vue-router provided the addRoutes method to add routes in version 2.0, and a glimmer of hope appeared.
After a lot of hard work, the function was finally realized. I recorded it for easy review. I also hope it can help comrades who have the same needs.
Ideas
1. First configure a fixed routing address locally, such as login and 404 pages, as follows:
import Vue from 'vue'
import Router from 'vue-router'
import store from '@/vuex/store'
Vue.use(Router)
let router = new Router({
 routes: [
  {
   path: '/login',
   name: 'login',
   meta: {requireAuth: false},
   // 模块使用异步加载
   component: (resolve) => require(['../components/login/login.vue'], resolve)
  }]
})
// 拦截登录,token验证
router.beforeEach((to, from, next) => {
 if (to.meta.requireAuth === undefined) {
  if (store.state.token) {
   next()
  } else {
   next({
    path: '/login'
   })
  }
 } else {
  next()
 }
})
export default routerOnly after configuring these fixed routes can we get to the login page, otherwise we will not be able to continue.
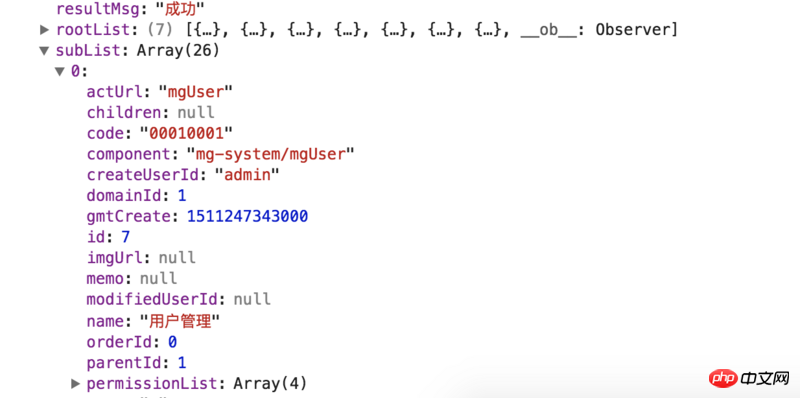
2. Then the important step is to agree with the back-end veteran on the permission menu list information that needs to be returned; first, let’s analyze the routing structure we need. Here I take my own routing as an example. . If I directly define the route myself, it will have the following structure:
let router = new Router({
 routes: [
  {
   path: '/login',
   name: 'login',
   meta: {requireAuth: false},
   component: (resolve) => require(['../components/login/login.vue'], resolve)
  },
  {
    path: '/',
    redirect: '/layout'
  },
  {
    path: '/layout',
    component: (resolve) => require(['../layout.vue'], resolve),
    children: [
      {
        path: 'index',
        meta: {
          type: '1',    //控制是否显示隐藏 1显示,2隐藏
          code: 00010001, // 后面需要控制路由高亮
          title: '首页',  // 菜单名称
          permissonList: [] // 权限列表
        }
        component: (resolve) => require(['@/components/index/index.vue'], resolve)
      },
      {
      ...
      }
    ]
  }]
})According to the above structural analysis, the route that actually needs to be dynamically configured is actually the children part under /layout, so the backend needs to be returned to us containing An array of all routes is enough

The rootList in the returned data is a list of first-level navigation. The first-level navigation actually has no routing function and is only used to switch the second-level navigation. The menu trigger and subList are the routing information we really need.
3. After getting the permission routing information, we need to process the data locally and assemble it into the data we need:
// 登录
login () {
let params = {
account: this.loginForm.username,
password: encrypt(this.loginForm.password)
}
this.loading = true
this.$http.post(this.$bumng + '/login', this.$HP(params))
.then((res) => {
this.loging = false
console.info('菜单列表:', res)
if (res.resultCode === this.$state_ok) {
// 合并一级菜单和二级菜单,便于显示
let menus = handleMenu.mergeSubInRoot(res.rootList, res.subList)
// 本地化处理好的菜单列表
this.saveRes({label: 'menuList', value: menus})
// 根据subList处理路由
let routes = handleMenu.mergeRoutes(res.subList)
// 本地化subList,便于在刷新页面的时候重新配置路由
this.saveRes({label: 'subList', value: res.subList})
// 防止重复配置相同路由
if (this.$router.options.routes.length <= 1) {
this.$router.addRoutes(routes)
// this.$router不是响应式的,所以手动将路由元注入路由对象
this.$router.options.routes.push(routes)
}
this.$router.replace('/layout/index')
}
})
.catch((err) => {
this.loging = false
console.error('错误:', err)
})
},Methods for processing menu lists and subLists: mergeSubInRoot and mergeRoutes
const routes = [
 {
  path: '/',
  redirect: '/layout'
 },
 {
  path: '/layout',
  component: (resolve) => require(['../layout.vue'], resolve),
  children: []
 }
]
export default {
 /**
  * 合并主菜单和子菜单
  * @param: rootList [Array] 主菜单列表
  * @param: subList [Array] 子菜单
  * */
 mergeSubInRoot (roots, subs) {
  if (roots && subs) {
   for (let i = 0; i < roots.length; i++) {
    let rootCode = roots[i].code
    roots[i].children = []
    for (let j = 0; j < subs.length; j++) {
     if (rootCode === subs[j].code.substring(0, 4)) {
      roots[i].children.push(subs[j])
     }
    }
   }
  }
  return roots
 },
 /**
  * 合并远程路由到本地路由
  * @param: subList [Array] 远程路由列表
  * @param: routes [Array] 本地路由列表
  * */
 mergeRoutes (subs) {
  if (subs) {
   for (let i = 0; i < subs.length; i++) {
    let temp = {
     path: subs[i].actUrl,
     name: subs[i].actUrl,
     component: (resolve) => require([`@/components/${subs[i].component}.vue`], resolve),
     meta: {
      type: subs[i].type,
      code: subs[i].code,
      title: subs[i].name,
      permissionList: subs[i].permissionList
     }
    }
    routes[1].children.push(temp)
   }
  }
  return routes
 }
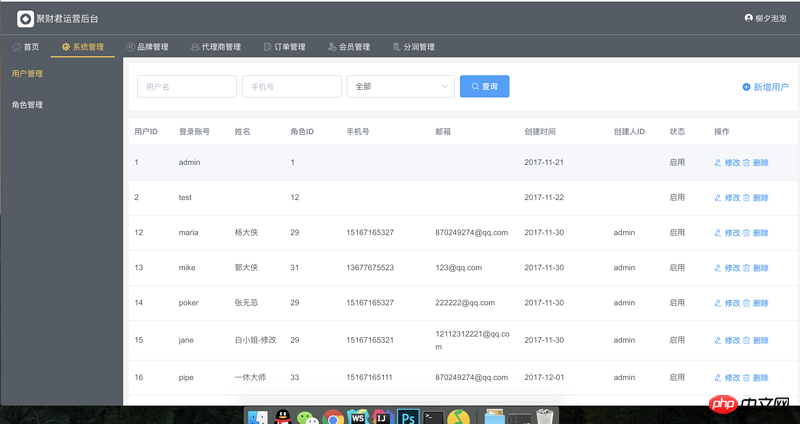
}So far we have successfully configured permission routing into local routing. My system login is as follows

Follow-up optimization
1. Menu list display and secondary navigation switching:
<template>
<p class="mainMenu">
<el-menu
class="menubar"
mode="horizontal"
:default-active="activeCode"
background-color="#545c64"
text-color="#fff"
active-text-color="#ffd04b">
<el-menu-item :index="item.code | splitCode" v-for="item in menuList" :key="item.code" @click="switchSubMenu(item)" v-if="item.code !== '0008'">
<i :class="`iconfont icon-${item.imgUrl}`"></i>
<span slot="title">{{item.name}}</span>
</el-menu-item>
</el-menu>
</p>
</template>
<script type="text/ecmascript-6">
import {mapState, mapMutations} from 'vuex'
export default {
name: 'menu',
data () {
return {
msg: 'Welcome to Your Vue.js App'
}
},
computed: {
...mapState(['menuList']),
activeCode () {
// 通过code保证在切换字路由的情况下一级路由也是高亮显示
return this.$route.meta.code.substring(0, 4)
}
},
methods: {
...mapMutations(['saveRes']),
// 切换二级路由
switchSubMenu (route) {
console.info('路由:', route)
if (route.actUrl !== 'index') {
// 用currentSubMenu控制二级路由数据
this.saveRes({label: 'currentSubMenu', value: route.children})
this.$router.push(`/layout/${route.children[0].actUrl}`)
} else {
// 不存在二级路由隐藏二级
this.saveRes({label: 'currentSubMenu', value: ''})
this.$router.push(`/layout/${route.actUrl}`)
}
}
},
filters: {
splitCode (code) {
return code.substring(0, 4)
}
}
}
</script>2. Prevent refresh routing from being lost; since the single-page application will be re-initialized during refresh, all All configured routes will be lost. Once you return to before liberation, only locally configured routes can be jumped. At this time, we can execute the following code in app.vue (ps: no matter where the refresh is performed, app.vue will be executed):
<script>
 import {decrypt} from '@/libs/AES'
 import handleMenu from '@/router/handleMenu'
 export default {
  name: 'app',
  created () {
   // 当this.$router.options.routes的长度为1,且本地缓存存在菜单列表的时候才重新配置路由
   if (this.$router.options.routes.length <= 1 && sessionStorage.getItem('subList')) {
    let subList = JSON.parse(decrypt(sessionStorage.getItem('subList')))
    let routes = handleMenu.mergeRoutes(subList)
    this.$router.addRoutes(routes)
    // this.$router不是响应式的,所以手动将路由元注入路由对象
    this.$router.options.routes.push(routes)
   }
  }
 }
</script>In this way, even if refreshed, the routing will be reconfigured.
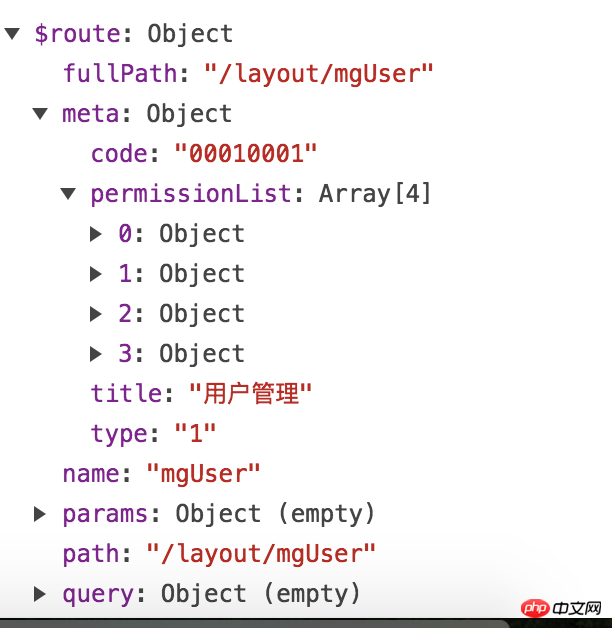
3. Regarding page button level control, you can customize a command to do this. Because we have put the permission list into the meta object of the corresponding route, we can easily go back to the permissions that the current user has on the current page on each page

I believe you have mastered the method after reading the case in this article. For more exciting information, please pay attention to other related articles on the php Chinese website!
Recommended reading:
Detailed steps to build a React development environment using create-react-app
##How to use element- ui limit date selection
The above is the detailed content of How to use vue addRoutes to implement dynamic permission routing menu. For more information, please follow other related articles on the PHP Chinese website!


