

How to implement verification code applet in php
This article mainly introduces the specific implementation method of the verification code applet based on PHP, and makes detailed comments, which is conducive to understanding and learning. Friends who need it can take a look together
Verification code function ( Personal understanding):
Reduce the pressure on the server (such as the verification code function of 12306);
Prevent violent registration
Personal idea: Generate n-digit random numbers from a-z, A-Z, 1-9 to form a new verification code.
Several small functions for generating verification codes
range() //Specify a range to output an array
a) For example: range(1,9)
array_merge()//Merge arrays
a) array_merge(array 1, array 2….)
array_rand (array, quantity)
a) Randomly take out several subscripts from the array and return an array
shuffle(array)//Will shuffle the array again Element
mt_rand (specify a range) //Generate a better random number
such as: mt_rand(1,5) // Generate an arbitrary number between 1-5
Generate verification code
1 2 3 4 5 6 7 8 9 10 11 12 13 |
|
Screenshots of running results
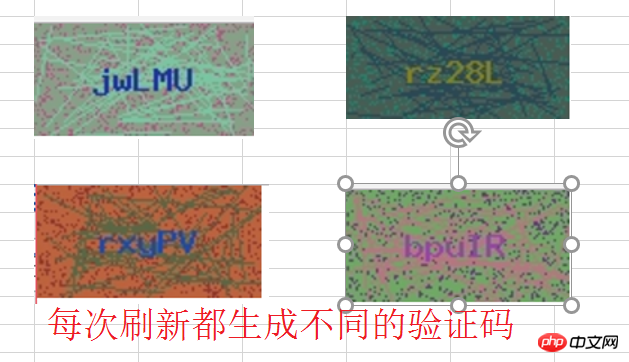
Perfection: Add the verification code to the image so that the verification code is realistic
Before improving, let’s introduce the image creation The rough steps
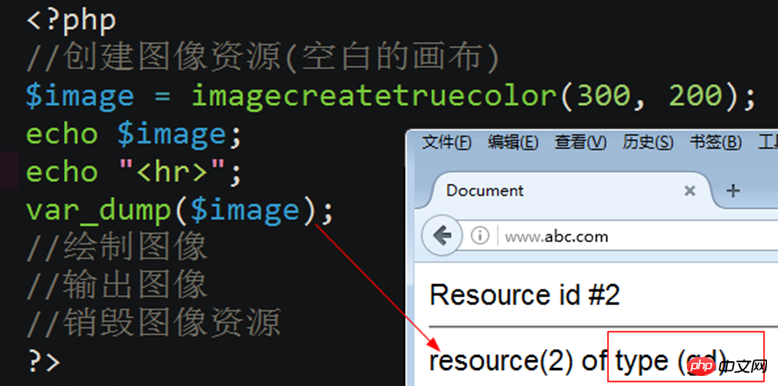
Create an image
Method 1: Create a true color image (empty canvas)
imagecreatetruecolor(width, height) //Create a true color image
Description:
width: width of the canvas (pixels)
height: the height of the canvas (pixels)
The return value is the image resource

is a true color image: fill color
imagefill(image, x, y, color) //Fill the image resource with color
- image //Image resource
- x, y, filled coordinate point (note: filled with the color closest to this point)
- color; //What color to use To fill
for a true color image: Assign color
##imagecolorallocate(image, red, green, blue)Description:
- image //Image resource
- red: //Red color(0 -255) or 0x(00-ff) //That is, expressed in hexadecimal (0xff is 255)
- green//Green color (0-255)
- blue //Blue color (0-255)
- Code demonstration of imagefill and imagecolorallocate
When the canvas is not filled with color Effect
 The effect and code when filling the canvas with color
1 2 3 4 5 6 7 8 9 10 11 12 13 14 15 16 17 18 |
|
## Result screenshot;
#Output image (take jpeg as an example)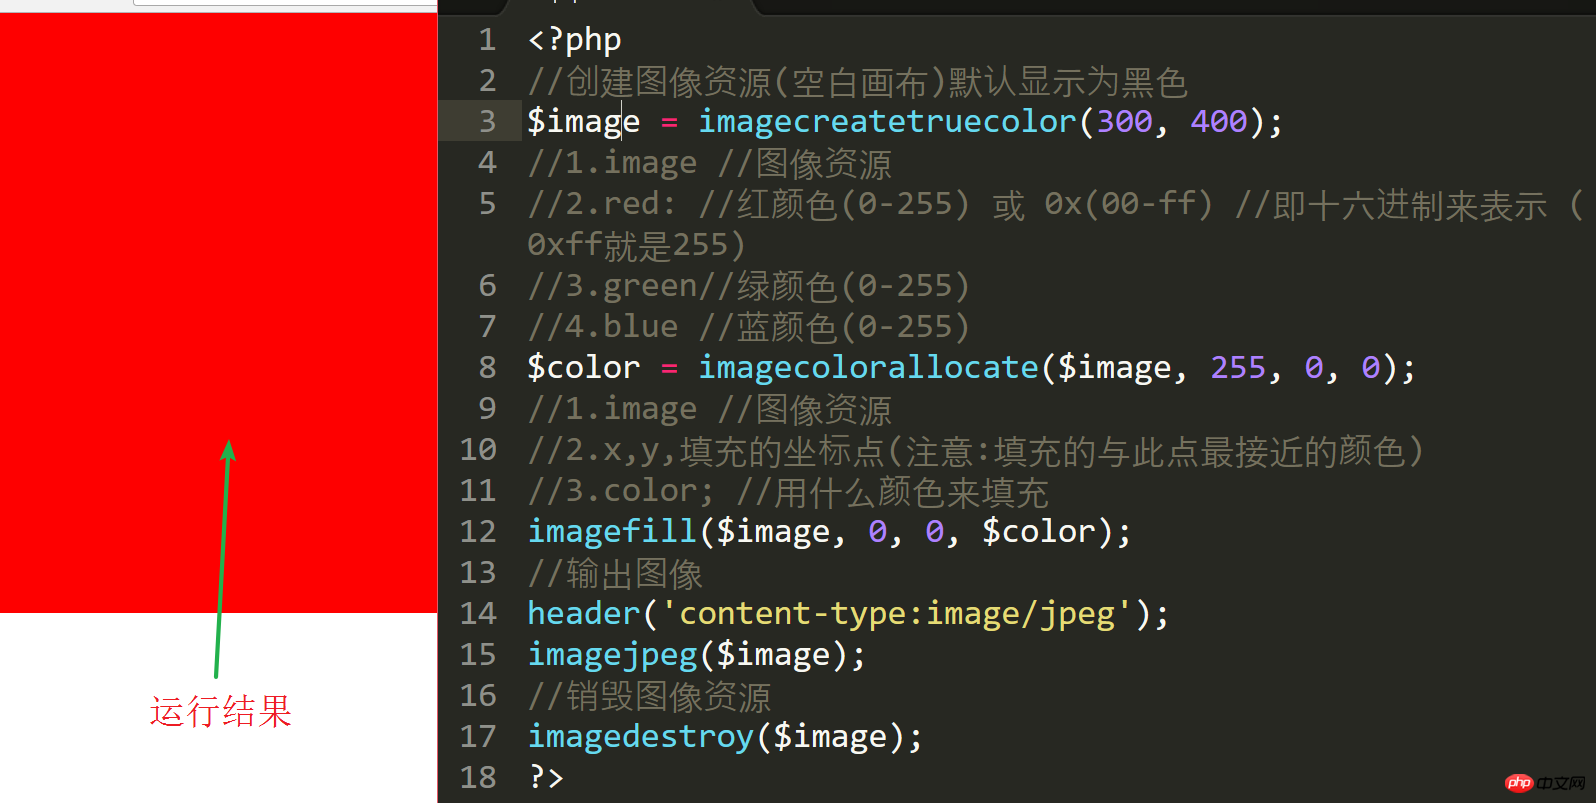
Output image to browser
a ) header('content-type:image/jpeg'); //Set to view the image through browsing
b) imagejpeg (image resource)Output the image by file
a) imagejpeg(image resource,'image path',image quality) //Quality value 0-100
b) Note:Note: Only jpeg format has the quality parameter.
Destroy the image
imagedestroy($image); / /Destroy images and release memory resources.
Verify The entire code of the code:
1 2 3 4 5 6 7 8 9 10 11 12 13 14 15 16 17 18 19 20 21 22 23 24 25 26 27 28 29 30 31 32 33 34 35 36 37 38 39 40 41 42 43 44 45 46 47 48 49 50 51 |
|
Understand some functions in the code
Add interference points
imagesetpixel(image, x, y, color)
Description: x, y is a point Coordinates

imageline(image, x1, y1, x2, y2, color)
说明: x1,y1是线的一个端点坐标; x2,y2是线的另一个端口的坐标; 由两点画一条线

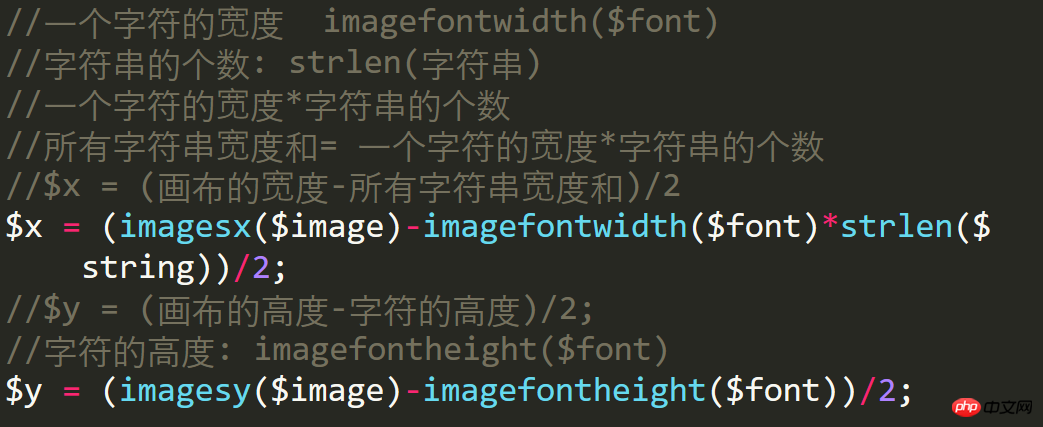
让验证码居于图像的正中
1 2 3 4 5 |
|
最后运行结果
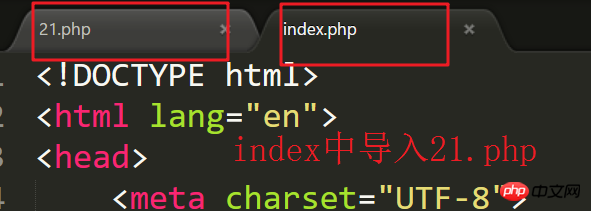
再次完善(和html代码结合起来)
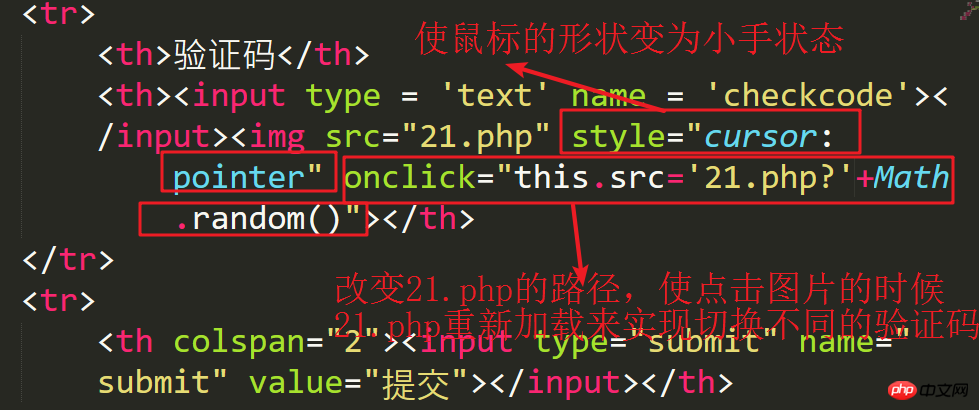
Html代码
1 2 3 4 5 6 7 8 9 10 11 12 13 14 15 16 17 18 19 20 21 22 23 24 25 26 27 28 29 30 31 |
|
理解;
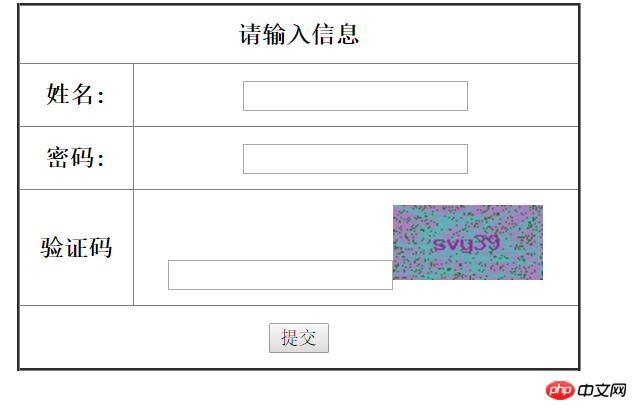
最后结果截图
以上就是本文的全部内容,希望对大家的学习有所帮助。
相关推荐:
The above is the detailed content of How to implement verification code applet in php. For more information, please follow other related articles on the PHP Chinese website!

Hot AI Tools

Undresser.AI Undress
AI-powered app for creating realistic nude photos

AI Clothes Remover
Online AI tool for removing clothes from photos.

Undress AI Tool
Undress images for free

Clothoff.io
AI clothes remover

AI Hentai Generator
Generate AI Hentai for free.
Hot Article
Hot Tools

Notepad++7.3.1
Easy-to-use and free code editor

SublimeText3 Chinese version
Chinese version, very easy to use

Zend Studio 13.0.1
Powerful PHP integrated development environment

Dreamweaver CS6
Visual web development tools

SublimeText3 Mac version
God-level code editing software (SublimeText3)
Hot Topics
 1359
1359
 52
52

 CakePHP Project Configuration
Sep 10, 2024 pm 05:25 PM
CakePHP Project Configuration
Sep 10, 2024 pm 05:25 PM
In this chapter, we will understand the Environment Variables, General Configuration, Database Configuration and Email Configuration in CakePHP.
 PHP 8.4 Installation and Upgrade guide for Ubuntu and Debian
Dec 24, 2024 pm 04:42 PM
PHP 8.4 Installation and Upgrade guide for Ubuntu and Debian
Dec 24, 2024 pm 04:42 PM
PHP 8.4 brings several new features, security improvements, and performance improvements with healthy amounts of feature deprecations and removals. This guide explains how to install PHP 8.4 or upgrade to PHP 8.4 on Ubuntu, Debian, or their derivati
 CakePHP Date and Time
Sep 10, 2024 pm 05:27 PM
CakePHP Date and Time
Sep 10, 2024 pm 05:27 PM
To work with date and time in cakephp4, we are going to make use of the available FrozenTime class.
 CakePHP File upload
Sep 10, 2024 pm 05:27 PM
CakePHP File upload
Sep 10, 2024 pm 05:27 PM
To work on file upload we are going to use the form helper. Here, is an example for file upload.
 CakePHP Routing
Sep 10, 2024 pm 05:25 PM
CakePHP Routing
Sep 10, 2024 pm 05:25 PM
In this chapter, we are going to learn the following topics related to routing ?
 CakePHP Working with Database
Sep 10, 2024 pm 05:25 PM
CakePHP Working with Database
Sep 10, 2024 pm 05:25 PM
Working with database in CakePHP is very easy. We will understand the CRUD (Create, Read, Update, Delete) operations in this chapter.
 Discuss CakePHP
Sep 10, 2024 pm 05:28 PM
Discuss CakePHP
Sep 10, 2024 pm 05:28 PM
CakePHP is an open-source framework for PHP. It is intended to make developing, deploying and maintaining applications much easier. CakePHP is based on a MVC-like architecture that is both powerful and easy to grasp. Models, Views, and Controllers gu
 CakePHP Creating Validators
Sep 10, 2024 pm 05:26 PM
CakePHP Creating Validators
Sep 10, 2024 pm 05:26 PM
Validator can be created by adding the following two lines in the controller.
