How to use Vue's toast pop-up component
This time I will show you how to use vue's toast pop-up component. What are the precautions for using vue's toast pop-up component? . Here is a practical case, let's take a look.
First, let’s analyze the characteristics (requirements) of the pop-up component:
0. Lightweight--a component is less than 1Kib (the actual package is less than 0.8k)
1. Generally used in multiple places - need to solve the problem of repeated reference registration on each page
1. Generally used to interact with js - no need to write < in <template> toast :show="true" text="Pop-up message"></toast>
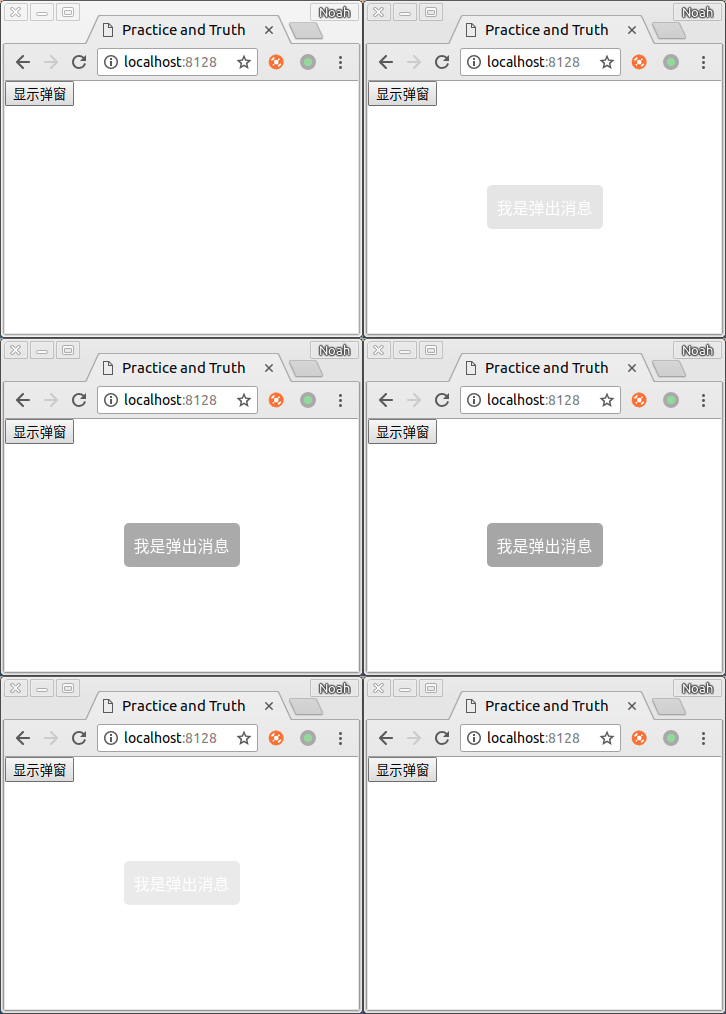
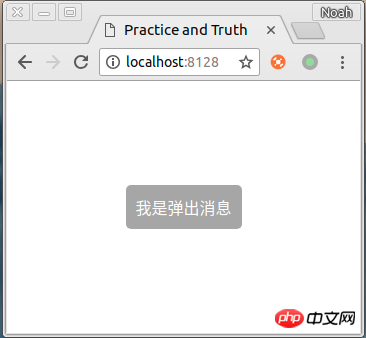
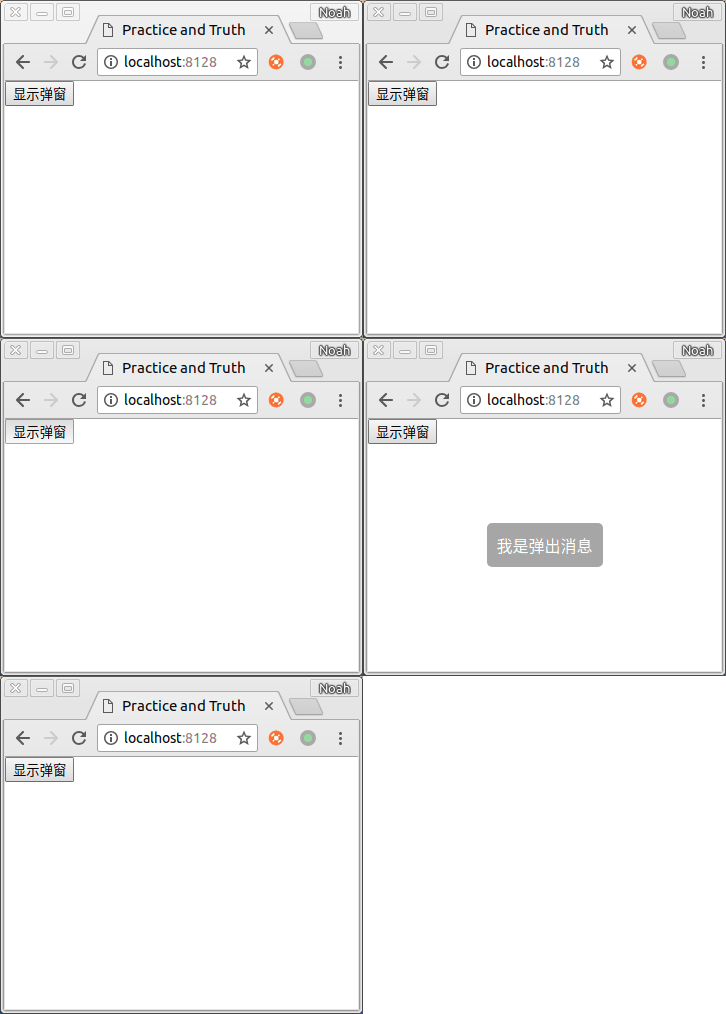
Today, we will implement a toast popup based on vue based on the above two requirements. Window component, the picture below is the final rendering.

1. First write an ordinary vue component
File location/src/toast/toast.vue
<template>
 <p class="wrap">我是弹窗</p>
</template>
<style scoped>
 .wrap{
 position: fixed;
 left: 50%;
 top:50%;
 background: rgba(0,0,0,.35);
 padding: 10px;
 border-radius: 5px;
 transform: translate(-50%,-50%);
 color:#fff;
 }
</style>2. Introduce components into the pages we need to use to facilitate viewing effects and errors
<template>
 <p id="app">
 <toast></toast>
 </p>
</template>
<script>
 import toast from './toast/toast'
 export default {
 components: {toast},
 }
</script>
3. Implement dynamic loading of components
You can see that a static pop-up has been displayed layer, let’s take a look at how to implement dynamic pop-up.
We first create a new index.js under the /src/toast/ directory, and then enter the following code in index.js ( Since the code is severely coupled, I will not explain it line by line and change it to inline comments)
File location/src/toast/index.js
import vue from 'vue'
// 这里就是我们刚刚创建的那个静态组件
import toastComponent from './toast.vue'
// 返回一个 扩展实例构造器
const ToastConstructor = vue.extend(toastComponent)
// 定义弹出组件的函数 接收2个参数, 要显示的文本 和 显示时间
function showToast(text, duration = 2000) {
 // 实例化一个 toast.vue
 const toastDom = new ToastConstructor({
 el: document.createElement('p'),
 data() {
 return {
 text:text,
 show:true
 }
 }
 })
 // 把 实例化的 toast.vue 添加到 body 里
 document.body.appendChild(toastDom.$el)
 // 过了 duration 时间后隐藏
 setTimeout(() => {toastDom.show = false} ,duration)
}
// 注册为全局组件的函数
function registryToast() {
 // 将组件注册到 vue 的 原型链里去,
 // 这样就可以在所有 vue 的实例里面使用 this.$toast()
 vue.prototype.$toast = showToast
}export default registryToast
Attached is a portal vue.extend official document
4. Trial
At this point, we have initially completed a project that can Globally registered and dynamically loaded toast components, let's try it out next. Register the component in vue's
entry file(if scaffolding is generated, it is ./src/main.js) File location/src/main.js
import toastRegistry from './toast/index'
// 这里也可以直接执行 toastRegistry()
Vue.use(toastRegistry)
我们稍微修改一下使用方式,把 第二步 的引用静态组件的代码,改成如下
<template>
 <p id="app">
 <input type="button" value="显示弹窗" @click="showToast">
 </p>
</template>
<script>
 export default {
 methods: {
 showToast () {
 this.$toast('我是弹出消息')
 }
 }
 }
</script> As you can see, we no longer need to introduce and register components in the page, we can directly use this.$ toast().
5. OptimizationNow we have initially implemented a pop-up window. But it is still a little bit away from success. There is an animation missing, and the current pop-up and hiding are very stiff.
Let’s slightly modify the showToast function in toast/index.js (there are changes in the commented areas)
File location/src/toast/index.js
function showToast(text, duration = 2000) {
 const toastDom = new ToastConstructor({
 el: document.createElement('p'),
 data() {
 return {
 text:text,
 showWrap:true, // 是否显示组件
 showContent:true // 作用:在隐藏组件之前,显示隐藏动画
 }
 }
 })
 document.body.appendChild(toastDom.$el)
 // 提前 250ms 执行淡出动画(因为我们再css里面设置的隐藏动画持续是250ms)
 setTimeout(() => {toastDom.showContent = false} ,duration - 1250)
 // 过了 duration 时间后隐藏整个组件
 setTimeout(() => {toastDom.showWrap = false} ,duration)
}Then, modify the style of toast.vue
File location/src/toast/toast.vue
<template>
<p class="wrap" v-if="showWrap" :class="showContent ?'fadein':'fadeout'">{{text}}</p>
</template>
<style scoped>
.wrap{
position: fixed;
left: 50%;
top:50%;
background: rgba(0,0,0,.35);
padding: 10px;
border-radius: 5px;
transform: translate(-50%,-50%);
color:#fff;
}
.fadein {
animation: animate_in 0.25s;
}
.fadeout {
animation: animate_out 0.25s;
opacity: 0;
}
@keyframes animate_in {
0% {
opacity: 0;
}
100%{
opacity: 1;
}
}
@keyframes animate_out {
0% {
opacity: 1;
}
100%{
opacity: 0;
}
}
</style>Done, a toast component is initially completed

Summary
##vue. The extend function can generate a component constructor. You can use this function to construct a vue component instance- You can use document.body.appendChild() to dynamically add the component to the body
- vue.prototype.$toast = showToast You can register the component globally
- Displaying animation is relatively simple, hiding animation must be reserved enough before hiding The animation execution time
- The source code address of this article is here
- The above is not important, the important thing is to give this article a star
- I believe you have mastered the method after reading the case in this article. For more exciting information, please pay attention to other related articles on the php Chinese website!
How to use js to encapsulate ajax function and usage
The above is the detailed content of How to use Vue's toast pop-up component. For more information, please follow other related articles on the PHP Chinese website!

Hot AI Tools

Undresser.AI Undress
AI-powered app for creating realistic nude photos

AI Clothes Remover
Online AI tool for removing clothes from photos.

Undress AI Tool
Undress images for free

Clothoff.io
AI clothes remover

AI Hentai Generator
Generate AI Hentai for free.

Hot Article

Hot Tools

Notepad++7.3.1
Easy-to-use and free code editor

SublimeText3 Chinese version
Chinese version, very easy to use

Zend Studio 13.0.1
Powerful PHP integrated development environment

Dreamweaver CS6
Visual web development tools

SublimeText3 Mac version
God-level code editing software (SublimeText3)

Hot Topics
 How to use magnet links
Feb 18, 2024 am 10:02 AM
Magnet link is a link method for downloading resources, which is more convenient and efficient than traditional download methods. Magnet links allow you to download resources in a peer-to-peer manner without relying on an intermediary server. This article will introduce how to use magnet links and what to pay attention to. 1. What is a magnet link? A magnet link is a download method based on the P2P (Peer-to-Peer) protocol. Through magnet links, users can directly connect to the publisher of the resource to complete resource sharing and downloading. Compared with traditional downloading methods, magnetic
 How to use mdf and mds files
Feb 19, 2024 pm 05:36 PM
How to use mdf files and mds files With the continuous advancement of computer technology, we can store and share data in a variety of ways. In the field of digital media, we often encounter some special file formats. In this article, we will discuss a common file format - mdf and mds files, and introduce how to use them. First, we need to understand the meaning of mdf files and mds files. mdf is the extension of the CD/DVD image file, and the mds file is the metadata file of the mdf file.
 What software is crystaldiskmark? -How to use crystaldiskmark?
Mar 18, 2024 pm 02:58 PM
CrystalDiskMark is a small HDD benchmark tool for hard drives that quickly measures sequential and random read/write speeds. Next, let the editor introduce CrystalDiskMark to you and how to use crystaldiskmark~ 1. Introduction to CrystalDiskMark CrystalDiskMark is a widely used disk performance testing tool used to evaluate the read and write speed and performance of mechanical hard drives and solid-state drives (SSD). Random I/O performance. It is a free Windows application and provides a user-friendly interface and various test modes to evaluate different aspects of hard drive performance and is widely used in hardware reviews
 How to install the Windows 10 old version component DirectPlay
Dec 28, 2023 pm 03:43 PM
Many users always encounter some problems when playing some games on win10, such as screen freezes and blurred screens. At this time, we can solve the problem by turning on the directplay function, and the operation method of the function is also Very simple. How to install directplay, the old component of win10 1. Enter "Control Panel" in the search box and open it 2. Select large icons as the viewing method 3. Find "Programs and Features" 4. Click on the left to enable or turn off win functions 5. Select the old version here Just check the box
 How to download foobar2000? -How to use foobar2000
Mar 18, 2024 am 10:58 AM
foobar2000 is a software that can listen to music resources at any time. It brings you all kinds of music with lossless sound quality. The enhanced version of the music player allows you to get a more comprehensive and comfortable music experience. Its design concept is to play the advanced audio on the computer The device is transplanted to mobile phones to provide a more convenient and efficient music playback experience. The interface design is simple, clear and easy to use. It adopts a minimalist design style without too many decorations and cumbersome operations to get started quickly. It also supports a variety of skins and Theme, personalize settings according to your own preferences, and create an exclusive music player that supports the playback of multiple audio formats. It also supports the audio gain function to adjust the volume according to your own hearing conditions to avoid hearing damage caused by excessive volume. Next, let me help you
 How to use Baidu Netdisk app
Mar 27, 2024 pm 06:46 PM
Cloud storage has become an indispensable part of our daily life and work nowadays. As one of the leading cloud storage services in China, Baidu Netdisk has won the favor of a large number of users with its powerful storage functions, efficient transmission speed and convenient operation experience. And whether you want to back up important files, share information, watch videos online, or listen to music, Baidu Cloud Disk can meet your needs. However, many users may not understand the specific use method of Baidu Netdisk app, so this tutorial will introduce in detail how to use Baidu Netdisk app. Users who are still confused can follow this article to learn more. ! How to use Baidu Cloud Network Disk: 1. Installation First, when downloading and installing Baidu Cloud software, please select the custom installation option.
 How to use Xiaoai Speaker How to connect Xiaoai Speaker to mobile phone
Feb 22, 2024 pm 05:19 PM
After long pressing the play button of the speaker, connect to wifi in the software and you can use it. Tutorial Applicable Model: Xiaomi 12 System: EMUI11.0 Version: Xiaoai Classmate 2.4.21 Analysis 1 First find the play button of the speaker, and press and hold to enter the network distribution mode. 2 Log in to your Xiaomi account in the Xiaoai Speaker software on your phone and click to add a new Xiaoai Speaker. 3. After entering the name and password of the wifi, you can call Xiao Ai to use it. Supplement: What functions does Xiaoai Speaker have? 1 Xiaoai Speaker has system functions, social functions, entertainment functions, knowledge functions, life functions, smart home, and training plans. Summary/Notes: The Xiao Ai App must be installed on your mobile phone in advance for easy connection and use.
 How to use NetEase Mailbox Master
Mar 27, 2024 pm 05:32 PM
NetEase Mailbox, as an email address widely used by Chinese netizens, has always won the trust of users with its stable and efficient services. NetEase Mailbox Master is an email software specially created for mobile phone users. It greatly simplifies the process of sending and receiving emails and makes our email processing more convenient. So how to use NetEase Mailbox Master, and what specific functions it has. Below, the editor of this site will give you a detailed introduction, hoping to help you! First, you can search and download the NetEase Mailbox Master app in the mobile app store. Search for "NetEase Mailbox Master" in App Store or Baidu Mobile Assistant, and then follow the prompts to install it. After the download and installation is completed, we open the NetEase email account and log in. The login interface is as shown below


