
 Web Front-end
JS Tutorial
Handwritten mobile terminal inertial sliding & rebound Vue navigation bar component problem (detailed tutorial)
Web Front-end
JS Tutorial
Handwritten mobile terminal inertial sliding & rebound Vue navigation bar component problem (detailed tutorial)
Handwritten mobile terminal inertial sliding & rebound Vue navigation bar component problem (detailed tutorial)
Some time ago I wrote a mobile terminal inertial sliding & rebound Vue navigation bar component ly-tab. I think it is very practical. You may use it when doing projects. Friends who are interested can learn together
Some time ago, I wrote an adaptive sliding Vue navigation bar component for the mobile terminal. I think it has certain practicality and everyone may use it (of course, if some big guys write better themselves, there is no need), so I sorted it out the past two days. After a while, it has been published to npm and GitHub. Click me to go to npm, and click me to go to the GitHub project. Students in need can npm install ly-tab -S or yarn in the project Add ly-tab is used. The specific usage will be discussed below.
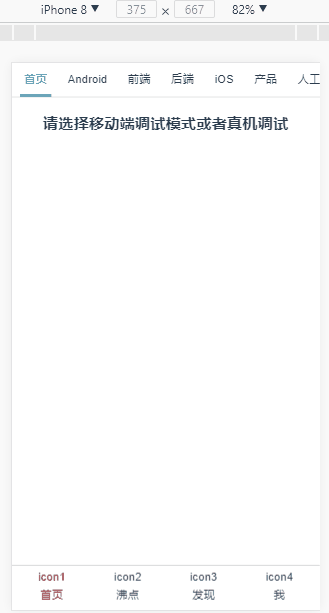
Okay, let’s take a look at the results first
Okay, let’s start talking nonsense. The internship has been almost 3 months. During this time, I have been following the mentor. I have also been exposed to some projects and learned a lot. The projects I have come into contact with are basically mobile projects, and the framework mainly uses Vue. Students who have worked on mobile devices or used mobile apps (bah, bullshit) will definitely find that many times there is a tab navigation bar with a sliding effect similar to the one above. I believe you must have seen it on the homepage of the Nuggets.
Implementation ideas
The project at that time happened to have this demand, so I wanted to be lazy and use the Mint-ui component library directly There are ready-made tabbar and tab-item components. I looked at its implementation source code on github and found that it only implements the switching function but cannot slide. So, if I am too lazy, I have to write it myself.
In fact, it is not difficult to implement the tab switching function. Mint-ui actually uses v-model syntax sugar, just like the following
<ly-tab v-model="selected">
  <ly-tab-item></ly-tab-item>
</ly-tab>
The following is the disassembly of v-model syntax The implementation of sugar
<ly-tab :value="selected" @input="selected = arguments[0]">
  <ly-tab-item></ly-tab-item>
</ly-tab>
Then you only need to implement it in the tab-item component. When it is clicked, let its parent component, which is the ly-tab component, $emit an input event, and pass in an identification event for each tab. The unique value of -item is used as the first parameter. Regarding this unique value, mint-ui requires the user to manually pass in a unique id value to each tab-item through props. The following is the demo implementation of Mint UI:
<mt-tabbar v-model="selected">
  <mt-tab-item id="订单">
    <img slot="icon" src="http://placehold.it/100x100">
    <span slot="label">订单</span>
  </mt-tab-item>
</mt-tabbar> However, after reading the boss’s thoughts on designing the Tabbar plug-in in vue, I feel that the approach in the article is better, because for the parent component <ly-tab-item/> is clicked, then I put the index of each <ly-tab-item/> component Wouldn't it be enough to use the index value as its unique identification value?
Then the question is: How to get its own index value inside the tab-item component?
First of all, the $children of the ly-tab component is an array. Since each <ly-tab-item/> component is created sequentially and inserted into the array by push, so each <ly-tab-item/> component is created and pushed to $children , for the <ly-tab-item/> component (this.$parent.$children.length || 1) - 1 Isn’t it just every < ly-tab-item/> The only index value of the component. In fact, the click-to-switch function can already be implemented here. Paste the code in tab-item.vue below:
tab-item.vue
<template>
<a class="ly-tab-item"
:style="$parent.value === id ? activeStyle : {}"
@click="$parent.$emit('input', id)">
<p class="ly-tab-item-icon"><slot name="icon"></slot></p>
<p class="ly-tab-item-label"><slot></slot></p>
</a>
</template>
<script>
export default {
name: 'LyTabItem',
computed: {
activeStyle () {
return {
color: this.$parent.activeColor,
borderColor: this.$parent.activeColor,
borderWidth: this.$parent.lineWidth,
borderBottomStyle: 'solid'
}
}
},
data () {
return {
id: (this.$parent.$children.length || 1) - 1
}
}
}
</script>
<style lang="scss">
.ly-tab-item {
text-decoration: none;
text-align: center;
.ly-tab-item-icon {
margin: 0 auto 5px;
}
.ly-tab-item-label {
margin: 0 auto 10px;
line-height: 18px;
}
}
</style>Regarding the implementation of touch sliding, inertial sliding and rebound effects in tab.vue, there is no discussion here. The method is explained in detail. Interested friends can check it out on github. Click here to check out the project on github. If you want to see a sample demo, you can clone the project locally and run it. You are welcome to correct me if it is not well written. If you think it is useful It would be best if you can get it or be able to help everyone, so you might as well give it a star, haha...
Hey, hey, that’s not right, why did you start asking for a star? The most important thing is I haven’t talked about it yet—how to use ly-tab?
How to use ly-tab
If you want to use ly-tab, you need to download it through npm or yarn in your project Installation:
npm install ly-tab -S
or
yarn add ly-tab
Then import it globally in main.js:
import Vue from 'vue';
import LyTab from 'ly-tab';
Vue.use(LyTab);
Then you can use it in your project <ly-tab></ly-tab> ; and <ly-tab-item></ly-tab-item> component without the need to introduce it again
chestnut
<ly-tab v-model="selected" fixBottom>
 <!-- selected是你自己定义的一个在data中用于存放当前tab-item的索引值的变量 -->
 <ly-tab-item v-for="(item, index) in tabList" :key="index">
  {{item.itemName}}
 </ly-tab-item>
</ly-tab>The chestnut above is actually just the implementation of tabbar. You definitely need to switch the view area in your project. Here I will briefly talk about my current approach:
Using Vue -router switches router-view
Use dynamic components (can be used with asynchronous components)
I seem to have only used this for the time being Two kinds. I don’t know if you have any other better methods. Welcome to share~
Configuration items
can be given to<ly-tab>< ;/ly-tab> The component passes in some configuration items to customize the effect you want
| Configuration item | Type | Description | Default value |
|---|---|---|---|
| lineWidth | Number | fixBottom is false when the tabbar bottom border-width | 1px |
| activeColor | String | Activated font color and border-bottom-color | red |
| fixBottom | Boolean | Whether it is fixed at the bottom of the view (cannot slide when false) | false |
| additionalX | Number | Approximately Equal to the maximum draggable distance when exceeding the boundary | 50px |
| Number | Inertial rebound index (the larger the value , the greater the amplitude, the longer the inertia rebound distance) | 10 | |
| Number | Sensitivity during inertial sliding (The smaller the value, the greater the resistance). It can be approximated that the time required for the speed to reduce to zero after the hand is released is | 1000ms | |
| Number | Rebound animation duration | 360ms |
In the vue project, use axios cross-domain processing
Vue-cli project to obtain local json file data Example
Using import and require in JavaScript to package and implement principle analysis
The above is the detailed content of Handwritten mobile terminal inertial sliding & rebound Vue navigation bar component problem (detailed tutorial). For more information, please follow other related articles on the PHP Chinese website!

Hot AI Tools

Undresser.AI Undress
AI-powered app for creating realistic nude photos

AI Clothes Remover
Online AI tool for removing clothes from photos.

Undress AI Tool
Undress images for free

Clothoff.io
AI clothes remover

Video Face Swap
Swap faces in any video effortlessly with our completely free AI face swap tool!

Hot Article
Hot Tools

Notepad++7.3.1
Easy-to-use and free code editor

SublimeText3 Chinese version
Chinese version, very easy to use

Zend Studio 13.0.1
Powerful PHP integrated development environment

Dreamweaver CS6
Visual web development tools

SublimeText3 Mac version
God-level code editing software (SublimeText3)
Hot Topics
 1393
1393
 52
37
110
52
37
110

 What should I do if my mobile phone screen is hard to slide and dry?
Dec 04, 2023 pm 03:51 PM
What should I do if my mobile phone screen is hard to slide and dry?
Dec 04, 2023 pm 03:51 PM
Solutions for mobile phone screens that are difficult to slide and dry: 1. Humidify the screen; 2. Clean the screen regularly; 3. Increase the sliding strength of your fingers; 4. Use mobile phone screen protectors; 5. Replace protective covers; 6. Keep hands moist; 7. , handle it cleanly when applying the film; 8. Use lubricant; 9. Use gloves; 10. Adjust the screen brightness; 11. Replace the mobile phone. Detailed introduction: 1. Humidify the screen, place a humidifier next to the screen or spray some water to increase the humidity in the air, thereby reducing the dryness of the screen; 2. Clean the screen regularly, use professional screen cleaner, etc.
 How to use JavaScript to achieve the up and down sliding switching effect of images and add fade-in and fade-out animations?
Oct 20, 2023 am 11:19 AM
How to use JavaScript to achieve the up and down sliding switching effect of images and add fade-in and fade-out animations?
Oct 20, 2023 am 11:19 AM
How can JavaScript achieve the up and down sliding switching effect of images and add fade-in and fade-out animations? In web development, it is often necessary to achieve image switching effects. You can use JavaScript to achieve up and down sliding switching, and add fade-in and fade-out animation effects. Let’s take a closer look. First, we need a container that contains multiple images. We can use div tags in HTML to host images. For example, we create a div with the id "image-container" to
 HTML, CSS, and jQuery: A technical guide to implementing a sliding panel effect
Oct 27, 2023 pm 04:39 PM
HTML, CSS, and jQuery: A technical guide to implementing a sliding panel effect
Oct 27, 2023 pm 04:39 PM
HTML, CSS, and jQuery: Technical Guidelines for Implementing Sliding Panel Effects With the popularity of mobile devices and the development of web applications, sliding panels, as a popular interaction method, are becoming more and more common in web design. By implementing the sliding panel effect, we can display more content in a limited space and improve the user experience. This article will introduce in detail how to use HTML, CSS and jQuery to achieve the sliding panel effect, and provide specific code examples. HTML Structure First, we need to create a basic
 How to use Vue to implement a sliding carousel
Nov 07, 2023 pm 12:59 PM
How to use Vue to implement a sliding carousel
Nov 07, 2023 pm 12:59 PM
Vue is a popular JavaScript framework that helps us build interactive web applications more easily. Today, we will introduce how to use Vue to create a sliding carousel. We will use VueCLI to create a new Vue project and use Vue's official carousel component to implement the sliding carousel chart. Here are the specific steps: Step 1: Install VueCLI To install VueCLI, you need to install Node.js first. Once you have Node.js installed
 Interpretation of jQuery sliding events: implementation principles and precautions
Feb 27, 2024 am 10:57 AM
Interpretation of jQuery sliding events: implementation principles and precautions
Feb 27, 2024 am 10:57 AM
Interpretation of jQuery sliding events: Implementation principles and precautions In front-end development, sliding events are one of the common and commonly used interactive operations. Through sliding events, we can implement functions such as switching carousels and scrolling loading of pages. As a popular JavaScript library, jQuery provides a wealth of sliding event processing methods to facilitate us to achieve various interactive effects. This article will delve into the implementation principles and precautions of sliding events in jQuery, and provide specific code examples. 1. Implementation principle
 How to implement sliding in react
Dec 30, 2022 am 11:09 AM
How to implement sliding in react
Dec 30, 2022 am 11:09 AM
The method to implement sliding in react: 1. Find the touches in the onTouchStart event and record the new touch occurrence according to the identifier; 2. Record the coordinates of each point passed by the touch according to the identifier in the onTouchMove event; 3. In the onTouchEnd event, find The finished touch event, and then calculate the gesture to be performed based on the point crossed by the finished touch event.
 watchOS 10.2: How to change your watch face with a swipe
Dec 15, 2023 pm 11:15 PM
watchOS 10.2: How to change your watch face with a swipe
Dec 15, 2023 pm 11:15 PM
In watchOS 10.2, you can enable swipe gestures to switch between Apple Watch watch faces more easily, just like you did before in watchOS 9. Read on to find out how it's done. If you're a long-time Apple Watch user, you probably remember a time when you could switch watch faces on the display with a simple swipe gesture. This was the default interaction in watchOS9, but Apple then removed the gesture when it upgraded to watchOS10. Apple changed the interaction because users complained it was too easy to accidentally change watch faces. But for anyone who's never had this problem, Apple just made it harder - it's required before swiping
 How to use CSS Flex elastic layout to implement sliding card layout
Sep 28, 2023 pm 01:16 PM
How to use CSS Flex elastic layout to implement sliding card layout
Sep 28, 2023 pm 01:16 PM
How to use CssFlex flexible layout to implement sliding card layout In modern web development, flexible layout (Flexbox) has become more and more popular. It is a CSS module for positioning and layout elements that can easily achieve various complex layout effects. This article will introduce how to use Flex elastic layout to implement sliding card layout and provide specific code examples. Sliding card layout is a common UI design pattern, often used to display images or content. Each card can be switched to the next by swiping or clicking
