
This article mainly introduces the complete and detailed process of yii2 installation in detail, which has certain reference value. Interested friends can refer to it
This article shares the yii2 installation process for everyone. For your reference, the specific content is as follows
There is very little information on yii2. I searched a lot of information on the Internet. After comprehensive installation, I found that they are not comprehensive and have taken many detours
I will introduce the complete installation process to you below:
Prerequisite: It is very important, your php version must be php5.4 or above
1. First you need to download the application template, which is divided into basic template and advanced application template. Here I take the advanced application template as an example:
Go here to download the advanced application template
2. After downloading, unzip it and put it in the www directory. I put it in D:\wamp\www\yii2\advanced
cmd dos command to enter thisD:\wamp\www\yii2\advanced :

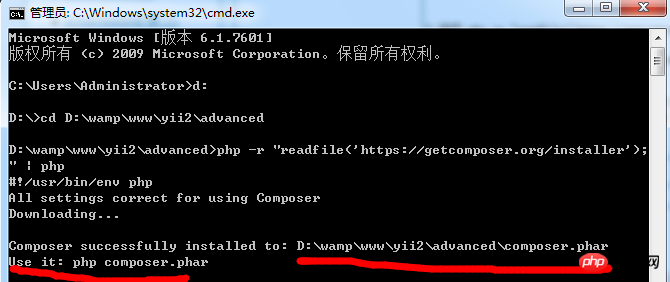
3. Run php -r "readfile('https://getcomposer.org/installer');" | php

4. This is a composer.phar file downloaded under the D:\wamp\www\yii2\advanced directory. With this file, you can execute the php composer.phar command , prompt:
5. Run php composer.phar global require "fxp/composer-asset-plugin:1.0.0-beta3" command, this imperative upgrade The template application must be executed, otherwise an access error will occur. If the error Nothing to install or update is reported, skip this step and there is no need to update.
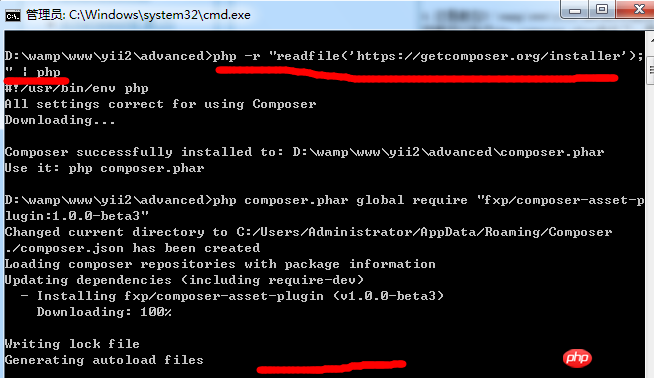
6. Preparation All plugins! ! Very important, without this step everything will fail
Execute the command: php composer.phar global require "fxp/composer-asset-plugin:1.0.0"

7. Install our yii2 application:
Execute the command: composer create-project --prefer-dist --stability=dev yiisoft/yii2-app-advanced .. /yii2test The yii2test application will be generated in the upper directory
Please note that you may be prompted to enter your GitHub username and password during the installation process. this is normal. Just enter them and continue. If you don't have a git account, just register one, but you may need to exit cmd and re-operate during installation.
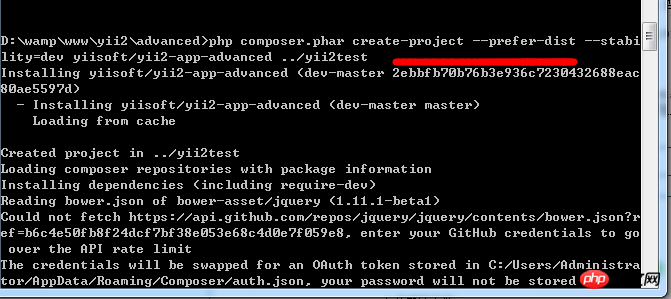
8. The last step: Initialize our application. The initialization is to execute the cmd init command in the yii2test directory you created and select 0 y
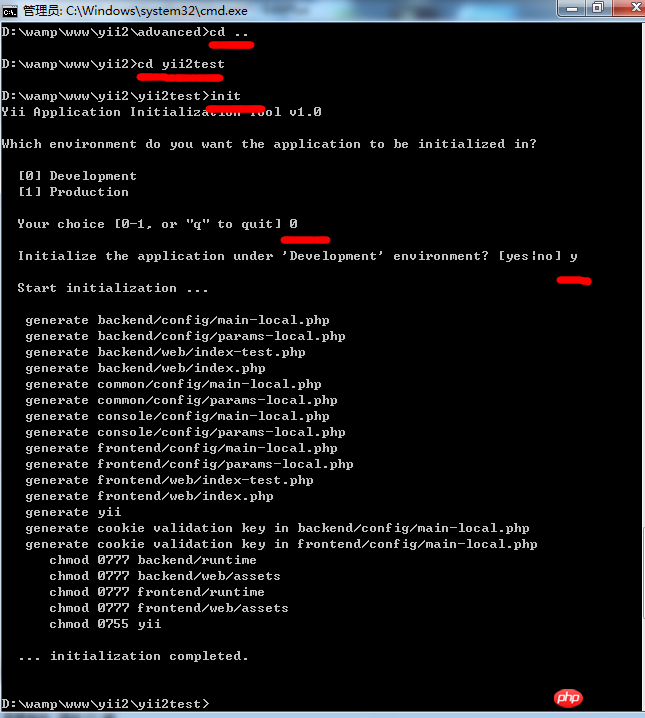
ok, now our yii2 installation is complete. Enter the test directory: localhost/yii2/yii2test/frontend/web/index.php
You will see the following interface:
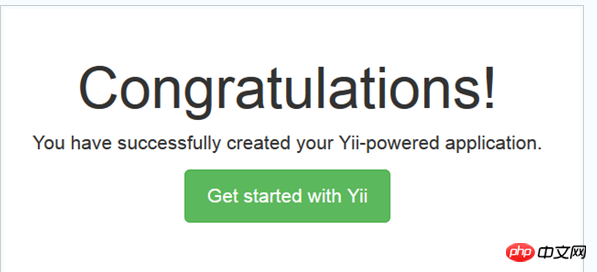
This means that your yii2 installation is successful. Be sure to remember that your php version is php5.4 or above!
The above is the detailed content of yii2 installation detailed process. For more information, please follow other related articles on the PHP Chinese website!


