Configuring tomcat in Mac environment
When we view web pages on a MAC system, we generally use tomcat. This is because appache only supports static web pages, but dynamic web pages such as asp, php, cgi, jsp, etc. need tomcat to handle. So how to install tomcat in your MAC? Now I will teach you how to install it. Friends in need can refer to it.
Preface
I believe you know a little bit about Java Web, and you are generally familiar with Tomcat. Apache is an ordinary server and only supports HTML. That is, ordinary web pages can support PHP through plug-ins and can also be connected to Tomcat (one-way Apache connection to Tomcat, which means that Tomcat resources can be accessed through Apache. Tomcat cannot access Appache resources). Appache only supports static web pages, but dynamic web pages such as asp, php, cgi, jsp, etc. need Tomcat to handle them. Let’s take a look at the detailed steps below.
1. Download
Log in to the Apache Tomcat official website, click Download, and select the version you want to download.
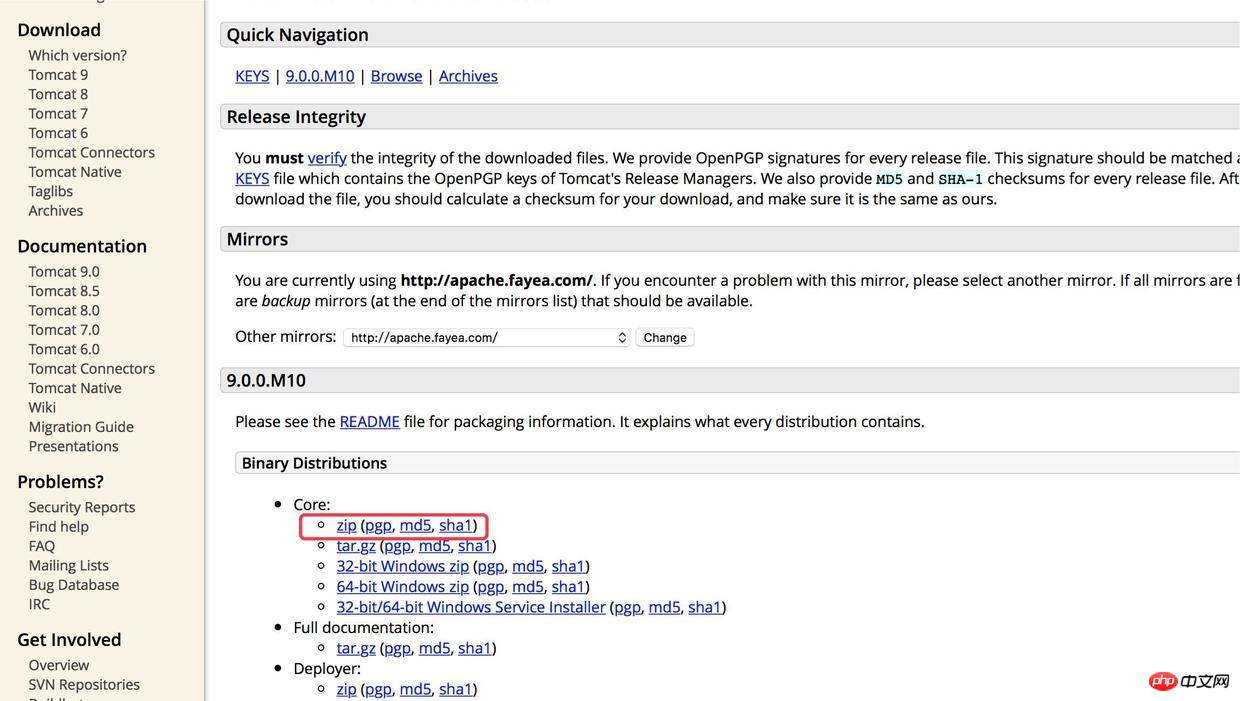
2. Set the local placement path
Right-click Finder—>Go to folder —> In the ~/Library/ directory, unzip the downloaded package, then name it Tomcat and put it here.
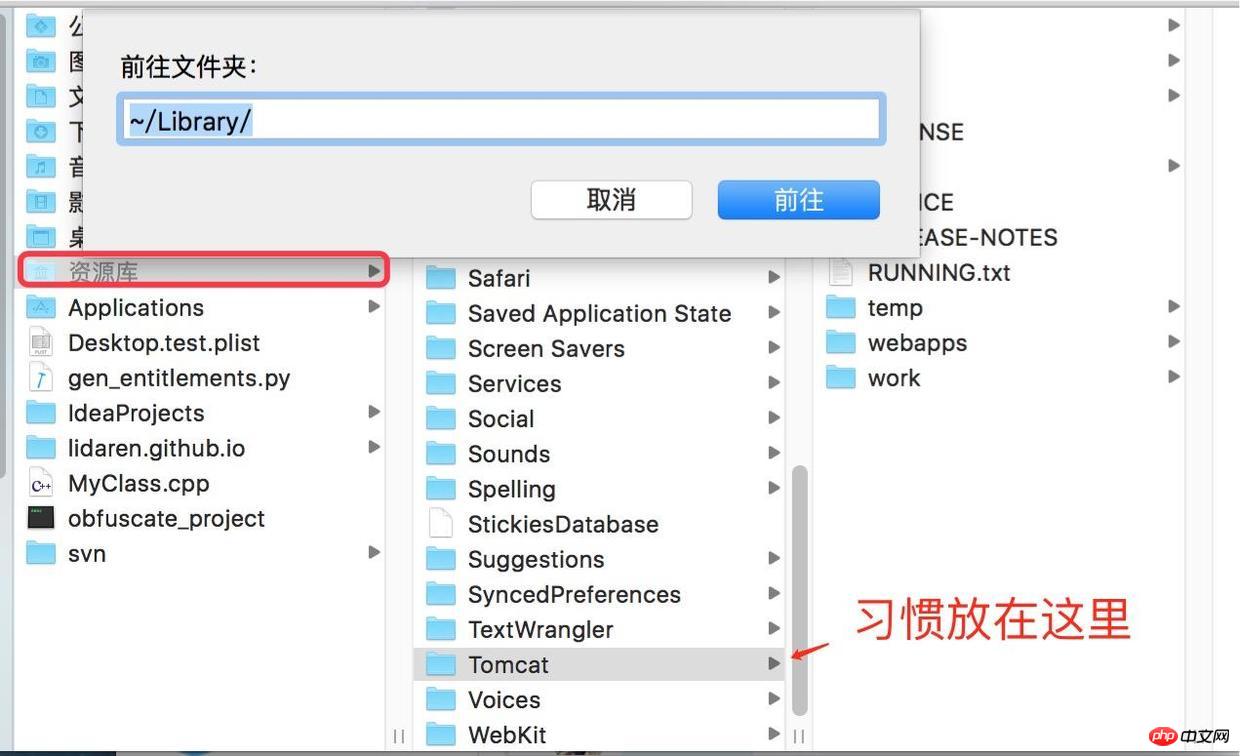
Prevent Tomcat’s path
3. Start Tomcat
Open the terminal, cd /Users/apple/Library/Tomcat/bin (Note: Switch to our Tomcat bin directory)

Open the terminal and enter "cd" "space", Then drag the bin folder to the terminal, enter quickly, click Enter
and then enter: ./startup.sh , press Enter, you can start our own Tomcat, as follows Picture:
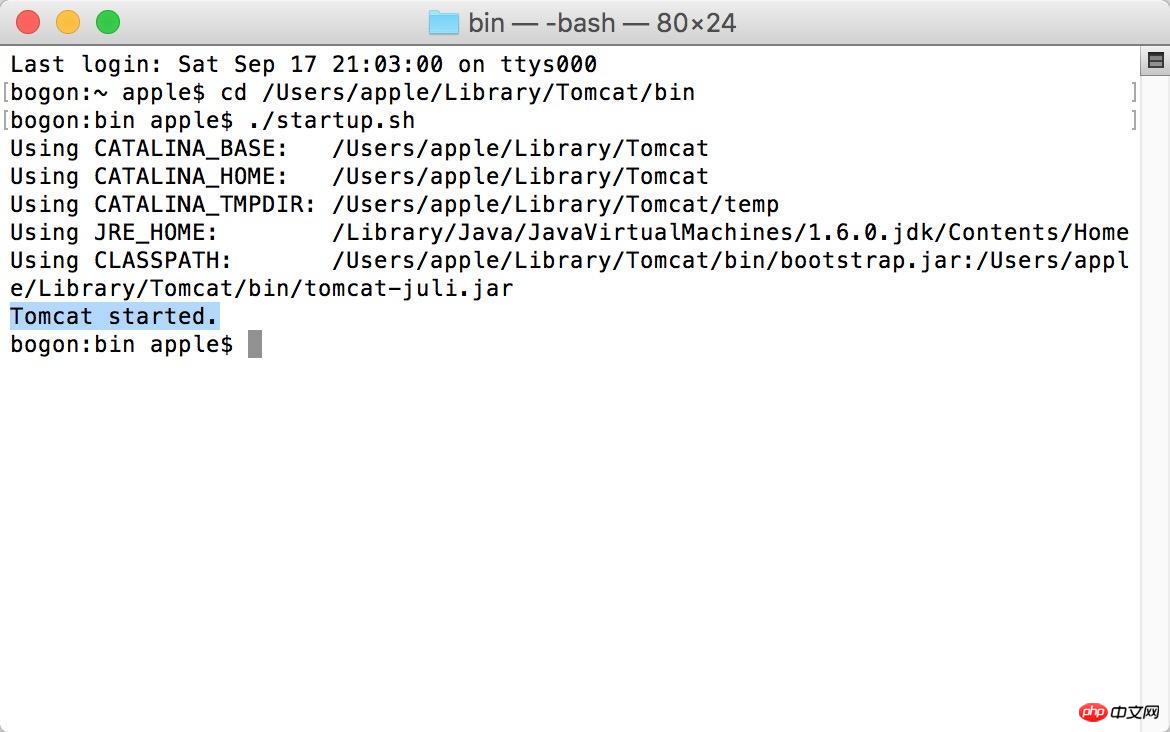
Start successfully
Open our browser, and then enter the URL http://localhost:8080/, if If a cat appears, it proves that the configuration is successful~
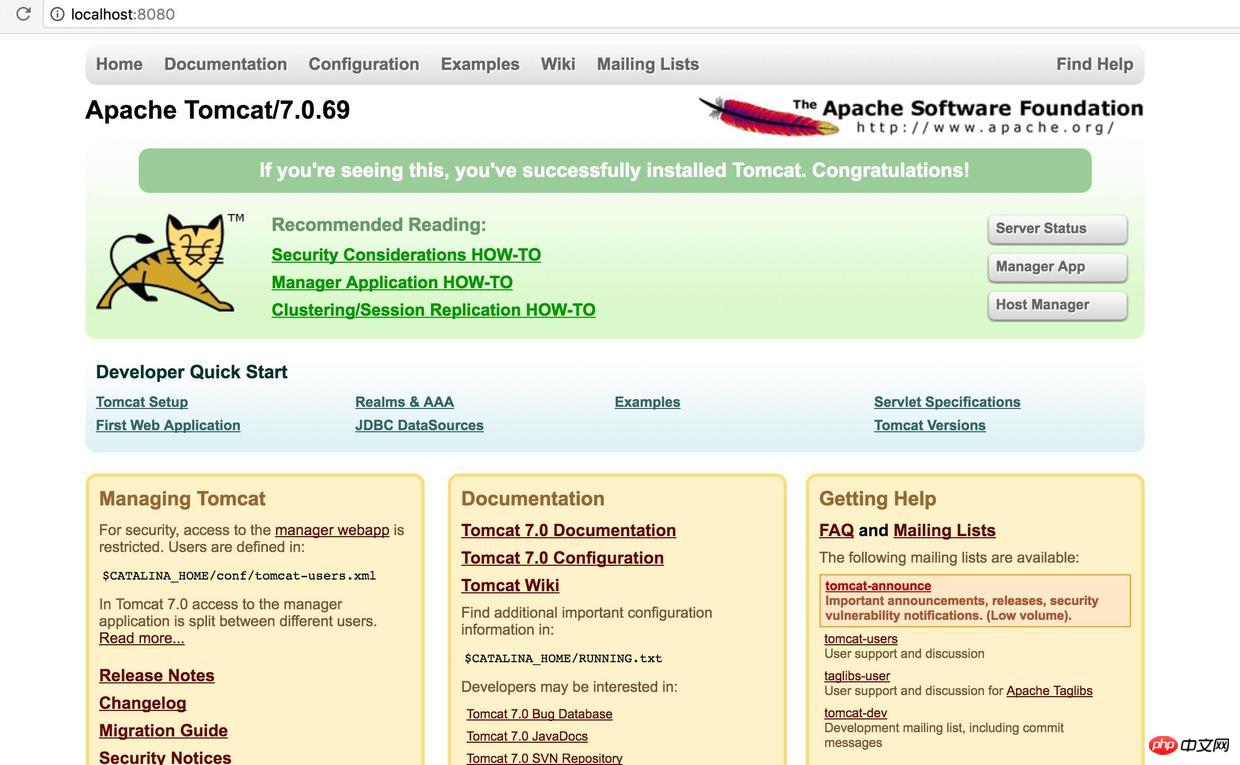
Instance interface
## 4. Close Tomcat
Also in the bin directory, enter in the terminal: ./shutdown.sh and press Enter , that’s it.
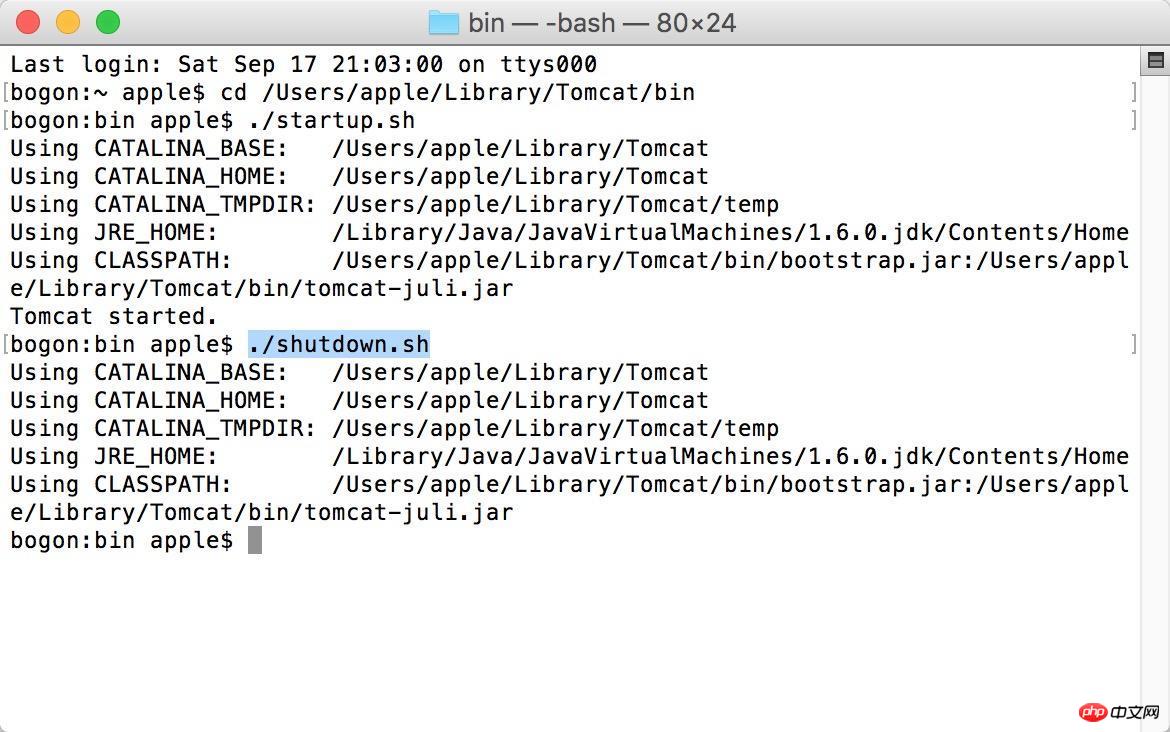 Close Tomcat
5. Problems you may encounter during the configuration
1. After enteringstartup.sh in the terminal, something like "Permission denied" appears. At this time, you need to set permissions on the directory: enter sudo chmod 755 Library/Tomcat/bin/*.sh Press Enter to set the read, write, and execute permissions for the file;
6. Tomcat directory structure and function
|- bin: stores tomcat commands. catalina.bat command: startup.bat-> catalina.bat start shutdown.bat- > catalina.bat stop| - conf: stores tomcat configuration information. The server.xml file is the core configuration file. |-lib: jar package that supports tomcat software running. There are also technical support packages, such as servlet, jsp|-logs: log information of the running process|-temp: temporary directory|-webapps: shared resources Table of contents. web application directory. (Note that it cannot be shared as a separate file) |-work: The running directory of tomcat. The temporary files generated when jsp is running are stored here|- WebRoot: the root directory of the web application|-Static resources (html css js image vedio)| -WEB-INF: Fixed writing method. |-classes: (optional) Fixed writing method. Store class bytecode files|-lib: (optional) Fixed writing method. Store jar package files. |-web.xmlNote:
1) The resources in the WEB-INF directory cannot be accessed through the browser Direct access2) If you want to access the resources in WEB-INF, you must configure the resources into a file called web.xml.The above is the detailed content of Configuring tomcat in Mac environment. For more information, please follow other related articles on the PHP Chinese website!

Hot AI Tools

Undresser.AI Undress
AI-powered app for creating realistic nude photos

AI Clothes Remover
Online AI tool for removing clothes from photos.

Undress AI Tool
Undress images for free

Clothoff.io
AI clothes remover

AI Hentai Generator
Generate AI Hentai for free.

Hot Article

Hot Tools

Notepad++7.3.1
Easy-to-use and free code editor

SublimeText3 Chinese version
Chinese version, very easy to use

Zend Studio 13.0.1
Powerful PHP integrated development environment

Dreamweaver CS6
Visual web development tools

SublimeText3 Mac version
God-level code editing software (SublimeText3)

Hot Topics
 How to deploy jar project in tomcat
Apr 21, 2024 am 07:27 AM
To deploy a JAR project to Tomcat, follow these steps: Download and unzip Tomcat. Configure the server.xml file, set the port and project deployment path. Copies the JAR file to the specified deployment path. Start Tomcat. Access the deployed project using the provided URL.
 How to allow external network access to tomcat server
Apr 21, 2024 am 07:22 AM
To allow the Tomcat server to access the external network, you need to: modify the Tomcat configuration file to allow external connections. Add a firewall rule to allow access to the Tomcat server port. Create a DNS record pointing the domain name to the Tomcat server public IP. Optional: Use a reverse proxy to improve security and performance. Optional: Set up HTTPS for increased security.
 Where is the tomcat installation directory?
Apr 21, 2024 am 07:48 AM
Tomcat installation directory: Default path: Windows: C:\Program Files\Apache Software Foundation\Tomcat 9.0macOS:/Library/Tomcat/Tomcat 9.0Linux:/opt/tomcat/tomcat9 Custom path: You can specify it during installation. Find the installation directory: use whereis or locate command.
 How to deploy multiple projects in tomcat
Apr 21, 2024 am 09:33 AM
To deploy multiple projects through Tomcat, you need to create a webapp directory for each project and then: Automatic deployment: Place the webapp directory in Tomcat's webapps directory. Manual deployment: Manually deploy the project in Tomcat's manager application. Once the project is deployed, it can be accessed by its deployment name, for example: http://localhost:8080/project1.
 Where is the root directory of the tomcat website?
Apr 21, 2024 am 09:27 AM
The Tomcat website root directory is located in Tomcat's webapps subdirectory and is used to store web application files, static resources, and the WEB-INF directory; it can be found by looking for the docBase attribute in the Tomcat configuration file.
 How to check the number of concurrent connections in tomcat
Apr 21, 2024 am 08:12 AM
How to check the number of concurrent Tomcat connections: Visit the Tomcat Manager page (http://localhost:8080/manager/html) and enter your user name and password. Click Status->Sessions in the left navigation bar to see the number of concurrent connections at the top of the page.
 How to check the port number of tomcat
Apr 21, 2024 am 08:00 AM
The Tomcat port number can be viewed by checking the port attribute of the <Connector> element in the server.xml file. Visit the Tomcat management interface (http://localhost:8080/manager/html) and view the "Status" tab. Run "catalina.sh version" from the command line and look at the "Port:" line.
 How to run two projects with different port numbers in tomcat
Apr 21, 2024 am 09:00 AM
Running projects with different port numbers on the Tomcat server requires the following steps: Modify the server.xml file and add a Connector element to define the port number. Add a Context element to define the application associated with the port number. Create a WAR file and deploy it to the corresponding directory (webapps or webapps/ROOT). Restart Tomcat to apply changes.


