
 Backend Development
PHP Tutorial
Install and configure php-fpm to build an Nginx+PHP production environment
Backend Development
PHP Tutorial
Install and configure php-fpm to build an Nginx+PHP production environment
Install and configure php-fpm to build an Nginx+PHP production environment

This article mainly introduces how to install and configure php-fpm to build a Nginx PHP production environment. The function of php-fpm is to integrate FastCGI process management into the PHP package. Friends who need it can refer to it
nginx itself cannot handle PHP. It is just a web server. When a request is received, if it is a PHP request, it will be sent to the PHP interpreter for processing and the result will be returned to the client.
nginx generally sends the request to the fastcgi management process for processing. The fascgi management process selects the cgi sub-process processing result and returns it to nginx
This article uses php-fpm as an example to introduce how to make nginx support PHP
1. Compile and install php-fpm
What is PHP-FPM
PHP-FPM is a PHP FastCGI manager, which is only used for PHP It can be downloaded at http://php-fpm.org/download.
PHP-FPM is actually a patch of the PHP source code, aiming to integrate FastCGI process management into the PHP package. It must be patched into your PHP source code, and it can be used after compiling and installing PHP.
The new version of PHP has integrated php-fpm, which is no longer a third-party package. It is recommended to use it. PHP-FPM provides a better PHP process management method, which can effectively control memory and processes, and can smoothly reload PHP configuration. It has more advantages than spawn-fcgi, so it is officially included in PHP. You can turn on PHP-FPM with the –enable-fpm parameter in ./configure. Other parameters are configured for php. The specific meaning of the options can be found here.
Preparation before installation
Execute under centos
yum -y install gcc automake autoconf libtool make

yum -y install gcc gcc-c++ glibc

yum -y install libmcrypt-devel mhash-devel libxslt-devel
##
libjpeg libjpeg-devel libpng libpng-devel freetype freetype-devel libxml2 libxml2-devel
zlib zlib-devel glibc glibc-devel glib2 glib2-devel bzip2 bzip2-devel
ncurses ncurses-devel curl curl-devel e2fsprogs e2fsprogs-devel
krb5 krb5-devel libidn libidn-devel openssl openssl-devel
wget http://cn2.php.net/distributions/php-5.4.7.tar.gz
tar zvxf php-5.4.7.tar.gz
cd php-5.4.7
./configure --prefix=/usr/local/php --enable-fpm --with-mcrypt
--enable-mbstring --disable-pdo --with-curl --disable-debug --disable-rpath
--enable-inline-optimization --with-bz2 --with-zlib --enable-sockets
--enable-sysvsem --enable-sysvshm --enable-pcntl --enable-mbregex
--with-mhash --enable-zip --with-pcre-regex --with-mysql --with-mysqli
--with-gd --with-jpeg-dir
make all install

cd /usr/local/php
cp etc/php-fpm.conf.default etc/php-fpm.conf
vi etc/php-fpm.conf
user = www-data
group = www-data
groupadd www-data
useradd -g www-data www-data
2. Compile and install nginx
3. Modify the nginx configuration file to support php-fpm
After the nginx installation is completed, modify the nginx configuration file to, nginx.confAdd the following configuration to the server section, pay attention to the configuration marked in red, otherwise the No input file specified. error will appear# pass the PHP scripts to FastCGI server listening on 127.0.0.1:9000
#
location ~ .php$ {
root html;
fastcgi_pass 127.0.0.1:9000;
fastcgi_index index.php;
fastcgi_param SCRIPT_FILENAME $document_root$fastcgi_script_name;
include fastcgi_params;
}Create a php file
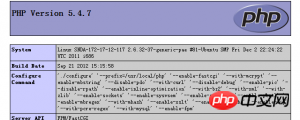
Create the index.php file under /usr/local/nginx/html and enter the following content
<?php
  echo phpinfo();
?>
Start php-fpm and nginx
/usr/local/php/sbin/php-fpm
#手动打补丁的启动方式/usr/local/php/sbin/php-fpm start

sudo /usr/local/nginx/nginx
php-fpm Close and restart, see the end of the article
6. Browser accessVisit http://your server ip/index.php, all can be seen To the php information.
##7. Error resolution
When using Nginx, you often encounter 502 Bad Gateway and 504 Gateway Time-out errors. Let’s use Nginx PHP-FPM to analyze the causes and solutions of these two common errors.
1.502 Bad Gateway error
There are two configuration items in php.ini and php-fpm.conf respectively: max_execution_time and request_terminate_timeout. These two items are used to configure the maximum execution time of a PHP script. When this time is exceeded, PHP-FPM will not only terminate the execution of the script,
will also terminate the Worker process that executes the script. Therefore, Nginx will find that the connection to communicate with itself is broken, and will return a 502 error to the client.
Take PHP-FPM's request_terminate_timeout=30 seconds as an example. The specific information of the 502 Bad Gateway error is as follows:
1) Nginx error access log:
   2013/09/19 01:09:00 [error] 27600#0: *78887 recv() failed (104: Connection reset by peer) while reading response header from upstream,
   client: 192.168.1.101, server: test.com, request: "POST /index.php HTTP/1.1", upstream: "fastcgi://unix:/dev/shm/php-fcgi.sock:",
   host: "test.com", referrer: "http://test.com/index.php"
WARNING: child 25708 exited on signal 15 (SIGTERM) after 21008.883410 seconds from start
So if you don’t want to change the global php.ini, then just change the configuration of PHP-FPM.
In addition, we should pay attention to the max_fail and fail_timeout items in the upstream module of Nginx. Sometimes the communication between Nginx and the upstream server (such as Tomcat, FastCGI) is only interrupted accidentally.
But if max_fail is set to a relatively small value, then in the next fail_timeout time, Nginx will think that the upstream server is down, and it will Returns 502 error.
2.504 Gateway Time-out error
PHP-FPM设置的脚本最大执行时间已经够长了,但执行耗时PHP脚本时,发现Nginx报错从502变为504了。这是为什么呢?
因为我们修改的只是PHP的配置,Nginx中也有关于与上游服务器通信超时时间的配置factcgi_connect/read/send_timeout。
以Nginx超时时间为90秒,PHP-FPM超时时间为300秒为例,报504 Gateway Timeout错误时的Nginx错误访问日志如下:
   2013/09/19 00:55:51 [error] 27600#0: *78877 upstream timed out (110: Connection timed out) while reading response header from upstream,
   client: 192.168.1.101, server: test.com, request: "POST /index.php HTTP/1.1", upstream: "fastcgi://unix:/dev/shm/php-fcgi.sock:",
   host: "test.com", referrer: "http://test.com/index.php"
调高这三项的值(主要是read和send两项,默认不配置的话Nginx会将超时时间设为60秒)之后,504错误也解决了。
而且这三项配置可以配置在http、server级别,也可以配置在location级别。担心影响其他应用的话,就配置在自己应用的location中吧。
要注意的是factcgi_connect/read/send_timeout是对FastCGI生效的,而proxy_connect/read/send_timeout是对proxy_pass生效的。
配置举例:
location ~ \.php$ {
        root          /home/cdai/test.com;
        include         fastcgi_params;
        fastcgi_connect_timeout   180;
        fastcgi_read_timeout      600;
        fastcgi_send_timeout      600;
        fastcgi_pass      unix:/dev/shm/php-fcgi.sock;
        fastcgi_index      index.php;
        fastcgi_param     SCRIPT_FILENAME /home/cdai/test.com$fastcgi_script_name;
}The above is the detailed content of Install and configure php-fpm to build an Nginx+PHP production environment. For more information, please follow other related articles on the PHP Chinese website!

Hot AI Tools

Undresser.AI Undress
AI-powered app for creating realistic nude photos

AI Clothes Remover
Online AI tool for removing clothes from photos.

Undress AI Tool
Undress images for free

Clothoff.io
AI clothes remover

Video Face Swap
Swap faces in any video effortlessly with our completely free AI face swap tool!

Hot Article
Hot Tools

Notepad++7.3.1
Easy-to-use and free code editor

SublimeText3 Chinese version
Chinese version, very easy to use

Zend Studio 13.0.1
Powerful PHP integrated development environment

Dreamweaver CS6
Visual web development tools

SublimeText3 Mac version
God-level code editing software (SublimeText3)
Hot Topics
 1386
1386
 52
52

 PHP 8.4 Installation and Upgrade guide for Ubuntu and Debian
Dec 24, 2024 pm 04:42 PM
PHP 8.4 Installation and Upgrade guide for Ubuntu and Debian
Dec 24, 2024 pm 04:42 PM
PHP 8.4 brings several new features, security improvements, and performance improvements with healthy amounts of feature deprecations and removals. This guide explains how to install PHP 8.4 or upgrade to PHP 8.4 on Ubuntu, Debian, or their derivati
 How To Set Up Visual Studio Code (VS Code) for PHP Development
Dec 20, 2024 am 11:31 AM
How To Set Up Visual Studio Code (VS Code) for PHP Development
Dec 20, 2024 am 11:31 AM
Visual Studio Code, also known as VS Code, is a free source code editor — or integrated development environment (IDE) — available for all major operating systems. With a large collection of extensions for many programming languages, VS Code can be c
 7 PHP Functions I Regret I Didn't Know Before
Nov 13, 2024 am 09:42 AM
7 PHP Functions I Regret I Didn't Know Before
Nov 13, 2024 am 09:42 AM
If you are an experienced PHP developer, you might have the feeling that you’ve been there and done that already.You have developed a significant number of applications, debugged millions of lines of code, and tweaked a bunch of scripts to achieve op
 How do you parse and process HTML/XML in PHP?
Feb 07, 2025 am 11:57 AM
How do you parse and process HTML/XML in PHP?
Feb 07, 2025 am 11:57 AM
This tutorial demonstrates how to efficiently process XML documents using PHP. XML (eXtensible Markup Language) is a versatile text-based markup language designed for both human readability and machine parsing. It's commonly used for data storage an
 Explain JSON Web Tokens (JWT) and their use case in PHP APIs.
Apr 05, 2025 am 12:04 AM
Explain JSON Web Tokens (JWT) and their use case in PHP APIs.
Apr 05, 2025 am 12:04 AM
JWT is an open standard based on JSON, used to securely transmit information between parties, mainly for identity authentication and information exchange. 1. JWT consists of three parts: Header, Payload and Signature. 2. The working principle of JWT includes three steps: generating JWT, verifying JWT and parsing Payload. 3. When using JWT for authentication in PHP, JWT can be generated and verified, and user role and permission information can be included in advanced usage. 4. Common errors include signature verification failure, token expiration, and payload oversized. Debugging skills include using debugging tools and logging. 5. Performance optimization and best practices include using appropriate signature algorithms, setting validity periods reasonably,
 PHP Program to Count Vowels in a String
Feb 07, 2025 pm 12:12 PM
PHP Program to Count Vowels in a String
Feb 07, 2025 pm 12:12 PM
A string is a sequence of characters, including letters, numbers, and symbols. This tutorial will learn how to calculate the number of vowels in a given string in PHP using different methods. The vowels in English are a, e, i, o, u, and they can be uppercase or lowercase. What is a vowel? Vowels are alphabetic characters that represent a specific pronunciation. There are five vowels in English, including uppercase and lowercase: a, e, i, o, u Example 1 Input: String = "Tutorialspoint" Output: 6 explain The vowels in the string "Tutorialspoint" are u, o, i, a, o, i. There are 6 yuan in total
 Explain late static binding in PHP (static::).
Apr 03, 2025 am 12:04 AM
Explain late static binding in PHP (static::).
Apr 03, 2025 am 12:04 AM
Static binding (static::) implements late static binding (LSB) in PHP, allowing calling classes to be referenced in static contexts rather than defining classes. 1) The parsing process is performed at runtime, 2) Look up the call class in the inheritance relationship, 3) It may bring performance overhead.
 What are PHP magic methods (__construct, __destruct, __call, __get, __set, etc.) and provide use cases?
Apr 03, 2025 am 12:03 AM
What are PHP magic methods (__construct, __destruct, __call, __get, __set, etc.) and provide use cases?
Apr 03, 2025 am 12:03 AM
What are the magic methods of PHP? PHP's magic methods include: 1.\_\_construct, used to initialize objects; 2.\_\_destruct, used to clean up resources; 3.\_\_call, handle non-existent method calls; 4.\_\_get, implement dynamic attribute access; 5.\_\_set, implement dynamic attribute settings. These methods are automatically called in certain situations, improving code flexibility and efficiency.
