

How to create an Angular project using Angular CLI
This time I will show you how to use Angular CLI to create an Angular project, and what are the precautions for using Angular CLI to create an Angular project. The following is a practical case, let's take a look.
Before starting the project, you need to install node and npm first, and then execute npm install -g @angular/cli to install Angular CLI.
1: Use the command line to create a new project
ng new newApp --skip-install
cd newApp
cnpm install
ng serve --open
Executing the above command will automatically create a new Angualr project and start the project.
Among them, --skip-install means that the node package will not be installed first. It will be much faster if we then use cnpm install to install it.
2: Directory structure
Now let’s take a look at what the ng command helps us generate, which is the directory structure of the project, which is First, have a general understanding of what it does. You don’t have to know everything, but first remember the following ones that I feel are important:
1.src: where the application code is stored;
2 .src/app: The main place where your code is stored. This may not be appropriate, but when you develop, you spend most of your time modifying the code here;
3.src/assets: pictures, etc. Where it is stored, it will be copied to the release package when building;
4.src/main.js: You will basically not modify it, it is the main entry of the program;
5.src /styles.css: Specially used styles are written in the corresponding places. As will be mentioned later, public styles will be written here;
6.karma.conf.js: Unit test configuration for Karma. It is used when running ng test.
Three: Self-defining components
import { Component } from '@angular/core';
@Component({
selector: 'my-comp',
template: '<ul><li *ngFor='let row of dataList'>ID:{{row.id}} INFO:{{row.info}}</li></ul>',
styles: [`ul{background-color: antiquewhite;padding-left: 10px;list-style: none;}`]
})
export class MyComponent {
dataList = [
{ id: 1, info: "Angular" },
{ id: 2, info: "React" },
{ id: 3, info: "Vue" }
];
}import { NgModule } from '@angular/core';
import { MyComponent } from './my.component';
@NgModule({
declarations: [
MyComponent
]
})
......Label selector;
2.selector: '.class'//Style selector; 3.selector: '[attribute]'//Attribute selector;
4.selector: '[attribute=value]'//Attribute value selector; 5.selector: ':not(sub_selector)'//Invert selector;6.selector: 'selector1, selector2'//Multiple selectors.Four: Custom service
Like components, let’s define a service first.import { Injectable } from '@angular/core';
export class DataFormat {
id: number;
info: string;
}
@Injectable()
export class MyServ {
getData(): DataFormat[] {
return [
{ id: 1, info: "Angular" },
{ id: 2, info: "React" },
{ id: 3, info: "Vue" }
];
}
}The use of the
import { Component } from '@angular/core';
import { MyServ } from './my.service';
@Component({
  providers: [MyServ]
})constructor to demonstrate it here:
import { MyServ } from './my.service';
......
export class MyComponent {
  dataList: any[];
  constructor(private demoService: MyServ) {
     this.dataList = this.demoService.getData();
    }
}5: The use of routing
We give a simple usage of routing here. The specific details are similar to the above and will be discussed separately. To discuss, the purpose of this article is to get started quickly. For the convenience of demonstration, we have defined two components by default: MyComponent and My2Component. First of all, you need to make sure that......
import { RouterModule } from '@angular/router';
@NgModule({
declarations: [MyComponent,My2Component],
imports: [
RouterModule.forRoot([
{path: 'my',component: MyComponent},
{path: 'my2',component: My2Component}
])
]
......
})
......<a routerLink="/my">toMycomp</a> <a routerLink="/my2">toMy2comp</a> <router-outlet></router-outlet>
点击toMycomp或者toMy2comp就会跳转对应的路由设置的组件了。
六:HTTP
由于@angular/http库中的HttpModule保存着http相关的服务,需要先引入进来(这里是在src/app/app.module.ts中引入):
import { HttpModule }  from '@angular/http';
@NgModule({
  imports: [HttpModule]
})
......现在,http就是一个服务,下面简单演示一种用法:
......
import { Http } from '@angular/http';
......
  constructor(private http: Http) {
    http.get('assets/XXX.json').forEach(function (data) {
      console.log(data['_body']);
    });
  }
......相信看了本文案例你已经掌握了方法,更多精彩请关注php中文网其它相关文章!
推荐阅读:
The above is the detailed content of How to create an Angular project using Angular CLI. For more information, please follow other related articles on the PHP Chinese website!

Hot AI Tools

Undresser.AI Undress
AI-powered app for creating realistic nude photos

AI Clothes Remover
Online AI tool for removing clothes from photos.

Undress AI Tool
Undress images for free

Clothoff.io
AI clothes remover

Video Face Swap
Swap faces in any video effortlessly with our completely free AI face swap tool!

Hot Article
Hot Tools

Notepad++7.3.1
Easy-to-use and free code editor

SublimeText3 Chinese version
Chinese version, very easy to use

Zend Studio 13.0.1
Powerful PHP integrated development environment

Dreamweaver CS6
Visual web development tools

SublimeText3 Mac version
God-level code editing software (SublimeText3)
Hot Topics
 1392
1392
 52
52

 How to personalize your iPhone on the latest iOS 17
Sep 21, 2023 am 08:17 AM
How to personalize your iPhone on the latest iOS 17
Sep 21, 2023 am 08:17 AM
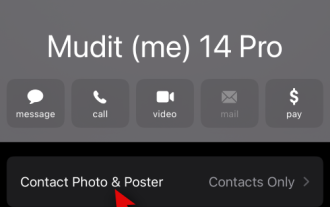
How to Personalize Calls on iPhone Apple’s iOS 17 introduces a new feature called Contact Posters that allows you to personalize the look of your call screen on your iPhone. This feature allows you to design a poster using selected photos, colors, fonts, and Memoji as contact cards. So when you make a call, your custom image will appear on the recipient's iPhone exactly as you envisioned. You can choose to share your unique contact poster with all your saved contacts, or choose who can see it. Likewise, during a call exchange, you will also see other people's contact posters. Additionally, Apple lets you set specific contact photos for individual contacts, making calls from those contacts
 How to create a folder on Realme Phone?
Mar 23, 2024 pm 02:30 PM
How to create a folder on Realme Phone?
Mar 23, 2024 pm 02:30 PM
Title: Realme Phone Beginner’s Guide: How to Create Folders on Realme Phone? In today's society, mobile phones have become an indispensable tool in people's lives. As a popular smartphone brand, Realme Phone is loved by users for its simple and practical operating system. In the process of using Realme phones, many people may encounter situations where they need to organize files and applications on their phones, and creating folders is an effective way. This article will introduce how to create folders on Realme phones to help users better manage their phone content. No.
 How to install Angular on Ubuntu 24.04
Mar 23, 2024 pm 12:20 PM
How to install Angular on Ubuntu 24.04
Mar 23, 2024 pm 12:20 PM
Angular.js is a freely accessible JavaScript platform for creating dynamic applications. It allows you to express various aspects of your application quickly and clearly by extending the syntax of HTML as a template language. Angular.js provides a range of tools to help you write, update and test your code. Additionally, it provides many features such as routing and form management. This guide will discuss how to install Angular on Ubuntu24. First, you need to install Node.js. Node.js is a JavaScript running environment based on the ChromeV8 engine that allows you to run JavaScript code on the server side. To be in Ub
 How to create pixel art in GIMP
Feb 19, 2024 pm 03:24 PM
How to create pixel art in GIMP
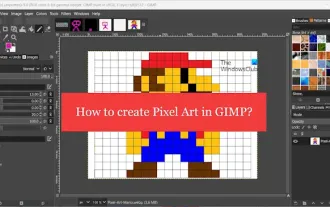
Feb 19, 2024 pm 03:24 PM
This article will interest you if you are interested in using GIMP for pixel art creation on Windows. GIMP is a well-known graphics editing software that is not only free and open source, but also helps users create beautiful images and designs easily. In addition to being suitable for beginners and professional designers alike, GIMP can also be used to create pixel art, a form of digital art that utilizes pixels as the only building blocks for drawing and creating. How to Create Pixel Art in GIMP Here are the main steps to create pixel pictures using GIMP on a Windows PC: Download and install GIMP, then launch the application. Create a new image. Resize width and height. Select the pencil tool. Set the brush type to pixels. set up
 How to use GitLab for project document management
Oct 20, 2023 am 10:40 AM
How to use GitLab for project document management
Oct 20, 2023 am 10:40 AM
How to use GitLab for project document management 1. Background introduction In the software development process, project documents are very important information. They can not only help the development team understand the needs and design of the project, but also provide reference to the testing team and customers. In order to facilitate version control and team collaboration of project documents, we can use GitLab for project document management. GitLab is a version control system based on Git. In addition to supporting code management, it can also manage project documents. 2. GitLab environment setup First, I
 How to create a family with Gree+
Mar 01, 2024 pm 12:40 PM
How to create a family with Gree+
Mar 01, 2024 pm 12:40 PM
Many friends expressed that they want to know how to create a family in Gree+ software. Here is the operation method for you. Friends who want to know more, come and take a look with me. First, open the Gree+ software on your mobile phone and log in. Then, in the options bar at the bottom of the page, click the "My" option on the far right to enter the personal account page. 2. After coming to my page, there is a "Create Family" option under "Family". After finding it, click on it to enter. 3. Next jump to the page to create a family, enter the family name to be set in the input box according to the prompts, and click the "Save" button in the upper right corner after entering it. 4. Finally, a "save successfully" prompt will pop up at the bottom of the page, indicating that the family has been successfully created.
 How to create a Gantt chart using Highcharts
Dec 17, 2023 pm 07:23 PM
How to create a Gantt chart using Highcharts
Dec 17, 2023 pm 07:23 PM
How to use Highcharts to create a Gantt chart requires specific code examples. Introduction: The Gantt chart is a chart form commonly used to display project progress and time management. It can visually display the start time, end time and progress of the task. Highcharts is a powerful JavaScript chart library that provides rich chart types and flexible configuration options. This article will introduce how to use Highcharts to create a Gantt chart and give specific code examples. 1. Highchart
 A first look at Django: Create your first Django project using the command line
Feb 19, 2024 am 09:56 AM
A first look at Django: Create your first Django project using the command line
Feb 19, 2024 am 09:56 AM
Start the journey of Django project: start from the command line and create your first Django project. Django is a powerful and flexible web application framework. It is based on Python and provides many tools and functions needed to develop web applications. This article will lead you to create your first Django project starting from the command line. Before starting, make sure you have Python and Django installed. Step 1: Create the project directory First, open the command line window and create a new directory
