This article mainly introduces how to customize your own colors and styles in Bootstrap 4. Now I share it with you and give it as a reference.
Bootstrap is the most popular CSS framework now. There are many websites and background management systems whose styles are designed based on Bootstrap. However, Bootstrap has always maintained the blue and light gray color tone, and the latest Bootstrap 4 is also the same. After watching it for a long time, it is inevitable to feel some aesthetic fatigue.
How to modify the color theme of Bootstrap? This article teaches you how to customize Bootstrap 4 to make your page more unique.
0. Required tools
Node.js compilation
Bootstrap4, download Bootstrap Dependency package, you need to install Node.jsBootstrap4 on your computer. Source code modification to Boosttrap requires a copy of the source code. You can download the source code by visiting the official Bootstrap website (https://getbootstrap.com).
Some places may not be able to access the Bootstrap4 official website, so you can also visit the Bootstrap Chinese website to download the source code.
1. Customized color theme
In order to facilitate customization, Bootstrap has extracted some variables and placed them in the scss/_varaibles.scss file.
Open this file and you will find that there are a lot of configurations. Find this paragraph:
$primary:    $blue !default;
$secondary:   $gray-600 !default;
$success:    $green !default;
$info:     $cyan !default;
$warning:    $yellow !default;
$danger:    $red !default;
$light:     $gray-100 !default;
$dark:     $gray-800 !default;
This is where the basic colors of Bootstrap are configured. Modifying these color values can give your website a completely different look. In addition to the main color, there are many color-related variables that can be controlled, and the night color of the border of an input box can also be adjusted. You can try it slowly.
For example, if you modify these variables in _variables.scss:
$primary:    #e95420 !default;
$secondary:   #0e8420 !default;
$success:    #fff !default;
$light:     #e8cd56 !default;
$dark:     #e95420 !default;

$input-bg: #c34113;
$input-border-color: #c34113;
$input-placeholder-color: #ccc;
$input-color: #fff;

$jumbotron-bg: rgb(247, 247, 247);
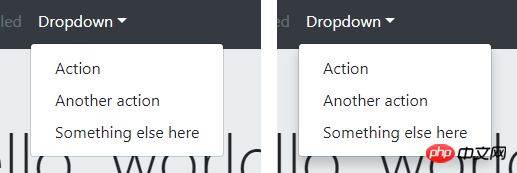
, you will get a similar color style of the Ubuntu website:

2. Fine-tuning the appearance of the component
In addition to adjusting the color, _variables.scss also has many variables that can fine-tune the appearance of the Bootstrap component, such as:
$enable-shadows, controls whether shadows are displayed around some pop-up components

##$enable-rounded , controls whether the components (buttons, input boxes, drop-down boxes, etc.) are surrounded by rounded corners

$enable-gradients, controls whether the background of the component is Display a weak gradient effect

4. Compile Bootstrap
After modifying the variables, how to generate your own Bootstrap CSS file? Requires compilation with npm. Before compiling, you need to download various dependency packages, which can be done through the install command:npm install
npm install -g cnpm --registry=https://registry.npm.taobao.org
npm run dist
5. Customize Bootstrap in the Webpack project
The above content is all about customizing Bootstrap4 by compiling source code. What should I do if I want to customize Bootstrap4 in my Webpack project? It is not appropriate to directly modify the Bootstrap source code in node_modules. The officially recommended way is to create a new custom.scss file in the project and write the variables you want to modify in it:// 如果想修改 _variables.scss 中的变量,请写在这里 $primary: #e95420 !default; $secondary: #0e8420 !default; ... // 文件末尾请这样引入 Bootstrap 的源码 @import "~bootstrap/scss/bootstrap";
What are the methods by which Vue can use CSS to replace scoped with modules?
How to use redux-saga, what are the methods and techniques for using redux-saga?
#How does JS get the value of input[file] and display it on the page? (Picture and text tutorial)
The above is the detailed content of How to customize your own colors and styles in Bootstrap 4?. For more information, please follow other related articles on the PHP Chinese website!
 How to install printer driver in linux
 Detailed explanation of Symbol class in JS
 How to view Tomcat source code
 The difference between vscode and vs
 My computer can't open it by double-clicking it.
 What software is ae
 How to restart the service in swoole framework
 How to intercept harassing calls
 Introduction to the difference between javascript and java


