thinkPHP3.2.3 method to implement Alibaba SMS verification
This article mainly introduces the method of thinkPHP3.2.3 to implement Alibaba Cloud SMS verification. It is very good and has certain reference value. Friends in need can refer to it
Register and log in to Alibaba Cloud
After clicking on the console->Slide the mouse to your user name (the second to last one on the right)->Click on accesskeys->Get
After clicking on the console- >Products and Services–>Cloud Computing Basic Services–>Cloud Communication–>SMS Service
If no test SMS signature and template are sent –>Add signature–>Add template
Download SDK
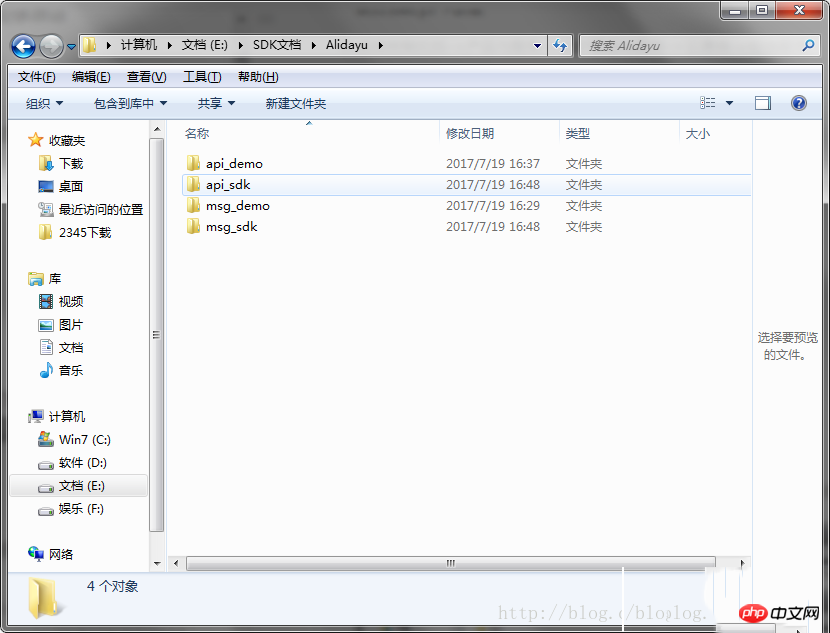
After entering, select PHP and you will get dysmsapi_demo_sdk__php.zip. Unzip and get the directory shown below

Place API
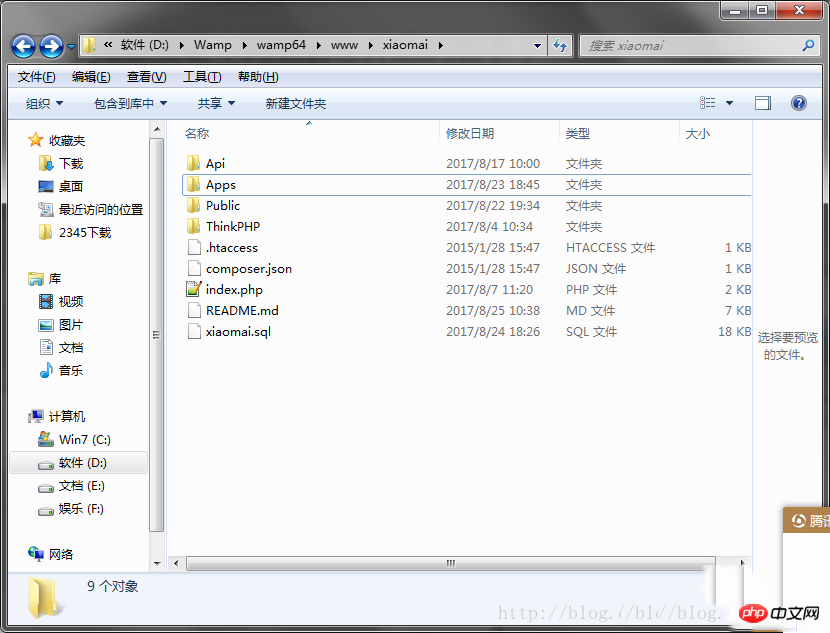
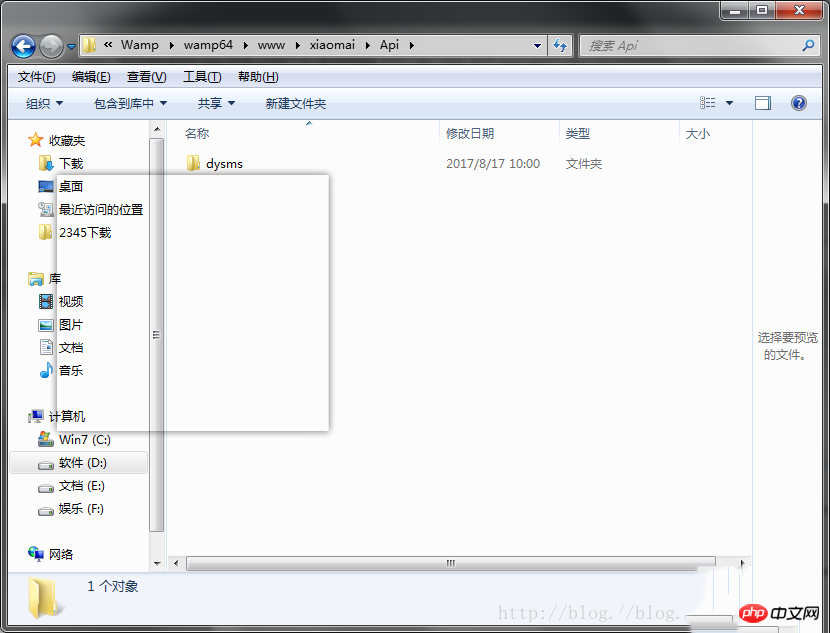
Create the folder Api in the TP root directory, copy the entire api_sdk folder into it, and rename it dysms (you can name it freely)


Introduce API files
Introduce the following path in the head of the controller you need to call
use Aliyun/Core/Config;
use Aliyun/Core/Profile/DefaultProfile;
use Aliyun/Core/DefaultAcsClient;
use Aliyun/Api/Sms/Request/V20170525/SendSmsRequest;

8. Zhengzhen coding starts now
Upload the source code:
/**
* 数据处理
*/
public function send_message(){
$phone=I("post.phone");
//查找是否已经注册
$user = D('User') -> where("user_phone = {$phone}") -> find();
if ($user) {
echo "手机号已注册!";
}else{
$this->send_phone($phone);
}
// $this->ajaxReturn($data,"JSON");
}
/**
* 生成短信验证码
* @paraminteger $length [验证码长度]
*/
public function createSMSCode($length = 4){
$min = pow(10 , ($length - 1));
$max = pow(10, $length) - 1;
return rand($min, $max);
}
/**
* 发送验证码
* @param[integer] $phone [手机号]
*/
public function send_phone($phone){
$code=$this->createSMSCode($length = 4);
require_once'./Api/dysms/vendor/autoload.php';//此处为你放置API的路径
Config::load();//加载区域结点配置
$accessKeyId = '换成自己的';
$accessKeySecret = '换成自己的';
$templateCode = '换成自己的'; //短信模板ID
//短信API产品名(短信产品名固定,无需修改)
$product = "Dysmsapi";
//短信API产品域名(接口地址固定,无需修改)
$domain = "dysmsapi.aliyuncs.com";
//暂时不支持多Region(目前仅支持cn-hangzhou请勿修改)
$region = "cn-hangzhou";
// 初始化用户Profile实例
$profile = DefaultProfile::getProfile($region, $accessKeyId, $accessKeySecret);
// 增加服务结点
DefaultProfile::addEndpoint("cn-hangzhou", "cn-hangzhou", $product, $domain);
// 初始化AcsClient用于发起请求
$acsClient = new DefaultAcsClient($profile);
// 初始化SendSmsRequest实例用于设置发送短信的参数
$request = new SendSmsRequest();
// 必填,设置短信接收号码
$request->setPhoneNumbers($phone);
// 必填,设置签名名称
$request->setSignName("换成自己的");
// 必填,设置模板CODE
$request->setTemplateCode("换成自己的");
$smsData = array('code'=>$code);//所使用的模板若有变量 在这里填入变量的值我的变量名为username此处也为username
//选填-假如模板中存在变量需要替换则为必填(JSON格式),友情提示:如果JSON中需要带换行符,请参照标准的JSON协议对换行符的要求,比如短信内容中包含/r/n的情况在JSON中需要表示成//r//n,否则会导致JSON在服务端解析失败
$request->setTemplateParam(json_encode($smsData));
//发起访问请求
$acsResponse = $acsClient -> getAcsResponse($request);
//返回请求结果
$result = json_decode(json_encode($acsResponse), true);
$resp = $result['Code'];
$this->sendMsgResult($resp,$phone,$code);
}
/**
* 验证手机号是否发送成功前端用ajax,发送成功则提示倒计时,如50秒后可以重新发送
* @param[json] $resp[发送结果]
* @param[type] $phone [手机号]
* @param[type] $code[验证码]
* @return [type] [description]
*/
private function sendMsgResult($resp,$phone,$code){
if ($resp == "OK") {
$data['phone']=$phone;
$data['code']=$code;
$data['send_time']=time();
$result=D("Smsverif")->add($data);
if($result){
$data="发送成功";
}else{
$data="发送失败";
}
} else{
$data="发送失败";
}
return $data;
}
/**
* 验证短信验证码是否有效,前端用jquery validate的remote
* @return [type] [description]
*/
public function checkSMSCode(){
$phone = $_POST['phone'];
$code = $_POST['verify'];
$nowTimeStr = time();
$smscodeObj = D("Smsverif")->where("phone={$phone} and code = {$code}")->find();
if($smscodeObj){
$smsCodeTimeStr = $smscodeObj['send_time'];
$recordCode = $smscodeObj['code'];
$flag = $this->checkTime($nowTimeStr, $smsCodeTimeStr);
if($flag!=true || $code !== $recordCode){
echo 'no';
}else{
echo 'ok';
}
}
}
/**
* 验证验证码是否在可用时间
*@param[json] $nowTimeStr[发送结果]
* @param[type] $smsCodeTimeStr [手机号]
*/
public function checkTime ($nowTimeStr,$smsCodeTimeStr) {
$time = $nowTimeStr - $smsCodeTimeStr;
if ($time>900) {
return false;
}else{
return true;
}
}is coming Click on the front-end js code:
Warm reminder: Please use the html yourself
With the code, how could it not be effective? (The example is user registration. My mobile phone number has already been registered, so the effect is to retrieve the password)

This is OK
Related recommendations:
ThinkPHP implementation example of Alipay interface function, thinkphp example
##
The above is the detailed content of thinkPHP3.2.3 method to implement Alibaba SMS verification. For more information, please follow other related articles on the PHP Chinese website!

Hot AI Tools

Undresser.AI Undress
AI-powered app for creating realistic nude photos

AI Clothes Remover
Online AI tool for removing clothes from photos.

Undress AI Tool
Undress images for free

Clothoff.io
AI clothes remover

AI Hentai Generator
Generate AI Hentai for free.

Hot Article

Hot Tools

Notepad++7.3.1
Easy-to-use and free code editor

SublimeText3 Chinese version
Chinese version, very easy to use

Zend Studio 13.0.1
Powerful PHP integrated development environment

Dreamweaver CS6
Visual web development tools

SublimeText3 Mac version
God-level code editing software (SublimeText3)

Hot Topics
 How to run thinkphp project
Apr 09, 2024 pm 05:33 PM
To run the ThinkPHP project, you need to: install Composer; use Composer to create the project; enter the project directory and execute php bin/console serve; visit http://localhost:8000 to view the welcome page.
 There are several versions of thinkphp
Apr 09, 2024 pm 06:09 PM
ThinkPHP has multiple versions designed for different PHP versions. Major versions include 3.2, 5.0, 5.1, and 6.0, while minor versions are used to fix bugs and provide new features. The latest stable version is ThinkPHP 6.0.16. When choosing a version, consider the PHP version, feature requirements, and community support. It is recommended to use the latest stable version for best performance and support.
 How to run thinkphp
Apr 09, 2024 pm 05:39 PM
Steps to run ThinkPHP Framework locally: Download and unzip ThinkPHP Framework to a local directory. Create a virtual host (optional) pointing to the ThinkPHP root directory. Configure database connection parameters. Start the web server. Initialize the ThinkPHP application. Access the ThinkPHP application URL and run it.
 Which one is better, laravel or thinkphp?
Apr 09, 2024 pm 03:18 PM
Performance comparison of Laravel and ThinkPHP frameworks: ThinkPHP generally performs better than Laravel, focusing on optimization and caching. Laravel performs well, but for complex applications, ThinkPHP may be a better fit.
 How to install thinkphp
Apr 09, 2024 pm 05:42 PM
ThinkPHP installation steps: Prepare PHP, Composer, and MySQL environments. Create projects using Composer. Install the ThinkPHP framework and dependencies. Configure database connection. Generate application code. Launch the application and visit http://localhost:8000.
 Development suggestions: How to use the ThinkPHP framework to implement asynchronous tasks
Nov 22, 2023 pm 12:01 PM
"Development Suggestions: How to Use the ThinkPHP Framework to Implement Asynchronous Tasks" With the rapid development of Internet technology, Web applications have increasingly higher requirements for handling a large number of concurrent requests and complex business logic. In order to improve system performance and user experience, developers often consider using asynchronous tasks to perform some time-consuming operations, such as sending emails, processing file uploads, generating reports, etc. In the field of PHP, the ThinkPHP framework, as a popular development framework, provides some convenient ways to implement asynchronous tasks.
 How is the performance of thinkphp?
Apr 09, 2024 pm 05:24 PM
ThinkPHP is a high-performance PHP framework with advantages such as caching mechanism, code optimization, parallel processing and database optimization. Official performance tests show that it can handle more than 10,000 requests per second and is widely used in large-scale websites and enterprise systems such as JD.com and Ctrip in actual applications.
 ThinkPHP6 backend management system development: realizing backend functions
Aug 27, 2023 am 11:55 AM
ThinkPHP6 backend management system development: Implementing backend functions Introduction: With the continuous development of Internet technology and market demand, more and more enterprises and organizations need an efficient, safe, and flexible backend management system to manage business data and conduct operational management. This article will use the ThinkPHP6 framework to demonstrate through examples how to develop a simple but practical backend management system, including basic functions such as permission control, data addition, deletion, modification and query. Environment preparation Before starting, we need to install PHP, MySQL, Com


