

Use of webpack refresh parsing function
This time I will bring you the use of the webpack refresh parsing function and what are the precautions for webpack refresh parsing. The following is a practical case, let's take a look.
The front end needs to frequently modify js and styles, and needs to be constantly adjusted according to the browser's page effect; and often our development directory and the local release directory are not the same, and we need to publish them after modification; another point That is, not all effects can be seen directly by double-clicking the page. We often need to use nginx to build a site locally to observe (it is ok on our own computer before putting it into the test environment). So if you have to manually refresh the browser and manually (or click) publish, and start the site, it is indeed a lot of physical work. And these three points webpack can help us do it.
webpack-dev-serverwebpack
realizes automatic refresh through webpack-dev-server (WDS). WDS is a development server (an express) running in memory. After starting, it will detect whether the file has changed and automatically compile again.
1. Installation
npm install webpack-dev-server --save-dev
First install it to the development directory through npm. After the installation is complete, it will be found under node_modules/bin.
2.npm start
Then modify package.json: (based on the previous section)
"scripts": {
  "start": "webpack-dev-server --env development",
  "build": "webpack --env production"
}You can now run start through npm or npm start to start.

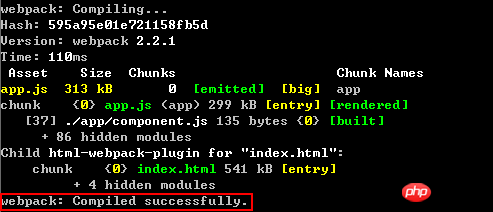
After starting, you can see that Project is running at http://localhost:8080. Opening the page
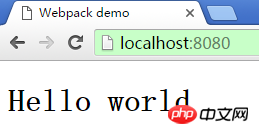
shows that WDS has automatically built a site for us. We modify component.js, compilation will appear in cmd, and the page will automatically refresh.
3. Start WDS directly
The official website introduces that you can start WDS directly through the following command.
webpack-dev-server --env development
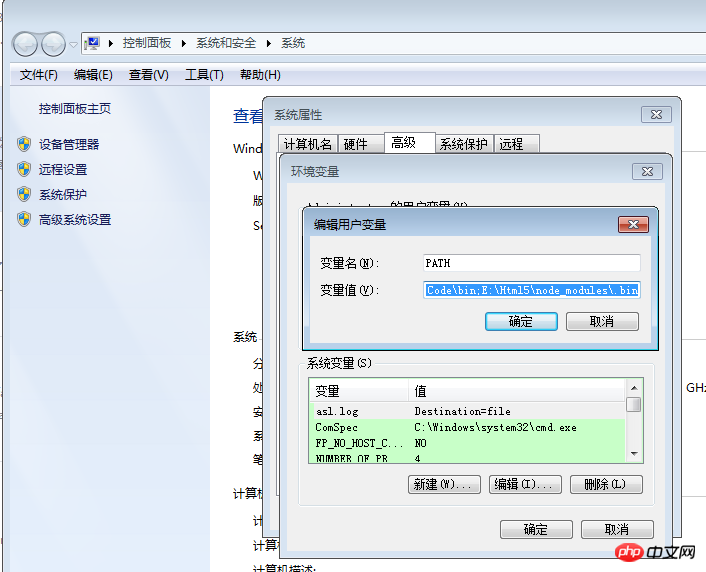
But there will be a prompt that webpack-dev-server --env development is not an internal command. This kind of problem is a problem with environment variables. Just set the bin directory you developed to the environment variable, such as My directory is 'E:\Html5\node_modules\.bin', just add a semicolon at the end.
C:\Users\Administrator.9BBOFZPACSCXLG2\AppData\Roaming\npm;C:\Program Files (x86)\Microsoft VS Code\bin;E:\Html5\node_modules\.bin
4.8080 port occupation
If the default 8080 port is occupied, WDS will change it. For example, use nginx to publish one first.
server{
   listen    8080;
   location / {
      root  E:/Html5/build;
      index index.html index.htm;
    }
}Restart WDS:
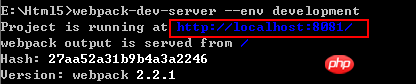
The port is switched to 8081. You can also manually configure the port:
 devServer:{
  //...
  port: 9000
}nodemon automatic startup
WDS monitors development files, and changes in webpack.config.js will not cause automatic startup. So we need nodemon to do this.
npm install nodemon --save-dev
First install it in the development directory, and then modify package.json:
 "scripts": {
  "start": "nodemon --watch webpack.config.js --exec \"webpack-dev-server --env development\"",
  "build": "webpack --env production"
},It is equivalent to letting nodemon monitor webpack.config.js and start it if it changes.
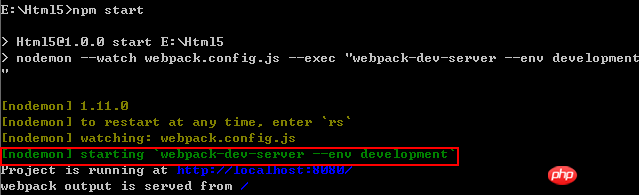
This way you can let your hands concentrate on development.
Agent
But I have a little doubt about the substitutability of the WDS site, because the nginx we deployed ourselves has some API proxies. If it is hung on the default site of WDS, it will naturally be inaccessible. In other words, can you configure a refresh path for WDS? If the file changes, refresh the specified address, or ask me to configure a proxy. Since it is an http server itself, it must also have proxy functions. After searching, it turned out to be: https://github.com/webpack/webpack-dev-server/tree/master/examples/proxy-advanced
module.exports = {
  context: __dirname,
  entry: "./app.js",
  devServer: {
    proxy: {
      "/api": {
        target: "http://jsonplaceholder.typicode.com/",
        changeOrigin: true,
        pathRewrite: {
          "^/api": ""
        },
        bypass: function(req) {
          if(req.url === "/api/nope") {
            return "/bypass.html";
          }
        }
      }
    }
  }
}即将api这个字段替换成http://jsonplaceholder.typicode.com/,并将其从原地址中删掉,这样就可以自己实现代理了。皆大欢喜!WDS是通过http-proxy-middleware来实现代理。更多参考:http://webpack.github.io/docs/webpack-dev-server.html;https://github.com/chimurai/http-proxy-middleware#options
but,这种刷新是怎么实现的呢?因为页面上没有嵌入什么别的js,去翻原码 web-dev-server/server.js中有这么一段:
Server.prototype._watch = function(path) {
  const watcher = chokidar.watch(path).on("change", function() {
    this.sockWrite(this.sockets, "content-changed");
  }.bind(this))
  this.contentBaseWatchers.push(watcher);
}用chokidar来监视文件变化,server的内部维护的有一个socket集合:
Server.prototype.sockWrite = function(sockets, type, data) {
  sockets.forEach(function(sock) {
    sock.write(JSON.stringify({
      type: type,
      data: data
    }));
  });
}sock是一个sockjs对象。https://github.com/sockjs/sockjs-client,从http://localhost:8080/webpack-dev-server/页面来看,sockjs是用来通信记录日志的。
var onSocketMsg = {
  hot: function() {
    hot = true;
    log("info", "[WDS] Hot Module Replacement enabled.");
  },
  invalid: function() {
    log("info", "[WDS] App updated. Recompiling...");
    sendMsg("Invalid");
  },
  hash: function(hash) {
    currentHash = hash;
  },
...
}我们在看app.js,其中有一个OnSocketMsg 对象。
var onSocketMsg = {
  hot: function() {
    hot = true;
    log("info", "[WDS] Hot Module Replacement enabled.");
  },
  invalid: function() {
    log("info", "[WDS] App updated. Recompiling...");
    sendMsg("Invalid");
  },
  hash: function(hash) {
    currentHash = hash;
  },
  "still-ok": function() {
    log("info", "[WDS] Nothing changed.")
    if(useWarningOverlay || useErrorOverlay) overlay.clear();
    sendMsg("StillOk");
  },
  "log-level": function(level) {
    logLevel = level;
  },
  "overlay": function(overlay) {
    if(typeof document !== "undefined") {
      if(typeof(overlay) === "boolean") {
        useWarningOverlay = overlay;
        useErrorOverlay = overlay;
      } else if(overlay) {
        useWarningOverlay = overlay.warnings;
        useErrorOverlay = overlay.errors;
      }
    }
  },
  ok: function() {
    sendMsg("Ok");
    if(useWarningOverlay || useErrorOverlay) overlay.clear();
    if(initial) return initial = false;
    reloadApp();
  },
  "content-changed": function() {
    log("info", "[WDS] Content base changed. Reloading...")
    self.location.reload();
  },
  warnings: function(warnings) {
    log("info", "[WDS] Warnings while compiling.");
    var strippedWarnings = warnings.map(function(warning) {
      return stripAnsi(warning);
    });
    sendMsg("Warnings", strippedWarnings);
    for(var i = 0; i < strippedWarnings.length; i++)
      console.warn(strippedWarnings[i]);
    if(useWarningOverlay) overlay.showMessage(warnings);
    if(initial) return initial = false;
    reloadApp();
  },
  errors: function(errors) {
    log("info", "[WDS] Errors while compiling. Reload prevented.");
    var strippedErrors = errors.map(function(error) {
      return stripAnsi(error);
    });
    sendMsg("Errors", strippedErrors);
    for(var i = 0; i < strippedErrors.length; i++)
      console.error(strippedErrors[i]);
    if(useErrorOverlay) overlay.showMessage(errors);
  },
  close: function() {
    log("error", "[WDS] Disconnected!");
    sendMsg("Close");
  }
};ok的时候触发一个reloadApp
function reloadApp() {
  if(hot) {
    log("info", "[WDS] App hot update...");
    var hotEmitter = __webpack_require__("./node_modules/webpack/hot/emitter.js");
    hotEmitter.emit("webpackHotUpdate", currentHash);
    if(typeof self !== "undefined") {
      // broadcast update to window
      self.postMessage("webpackHotUpdate" + currentHash, "*");
    }
  } else {
    log("info", "[WDS] App updated. Reloading...");
    self.location.reload();
  }
}也就是说WDS先检测文件是否变化,然后通过sockjs通知到客户端,这样就实现了刷新。之前WebSocket的第三方只用过socket.io,看起来sockjs也蛮好用的。不必外带一个js,在主js里面就可以写了。
小结:效率提高的一方面是将一些机械的重复性流程或动作自动化起来。WDS和nodemon就是两个为你干活的小弟。
相信看了本文案例你已经掌握了方法,更多精彩请关注php中文网其它相关文章!
推荐阅读:
The above is the detailed content of Use of webpack refresh parsing function. For more information, please follow other related articles on the PHP Chinese website!

Hot AI Tools

Undresser.AI Undress
AI-powered app for creating realistic nude photos

AI Clothes Remover
Online AI tool for removing clothes from photos.

Undress AI Tool
Undress images for free

Clothoff.io
AI clothes remover

AI Hentai Generator
Generate AI Hentai for free.

Hot Article
Hot Tools

Notepad++7.3.1
Easy-to-use and free code editor

SublimeText3 Chinese version
Chinese version, very easy to use

Zend Studio 13.0.1
Powerful PHP integrated development environment

Dreamweaver CS6
Visual web development tools

SublimeText3 Mac version
God-level code editing software (SublimeText3)
Hot Topics
 1378
1378
 52
52

 How to set up web page automatic refresh
Oct 26, 2023 am 10:52 AM
How to set up web page automatic refresh
Oct 26, 2023 am 10:52 AM
To set the automatic refresh of a web page, you can use the HTML "meta" tag, the JavaScript "setTimeout" function, the "setInterval" function or the HTTP "Refresh" header. Detailed introduction: 1. Use the "meta" tag of HTML. In the "<head>" tag of the HTML document, you can use the "meta" tag to set the automatic refresh of the web page; 2. The "setTimeout" function of JavaScript, etc.
 VUE3 Getting Started Tutorial: Packaging and Building with Webpack
Jun 15, 2023 pm 06:17 PM
VUE3 Getting Started Tutorial: Packaging and Building with Webpack
Jun 15, 2023 pm 06:17 PM
Vue is an excellent JavaScript framework that can help us quickly build interactive and efficient web applications. Vue3 is the latest version of Vue, which introduces many new features and functionality. Webpack is currently one of the most popular JavaScript module packagers and build tools, which can help us manage various resources in our projects. This article will introduce how to use Webpack to package and build Vue3 applications. 1. Install Webpack
 Using Python and WebDriver to automatically refresh web pages
Jul 08, 2023 pm 01:46 PM
Using Python and WebDriver to automatically refresh web pages
Jul 08, 2023 pm 01:46 PM
Using Python and WebDriver to implement automatic web page refresh Introduction: In daily web browsing, we often encounter scenarios that require frequent web page refreshes, such as monitoring real-time data, automatically refreshing dynamic pages, etc. Manually refreshing the web page will waste a lot of time and energy, so we can use Python and WebDriver to implement the function of automatically refreshing the web page and improve our work efficiency. 1. Installation and configuration environment Before starting, we need to install and configure the corresponding environment. Install Python
 What should I do if my win11 desktop frequently refreshes automatically?
Jun 29, 2023 pm 02:56 PM
What should I do if my win11 desktop frequently refreshes automatically?
Jun 29, 2023 pm 02:56 PM
What should I do if my win11 desktop frequently refreshes automatically? The win11 system is the latest Windows system launched by Microsoft. It is built with the latest technology and can provide you with the latest high-quality services, but at the same time, there are also some new types of problems. Recently, some friends reported that the desktop often refreshes after win11 is updated. This is most likely because there are some problems with the system. So, how should we solve this problem? Below, the editor will bring you a solution to the frequent automatic refresh of the Win11 desktop. The win11 desktop often automatically refreshes the solution. Method 1: Uninstall updates 1. First, we use the keyboard "ctrl+shift+esc" key combination to open the task manager. 2. After opening, click
 Python script automatically refreshes Excel spreadsheet
Sep 09, 2023 pm 06:21 PM
Python script automatically refreshes Excel spreadsheet
Sep 09, 2023 pm 06:21 PM
Python and Excel are two powerful tools that when combined can open up a world of automation. Python has versatile libraries and user-friendly syntax that enable us to write scripts to perform various tasks efficiently. Excel, on the other hand, is a widely used spreadsheet program that provides a familiar interface for data analysis and manipulation. In this tutorial, we will explore how to leverage Python to automate the process of refreshing Excel spreadsheets, saving us time and effort. Do you find yourself spending valuable time manually refreshing your Excel spreadsheet with updated data? This is a repetitive and time-consuming task that can really kill productivity. In this article we will guide you through using Py
 What is the difference between vite and webpack
Jan 11, 2023 pm 02:55 PM
What is the difference between vite and webpack
Jan 11, 2023 pm 02:55 PM
Differences: 1. The startup speed of the webpack server is slower than that of Vite; because Vite does not require packaging when starting, there is no need to analyze module dependencies and compile, so the startup speed is very fast. 2. Vite hot update is faster than webpack; in terms of HRM of Vite, when the content of a certain module changes, just let the browser re-request the module. 3. Vite uses esbuild to pre-build dependencies, while webpack is based on node. 4. The ecology of Vite is not as good as webpack, and the loaders and plug-ins are not rich enough.
 How to solve the problem of automatic refresh of Win10 desktop?
Jun 30, 2023 pm 11:13 PM
How to solve the problem of automatic refresh of Win10 desktop?
Jun 30, 2023 pm 11:13 PM
How to solve the problem that the Win10 system desktop frequently refreshes automatically? We all use computers for study and entertainment in our daily life, and there are many files and applications we need on the desktop. However, recently when some friends are using win10, the desktop keeps refreshing automatically. If you don't know how to solve it, the editor below has compiled a guide to solving the problem of frequent automatic refresh of the Win10 system desktop. If you are interested, follow the editor to read below! Solution guide for Win10 system desktop frequently refreshing automatically 1. Right-click the "Start" menu and select "Task Manager", as shown in the figure. 2. In the "Task Manager" interface, find "Windows Explorer" in the process, as shown in the figure. 3. Right-click it and select in the interface that appears.
 How to solve the problem of automatic refresh of Win11 desktop
Jan 09, 2024 am 09:57 AM
How to solve the problem of automatic refresh of Win11 desktop
Jan 09, 2024 am 09:57 AM
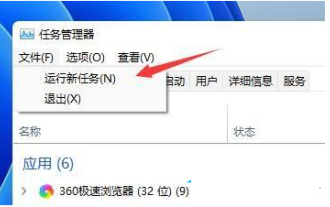
Although the Win11 system has been launched for a long time, we still encounter many problems during use. For example, some friends often encounter the situation where the screen and desktop keep refreshing automatically during use. At this time, we need to How to solve it? Let’s take a look at the solution with the editor below. Solution to automatic refresh of Win11 desktop 1. First, we use the keyboard "ctrl+shift+esc" key combination to open the Task Manager. 2. After opening, click "File" in the upper left corner and select "Run New Task". 3. Then check the option "Create this task with system administrative rights".
