This time I will show you how to implement vue props to transfer data, and what are the precautions for vue props to transfer data. The following is a practical case, let's take a look.
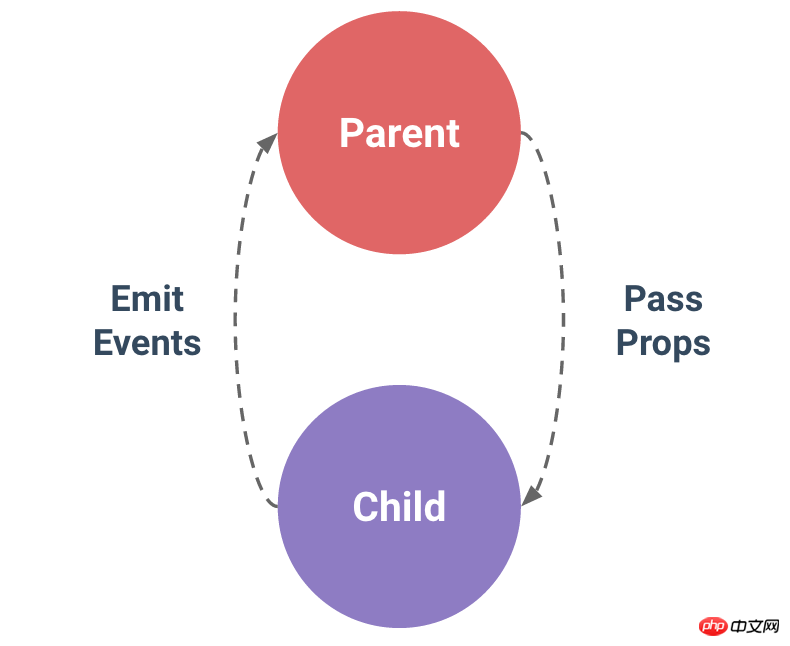
In Vue, the relationship between parent and child components can be summarized as props are passed downwards and events are passed upwards. The parent component sends data to the child component through props, and the child component sends messages to the parent component through events. See how they work.

1. Basic Usage
Components are not just about reusing the content of the template. What's more important is communication between components.
In the component, use the option props to declare the data that needs to be received from the parent. The value of props can be two types, one is a string array, and the other is an object.
1.1 String array:
  <p id="app4">
   <my-component4 message="数据来自父组件"></my-component4>
  </p>
Vue.component('my-component4',{
 props: ['message'],
 template: '<p>{{message}}</p>'
});
var app4 = new Vue({
 el: '#app4'
});The result after rendering is: The data declared in
<p id= ” app4”>
  <p >来自父组件的数据</ p>
</p>
props and the data returned by the component data function are mainly The difference is that the props come from the parent, while the data in the data is the component's own data, and the scope is the component itself. Both types of data can be used in the template, computed properties, and methods.
The data message in the above example is passed from the parent through props. Write the name of the props directly on the custom label of the component. If you want to pass multiple data, just add items in the props array. .
Sometimes, the data passed is not directly hard-coded, but dynamic data from the parent. In this case, you can use the command v -bind to dynamically bind the value of props. When the data of the parent component changes , will also be passed to child components.
  <p id="app5">
   <input type="text" v-model="text">
   <my-component5 :my-text="text"></my-component5>
  </p>
Vue.component('my-component5',{
 props: ['myText'],
 template: '<p>{{myText}}</p>'
});
var app5 = new Vue({
 el: '#app5',
 data: {
  text: '动态传递父组件数据'
 }
});A few points to note:
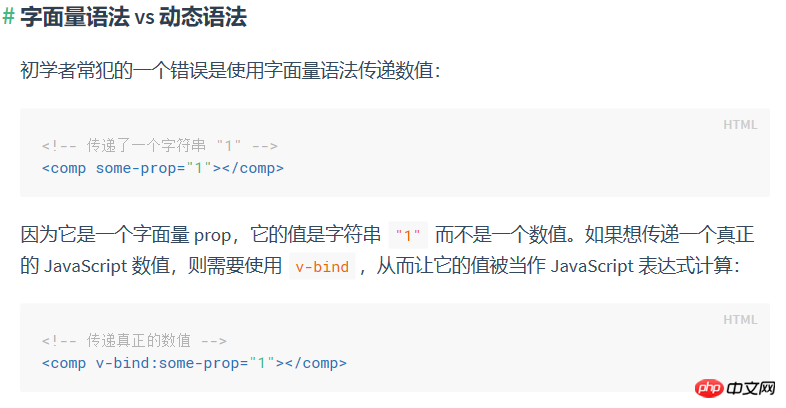
1. If you want to directly pass numbers, Boolean values, arrays, and objects, and do not use v-bind, only strings will be passed.

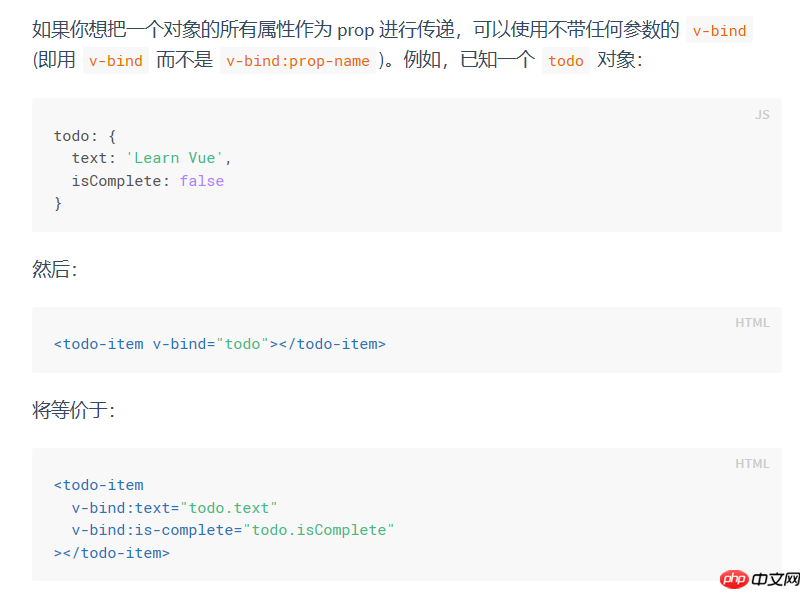
2. If you want to pass all the properties of an object as props, you can use v-bind without any parameters (that is, use v-bind instead of v -bind:prop-name). For example, a known todo object:

1.2 Object:
When prop needs to be verified, object writing is required.
Generally when your component needs to be provided to others, it is recommended to perform data verification. For example, a certain data must be of numeric type. If a string is passed in, a warning will pop up on the console.
 <p id="app6">
   <input type="text" v-model="number">
   <my-component6 :my-text="number"></my-component6>
  </p>
Vue.component('my-component6',{
 props: {
  'myText':{
   type: Number, //必须是数字类型的
   required: true, //必须传值
   default: 1 //如果未定义,默认值就是1
  }
 },
 template: '<p>{{myText}}</p>'
});
var app6 = new Vue({
 el: '#app6',
 data: {
  number: 1
 }
});The verified type type can be:
• String
• Number
• Boolean
• Object
• Array
• Function
type can also be a custom constructor, detected using instanceof.
When prop verification fails, a warning will be thrown in the console under the development version.
2. One-way data flow
The biggest change between Vue 2.x and Vue l.x is that Vue2.x is passed through props The data is one-way, that is, when the data of the parent component changes, it will be passed to the child component, but not the other way around.
In business, we often encounter two situations where prop needs to be changed.
2.1 One is that the parent component passes in the initial value, and the subcomponent saves it as the initial value. It can be used and modified at will within the scope. (After Prop is passed in as the initial value, the subcomponent wants to use it as local data;)
In this case, you can declare another data in the component data and reference the prop of the parent component. The sample code is as follows :
 <p id="app7">
   <my-component7 :init-count="1"></my-component7>
  </p>
Vue.component('my-component7',{
 props: ['initCount'],
 template: '<p>{{count}}</p>',
 data: function(){
  return {
   count: this.initCount
  }
 }
});
var app7 = new Vue({
 el: '#app7'
});The data count is declared in the component. It will obtain the initCount from the parent component when the component is initialized. After that, it has nothing to do with it. It only maintains the count, so that you can avoid directly operating the initCount.
2.2 Prop is passed in as the original value that needs to be transformed. (Prop is passed in as raw data and is processed into other data output by the subcomponent.)
In this case, calculated properties are enough. The sample code is as follows:
  <p id="app8">
   <my-component8 :width="100"></my-component8>
  </p>
Vue.component('my-component8',{
 props: ['width'],
 template: '<p :style="style">组件内容</p>',
 computed: {
  style: function(){
   return {
    width: this.width+'px'
   }
  }
 }
});
var app8 = new Vue({
 el: '#app8'
});Note that objects and Arrays are reference types, pointing to the same memory space. If prop is an object or array, changing it inside the child component will affect the state of the parent component.
Я считаю, что вы освоили этот метод после прочтения примера, описанного в этой статье. Для получения более интересной информации обратите внимание на другие статьи по теме на китайском веб-сайте php!
Рекомендуется к прочтению:
Подробное объяснение использования древовидного меню с проверкой и каскадным выбором
Область использования комментариев в регулярных выражениях Что
The above is the detailed content of How to implement data transfer with vue+props. For more information, please follow other related articles on the PHP Chinese website!


