
首先我们在M层创建一个类:
1 2 3 4 5 6 7 8 9 10 11 12 13 14 15 16 17 18 19 20 21 22 23 24 |
|
代码中已有注释,不多说。
下面,V层:
1 2 3 4 5 6 7 8 9 10 11 12 13 14 15 16 17 18 19 20 21 22 23 24 25 26 27 28 29 30 |
|
这里注意第一行,
1 |
|
我们绑定我们写的数据类,这样我们才能顺利创建表单。
然后是C层:
1 2 3 4 5 6 7 8 9 10 11 12 13 14 15 16 17 18 |
|
这里我们有两个RsvpForm,我们在上面添加提交方式,分别是Get和Post
1 |
|
是否通过数据验证,通过返回视图Thanks,且把表单传过来的值传给Thanks视图
数据验证不通过,返回原视图,
这里注意V层
1 |
|
添加这句话,在数据验证的时候,数据不通过,视图层才能显示我们的错误提示信息。
运行截图演示:
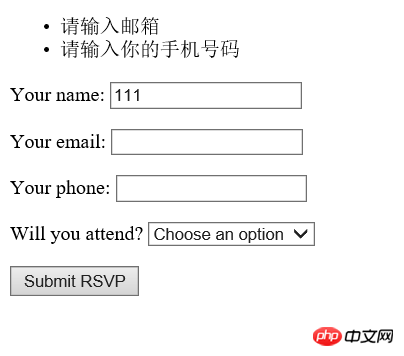
我们只输入了姓名,其他没有输入,提示错误信息
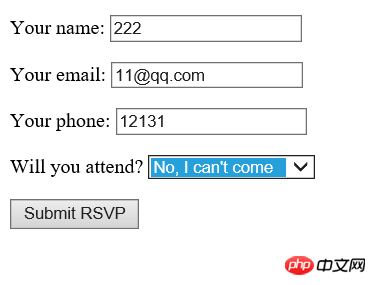
我们输入一个正确的:
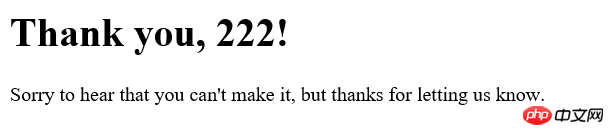
然后点击,调到Thanks视图,Thanks视图代码如下:
1 2 3 4 5 6 7 8 9 10 11 12 13 14 15 16 17 18 19 20 21 22 23 24 25 26 27 |
|
这里注意,我们也要绑定我们写的模型类:
1 |
|
我们输入的姓名
1 |
|
我们输入的值,像传其他,跟这样类似。
结果截图:
至此,我们的MVC三层合作,数据验证,完成!
本文讲解了ASP.NET MVC 三层合作-数据验证,更多相关内容请关注php中文网。
相关推荐:
The above is the detailed content of ASP.NET MVC three-tier cooperation-data validation. For more information, please follow other related articles on the PHP Chinese website!
 mysql default transaction isolation level
 What is digital currency
 The difference between arrow functions and ordinary functions
 Clean up junk in win10
 special symbol point
 What keys do arrows refer to in computers?
 How to use the Print() function in Python
 There is an extra blank page in Word and I cannot delete it.


![[Web front-end] Node.js quick start](https://img.php.cn/upload/course/000/000/067/662b5d34ba7c0227.png)


