

Customize the player using iview's ui framework
This time I will bring you the custom player using iview's ui framework. What are the precautions for using iview's ui framework to customize the player? The following is a practical case, let's take a look.

Picture 2-Collapse the sidebar;
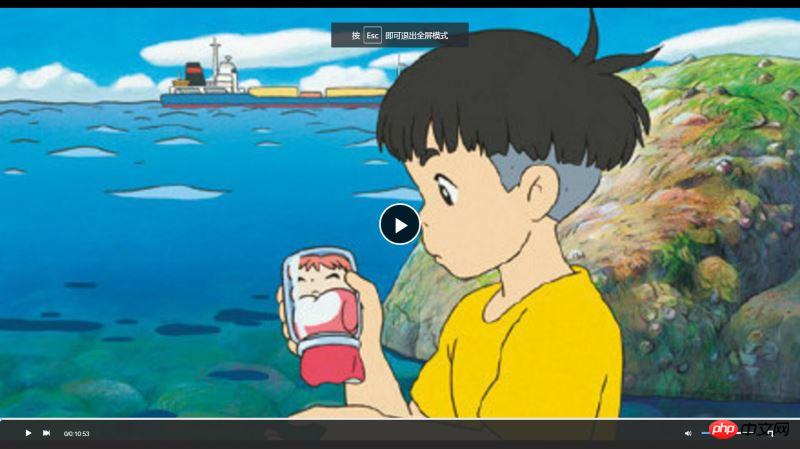
Picture 3: Full screen.
Written in front
You need to use vue in this project, vue-video-player , I use the ui framework of iview, but the ui framework does not matter. What I focus on here is the use of vue-video-player developed based on video.js, and how to operate the API in video.js.
vue-video-player Project address: https://github.com/surmon-china/vue-video-player.
video.js document address: http://docs.videojs.com/docs/api/player.html.
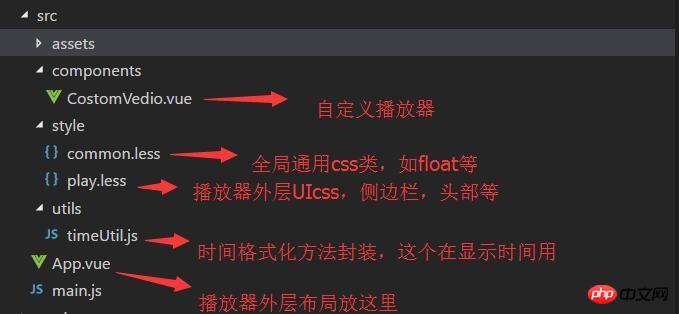
Project directory:
1. Outer ui layout
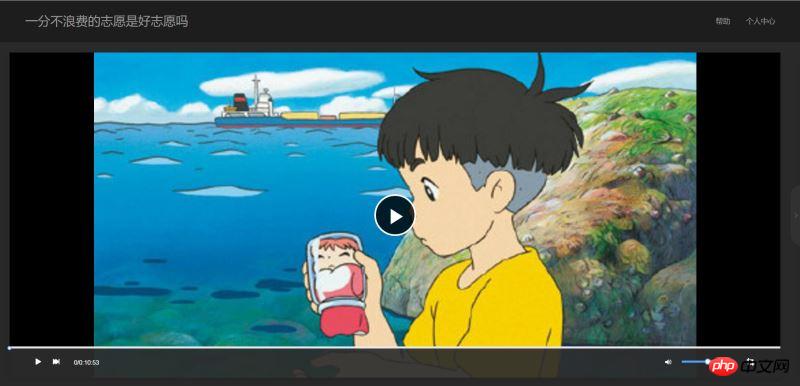
Figure 1 As you can see, this project uses a two-column adaptive layout. The right side is the playlist with a fixed width of 500px, and the left side is the player box. The playlist box can be expanded or collapsed according to the click of the handle, and the player The box also adapts its width according to the expansion/contraction of the playlist.
(Because the recorded animation is too large to be uploaded, you can clone my program and run it to see it).
The html code structure is as follows:
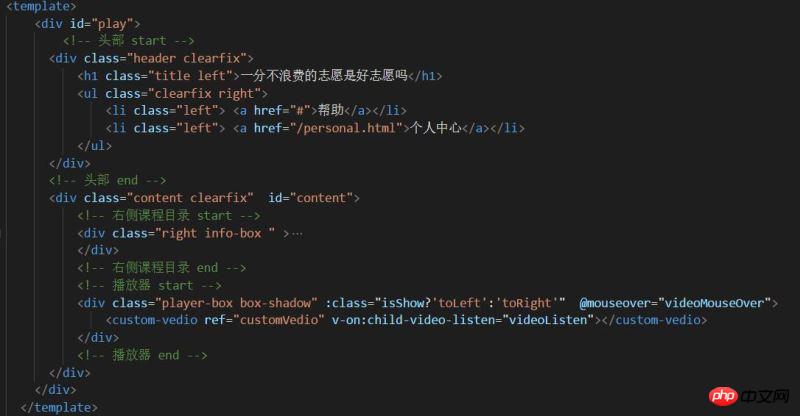
view plain copy
.transition{
       transition: all 1s ease;
       -moz-transition: all 1s ease;
       -webkit-transition: all 1s ease;
       -o-transition: all 1s ease;
   }
view plain copy
.toLeft{
        .transition;
        margin-right: 540px !important;
    }
    .toRight{
        .transition;
        margin-right: 40px !important;
    }
    .toHide{
        .transition;
        right: -500px !important;
    }
    .toShow{
        .transition;
        right: 0px !important;
    }
view plain copy
// 播放区
    .player-box{
        margin-right: 540px;
        height: 100%;
        position: relative;
    }
view plain copy
//侧边信息区
    .info-box{
        width: 520px;
        height: 100%;
        background: transparent;
        position: relative;
        overflow: hidden;
    }
[css] view plain copy
// 内容区
.content{
    background: #292929;
    position: relative;
    padding: 20px 0 20px 20px;

}2. Player ui
The entire custom player ui is encapsulated into a component-CostomVedio.vue, and the playback area uses vue-video- player, but the bottom control bar is customized and does not use the controlBar that comes with the player. Usually these common ones do not meet the requirements of the designer, so we need to customize the player UI. The html structure code is as follows:view plain copy
<template>
<p class="custom-video-outer-box" @mouseover="videoMouseOver">
<video-player class="video-player-box"
ref="videoPlayer"
:options="playerOptions"
:playsinline="true"
customEventName="customstatechangedeventname"
@play="onPlayerPlay($event)"
@pause="onPlayerPause($event)"
@ended="onPlayerEnded($event)"
@waiting="onPlayerWaiting($event)"
@playing="onPlayerPlaying($event)"
@loadeddata="onPlayerLoadeddata($event)"
@timeupdate="onPlayerTimeupdate($event)"
@statechanged="playerStateChanged($event)"
@ready="playerReadied"
>
<!-- @canplay="onPlayerCanplay($event)" -->
<!-- @canplaythrough="onPlayerCanplaythrough($event)" -->
</video-player>
<!-- 底部进度条 start -->
<transition name="fade">
<p class="bottomCtrl" v-show="isBottomCtrlShow" id="bottomCtrl">
<!-- -->
<!-- <p class="bottomCtrl" v-show="false"> -->
<!-- <p class="bottomCtrl" > -->
<Slider v-model="playerCtrl.currentTimeInt" class="progress-slider" :max="playerCtrl.durationInt" :tip-format="progressTipFormat" @on-change="progressChange"></Slider>
<p class="clearfix" >
<p class="left">
<!-- 暂停 -->
<span v-on:click="play" v-if="!playerCtrl.isPlay" class="icon">
<Icon type="play"></Icon>
</span>
<!-- 播放 -->
<span v-else v-on:click="pause" class="icon">
<Icon type="stop"></Icon>
</span>
<!-- 下一曲 -->
<span class="icon" v-on:click="nextClick">
<Icon type="skip-forward"></Icon>
</span>
<span class="time">
{{playerCtrl.currentTime}}/{{playerCtrl.duration}}
</span>
</p>
<p class="right clearfix">
<p class="voice-box clearfix left">
<!-- 音量 -->
<Icon type="volume-medium" class="left icon"></Icon>
<Slider v-model="playerCtrl.voiceSlider" class="voice-slider left " max=100 @on-change="volumeChange"></Slider>
</p>
<!-- 全屏 -->
<span class="icon left" @click="fullScreenHandle">
<Icon type="crop" class="full-screen" ></Icon>
</span>
</p>
</p>
</p>
</transition>
</p>
</template>The specific idea is to use the player to fill the playback area, and use position positioning to fix the custom controlBar at the bottom of the playback area. Note here The z-index of the controlBar must be large enough, otherwise it will not be visible at the top when it is full screen.
css style:view plain copy
<style lang="less">
.video-player-box{
height: 100% !important;
width: 100% !important;
}
//底部进度条
.bottomCtrl{
line-height: 60px;
height: 60px;
overflow: visible;
position: absolute;
bottom: 0;
left: 0;
background-color: rgba(45, 45, 45, .92);
width: 100%;
padding: 0 50px;
color: #fff;
z-index: 999999999999999;
.icon{
font-size: 16px;
line-height: 60px;
cursor: pointer;
}
.icon+.icon{
margin-left: 20px;
}
}
.custom-video-outer-box{
position: relative;
height: 100%;
width: 100%;
}
.progress-slider{
position: absolute;
width: 100%;
top: 0;
left: 0;
height: 18px;
line-height: 18px;
.ivu-slider-wrap{
margin: 0 !important;
border-radius: 0 !important;
}
.ivu-slider-button-wrap{
line-height: normal !important;
}
.ivu-slider-button{
height: 8px !important;
width: 8px !important;
}
}
.voice-box{
.voice-slider{
width: 100px;
margin-left: 20px;
}
.ivu-slider-wrap{
margin: 27px 0 !important;
}
}
.time{
margin-left: 25px;
}
.full-screen{
margin-left: 25px;
line-height: 60px;
}
.ivu-progress-outer{
padding: 0 10px !important;
}
.vjs-big-play-button{
height: 80px !important;
width: 80px !important;
line-height: 80px !important;
text-align: center;
background:rgba(0, 0, 0, 0.8) !important;
border-radius: 50% !important;
top: 50% !important;
left: 50% !important;
margin-left: -40px !important;
margin-top: -40px !important;
}
#vjs_video_3{
max-height: 100% !important;
width: 100% !important;
height: 100% !important;
}
.video-player-box>p{
height: 100% !important;
width: 100% !important;
}
.video-js .vjs-big-play-button{
font-size: 5em !important;
}
video{
max-height: 100% !important;
}
</style>3. Implement the custom controlBar function
The next step is to implement customization ControlBar functions, such as play, pause, next song, playback progress, remaining time, full screen, volume adjustment, etc. Here we must first look at the corresponding API of video.js. Although it is in English, it is written very clearly and is easy to understand. video.js api document address: http://docs.videojs.com/docs/api/player.html1. Play, pause, next song, full screen are mainly for monitoring We add a custom button click event, and then call the player API to perform the corresponding operation and change the state.view plain copy
// 播放
play(){
this.player.play();
},
// 暂停
pause(){
this.player.pause();
},
//下一曲
nextClick(){
console.log("自定义","下一曲点击");
},
//全屏
fullScreenHandle(){
console.log("全屏");
if(!this.player.isFullscreen()){
this.player.requestFullscreen();
this.player.isFullscreen(true);
}else{
this.player.exitFullscreen();
this.player.isFullscreen(false);
}
},view plain copy
<video-player class="video-player-box"
ref="videoPlayer"
:options="playerOptions"
:playsinline="true"
customEventName="customstatechangedeventname"
@play="onPlayerPlay($event)"
@pause="onPlayerPause($event)"
@ended="onPlayerEnded($event)"
@waiting="onPlayerWaiting($event)"
@playing="onPlayerPlaying($event)"
@loadeddata="onPlayerLoadeddata($event)"
@timeupdate="onPlayerTimeupdate($event)"
@statechanged="playerStateChanged($event)"
@ready="playerReadied"
>
<!-- @canplay="onPlayerCanplay($event)" -->
<!-- @canplaythrough="onPlayerCanplaythrough($event)" -->
</video-player>We can change our behavior accordingly based on these state changes UI, such as displaying a "pause" button when playing, displaying "play" and other functions when pausing.
view plain copy
//时间更新
           onPlayerTimeupdate(player){
               this.playerCtrl.currentTime=timeUtil.secondToDate(player.currentTime());
               this.playerCtrl.currentTimeInt=Math.floor(player.currentTime());
               console.log("当前音量",player.volume());
},view plain copy @on-change="progressChange"
view plain copy
//进度条被拉动
           progressChange(val){
               this.player.currentTime(val);
               this.playerCtrl.currentTimeInt=val;
               this.playerCtrl.currentTime=timeUtil.secondToDate(val);
},拿到定点的值,然后通过player的currentTime设置跳到定点播放。
音量调节的做法跟播放进度相似:
一开始初始化的时候记得配置
view plain copy
muted:false,//开始声音
来开启声音,否则静音状态下调节声音无效。
使用player.volume(val)这个api设置音量,其中val=0,表示声音off,val=1表示声音最大,0.5表示声音设置在half。
四:总结
最后在app.vue/需要用到这个播放器的地方 引入自定义播放器组件即可。vue-video-player是大神基于video.js开发的适用于vue.js框架的组件,具有良好兼容性,所以我们在vue中使用这个播放器组件本质还是使用video.js,我们要更多的去了解video.js中的api并使用他。
相信看了本文案例你已经掌握了方法,更多精彩请关注php中文网其它相关文章!
推荐阅读:
The above is the detailed content of Customize the player using iview's ui framework. For more information, please follow other related articles on the PHP Chinese website!

Hot AI Tools

Undresser.AI Undress
AI-powered app for creating realistic nude photos

AI Clothes Remover
Online AI tool for removing clothes from photos.

Undress AI Tool
Undress images for free

Clothoff.io
AI clothes remover

AI Hentai Generator
Generate AI Hentai for free.

Hot Article
Hot Tools

Notepad++7.3.1
Easy-to-use and free code editor

SublimeText3 Chinese version
Chinese version, very easy to use

Zend Studio 13.0.1
Powerful PHP integrated development environment

Dreamweaver CS6
Visual web development tools

SublimeText3 Mac version
God-level code editing software (SublimeText3)
Hot Topics
 1378
1378
 52
52

 How to add functions to buttons for vue
Apr 08, 2025 am 08:51 AM
How to add functions to buttons for vue
Apr 08, 2025 am 08:51 AM
You can add a function to the Vue button by binding the button in the HTML template to a method. Define the method and write function logic in the Vue instance.
 How to use bootstrap in vue
Apr 07, 2025 pm 11:33 PM
How to use bootstrap in vue
Apr 07, 2025 pm 11:33 PM
Using Bootstrap in Vue.js is divided into five steps: Install Bootstrap. Import Bootstrap in main.js. Use the Bootstrap component directly in the template. Optional: Custom style. Optional: Use plug-ins.
 How to reference js file with vue.js
Apr 07, 2025 pm 11:27 PM
How to reference js file with vue.js
Apr 07, 2025 pm 11:27 PM
There are three ways to refer to JS files in Vue.js: directly specify the path using the <script> tag;; dynamic import using the mounted() lifecycle hook; and importing through the Vuex state management library.
 How to use watch in vue
Apr 07, 2025 pm 11:36 PM
How to use watch in vue
Apr 07, 2025 pm 11:36 PM
The watch option in Vue.js allows developers to listen for changes in specific data. When the data changes, watch triggers a callback function to perform update views or other tasks. Its configuration options include immediate, which specifies whether to execute a callback immediately, and deep, which specifies whether to recursively listen to changes to objects or arrays.
 How to return to previous page by vue
Apr 07, 2025 pm 11:30 PM
How to return to previous page by vue
Apr 07, 2025 pm 11:30 PM
Vue.js has four methods to return to the previous page: $router.go(-1)$router.back() uses <router-link to="/" component window.history.back(), and the method selection depends on the scene.
 What does vue multi-page development mean?
Apr 07, 2025 pm 11:57 PM
What does vue multi-page development mean?
Apr 07, 2025 pm 11:57 PM
Vue multi-page development is a way to build applications using the Vue.js framework, where the application is divided into separate pages: Code Maintenance: Splitting the application into multiple pages can make the code easier to manage and maintain. Modularity: Each page can be used as a separate module for easy reuse and replacement. Simple routing: Navigation between pages can be managed through simple routing configuration. SEO Optimization: Each page has its own URL, which helps SEO.
 How to use foreach loop in vue
Apr 08, 2025 am 06:33 AM
How to use foreach loop in vue
Apr 08, 2025 am 06:33 AM
The foreach loop in Vue.js uses the v-for directive, which allows developers to iterate through each element in an array or object and perform specific operations on each element. The syntax is as follows: <template> <ul> <li v-for="item in items>>{{ item }}</li> </ul> </template>&am
 How to use function intercept vue
Apr 08, 2025 am 06:51 AM
How to use function intercept vue
Apr 08, 2025 am 06:51 AM
Function interception in Vue is a technique used to limit the number of times a function is called within a specified time period and prevent performance problems. The implementation method is: import the lodash library: import { debounce } from 'lodash'; Use the debounce function to create an intercept function: const debouncedFunction = debounce(() => { / Logical / }, 500); Call the intercept function, and the control function is called at most once in 500 milliseconds.
