

Angular CLI installation tutorial
This article mainly introduces the installation and use of Angular CLI for Angular development and learning. Now I share it with you and give it as a reference.
We have prepared the development environment before, and now we can officially develop. As mentioned earlier, Angular provides a command line tool that can simplify our program development. We will also use this tool in future development, so we need to first install this development tool called Angular CLI.
The process of installing CLI is very simple, no different from installing other tools or even installing a common development package. We have configured NPM Registry and successfully installed yarn, so we can use yarn to install this tool. The specific command is:
yarn global add @angular/cli
Parametersglobal indicates global installation; add indicates "add"; the last is the CLI package name, which is not specified If the version is good, yarn will be asked to install the latest version of the CLI. . This statement is equivalent to the previous NPM
npm install -g @angular/cli
.
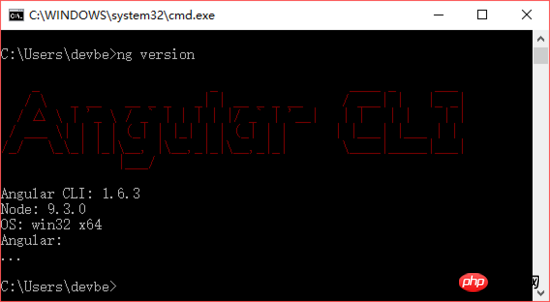
After that we run
ng version
If the version number of Angular CLI can be output, the installation is successful. Note that all Angular CLI commands start with ng.
Angular CLI is built on webpack and can help us generate Angular project framework, generate Angular modules, components, instructions, etc. If you build this development environment manually, you need to understand various details of webpack, write various automated scripts, etc., which requires higher front-end development technology. Considering our basic tutorial, using the CLI to assist development is definitely appropriate. We will introduce the use of Angular CLI in detail in subsequent chapters. If you are interested in Angular CLI, you can learn more details through its official website.
The CLI just installed uses NPM as the package management tool by default. If we want to use yarn, just run the following command:
ng set --global packageManager=yarn
On the other hand, if we want to switch back to NPM, just use
ng set --global packageManager=npm
.
After installing Angular CLI, let’s create the first sample project to understand the basic use of Angular CLI.
First, create a demo project using
ng new demo
. new is to create a new project, and the following demo is the name of the project. Angular CLI will help us generate a complete project framework - including all files, file structures, and various auxiliary files required for the project. Afterwards, Angular CLI will automatically run yarn install, which is to install various dependencies required by the project. The installation process will take a long time, so you need to wait patiently for some time.

When an interface similar to the above appears and prompts "Projecy 'demo' successfully created", it means that the project has been created. If there are errors, you need to check the installation process or network connection, etc.
After the project is created, a project folder will be generated in the current directory. After that we can enter the project directory
cd demo
and run
ng serve

##ng serve command will compile the project and then start a small built-in server, we can view the running results of the project through the browser. Pay attention to the above tip: NG Live Development Server is listening on localhost:4200, open your browser on http://localhost:4200/, that is to say, the address of this server should be http://localhost:4200, we only need to use Just access this address with your browser:

ng build --prod
Related articles:
Is there a better solution than asynchronous implementation using JavaScript?
Using Koa to build projects through Node.js
Detailed interpretation of React Native Flexbox layout
The above is the detailed content of Angular CLI installation tutorial. For more information, please follow other related articles on the PHP Chinese website!

Hot AI Tools

Undresser.AI Undress
AI-powered app for creating realistic nude photos

AI Clothes Remover
Online AI tool for removing clothes from photos.

Undress AI Tool
Undress images for free

Clothoff.io
AI clothes remover

AI Hentai Generator
Generate AI Hentai for free.

Hot Article
Hot Tools

Notepad++7.3.1
Easy-to-use and free code editor

SublimeText3 Chinese version
Chinese version, very easy to use

Zend Studio 13.0.1
Powerful PHP integrated development environment

Dreamweaver CS6
Visual web development tools

SublimeText3 Mac version
God-level code editing software (SublimeText3)
Hot Topics


 Let's talk about metadata and decorators in Angular
Feb 28, 2022 am 11:10 AM
Let's talk about metadata and decorators in Angular
Feb 28, 2022 am 11:10 AM
This article continues the learning of Angular, takes you to understand the metadata and decorators in Angular, and briefly understands their usage. I hope it will be helpful to everyone!
 How to install Angular on Ubuntu 24.04
Mar 23, 2024 pm 12:20 PM
How to install Angular on Ubuntu 24.04
Mar 23, 2024 pm 12:20 PM
Angular.js is a freely accessible JavaScript platform for creating dynamic applications. It allows you to express various aspects of your application quickly and clearly by extending the syntax of HTML as a template language. Angular.js provides a range of tools to help you write, update and test your code. Additionally, it provides many features such as routing and form management. This guide will discuss how to install Angular on Ubuntu24. First, you need to install Node.js. Node.js is a JavaScript running environment based on the ChromeV8 engine that allows you to run JavaScript code on the server side. To be in Ub
 Detailed explanation of angular learning state manager NgRx
May 25, 2022 am 11:01 AM
Detailed explanation of angular learning state manager NgRx
May 25, 2022 am 11:01 AM
This article will give you an in-depth understanding of Angular's state manager NgRx and introduce how to use NgRx. I hope it will be helpful to you!
 A brief analysis of how to use monaco-editor in angular
Oct 17, 2022 pm 08:04 PM
A brief analysis of how to use monaco-editor in angular
Oct 17, 2022 pm 08:04 PM
How to use monaco-editor in angular? The following article records the use of monaco-editor in angular that was used in a recent business. I hope it will be helpful to everyone!
 An article exploring server-side rendering (SSR) in Angular
Dec 27, 2022 pm 07:24 PM
An article exploring server-side rendering (SSR) in Angular
Dec 27, 2022 pm 07:24 PM
Do you know Angular Universal? It can help the website provide better SEO support!
 Angular + NG-ZORRO quickly develop a backend system
Apr 21, 2022 am 10:45 AM
Angular + NG-ZORRO quickly develop a backend system
Apr 21, 2022 am 10:45 AM
This article will share with you an Angular practical experience and learn how to quickly develop a backend system using angualr combined with ng-zorro. I hope it will be helpful to everyone!
 What should I do if the project is too big? How to split Angular projects reasonably?
Jul 26, 2022 pm 07:18 PM
What should I do if the project is too big? How to split Angular projects reasonably?
Jul 26, 2022 pm 07:18 PM
The Angular project is too large, how to split it reasonably? The following article will introduce to you how to reasonably split Angular projects. I hope it will be helpful to you!
 Let's talk about how to customize the angular-datetime-picker format
Sep 08, 2022 pm 08:29 PM
Let's talk about how to customize the angular-datetime-picker format
Sep 08, 2022 pm 08:29 PM
How to customize the angular-datetime-picker format? The following article talks about how to customize the format. I hope it will be helpful to everyone!
