
This article mainly introduces the bootstrap-table.js extension paging toolbar and adds the function of jumping to page xx. Since my level is stuck at the dom level, this extension only supports tables on the page. If you have any questions, Suggestions are welcome to propose
new projects. I plan to use the bootstrap-table control to display the table on the page. Unfortunately, the paging toolbar of this control does not have the function of jumping to the xx page. In order to adapt to the company's art (only An artist who knows how to produce pictures, but asked me for this and that), bit the bullet and changed the source code of bootstrap-table to implement this function.
Note: Since my js level is still at the dom level, this extension only supports a single table on the page, which means that if the same page references bootstrap-table twice, the jump will be invalid.
If any gods from all walks of life have a more perfect solution, please leave a message and tell me so that I can learn from it.
I won’t go into details about how to reference controls. Baidu on the Internet has said it better than me. Let’s go directly to the source code.
1. Download the source code of bootstrap-table.js (be careful not to download min. The version I downloaded is: version: 1.11.0). In the source code, use '
html.push('</p>',
'<p class="pull-' + this.options.paginationHAlign + ' pagination">',
'<ul class="pagination' + sprintf(' pagination-%s', this.options.iconSize) + '">',
'<li class="page-pre"><a href="javascript:void(0)" rel="external nofollow" rel="external nofollow" >' + this.options.paginationPreText + '</a></li>');ok, cover the above code into the following code
html.push('</p>',
'<p class="goPage"><input type="button" value="跳转" class="pageBtn" onclick="toPage();"></p>',
'<p class="goPage">跳转到第<input id="pageNum" class="pageNum" type="text">页</p>',
'<p class="pull-' + this.options.paginationHAlign + ' pagination">',
'<ul class="pagination' + sprintf(' pagination-%s', this.options.iconSize) + '">',
'<li class="page-pre"><a href="javascript:void(0)" rel="external nofollow" rel="external nofollow" >' + this.options.paginationPreText + '</a></li>');At this point, the source code is modified.
2 , then, add the following class in the global css file
.pageBtn {

}
.pageNum {
  width: 40px;
  border-radius: 3px;
}
.goPage {
  float: right;
  margin-left: 5px;
  margin-top: 13px;
  height: 30px;
}If you need to customize the button style, you can define it yourself in pgeBtn
3. Add the jump method in the js file
function toPage() {
  var pageNum = $("#pageNum").val();
  if (pageNum) {
    $('#table').bootstrapTable('selectPage', parseInt(pageNum));
  }
} Note that my table id is defined as table. You need to replace $('#table').bootstrapTable with your own defined id
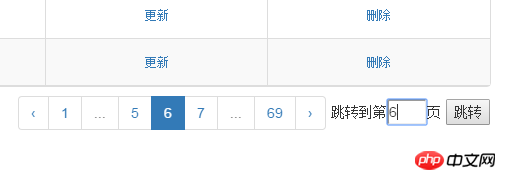
or above, and it can be achieved. Enter the page number to jump. The rendering is as follows:
The above is what I compiled for everyone. I hope it will be helpful to everyone in the future.
Related articles :
How to get the top N main color values of the image in javascript
How to create a logistics map in D3.js (detailed tutorial)
About how to use ejsExcel template
The above is the detailed content of About using bootstrap-table.js to implement extended paging toolbar functionality. For more information, please follow other related articles on the PHP Chinese website!


![[Web front-end] Node.js quick start](https://img.php.cn/upload/course/000/000/067/662b5d34ba7c0227.png)


